There are many ways to get a phone or GPS mount installed in your Toyota 4Runner, but one of the most sturdiest ways, that will survive off-roading is to use the driver’s handle near the A-pillar.
In this post I show you how to install a RAM® Mount with the X-Grip® for your phone or GPS, with simple hand tools.
PARTS REQUIRED
Some of these parts can be bought together in a single package for cheaper, refer the links below for the best combination deal.
- RAM® Mount RAM-B-367U 1” Ball
- RAM® Mount RAM-B-201U Double Socket Medium Arm for 1” Ball
- RAM® Mount RAM-HOL-UN10BU X-Grip® for Large phones
- RAM® Mount RAM-HOL-UN7BU X-Grip® for Small phones
- M6-1.0 x 75mm Socket Head Cap Bolts - The RAM® Mount ball comes with M8 bolts but the 4Runner accepts only a M6 bolt, so you have to buy a long M6 bolt instead.
- M6-1.0 Nut and optional washer from your local auto-parts or home improvement store
- T5 Allen Key or Socket
- Phillips Screw Driver
INSTALLATION PROCESS
The A-pillar handle near the driver’s steering wheel is the best place to hang the RAM® Mount. The handle is screwed into the A-pillar with an M6 screw/bolt and all you do is replace that M6 bolt with another M6 bolt that fits the RAM® ball and the ball is bolted to the pillar and does not move. This is perfect for off-roading and street driving as your device stays in place.
Step 1: Take off the cover for the screw on the handle, using a flat-head screw driver or long finger nails. Figure 1 shows the screw that you can then remove using a Phillips screw driver.
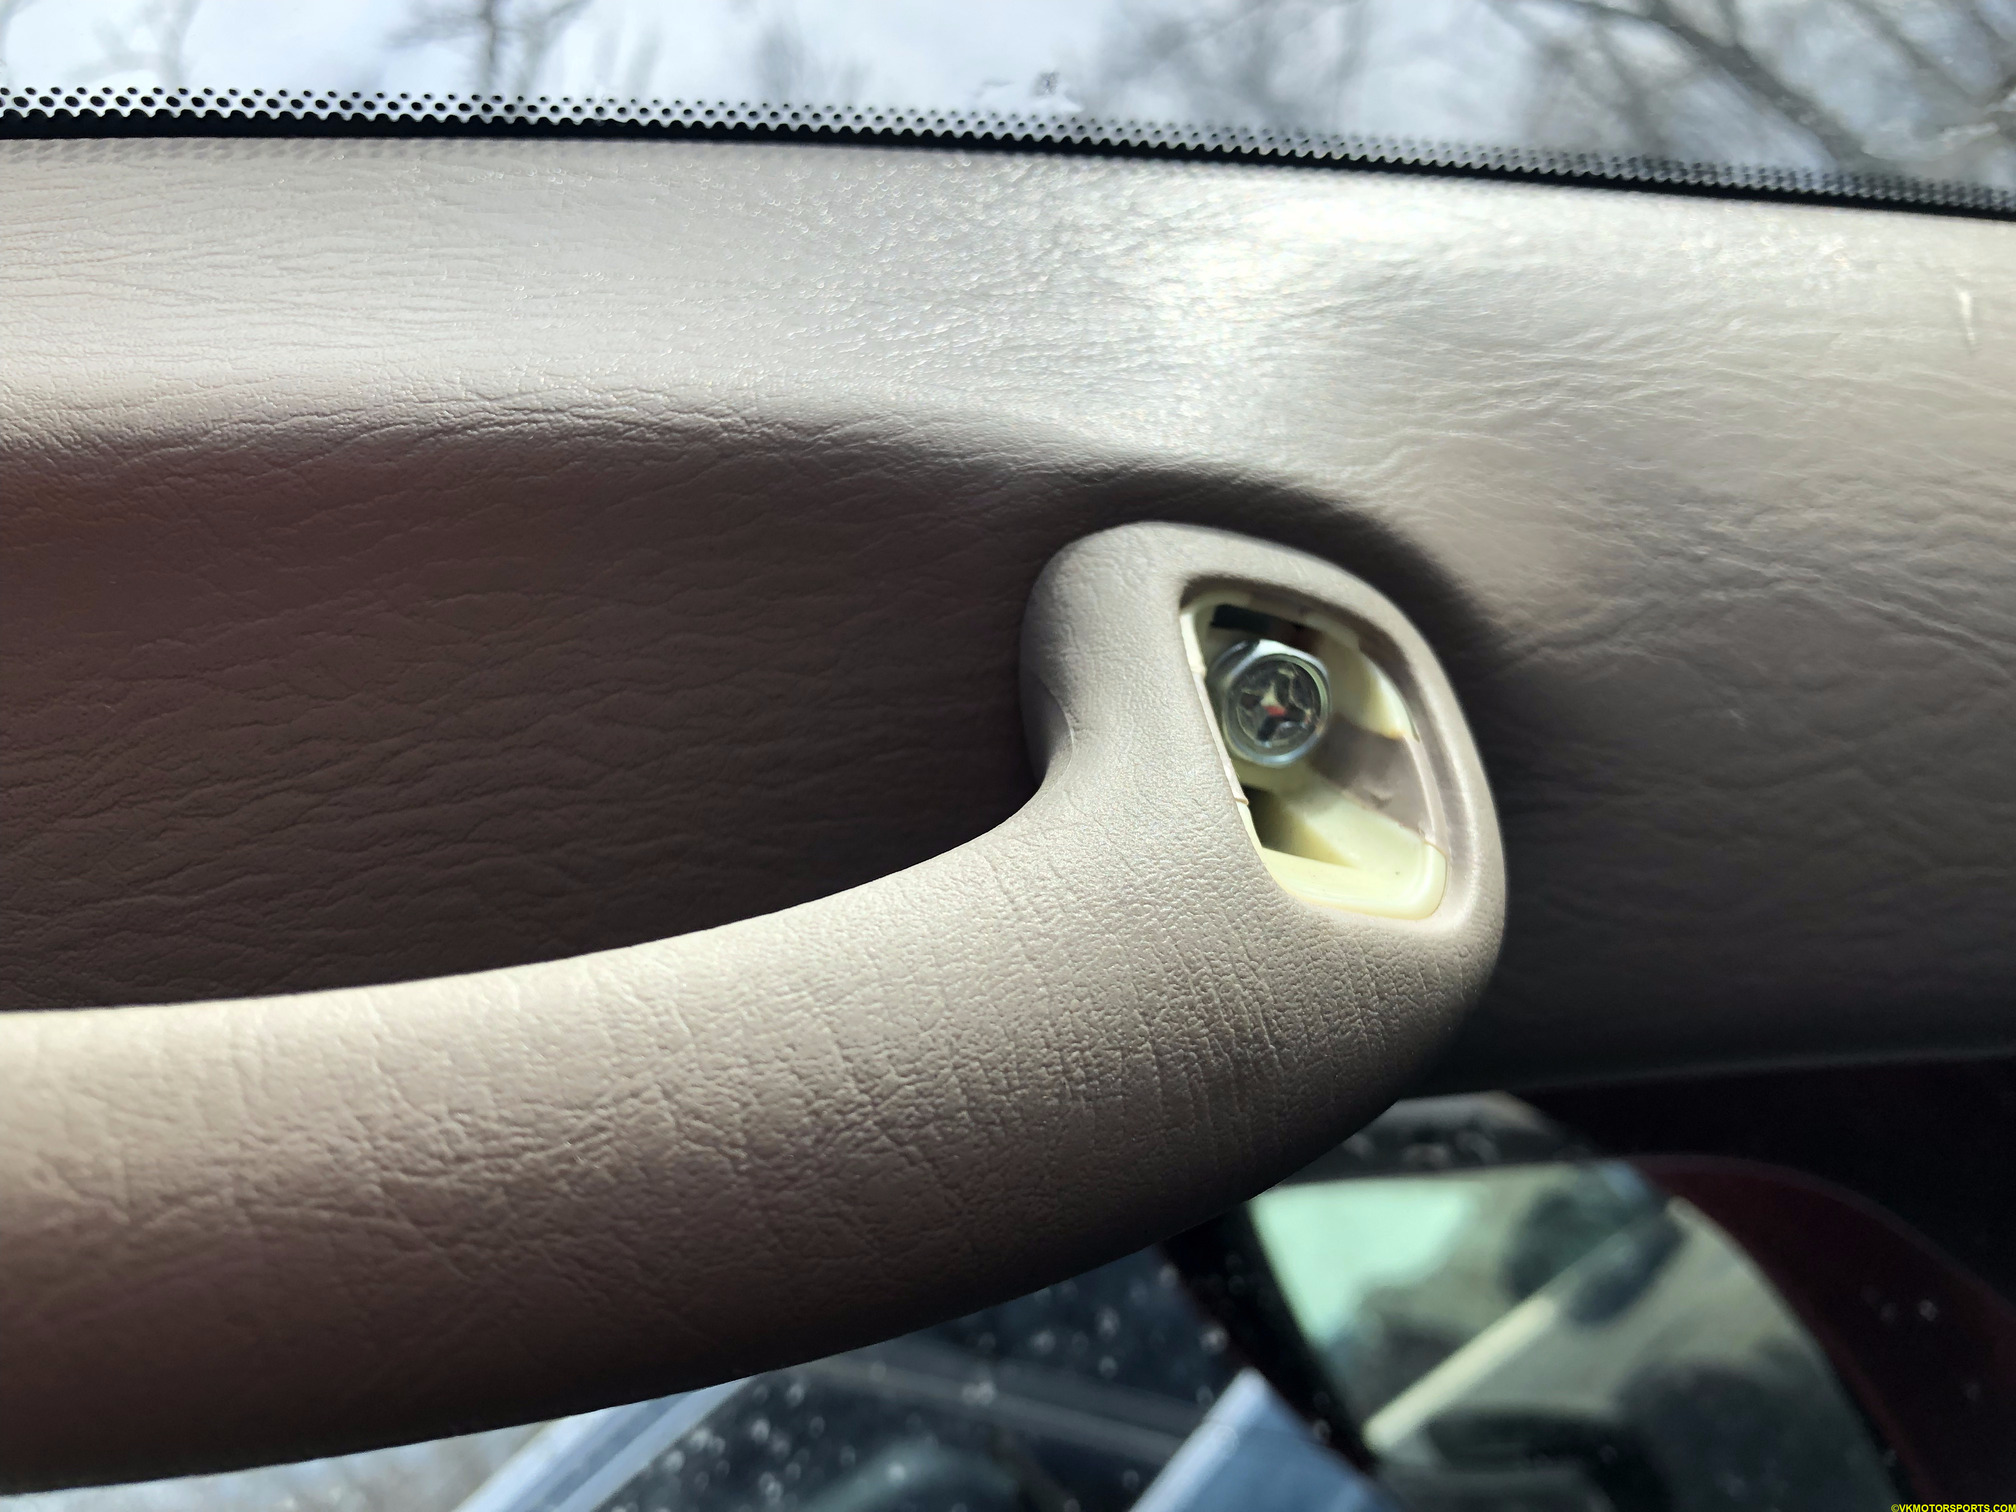 Figure 1. Screw cap removed to show the screw that needs to be removed
Step 2: Now insert the 75mm M6-1.0 bolt in the RAM® RAM-B-367U ball (Figure 2a) and place a nut and washer that fits on the bolt below the head of the ball so that the ball will stay in place. The bolt can be too long, so you may choose to use a 65mm bolt instead. However, the ball then gets in the way of full tightening, so I used an M6-1.0 nut and washer to keep it tightly in place (Figure 2b).
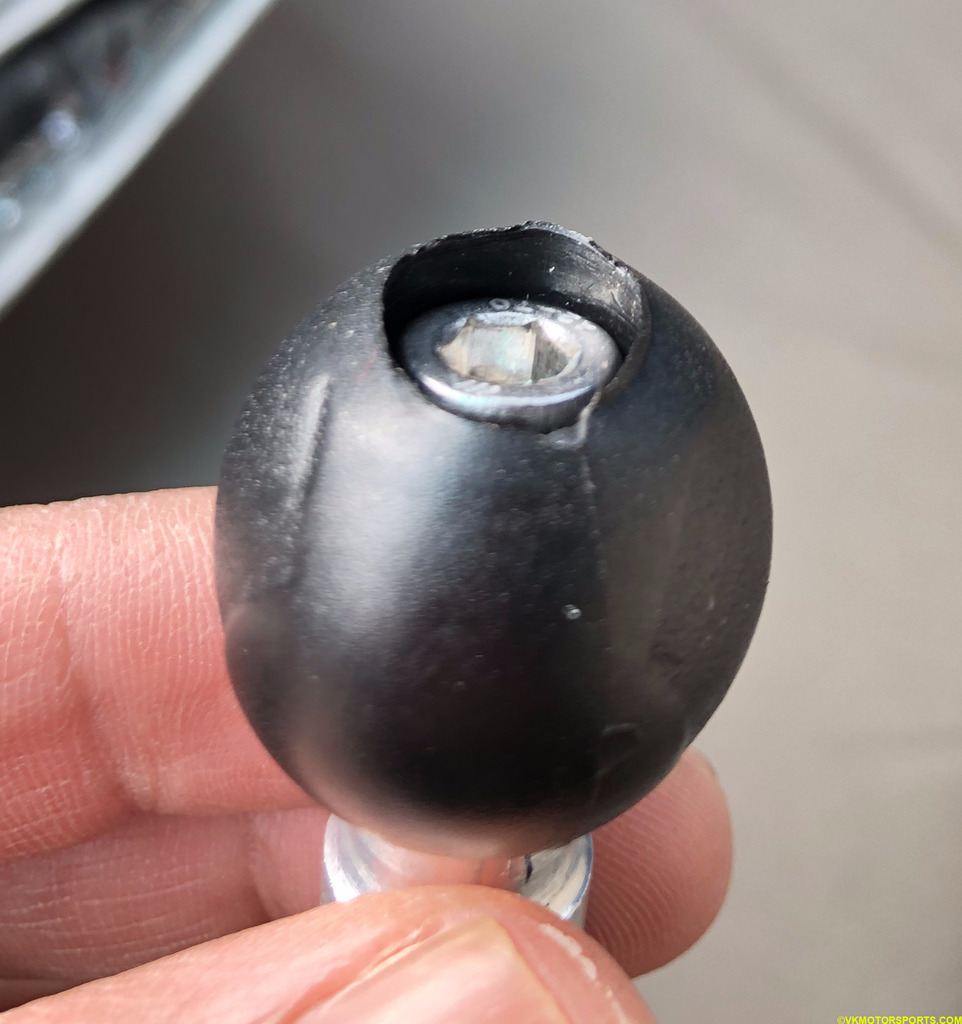 Figure 2a. Insert the M6-1.0 75mm bolt in the RAM® RAM-B-367U ball
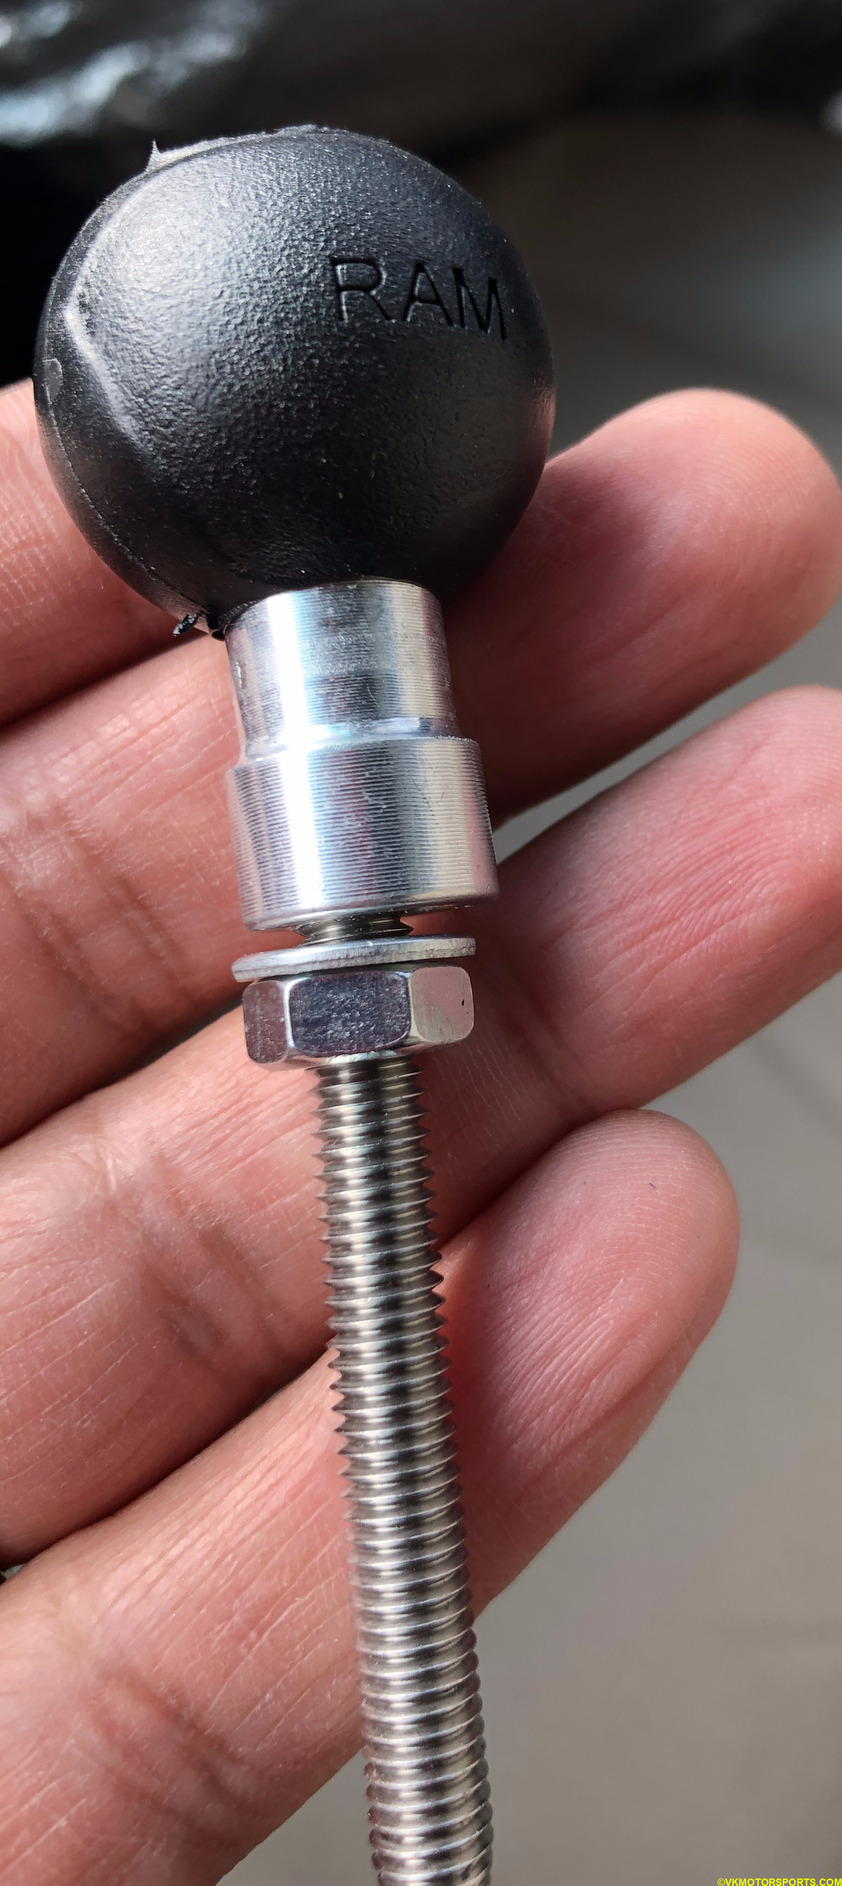 Figure 2b. Tighten the base with an extra nut and washer
Step 3: Now screw in the bolt using a T5 allen key or socket until it is tight (Figure 3). Adjust the nut in the rear to be tight by hand if the bolt does not go in fully. You want a little portion of the ball to be visible outside the handle so that the arm can be attached to it.
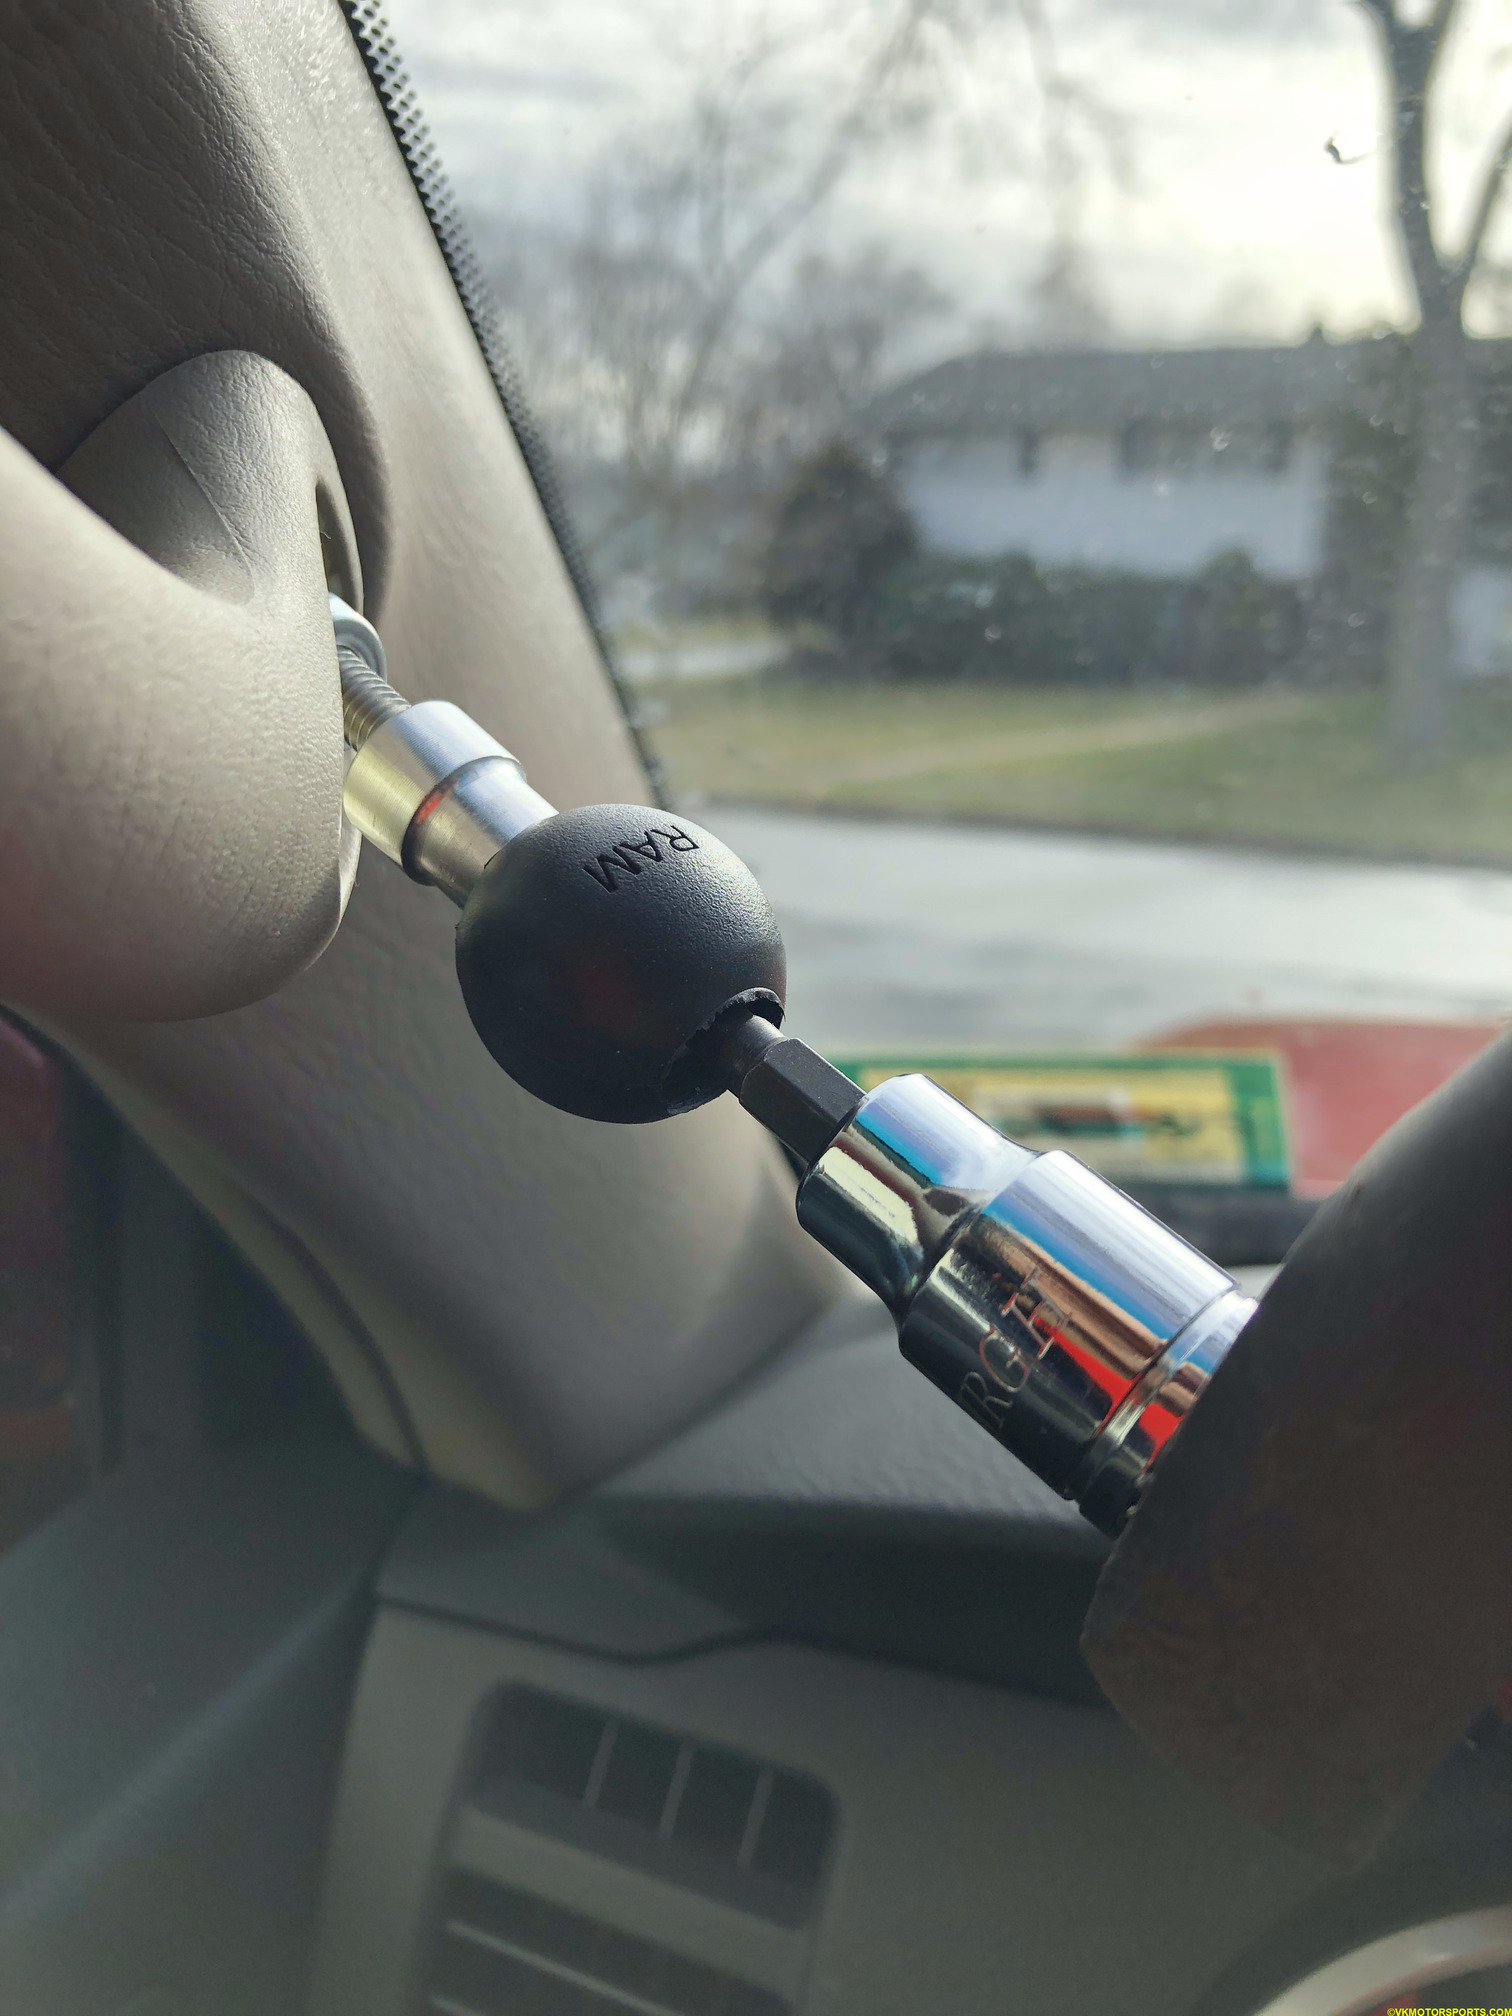 Figure 3. Screw in the bolt tight using a T5 socket or allen key
Here is what it will look like once tightened.
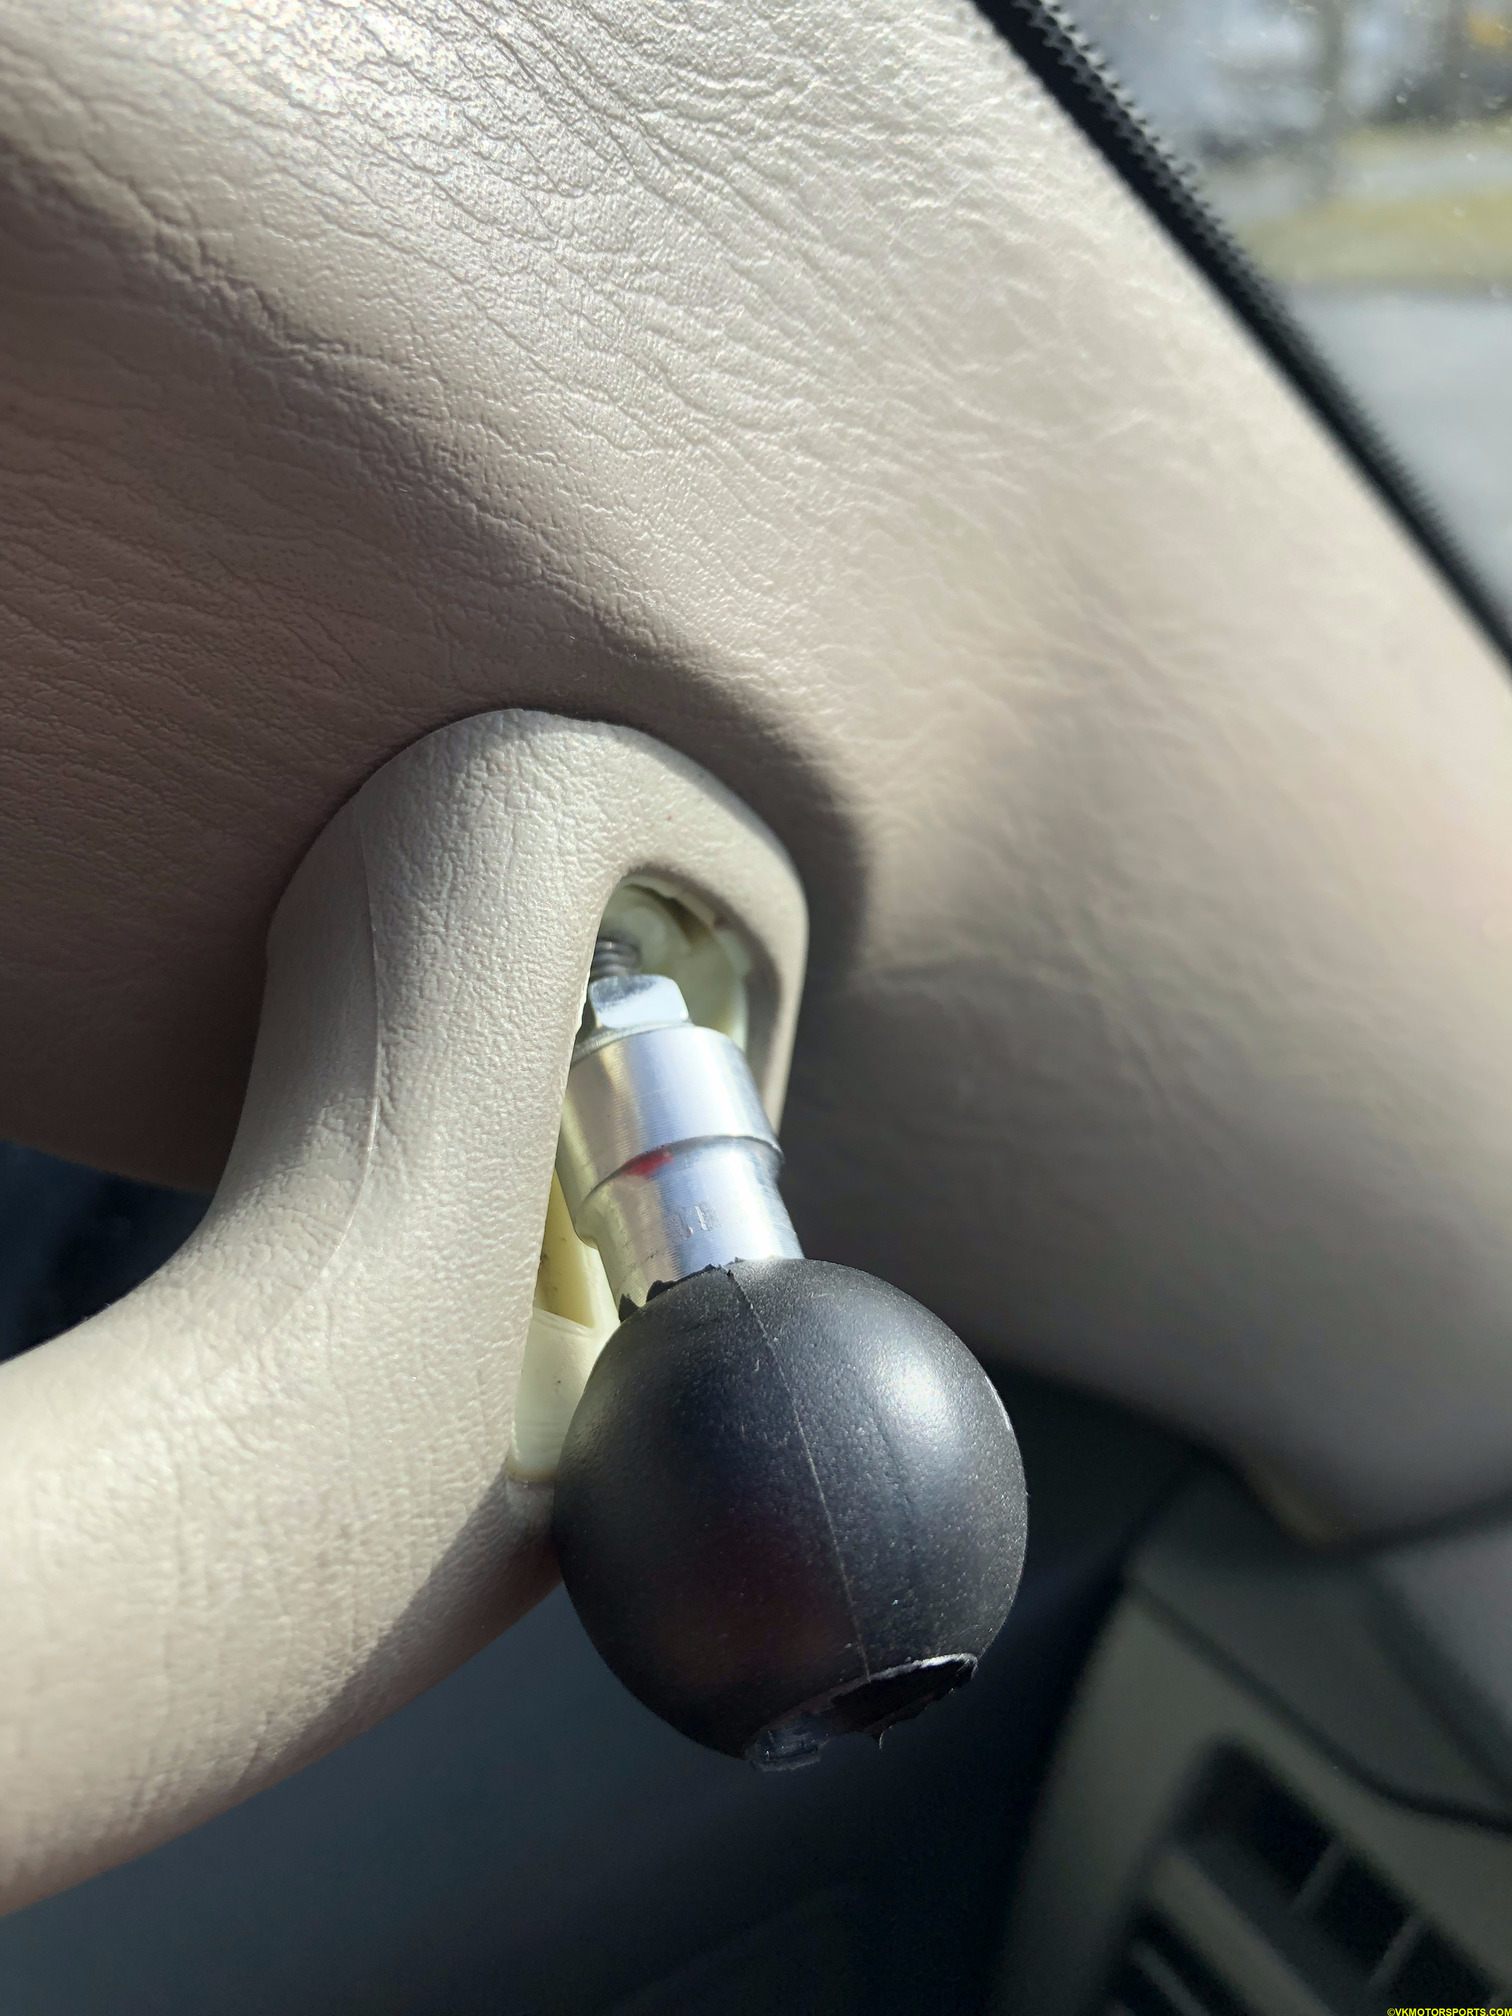 Figure 4. RAM® ball in place
Step 5: Loosen the RAM® RAM-B-201U double socket arm on one side and place it over the ball, and tighten it.
 Figure 5.RAM® RAM-B-201U Arm attached
Step 6: Now attach your choice of RAM® X-Grip® to the arm using the other end by loosening the knob and then tightening it again. I used the RAM-HOL-UN10BU X-Grip® since I have a larger phone, but if you have a small phone you may want to purchase the RAM-HOL-UN7BU X-Grip®.
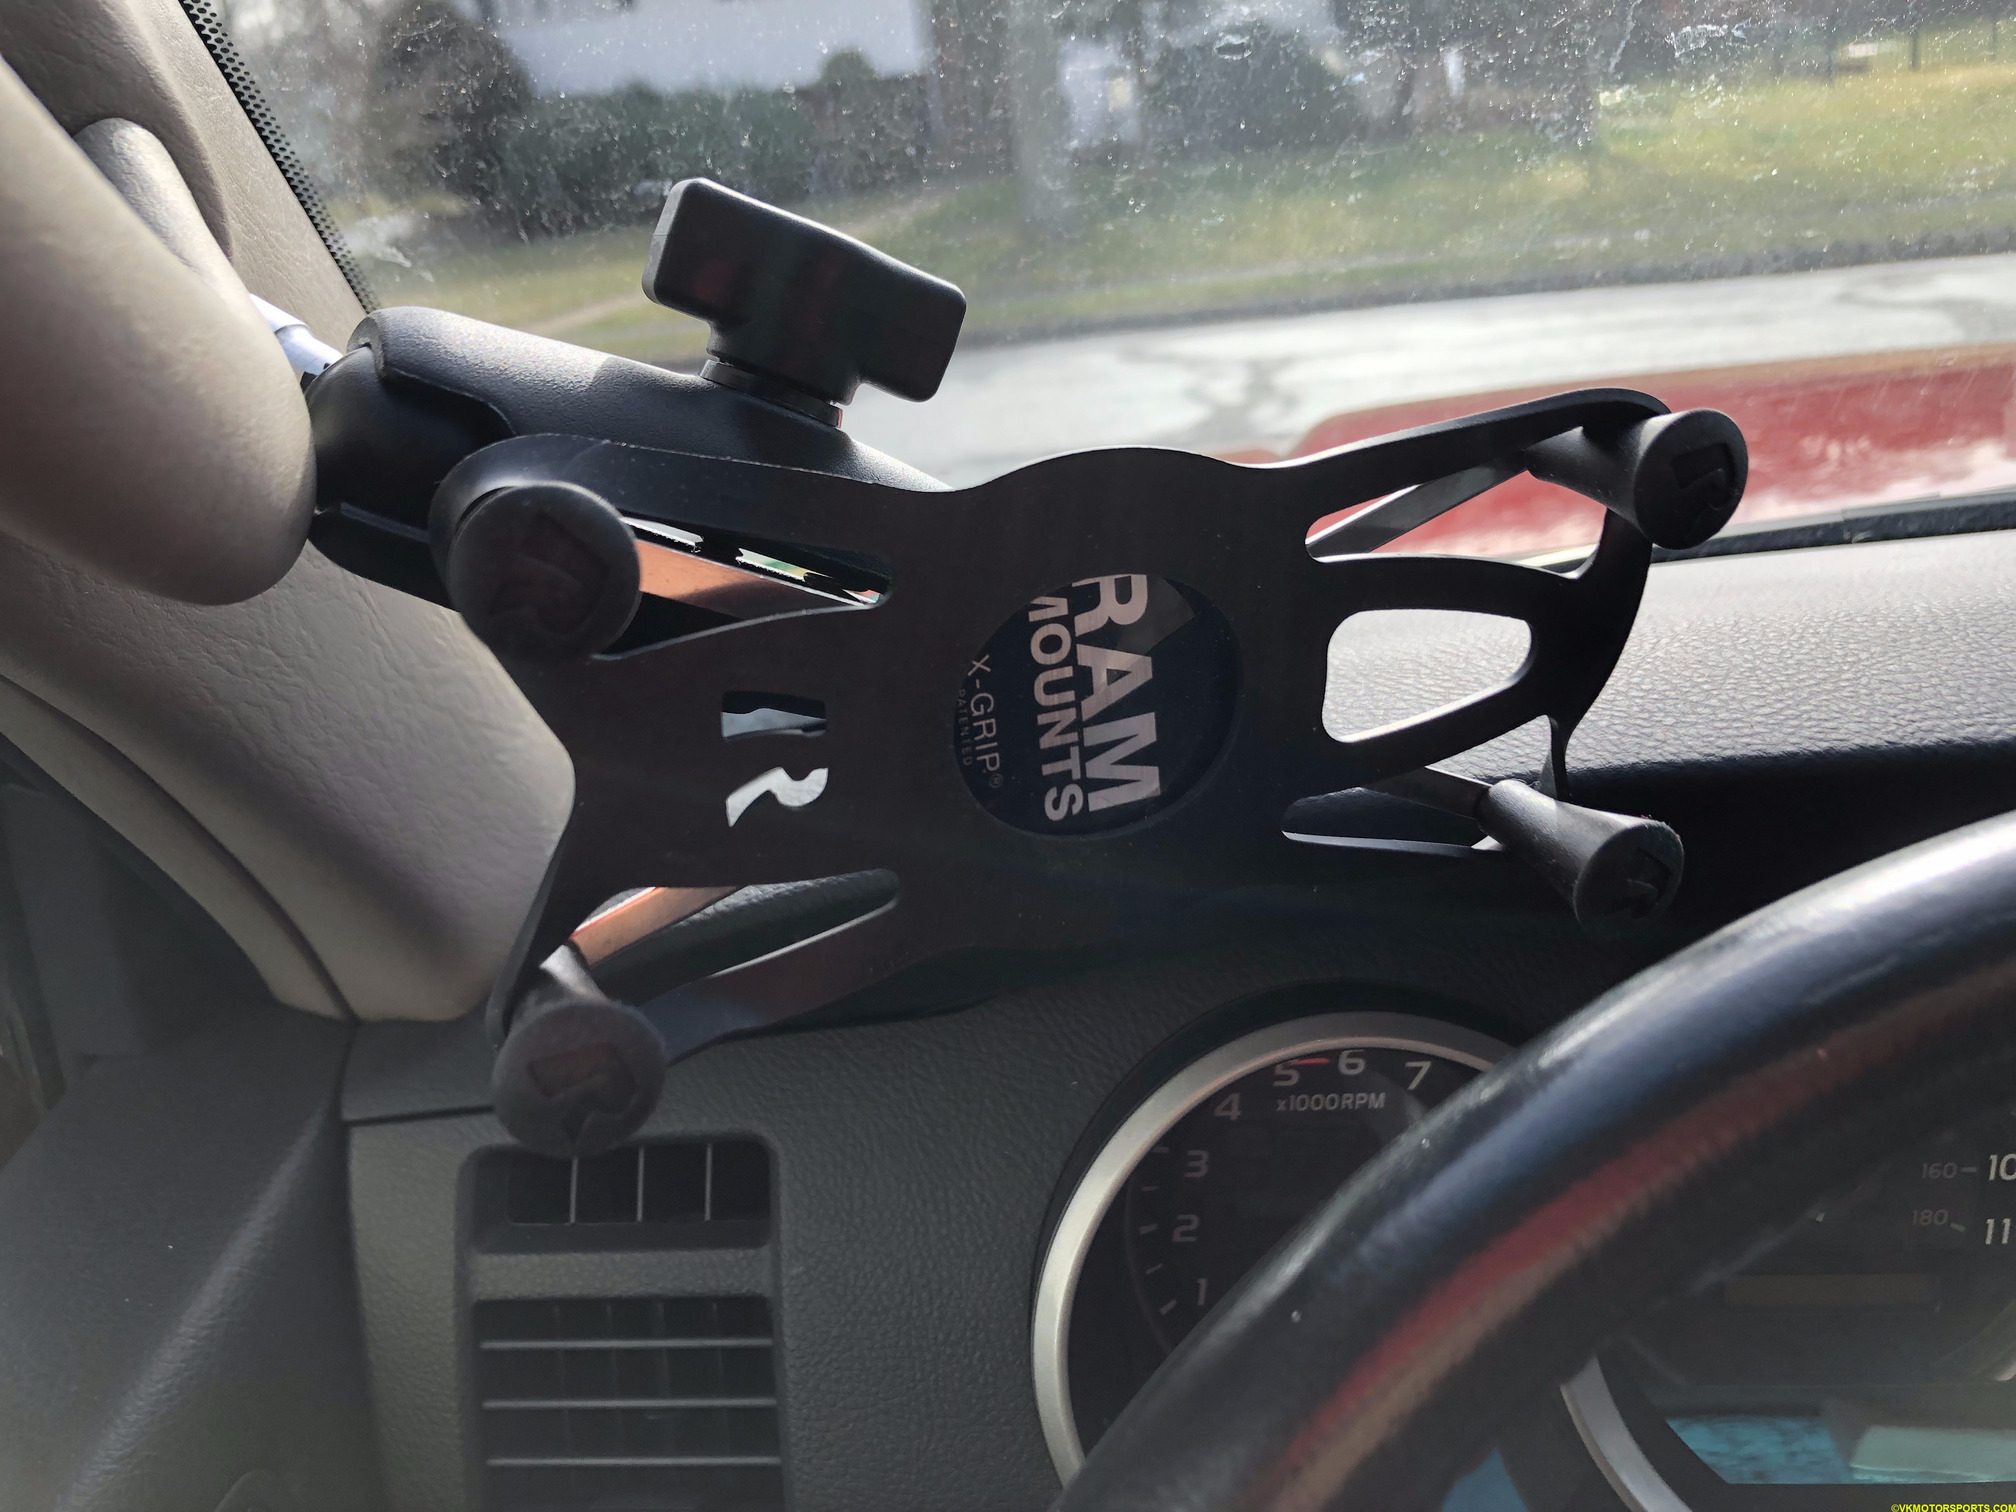 Figure 6. Attach the RAM-HOL-UN10BU X-Grip® to the other end of the arm
With this, now you can install the phone in the X-Grip® and drive over any terrain without worrying about it falling down. You can also use the phone or a GPS in there to show you directions when you need it, while not covering your stock infotainment system.