I had been looking for a deal for good red seats for my interior for almost 7 months now, since I am going for a certain look for the Infiniti G35. I finally got a great deal on a pair of used red Braum seats for a price of $550 along with a separate deal of a pair of seat brackets by Planted Technology for $200 for the pair off Facebook Marketplace. I got these in March but finally got time to install the seats today, in May ! This post describes how to remove stock seats and install replacement seats in the G35 Coupe.
HARDWARE REQUIREMENTS
- Replacement seats - can be stock, or any aftermarket seats. These are the Braum seats I got used for $550. Make sure these come with seat sliders if you buy new. If not, you can get these.
- Planted Seat Bracket for Infiniti G35 Driver Part# SB075DR
- Planted Seat Bracket for Infiniti G35 Passenger Part# SB075PA
- Sparco 50001 Bottom Mount Seat Hardware - 2 packets of these. Requires a 13mm socket and 6mm Hex Allen Key
- 6-point 14mm socket to remove seat bolts
- Dorman Hex Nut Class 10.9 Thread Size M12-1.25 for seat belt buckle. Requires a 19mm socket
- Carpet and Upholstery Cleaning Spray
REMOVAL OF THE STOCK SEATS
First step is to remove the stock seats and cleanup the carpet. The process is the same for both the driver and passenger seats.
Step 1: Remove the bolt covers using a trim tool or a flat-head screw driver or pop them off with your hands, as shown in Figure 1a and 1b. You want to use the seat slider buttons to move the seat back and forth to get access to the bolt covers for removal.
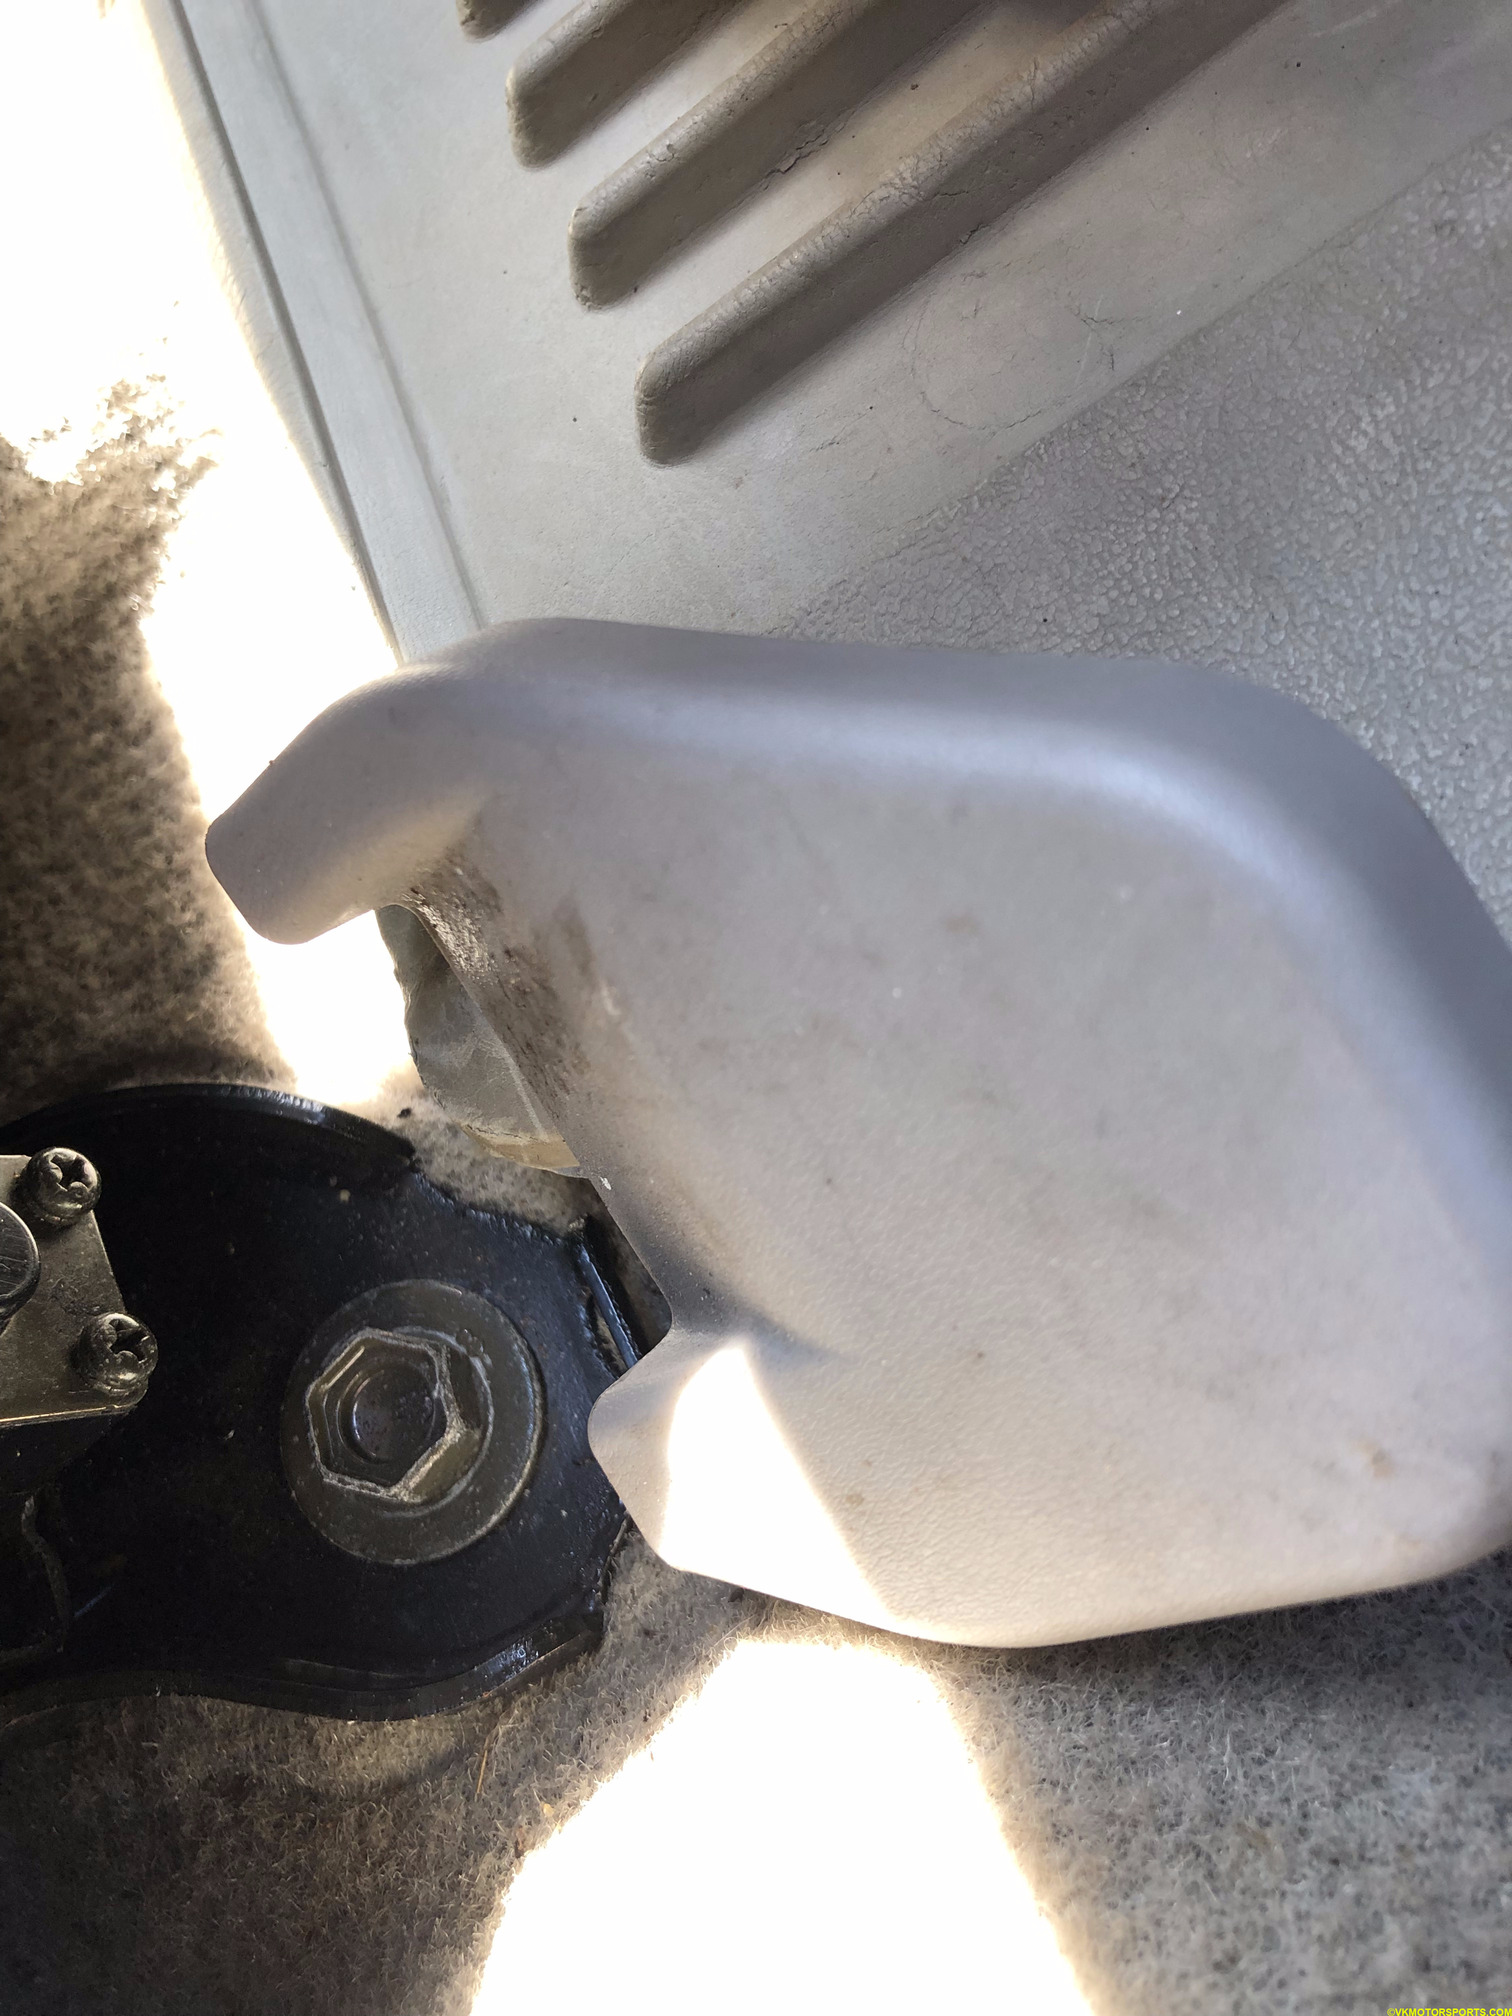 Figure 1a. Remove the bolt covers in the front of the seat
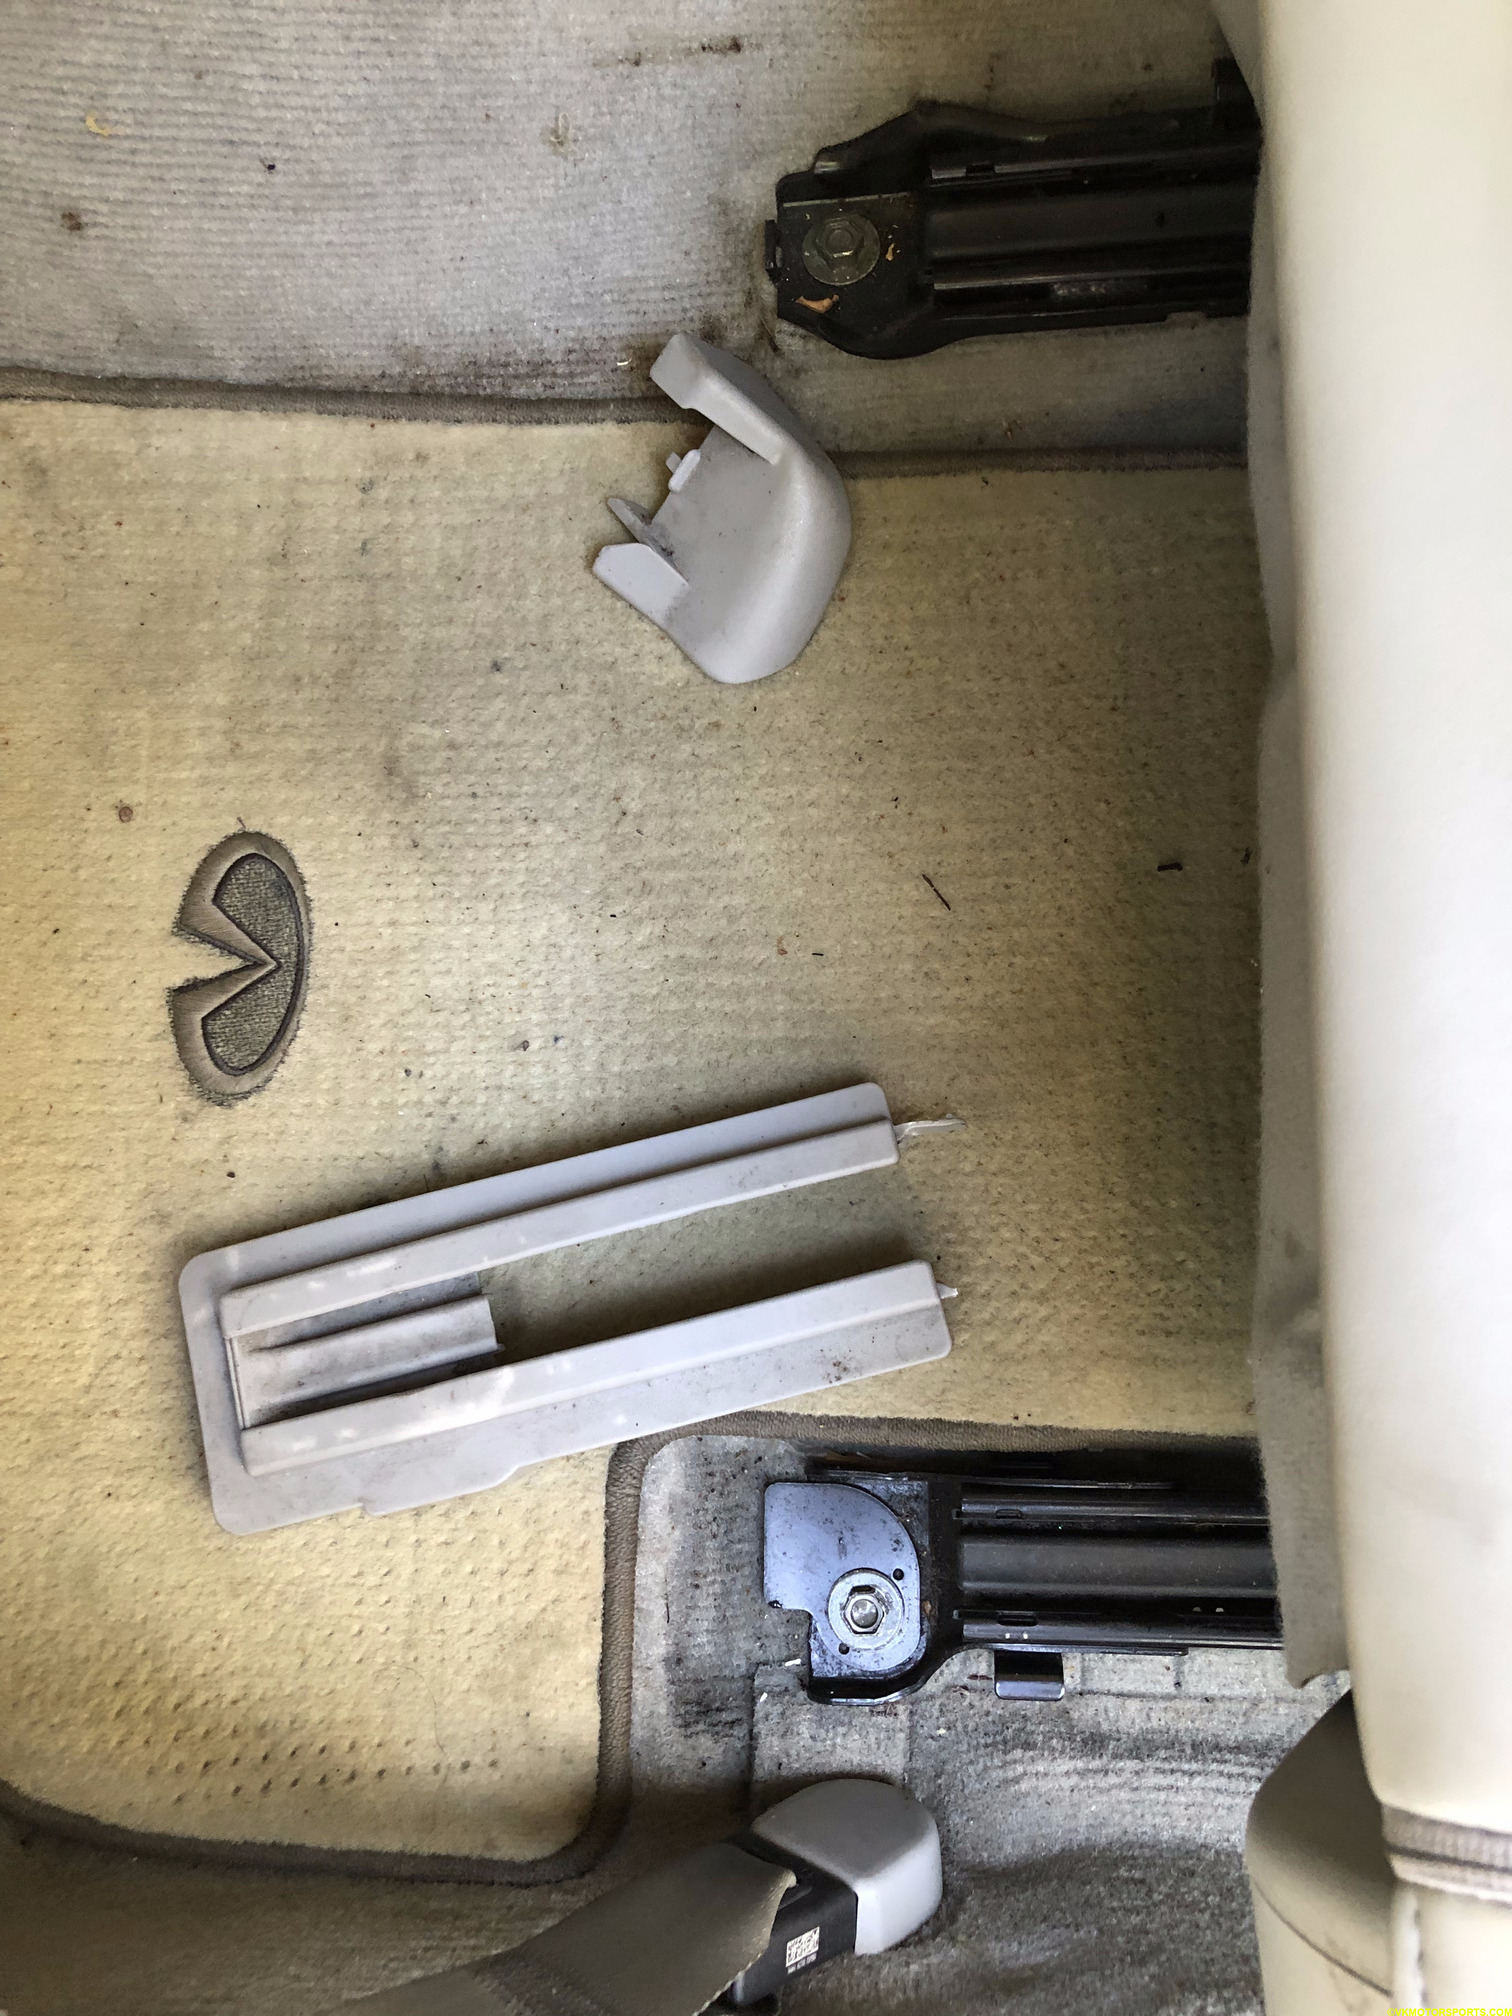 Figure 1b. Remove the bolt covers in the rear of the seat
Step 2: Using a 6-point 14mm socket (Figure 2a), you should unscrew the 2 bolts in the front (Figure 2b) and 2 bolts in the rear (Figure 2c).
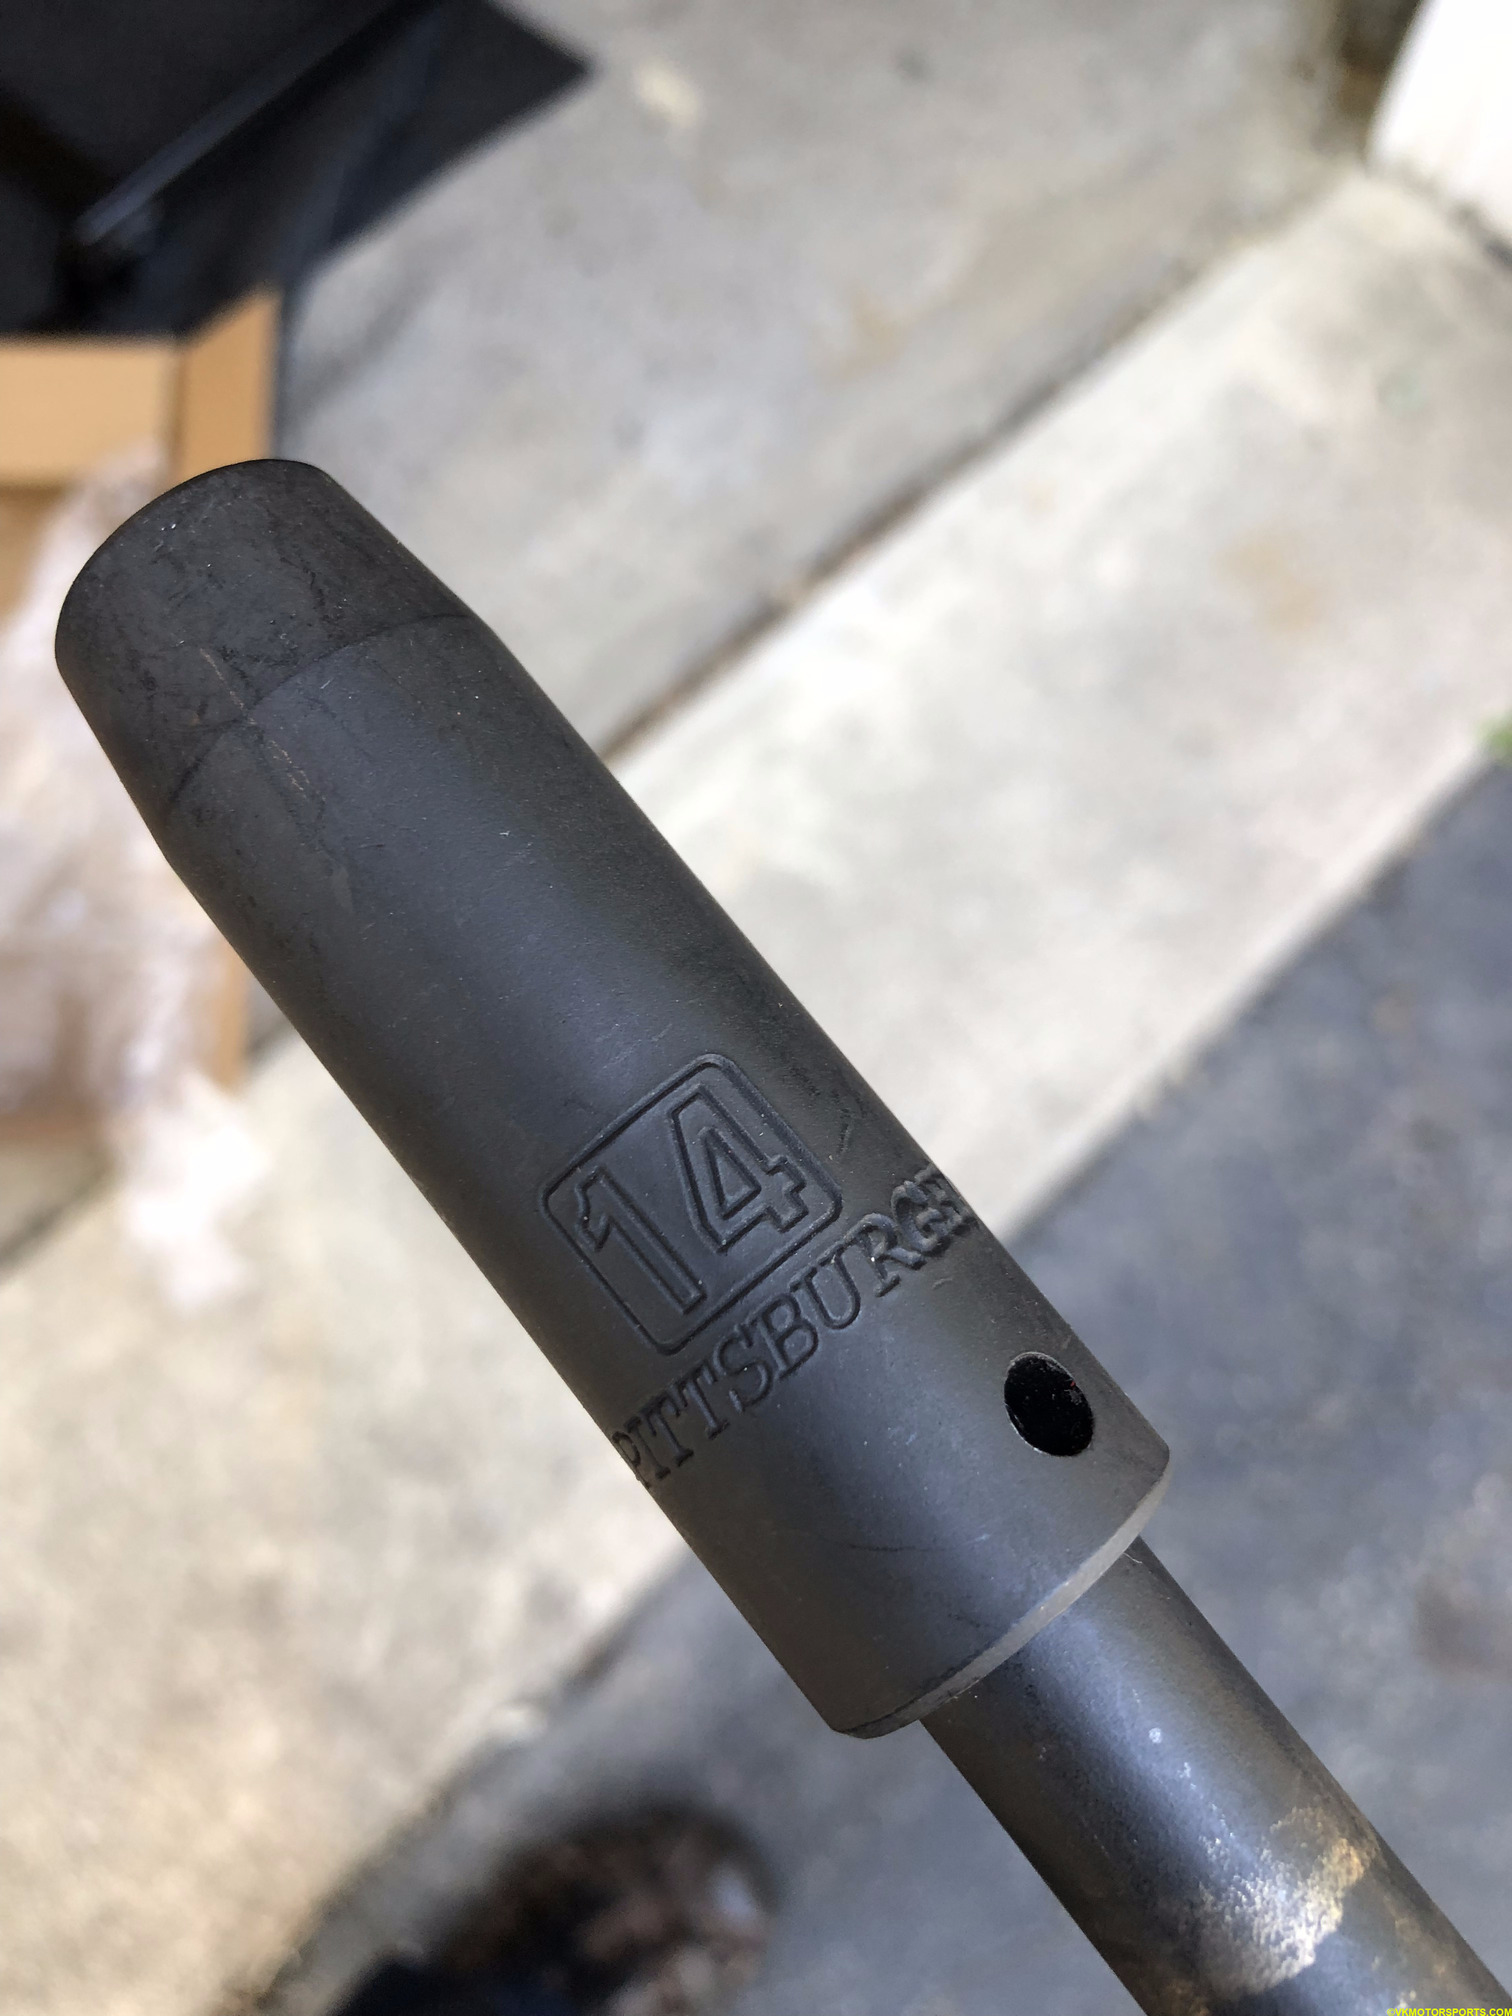 Figure 2a. 14mm 6-point socket used to remove seat bolts
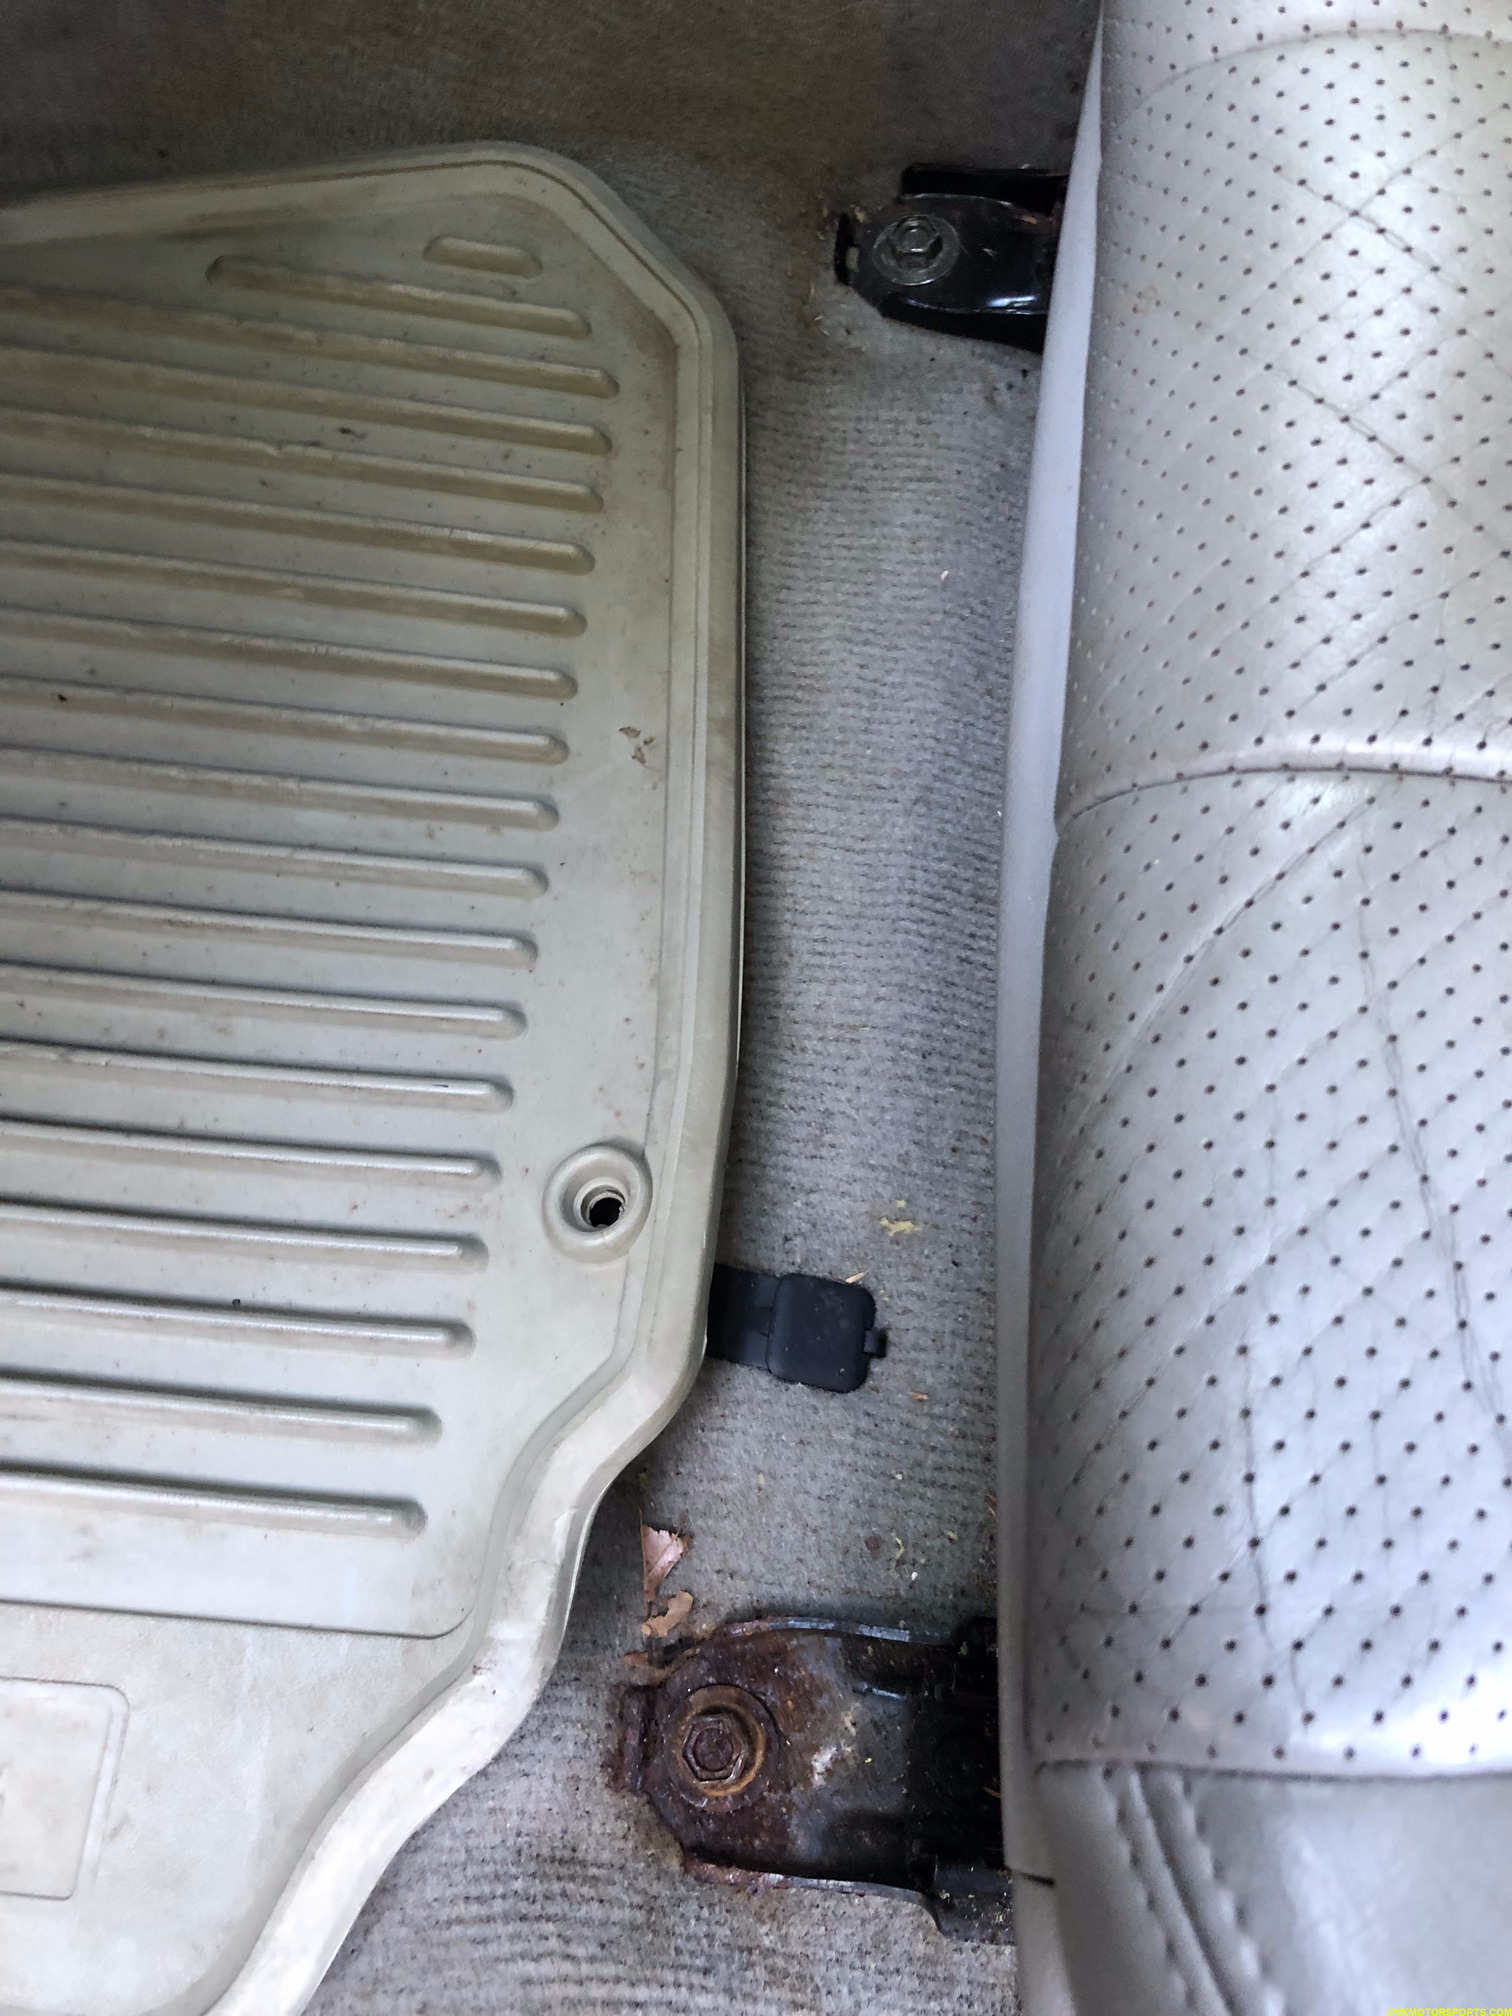 Figure 2b. 2 front bolts visible on the driver's seat bracket
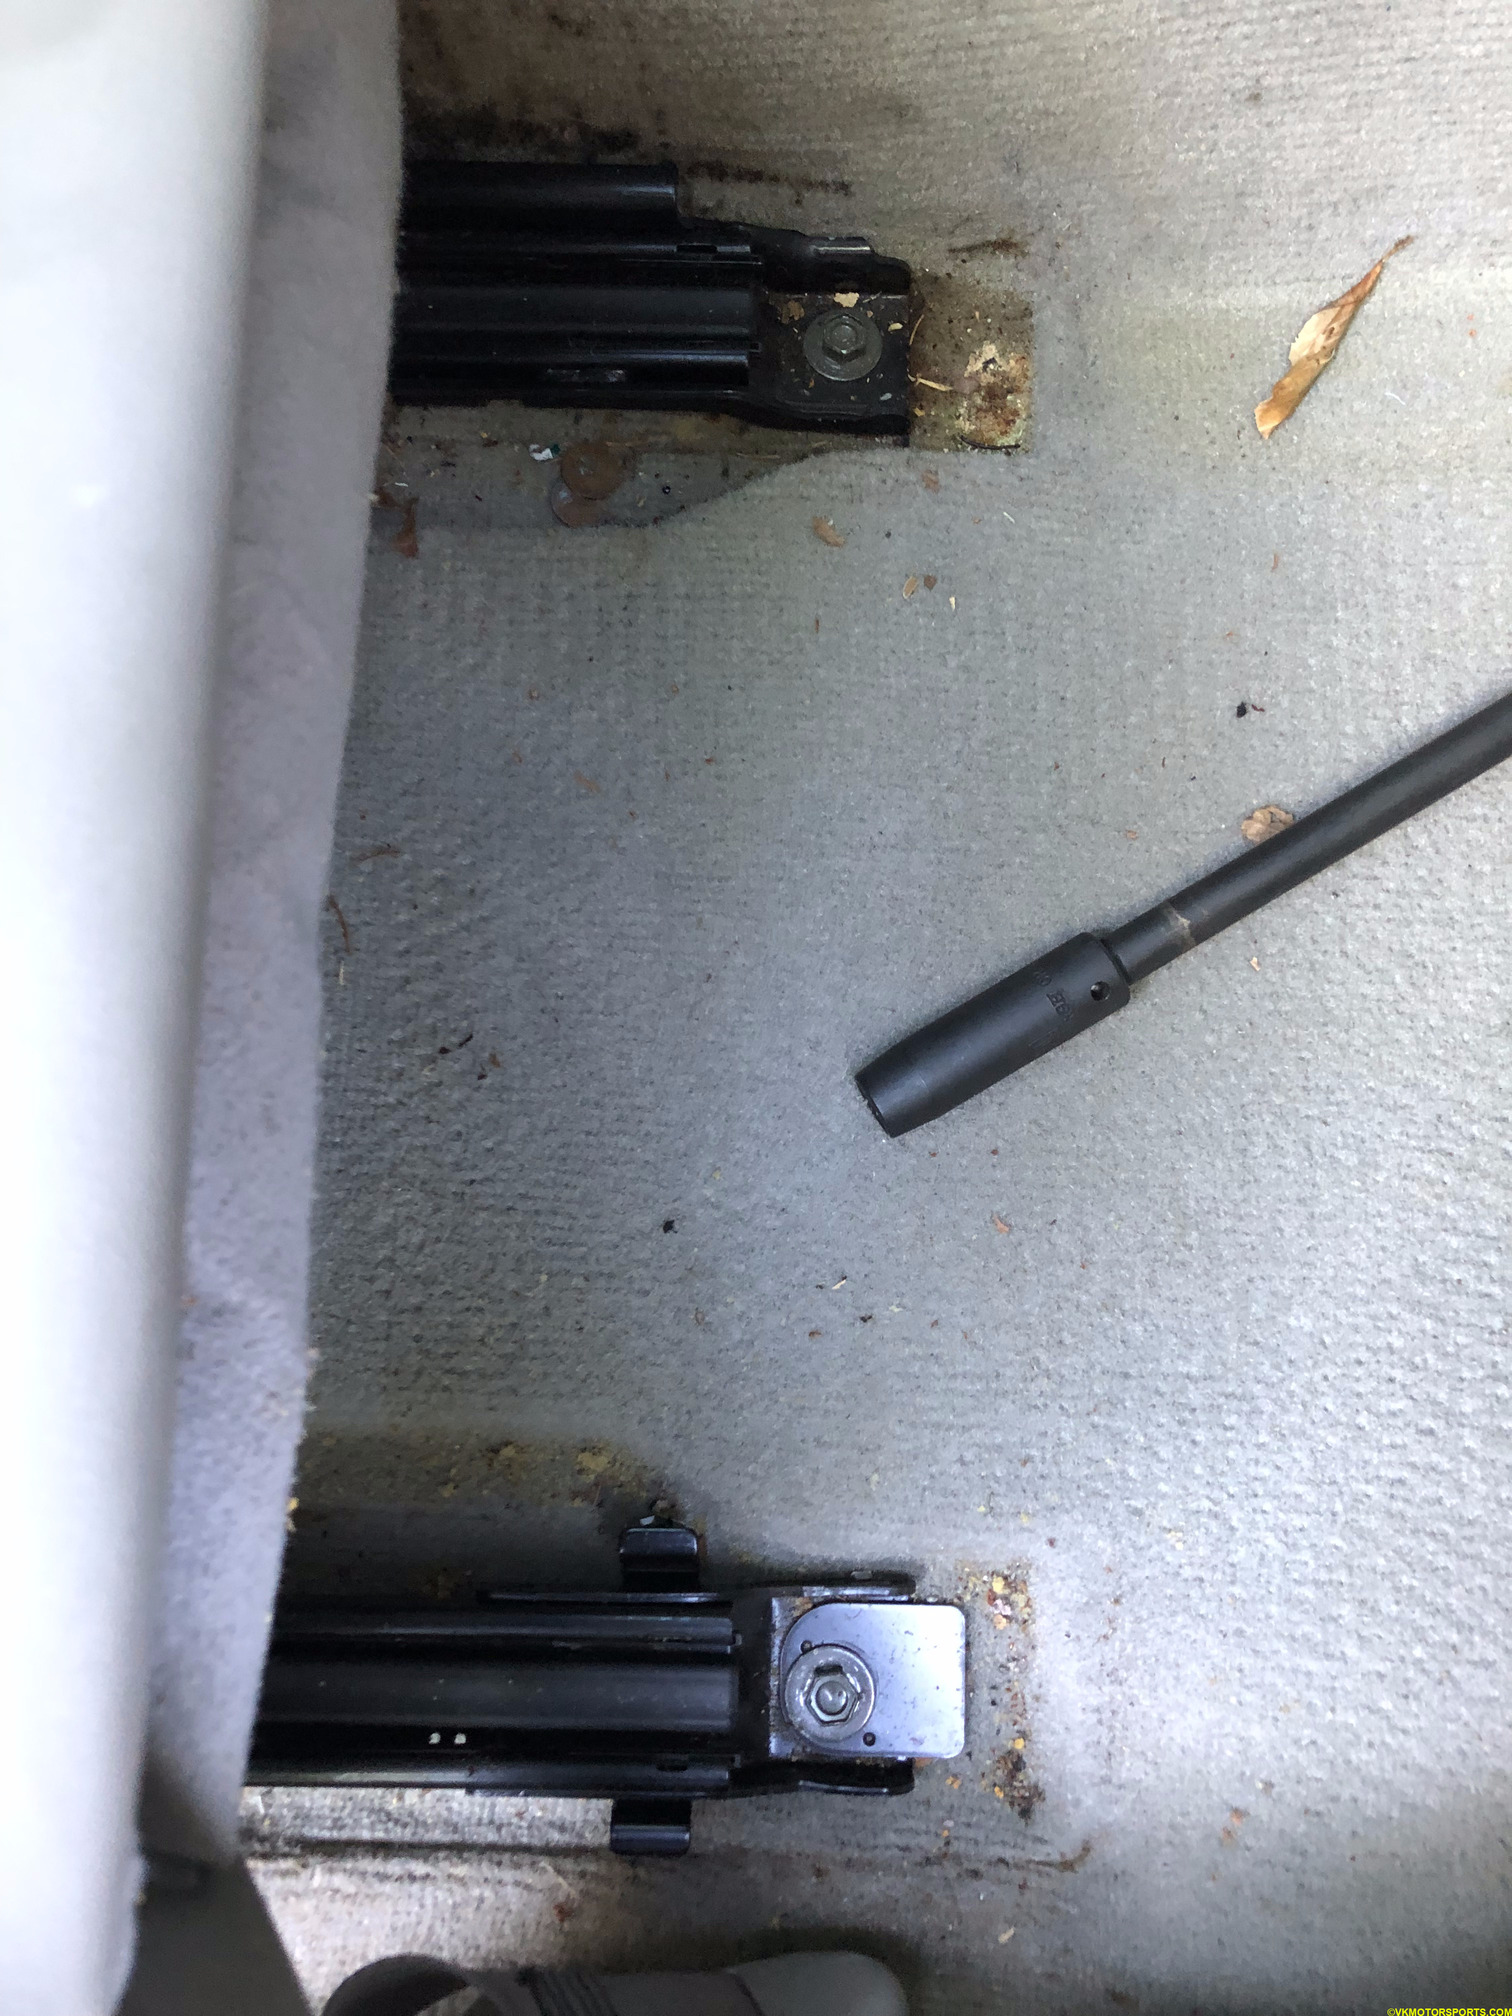 Figure 2c. 2 rear bolts visible on the driver's seat bracket
Step 3: Before you take out the unbolted seats from the car, you have to disconnect all the electrical connectors below the seat. Lift up the front of the seat as shown in Figure 3a and locate the connectors. Some connectors will be attached to the seat bottom (Figures 3b, 3c and 3d) and you have to slide them off the tabs as seen in Figures 3d and 3e.
Using a flat screwdriver you will have to disconnect each of the three connectors - the big white one, the yellow airbag one and the small white one for the seat belt buckle (Figure 3b). Once disconnected you can remove the seat out of the car (Figure 3g).
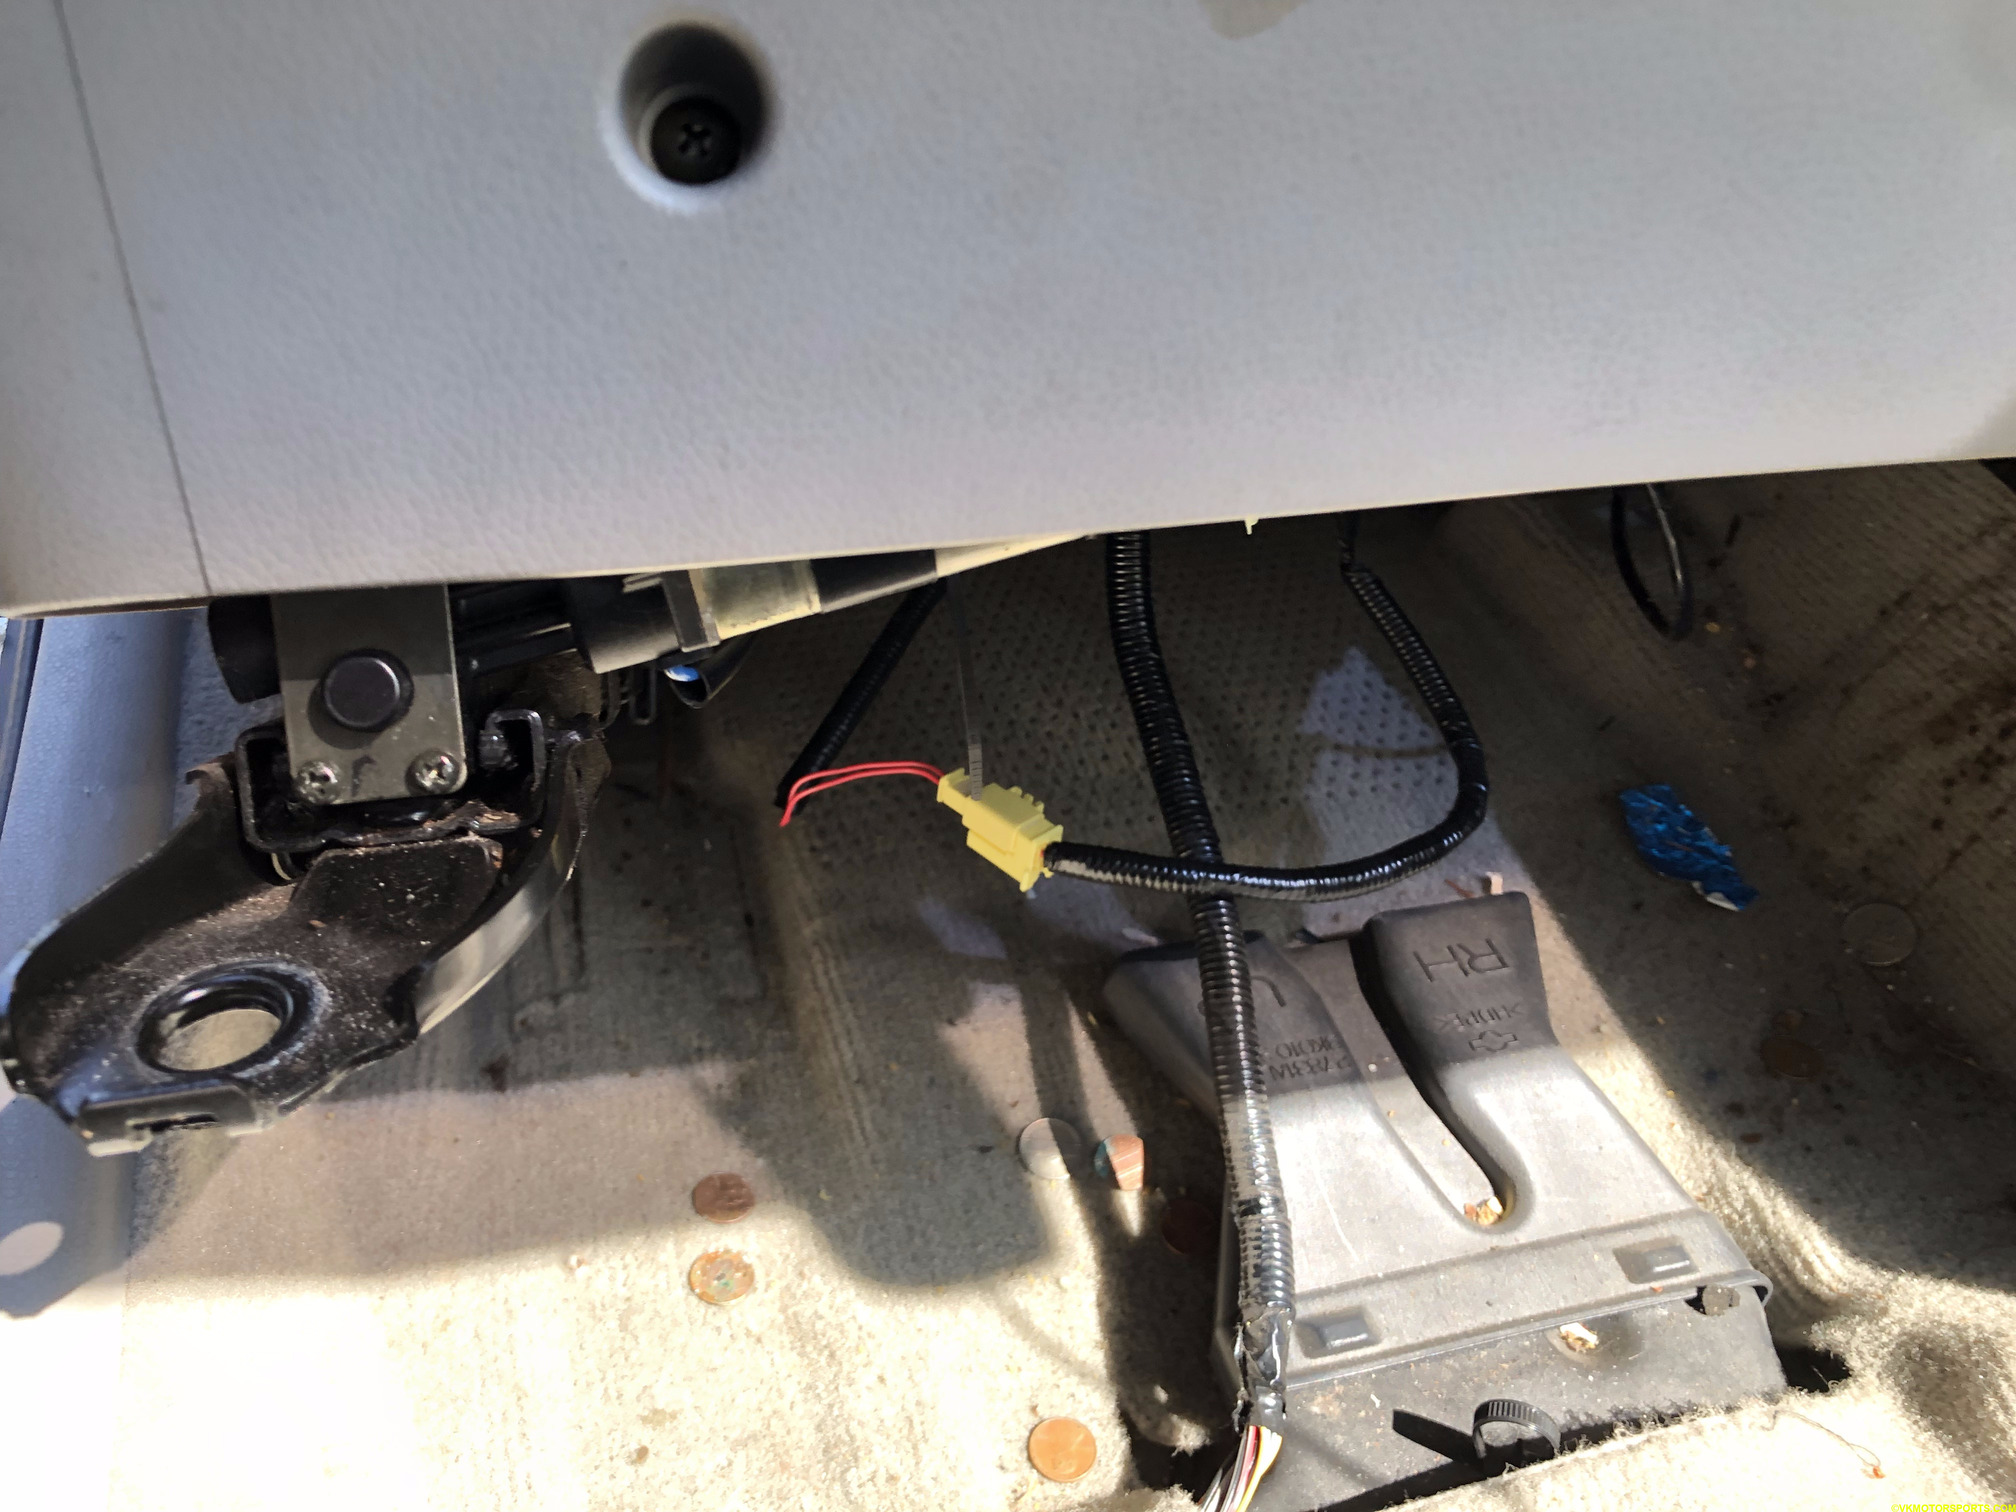 Figure 3a. Lift the front of the seat up
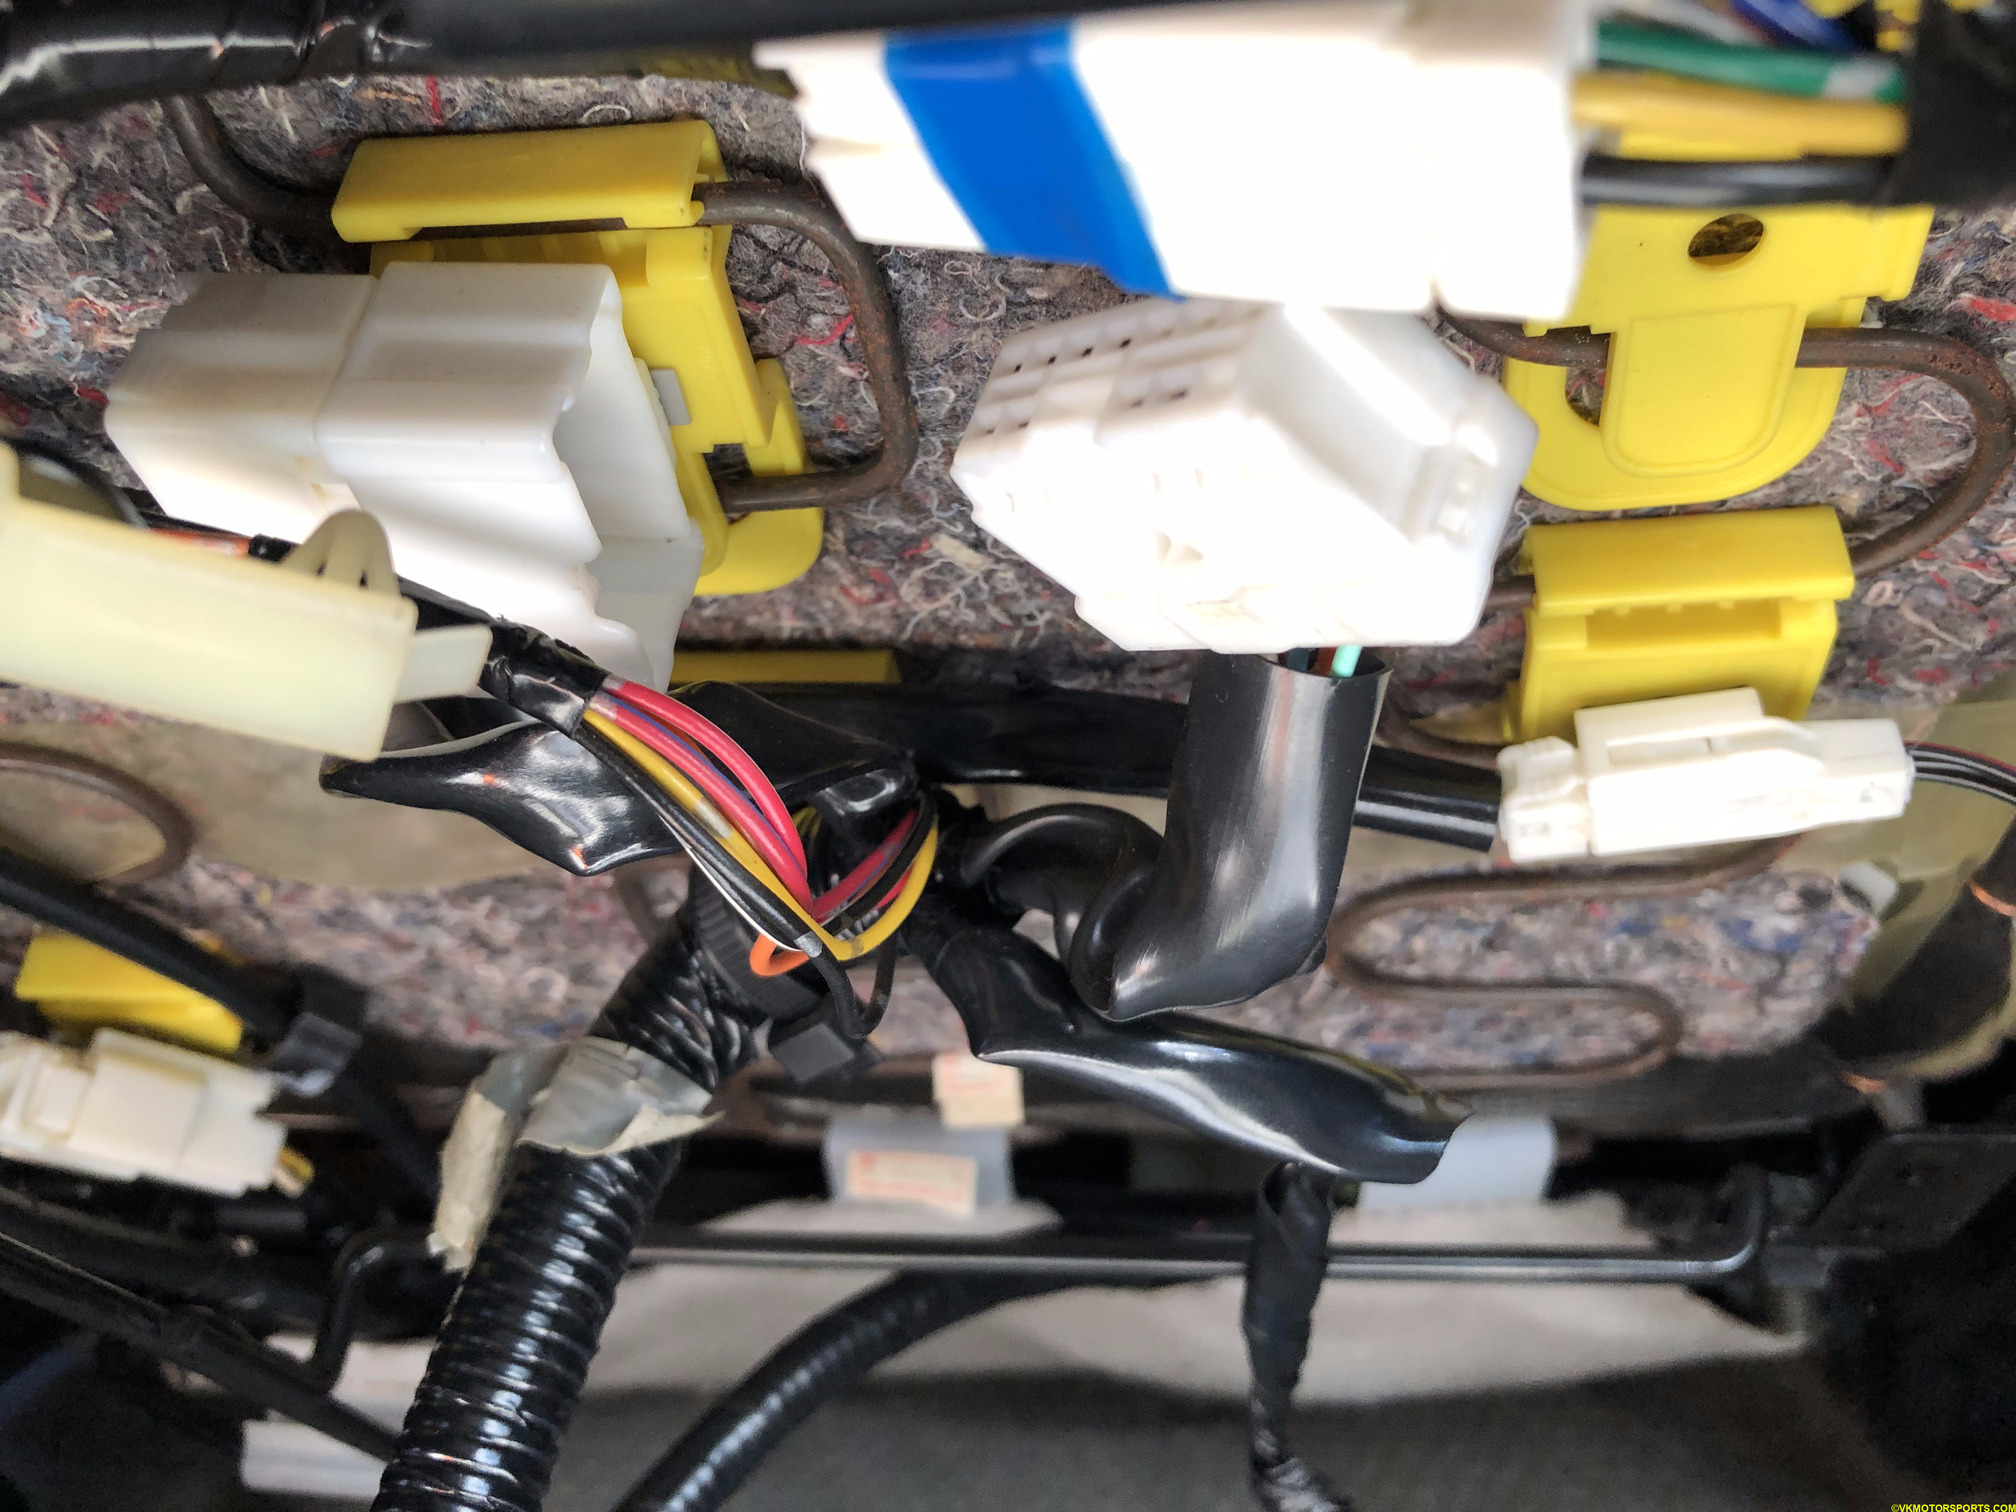 Figure 3b. Disconnect the big white connector using a flat-head screwdriver
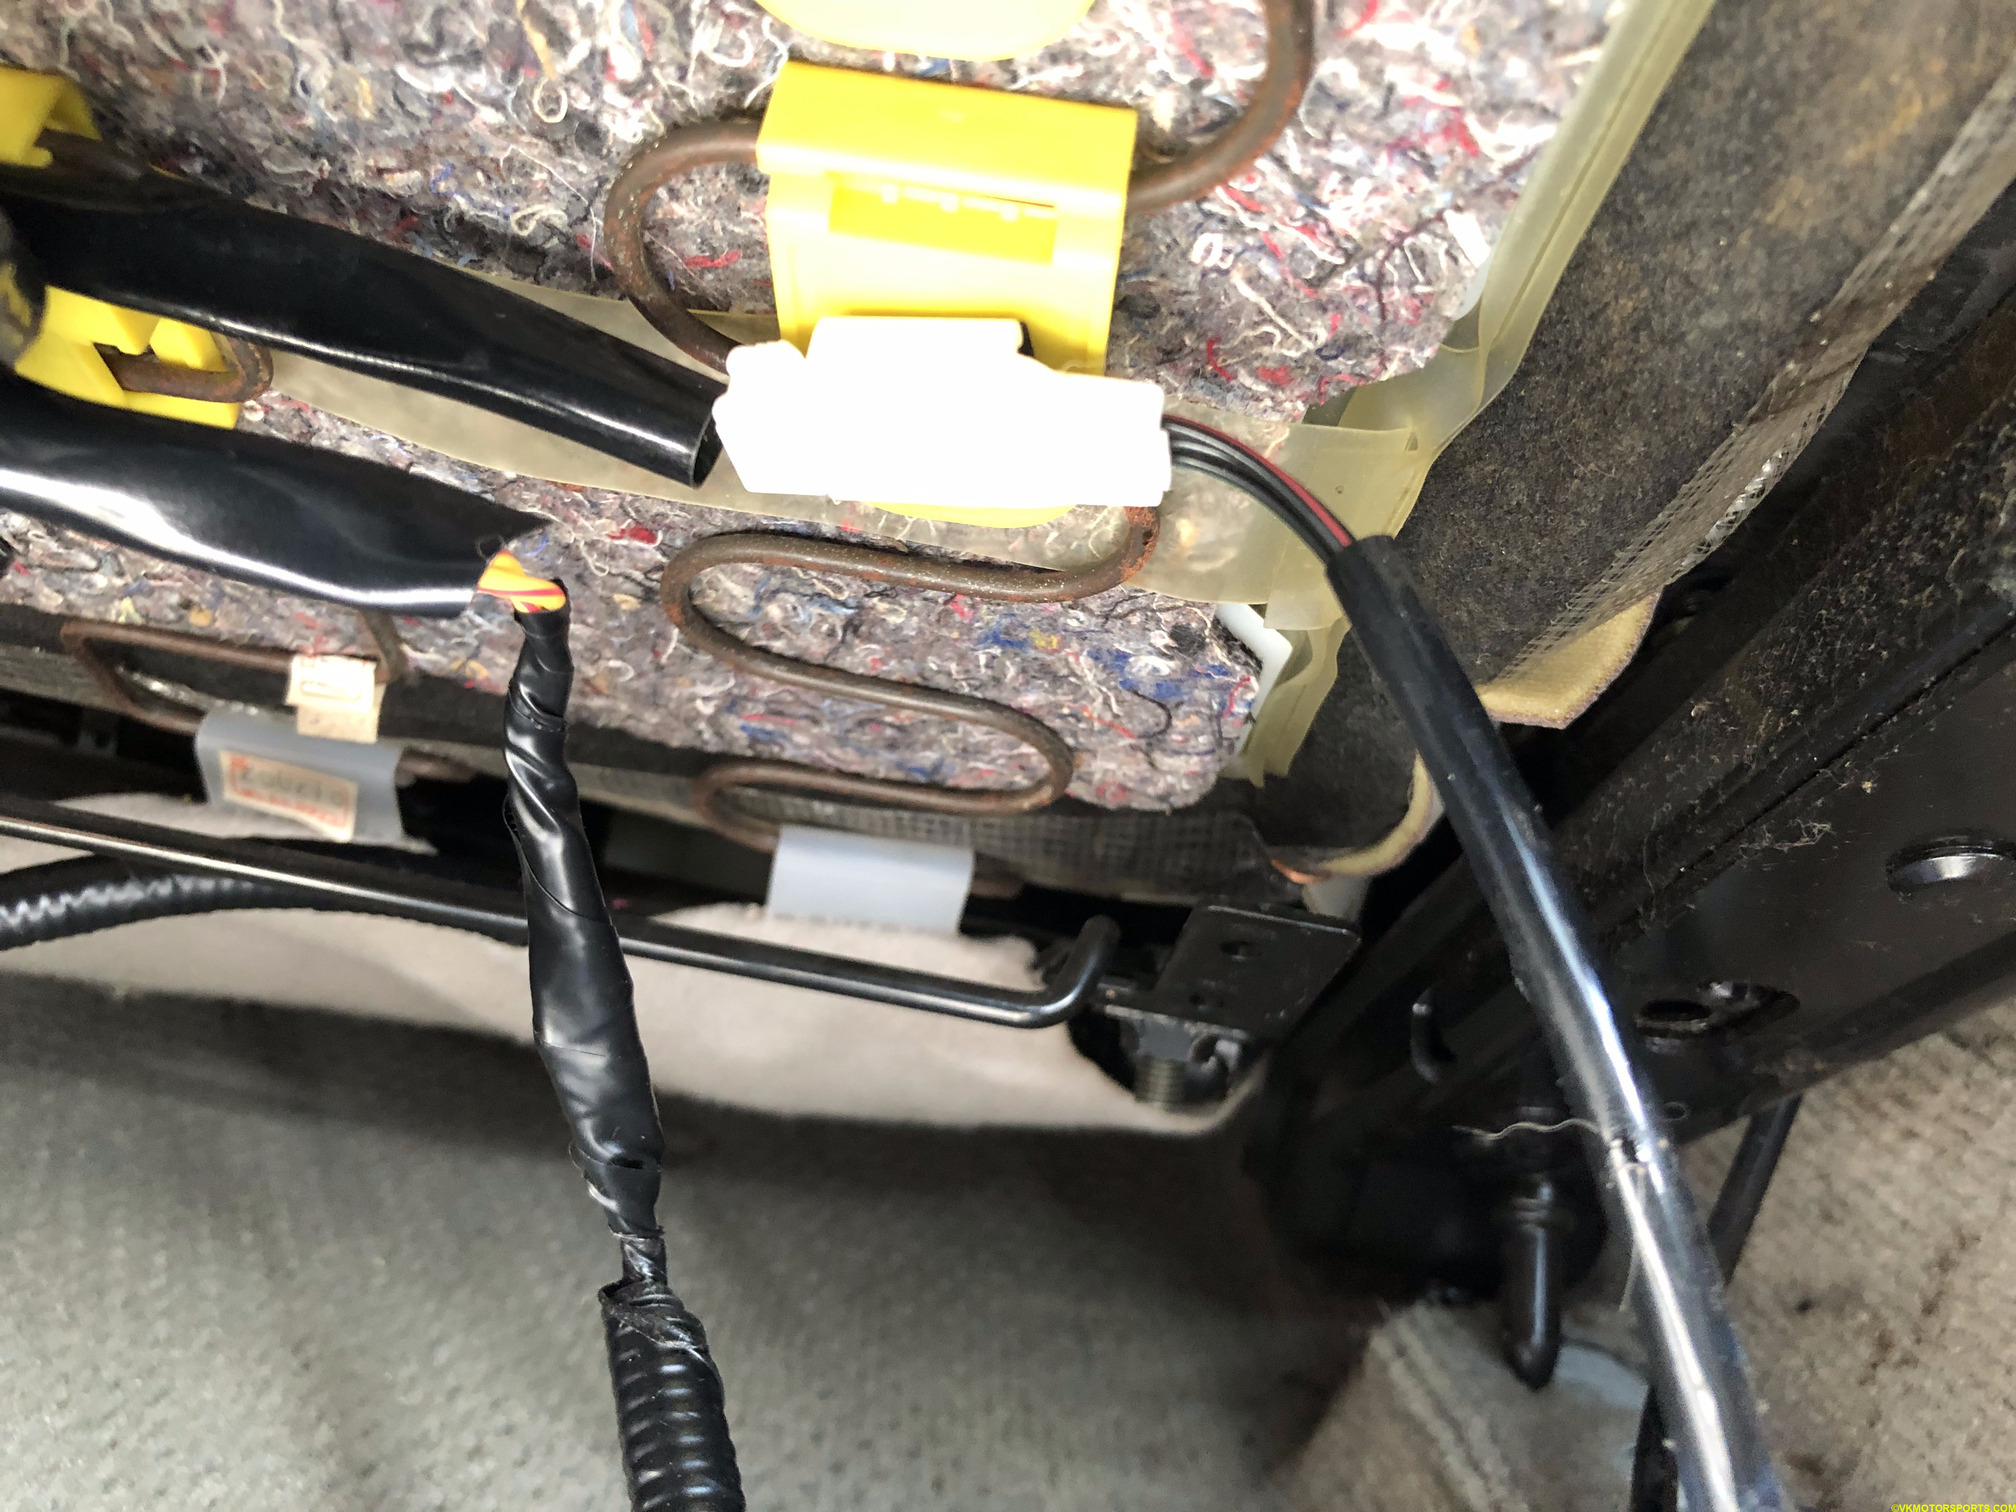 Figure 3c. Disconnect the small white connector
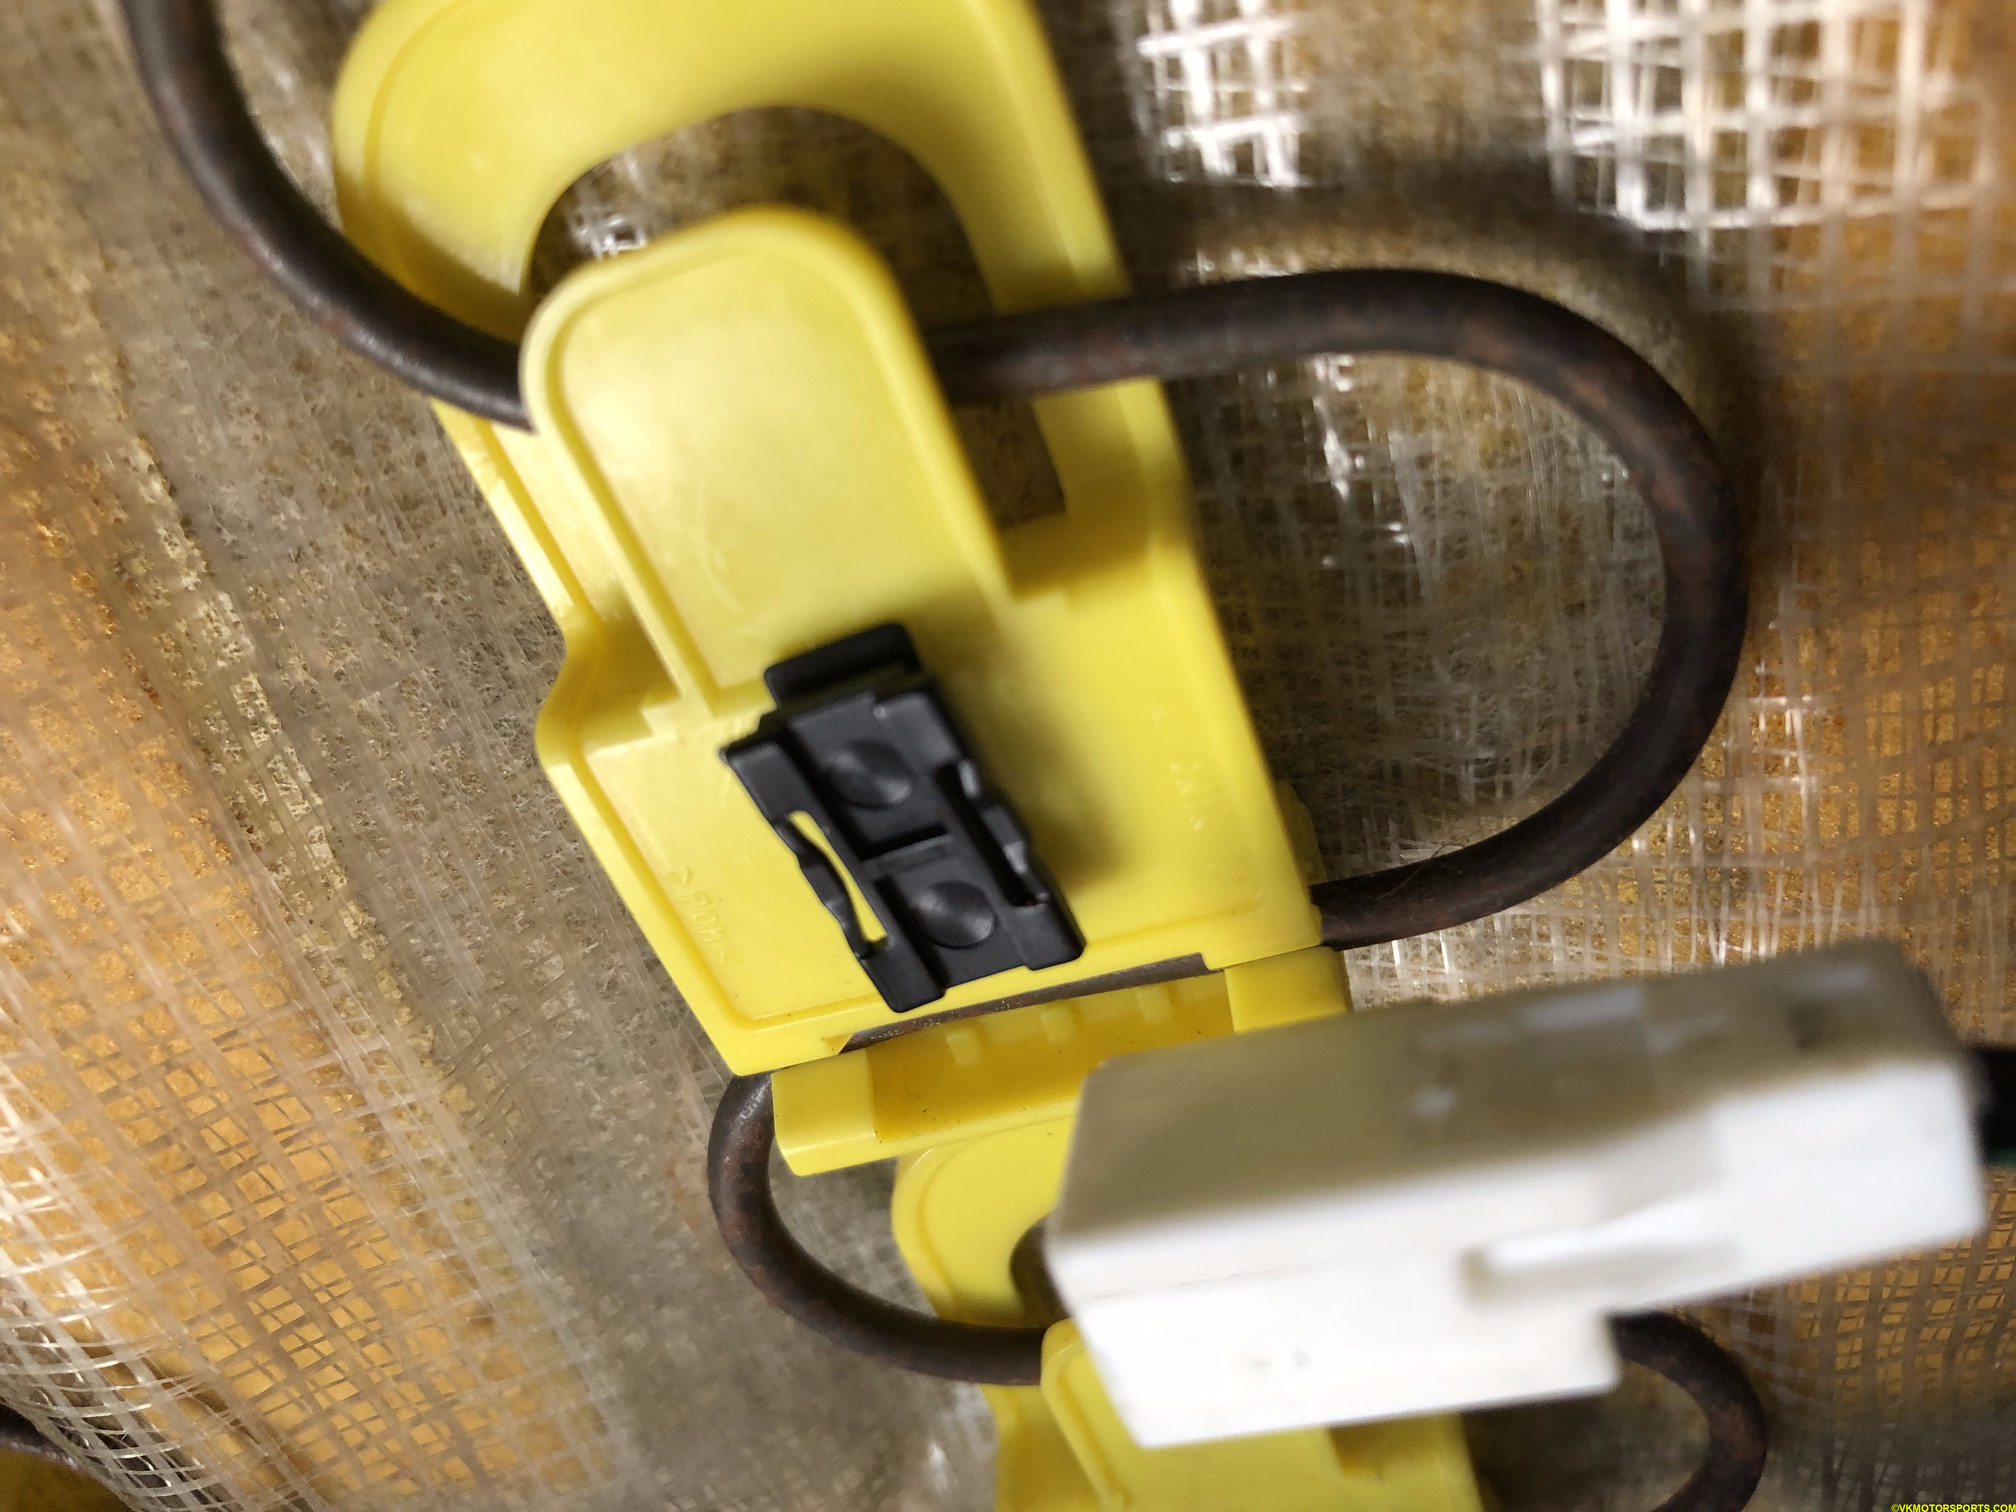 Figure 3d. The black tab is where the small white connector was attached
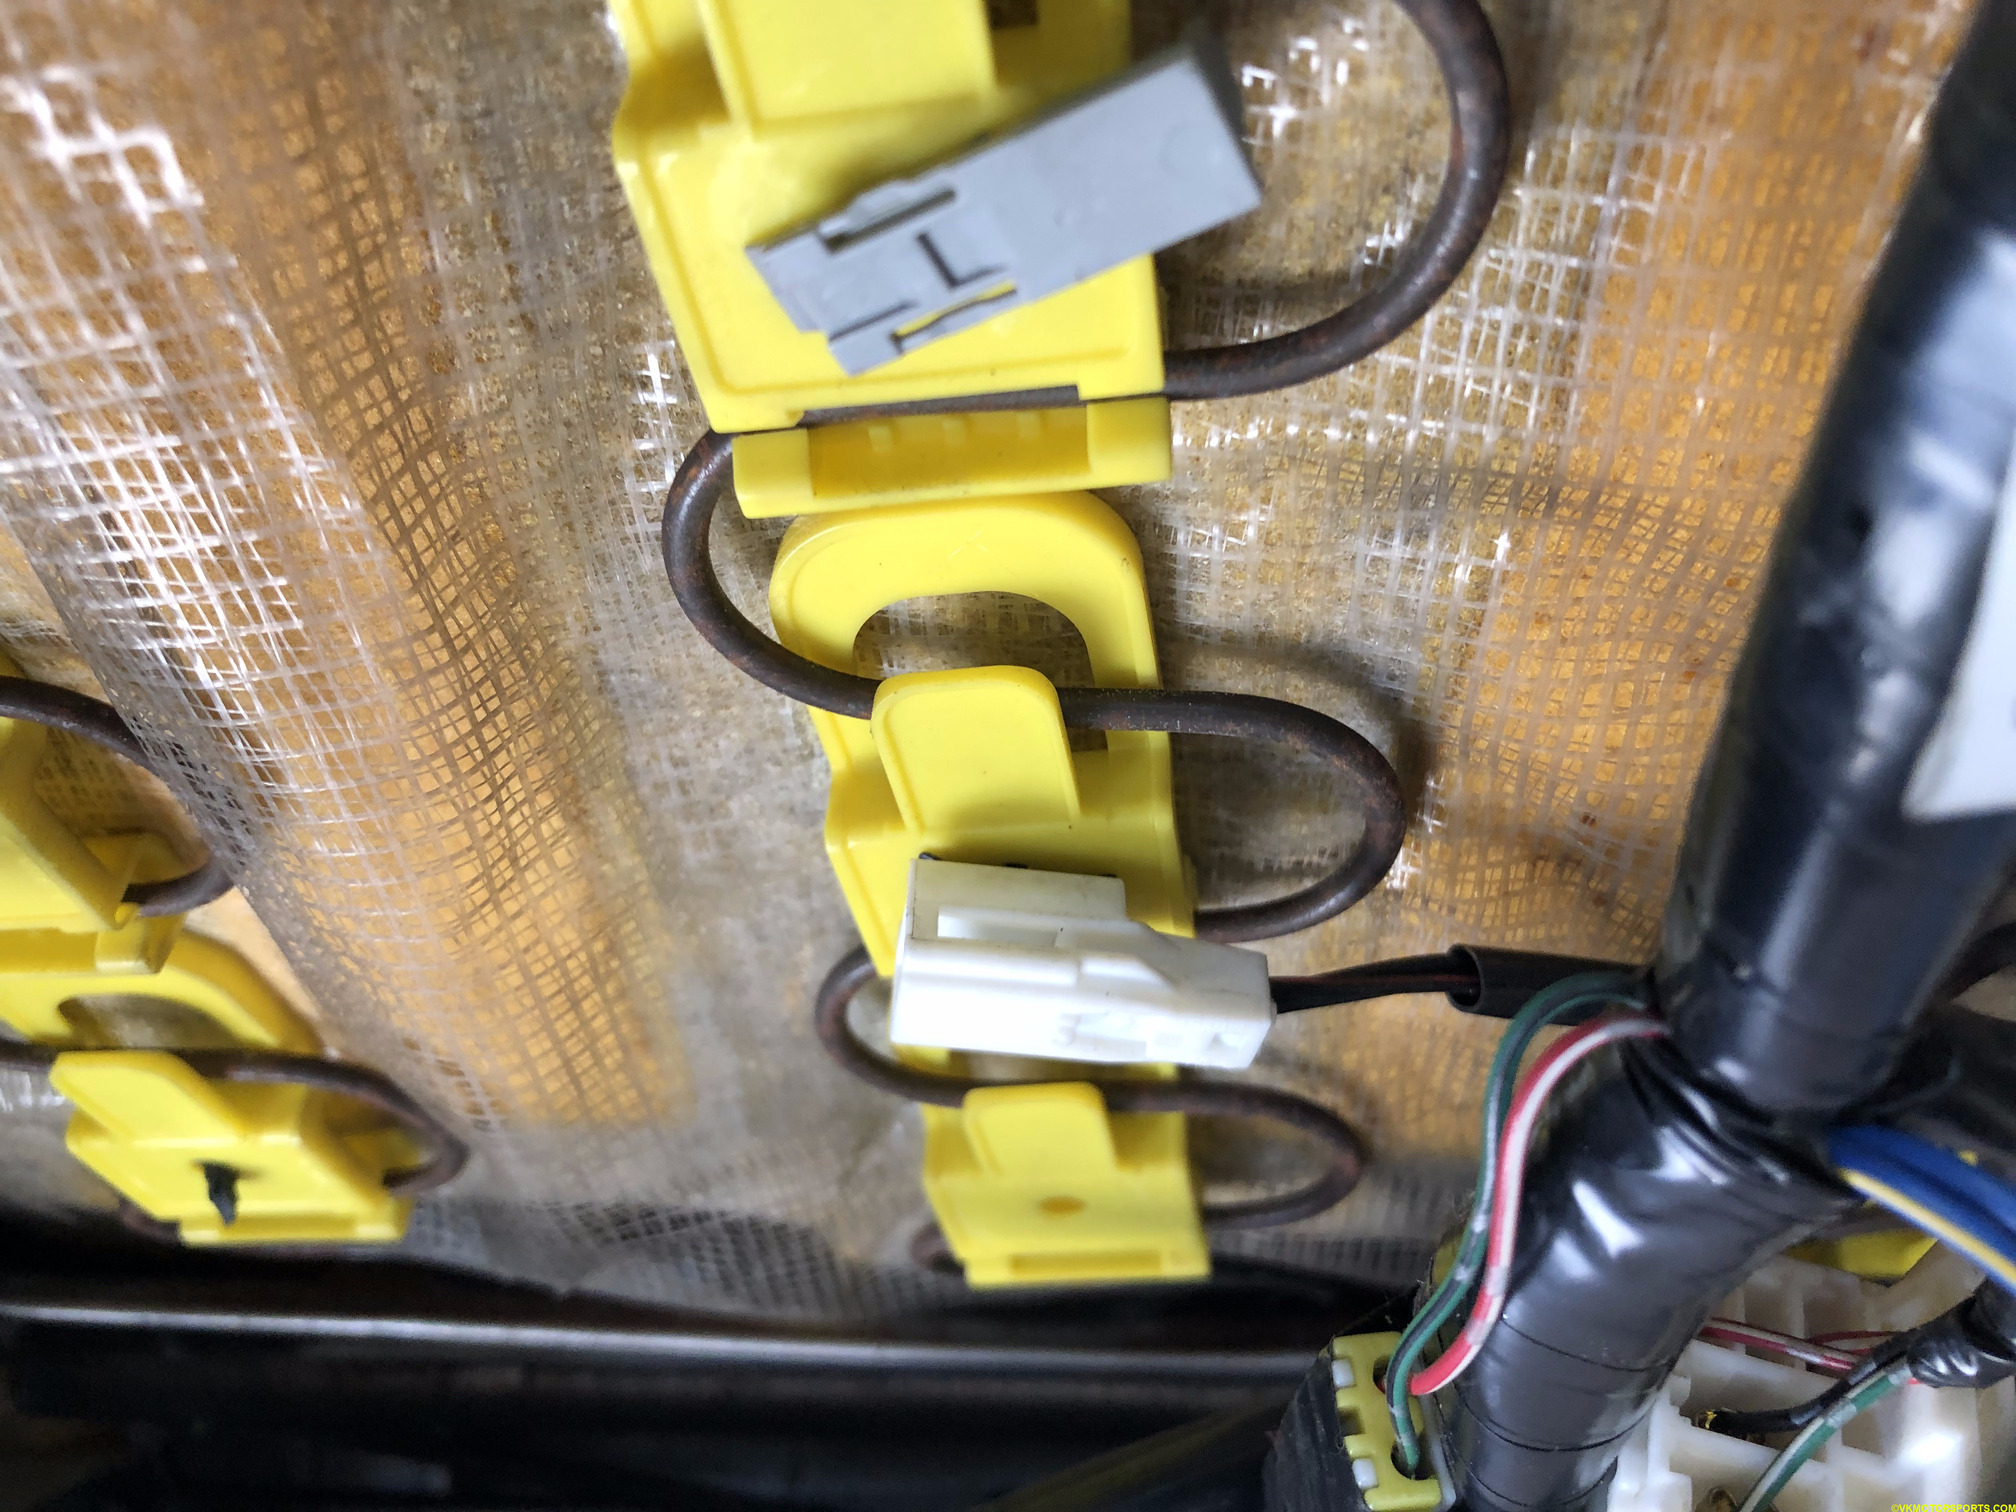 Figure 3e. Showing the grey tab for the big white connector
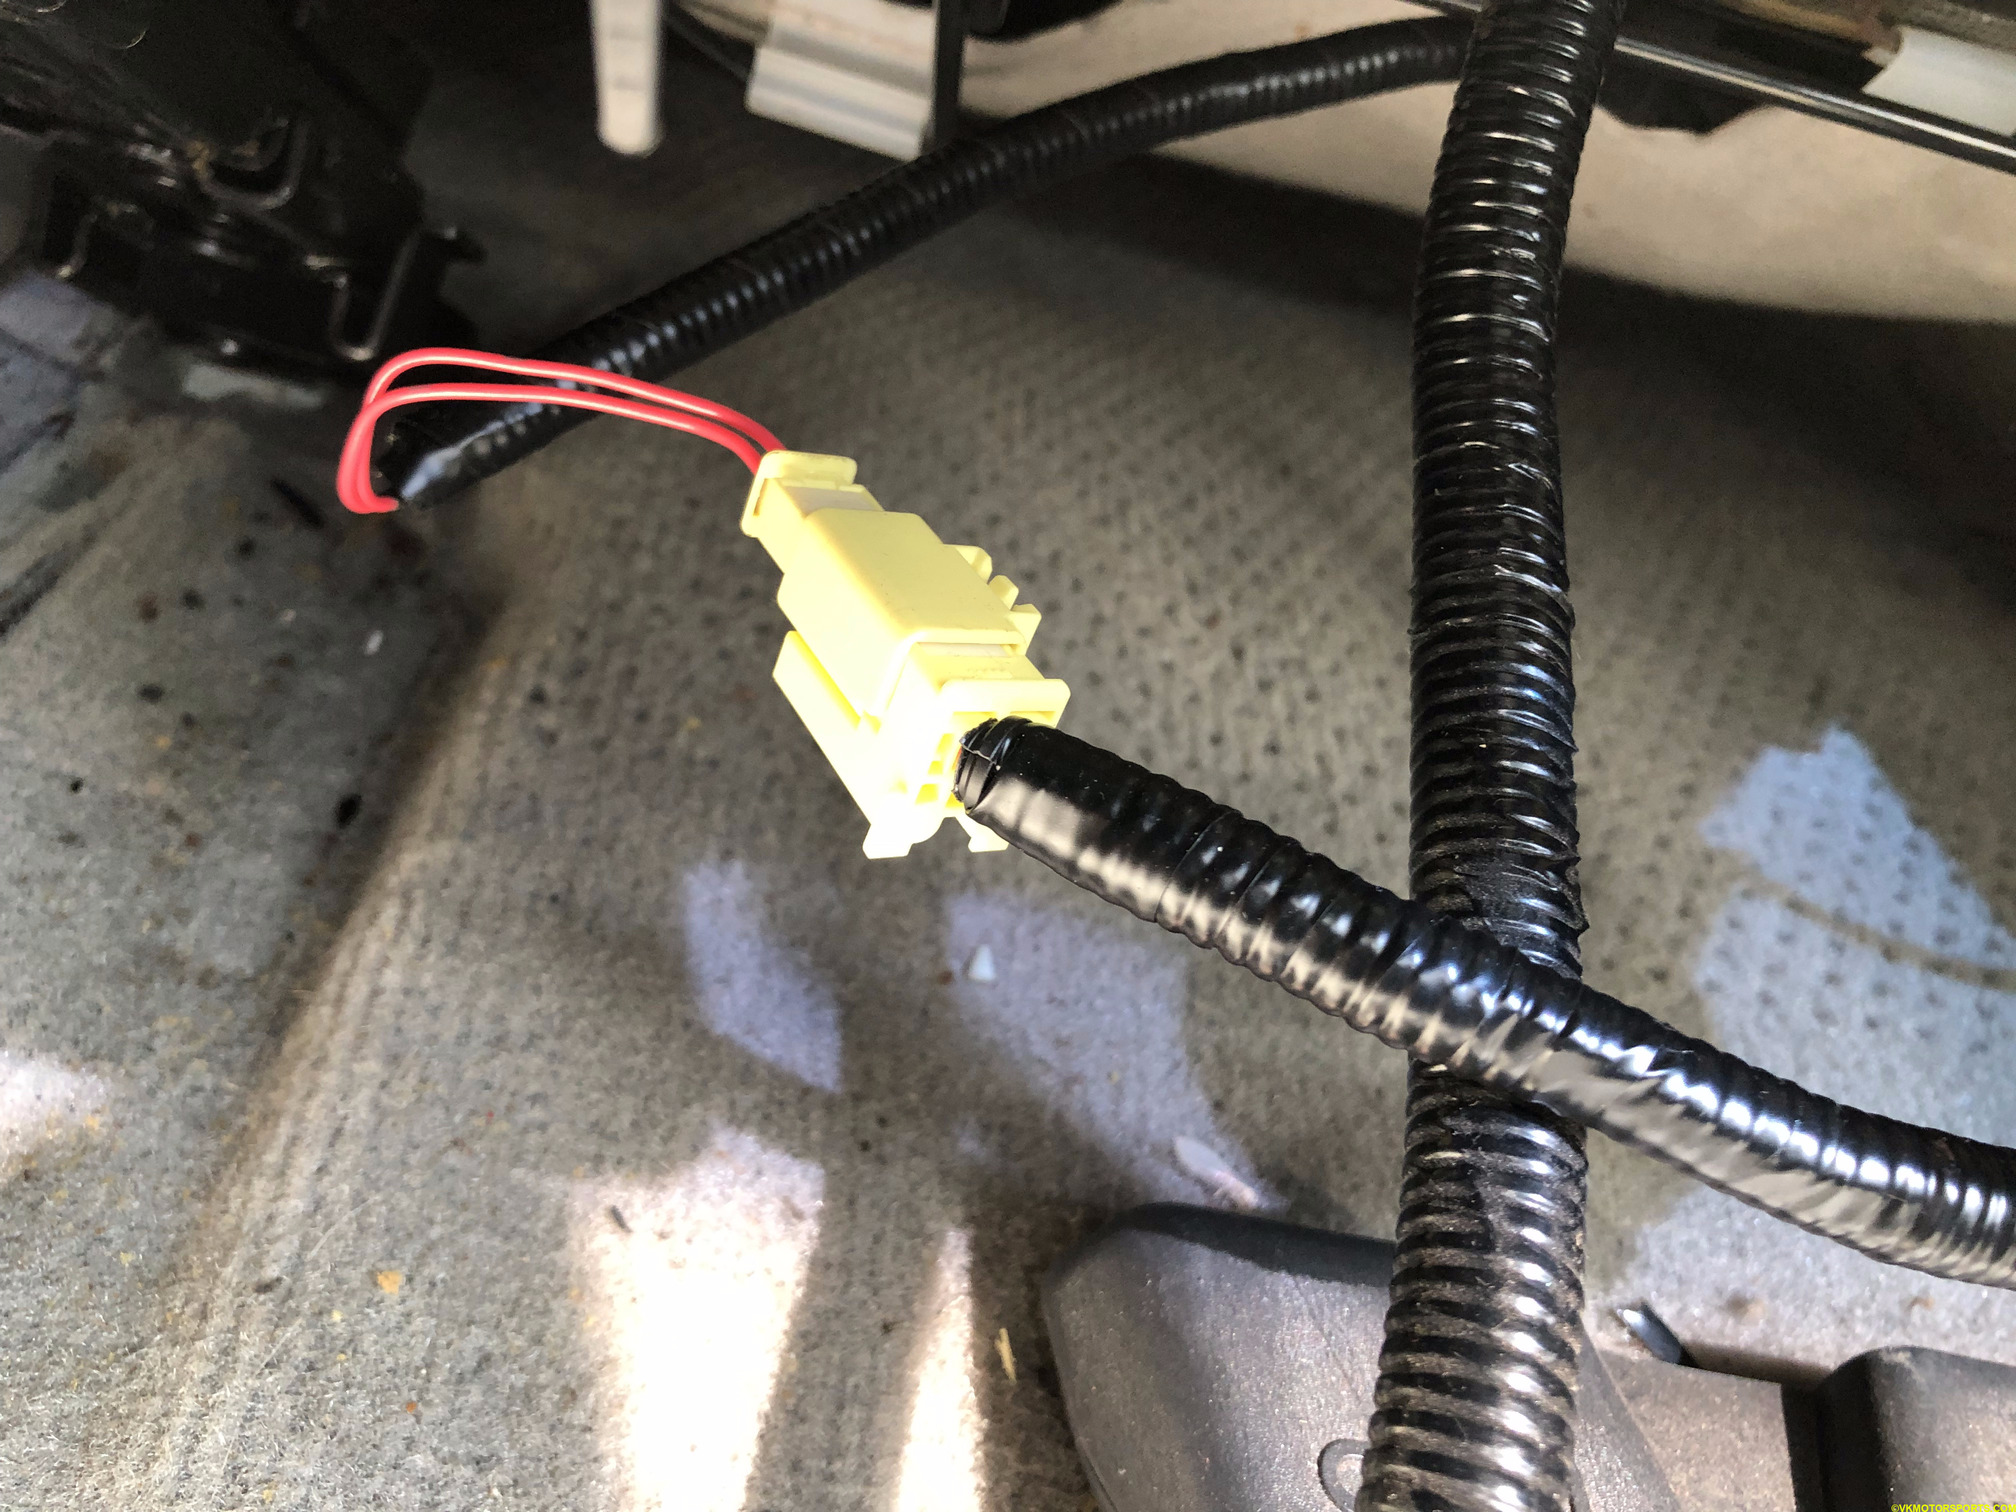 Figure 3f. Yellow connector is the airbag sensor connector
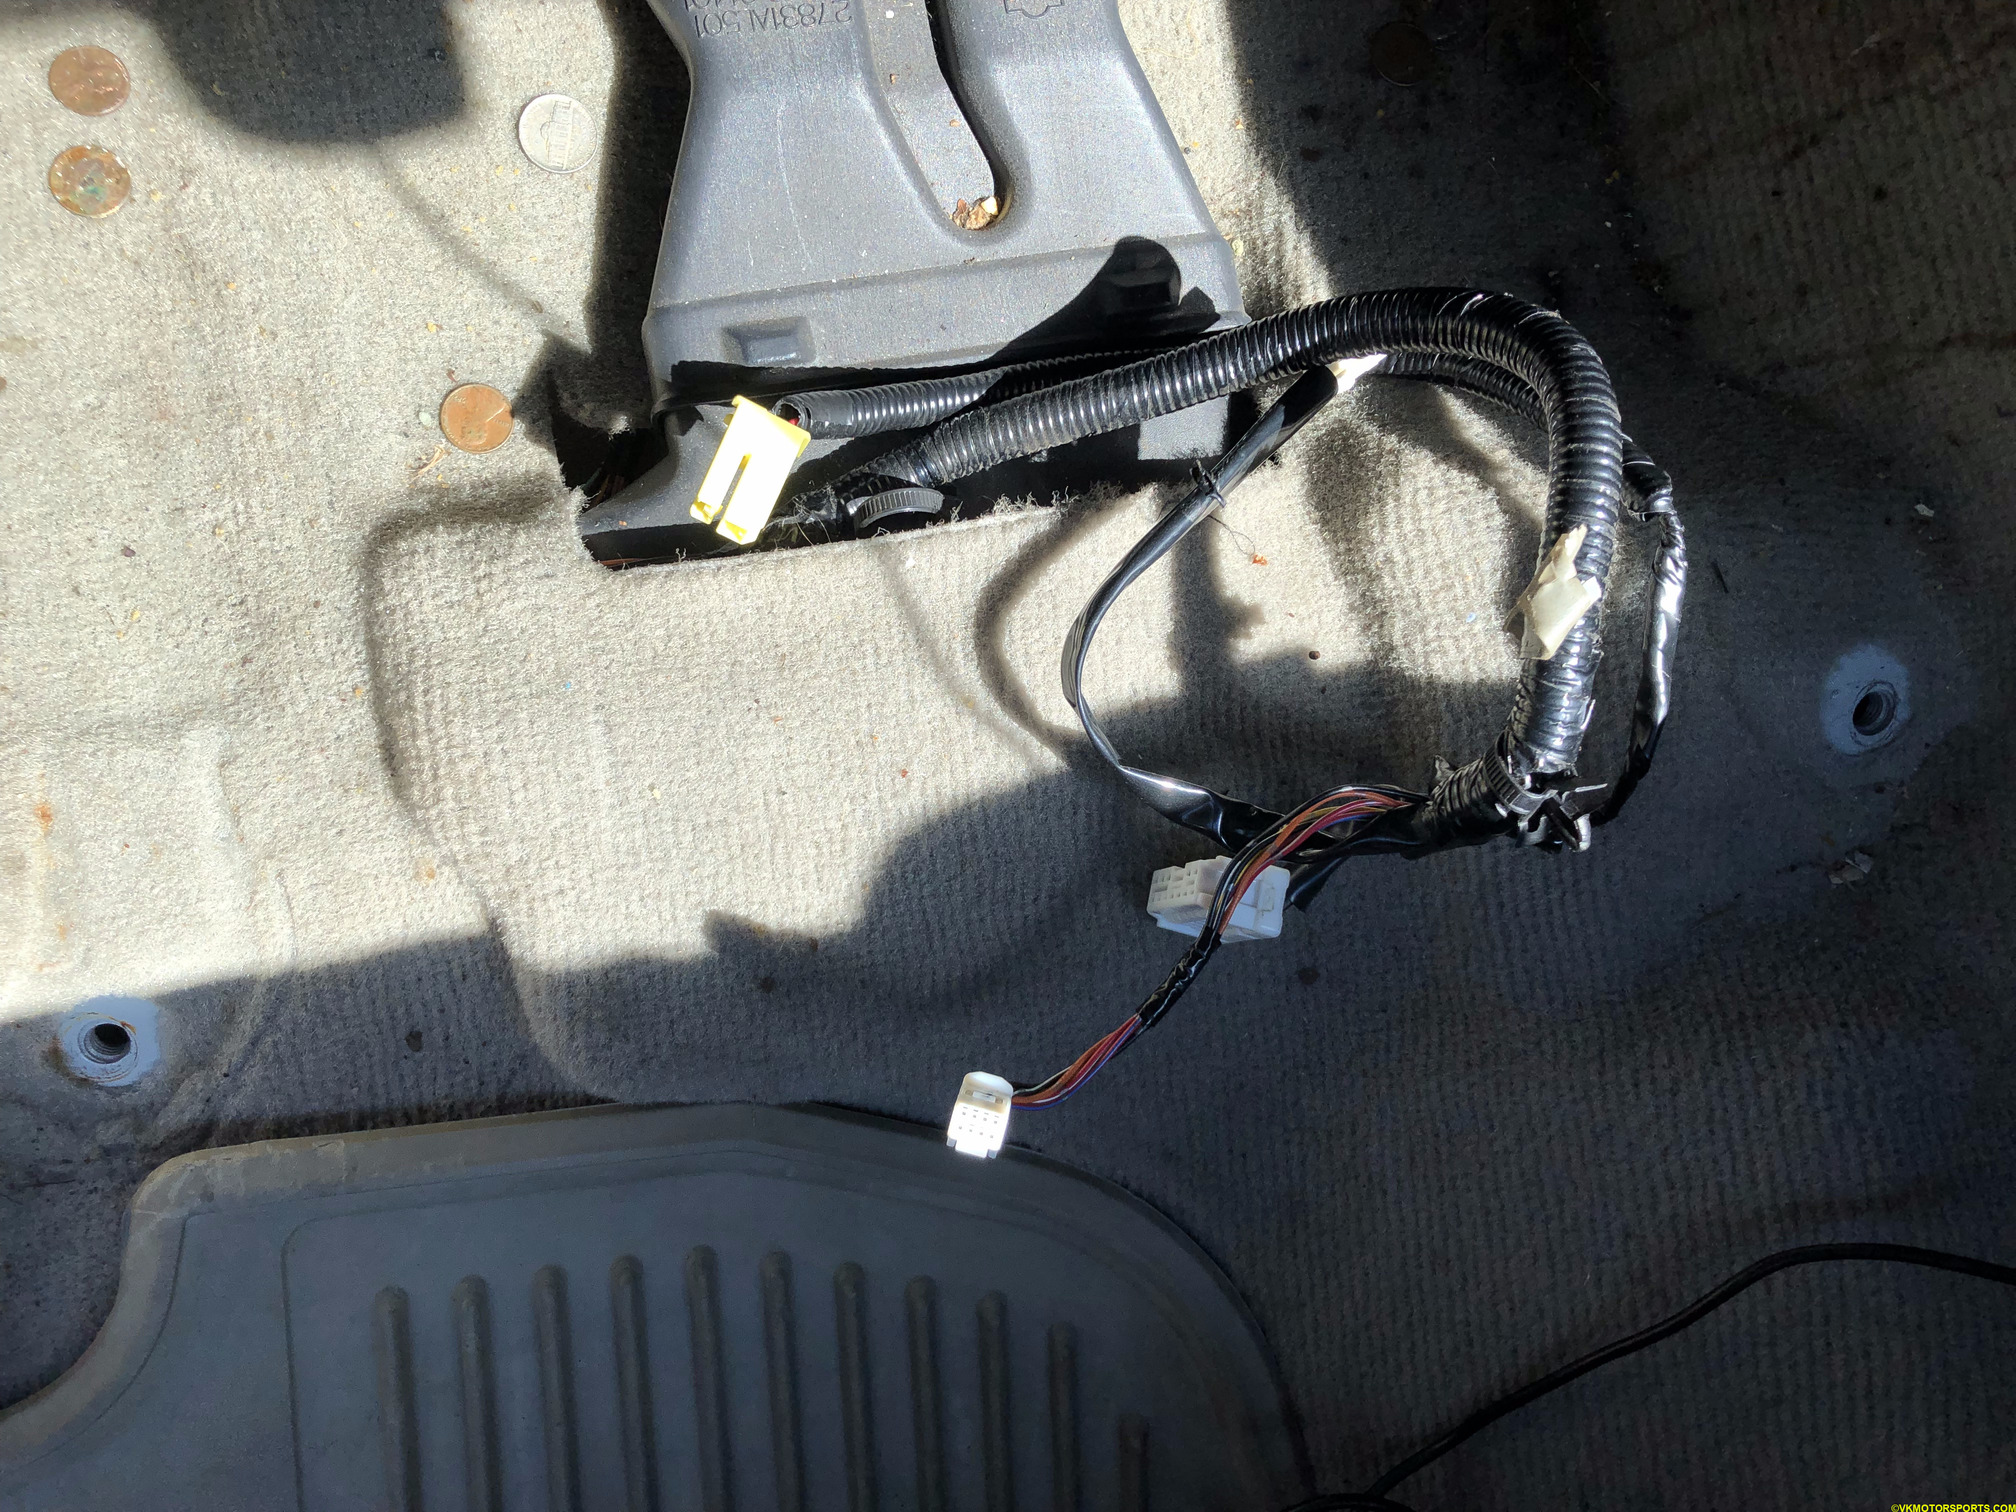 Figure 3g. All connectors have been disconnected and the seat removed
Step 4: We need to remove the seat belt buckle from the seat (Figure 4a), so that we can re-use it in the new seat bracket. Using the same 14” socket you can unscrew the bolt holding the buckle to the seat as shown in Figure 4b.
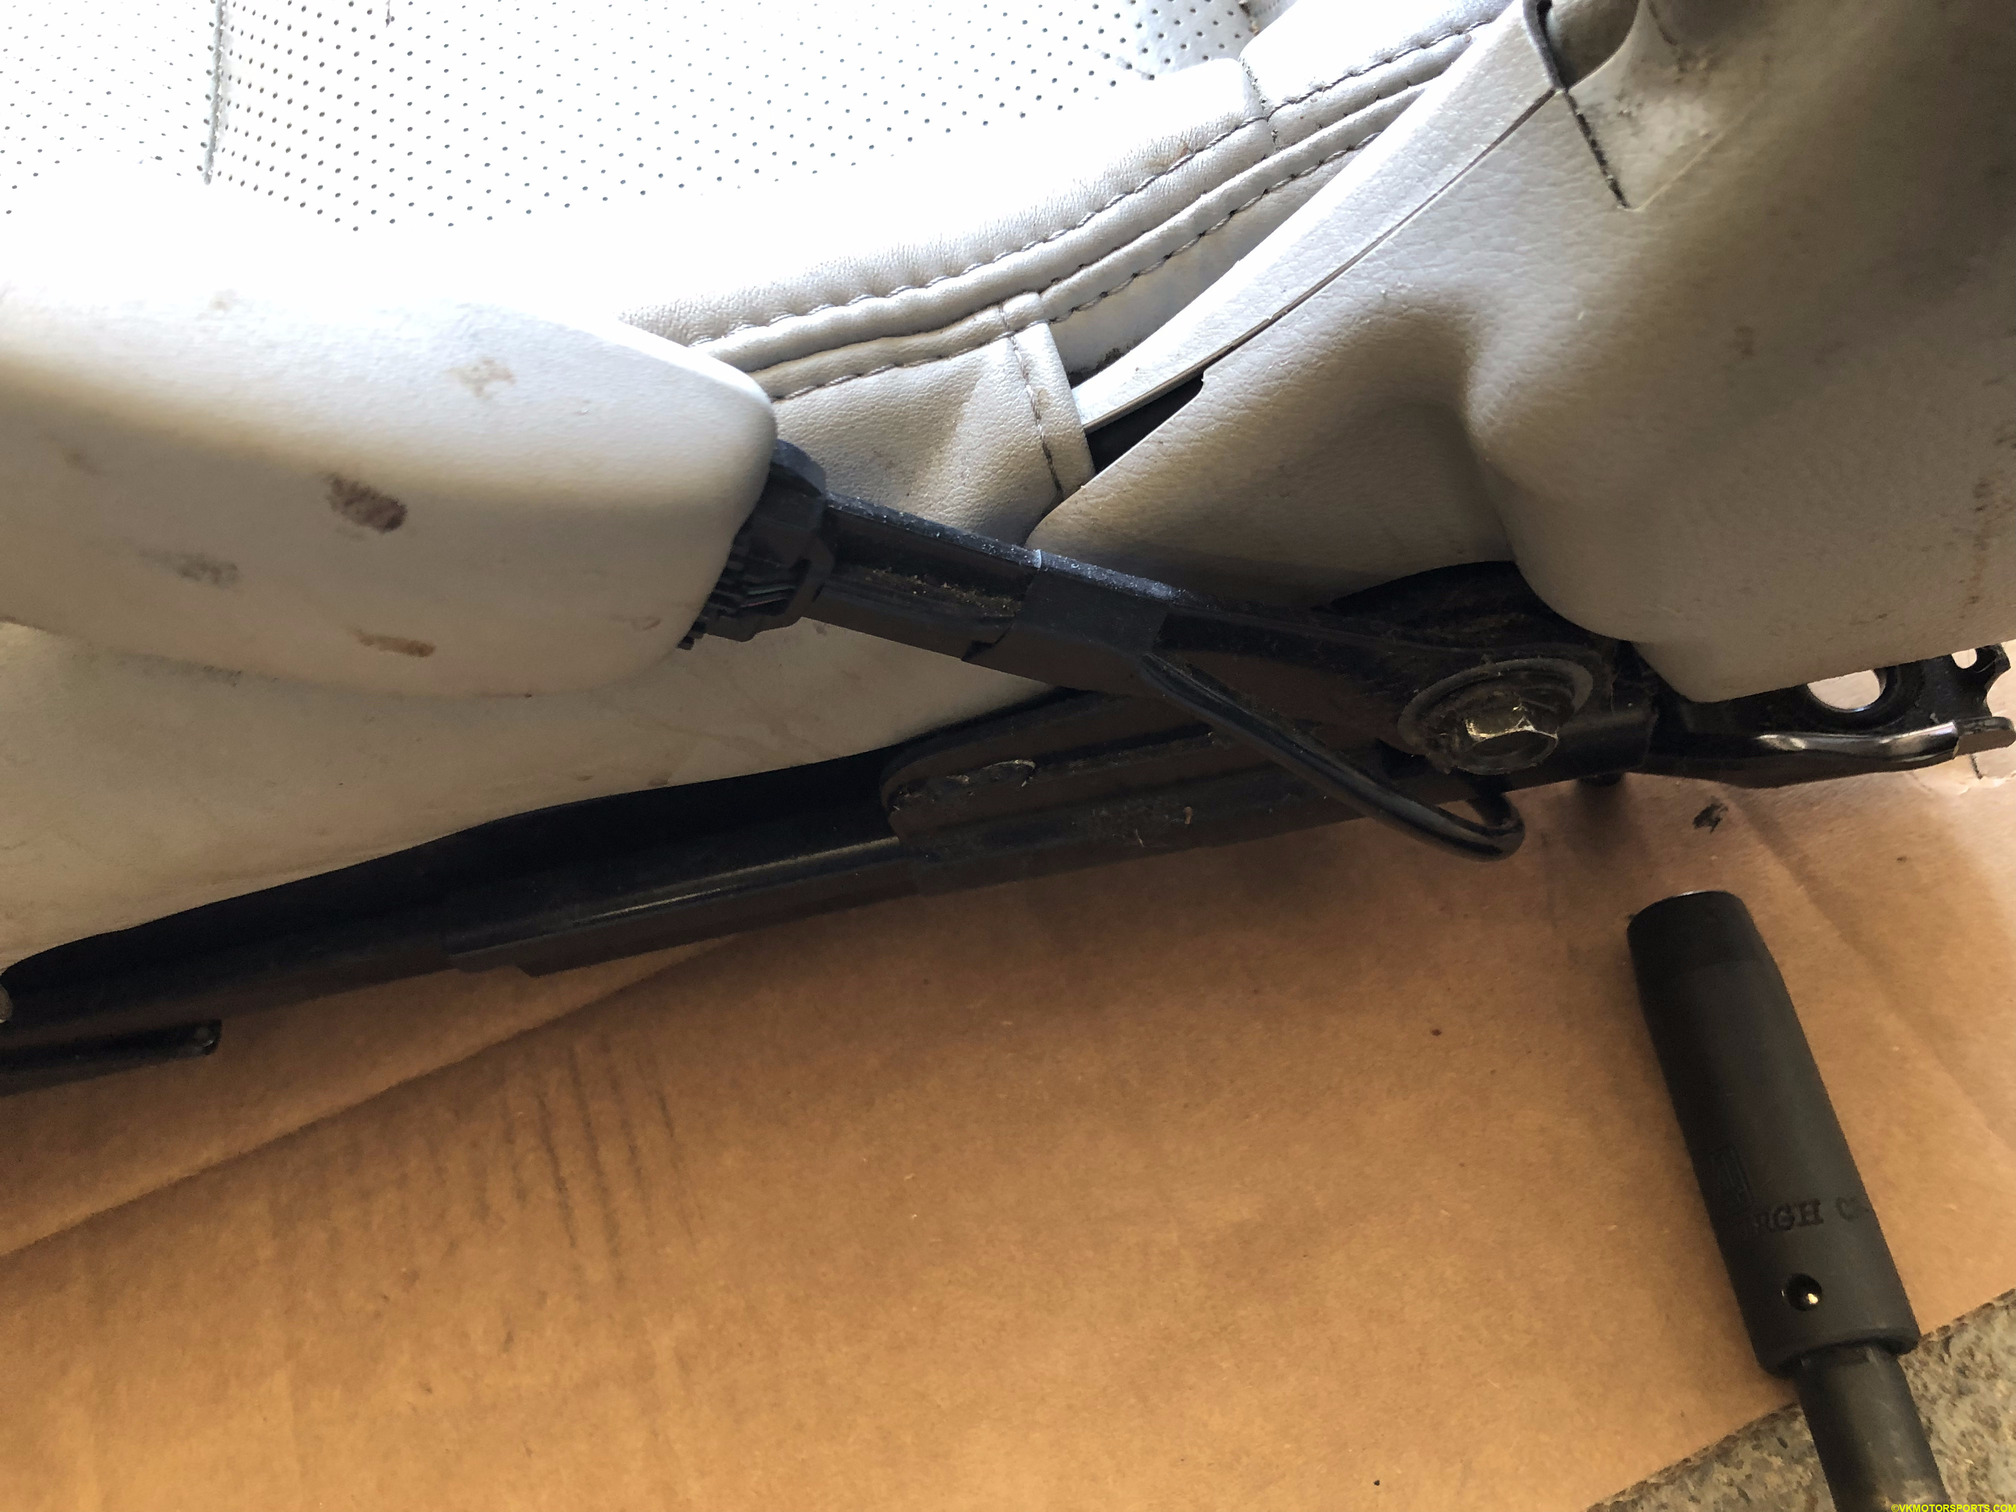 Figure 4a. Seat belt buckle bolt and the 14mm socket
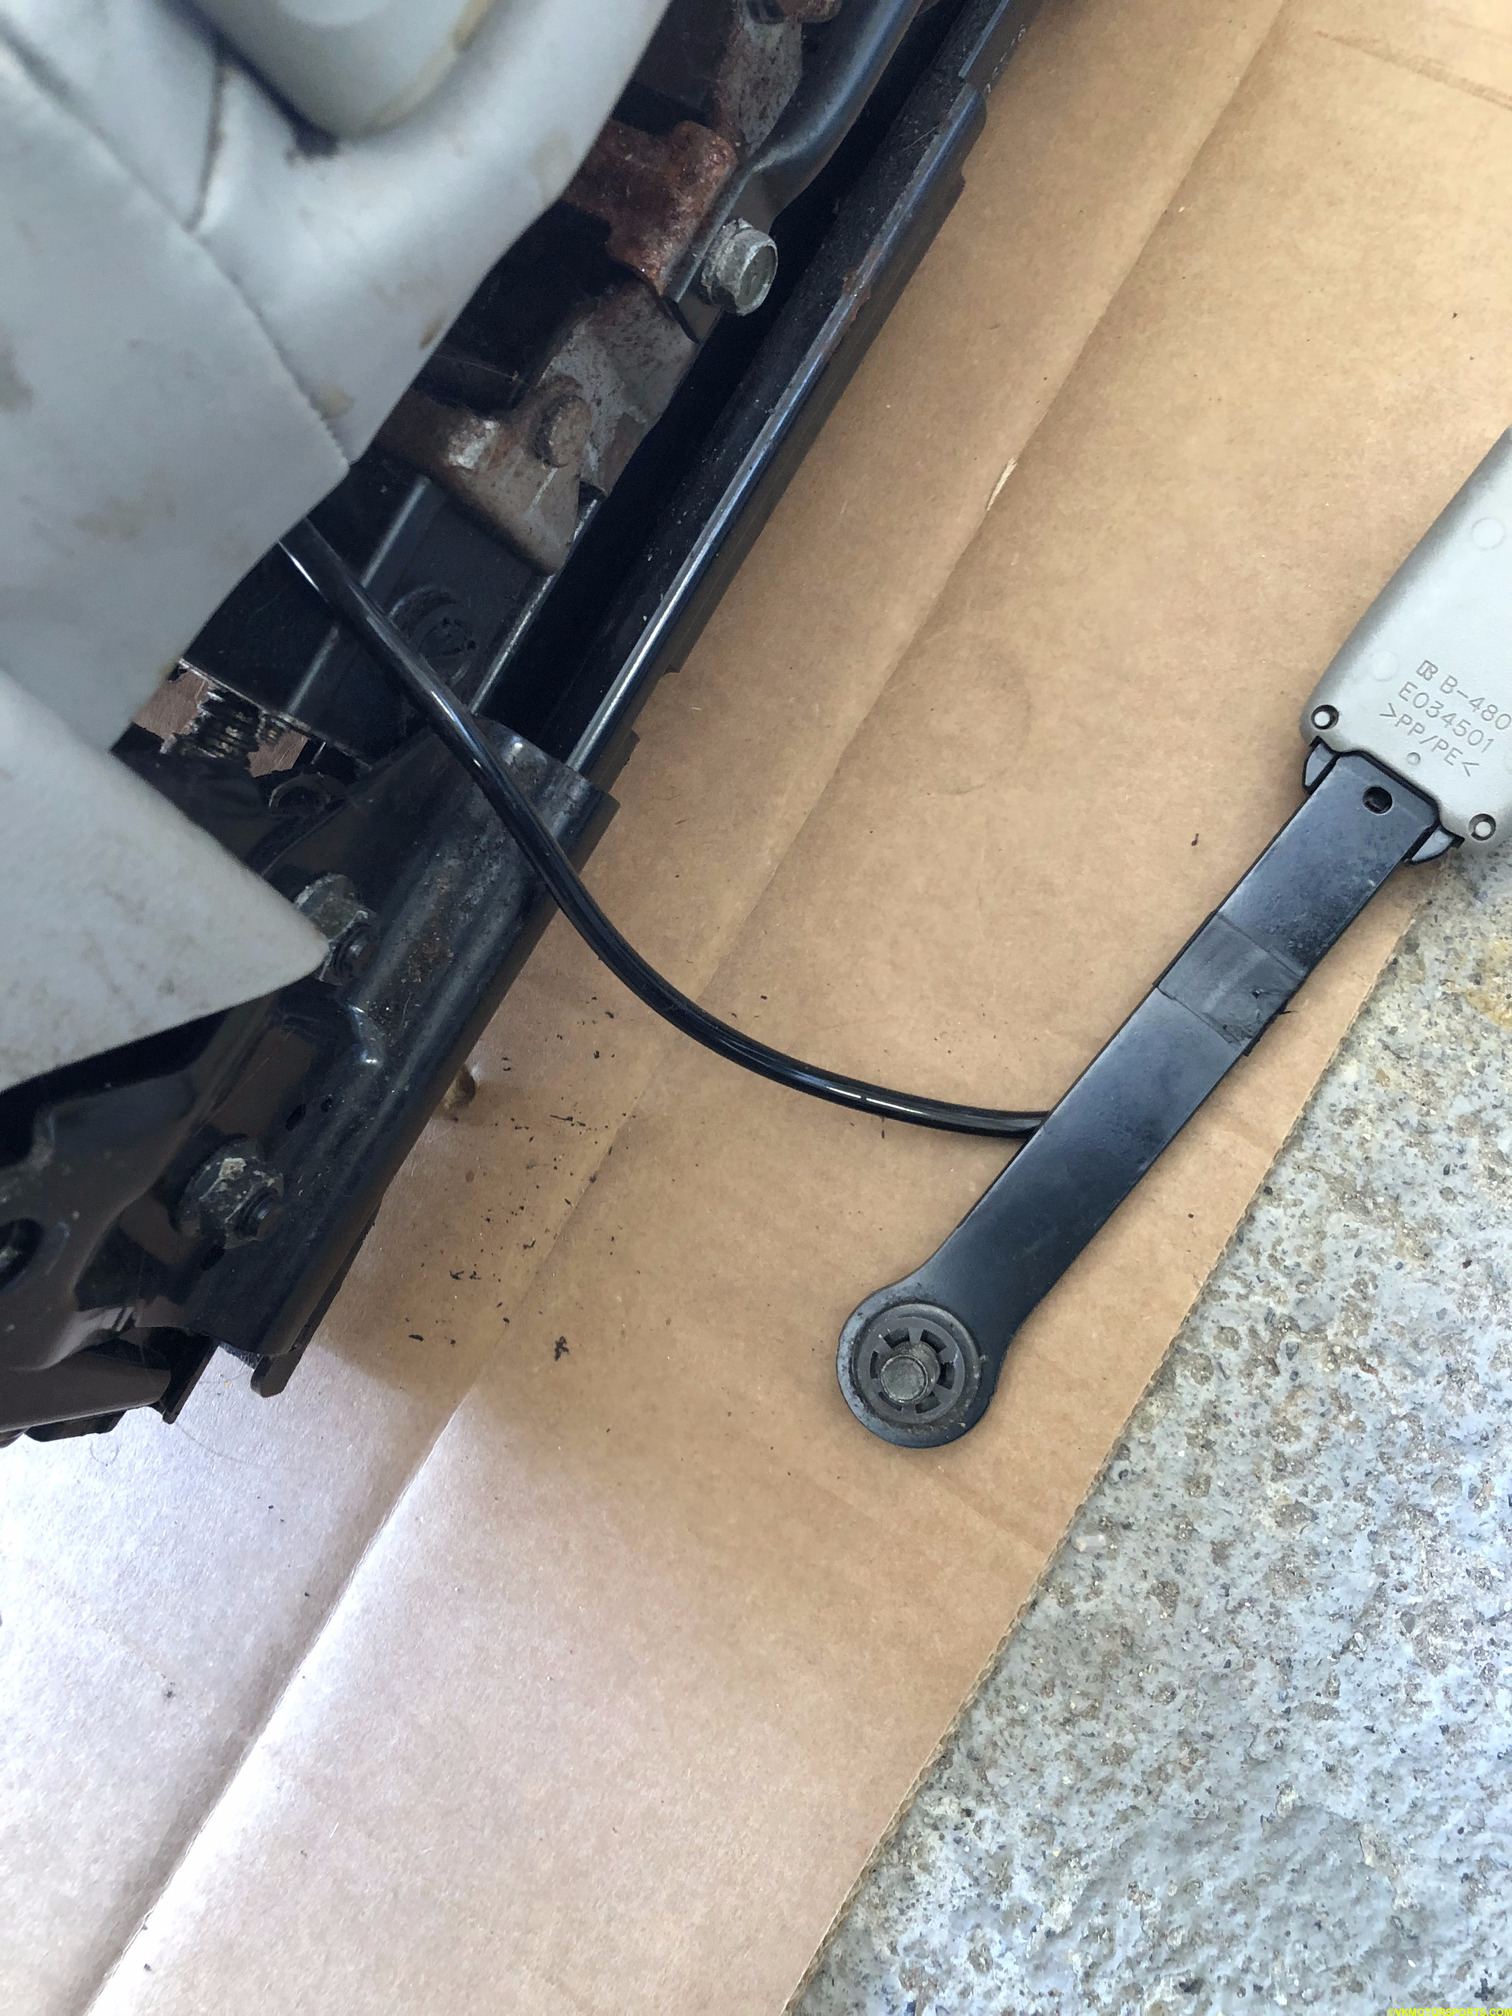 Figure 4b. Seat belt buckle removed
Step 5: Now that the seat is out, we have an opportunity to clean the carpet thoroughly. If you look at Figure 5a, clearly the previous owner had dropped coffee (or blood) over the carpet and it needed serious cleaning. Even with 2-3 times of trying super hard with the best carpet cleaners as seen in Figures 5b and 5c, I could only get the carpets cleaned as shown in Figures 5d and 5e, for the driver and passenger side, respectively. But I think that was good enough.
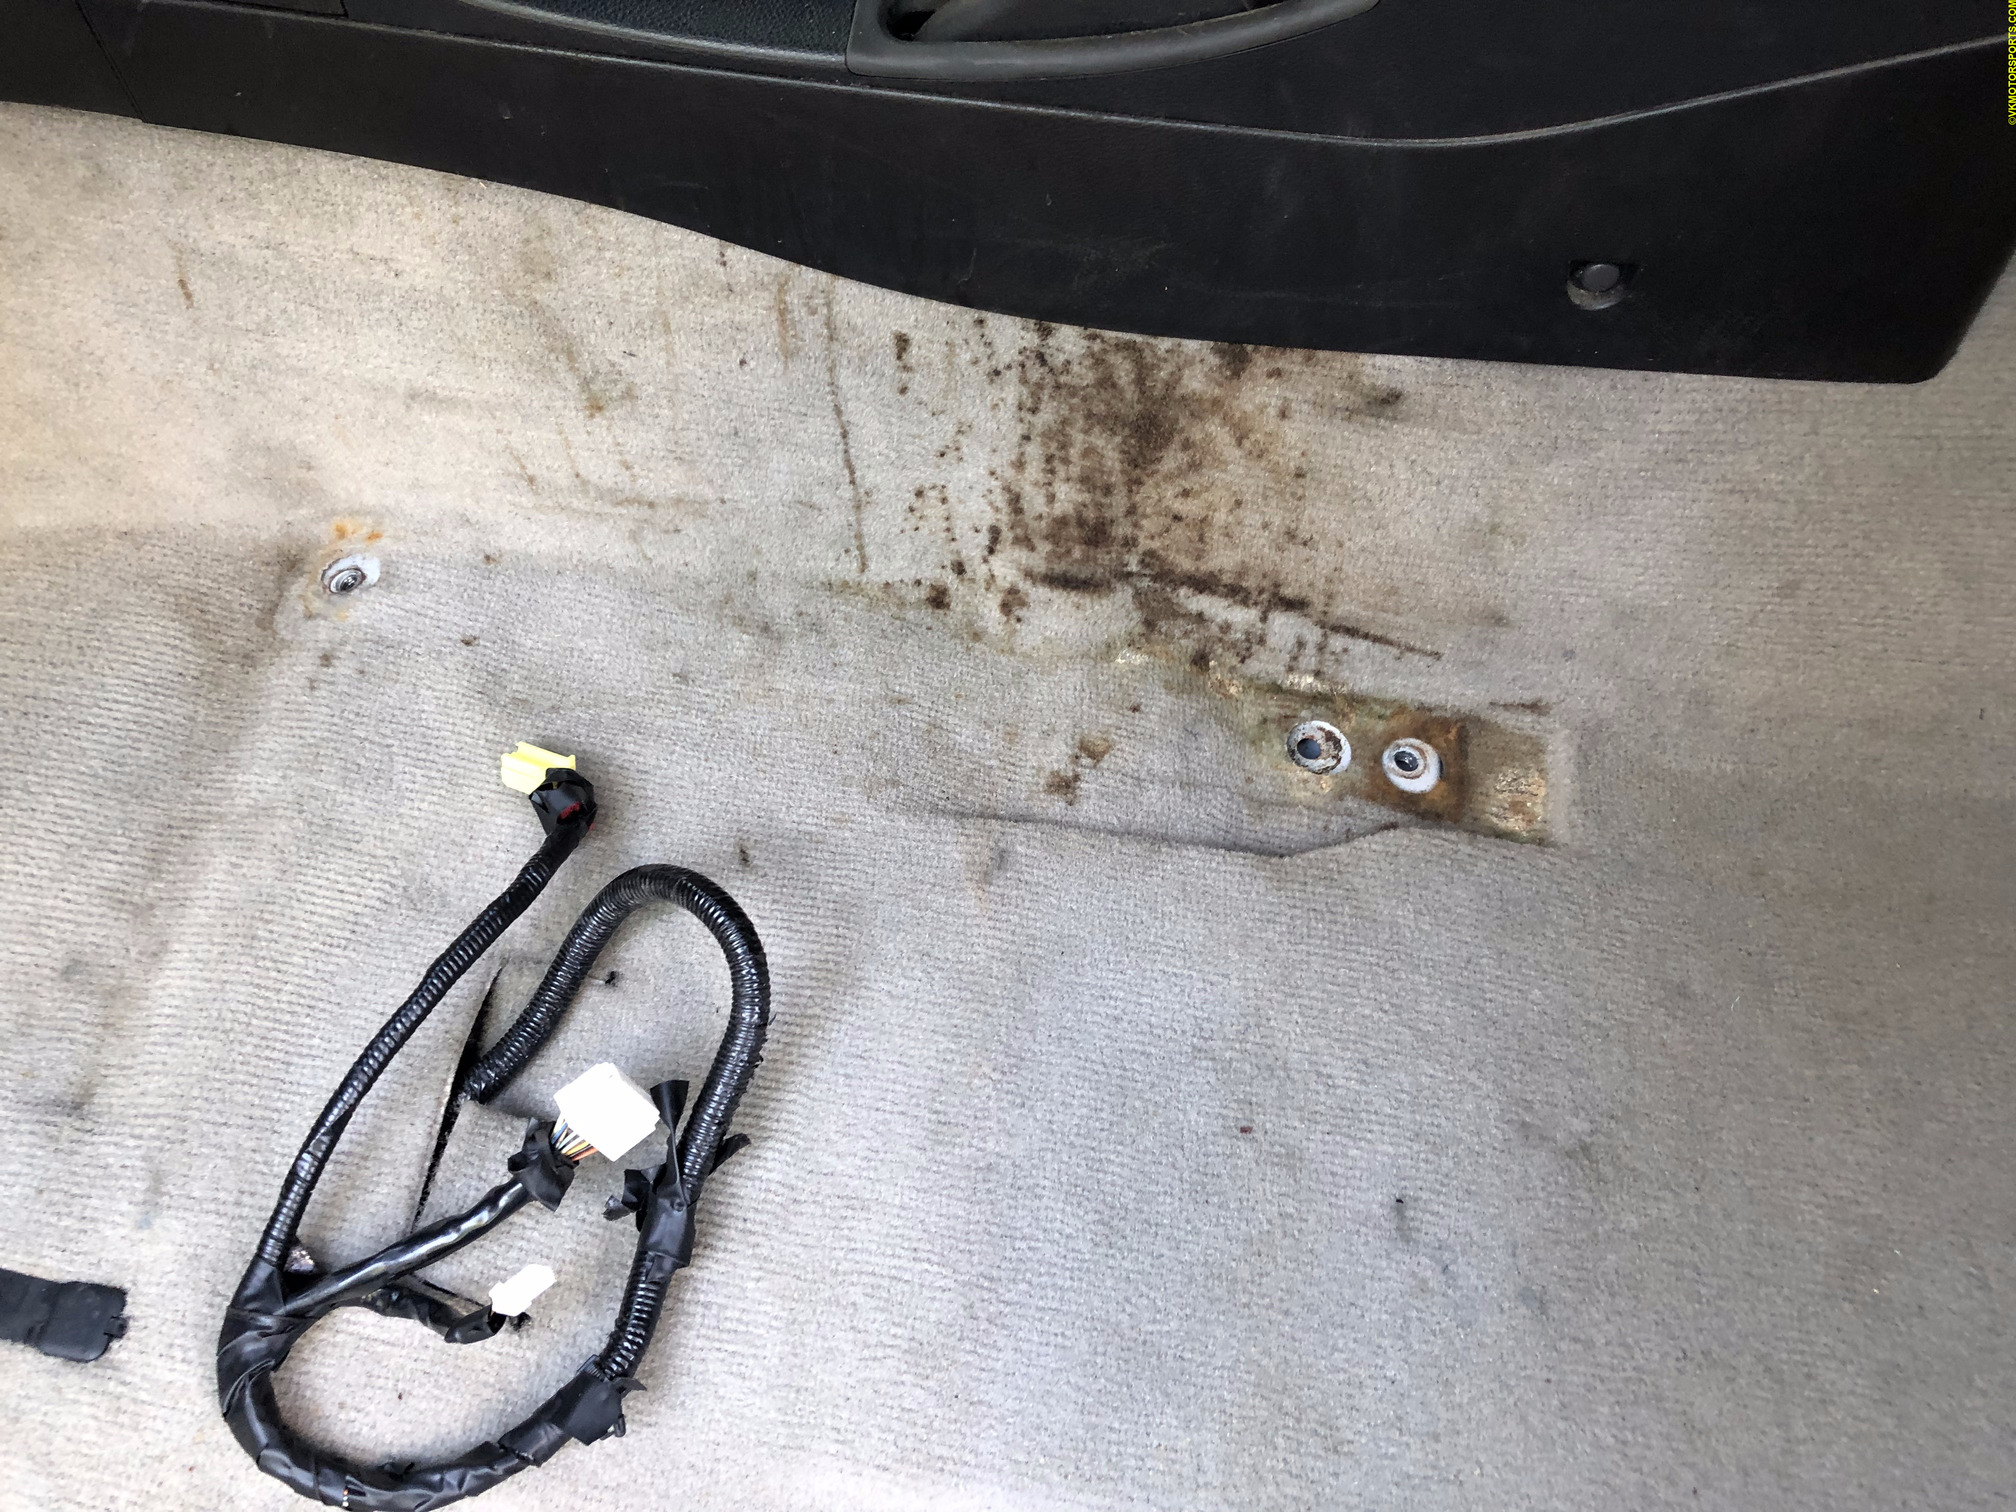 Figure 5a. Dirty carpet on the driver side
 Figure 5b. Meguiar’s Carpet Cleaner Spray with brush attachment
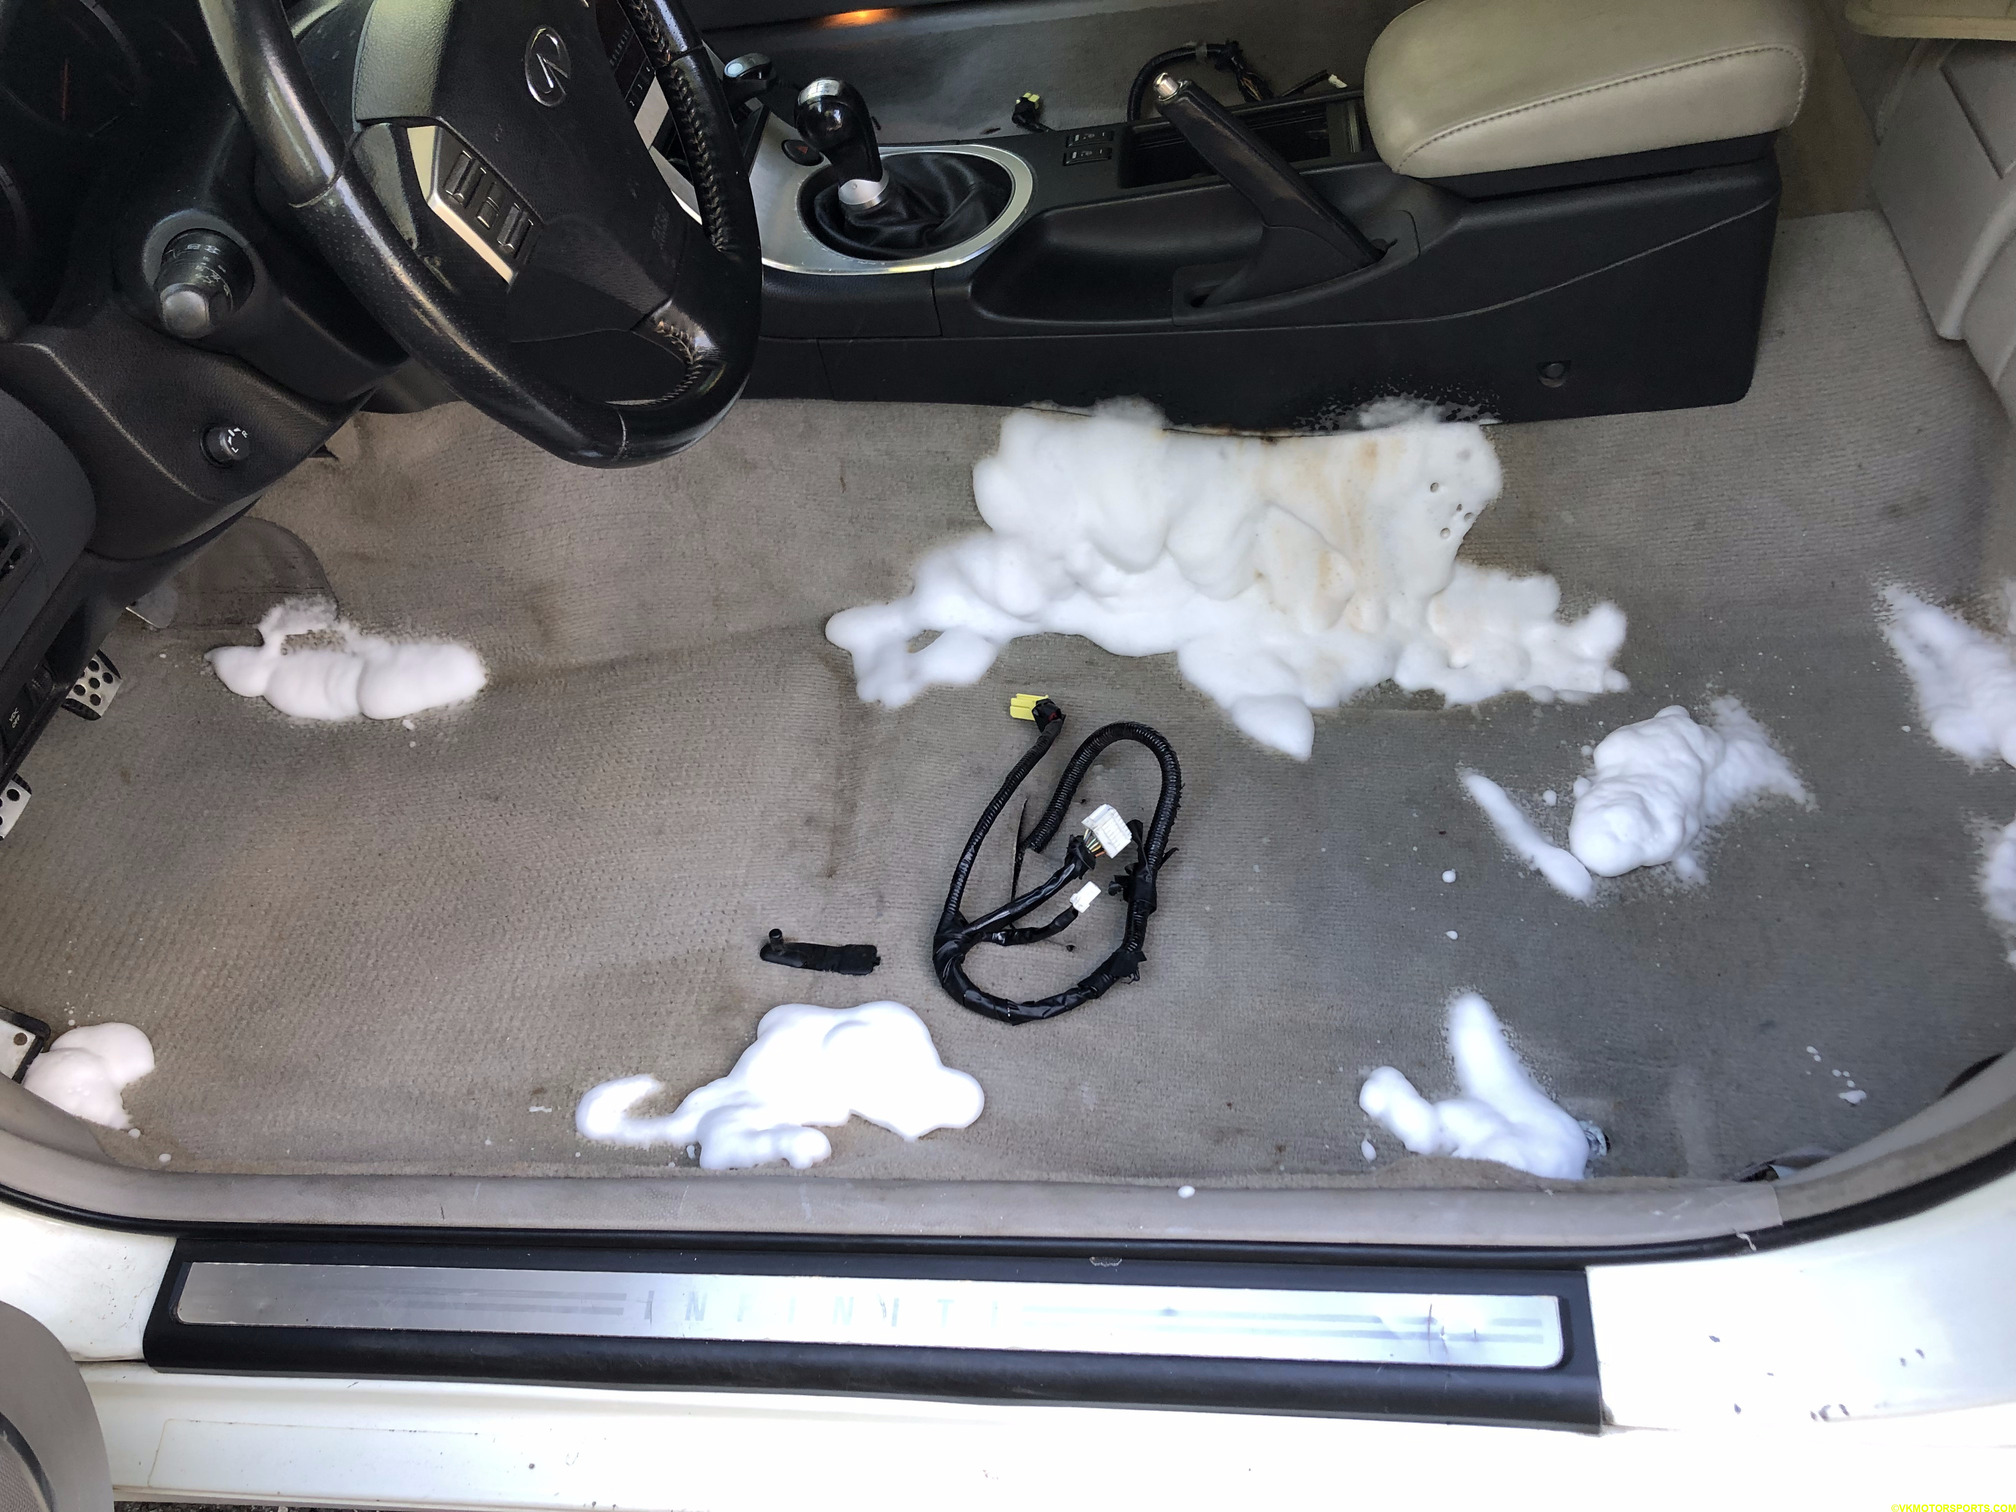 Figure 5c. Carpet cleaning foam in action
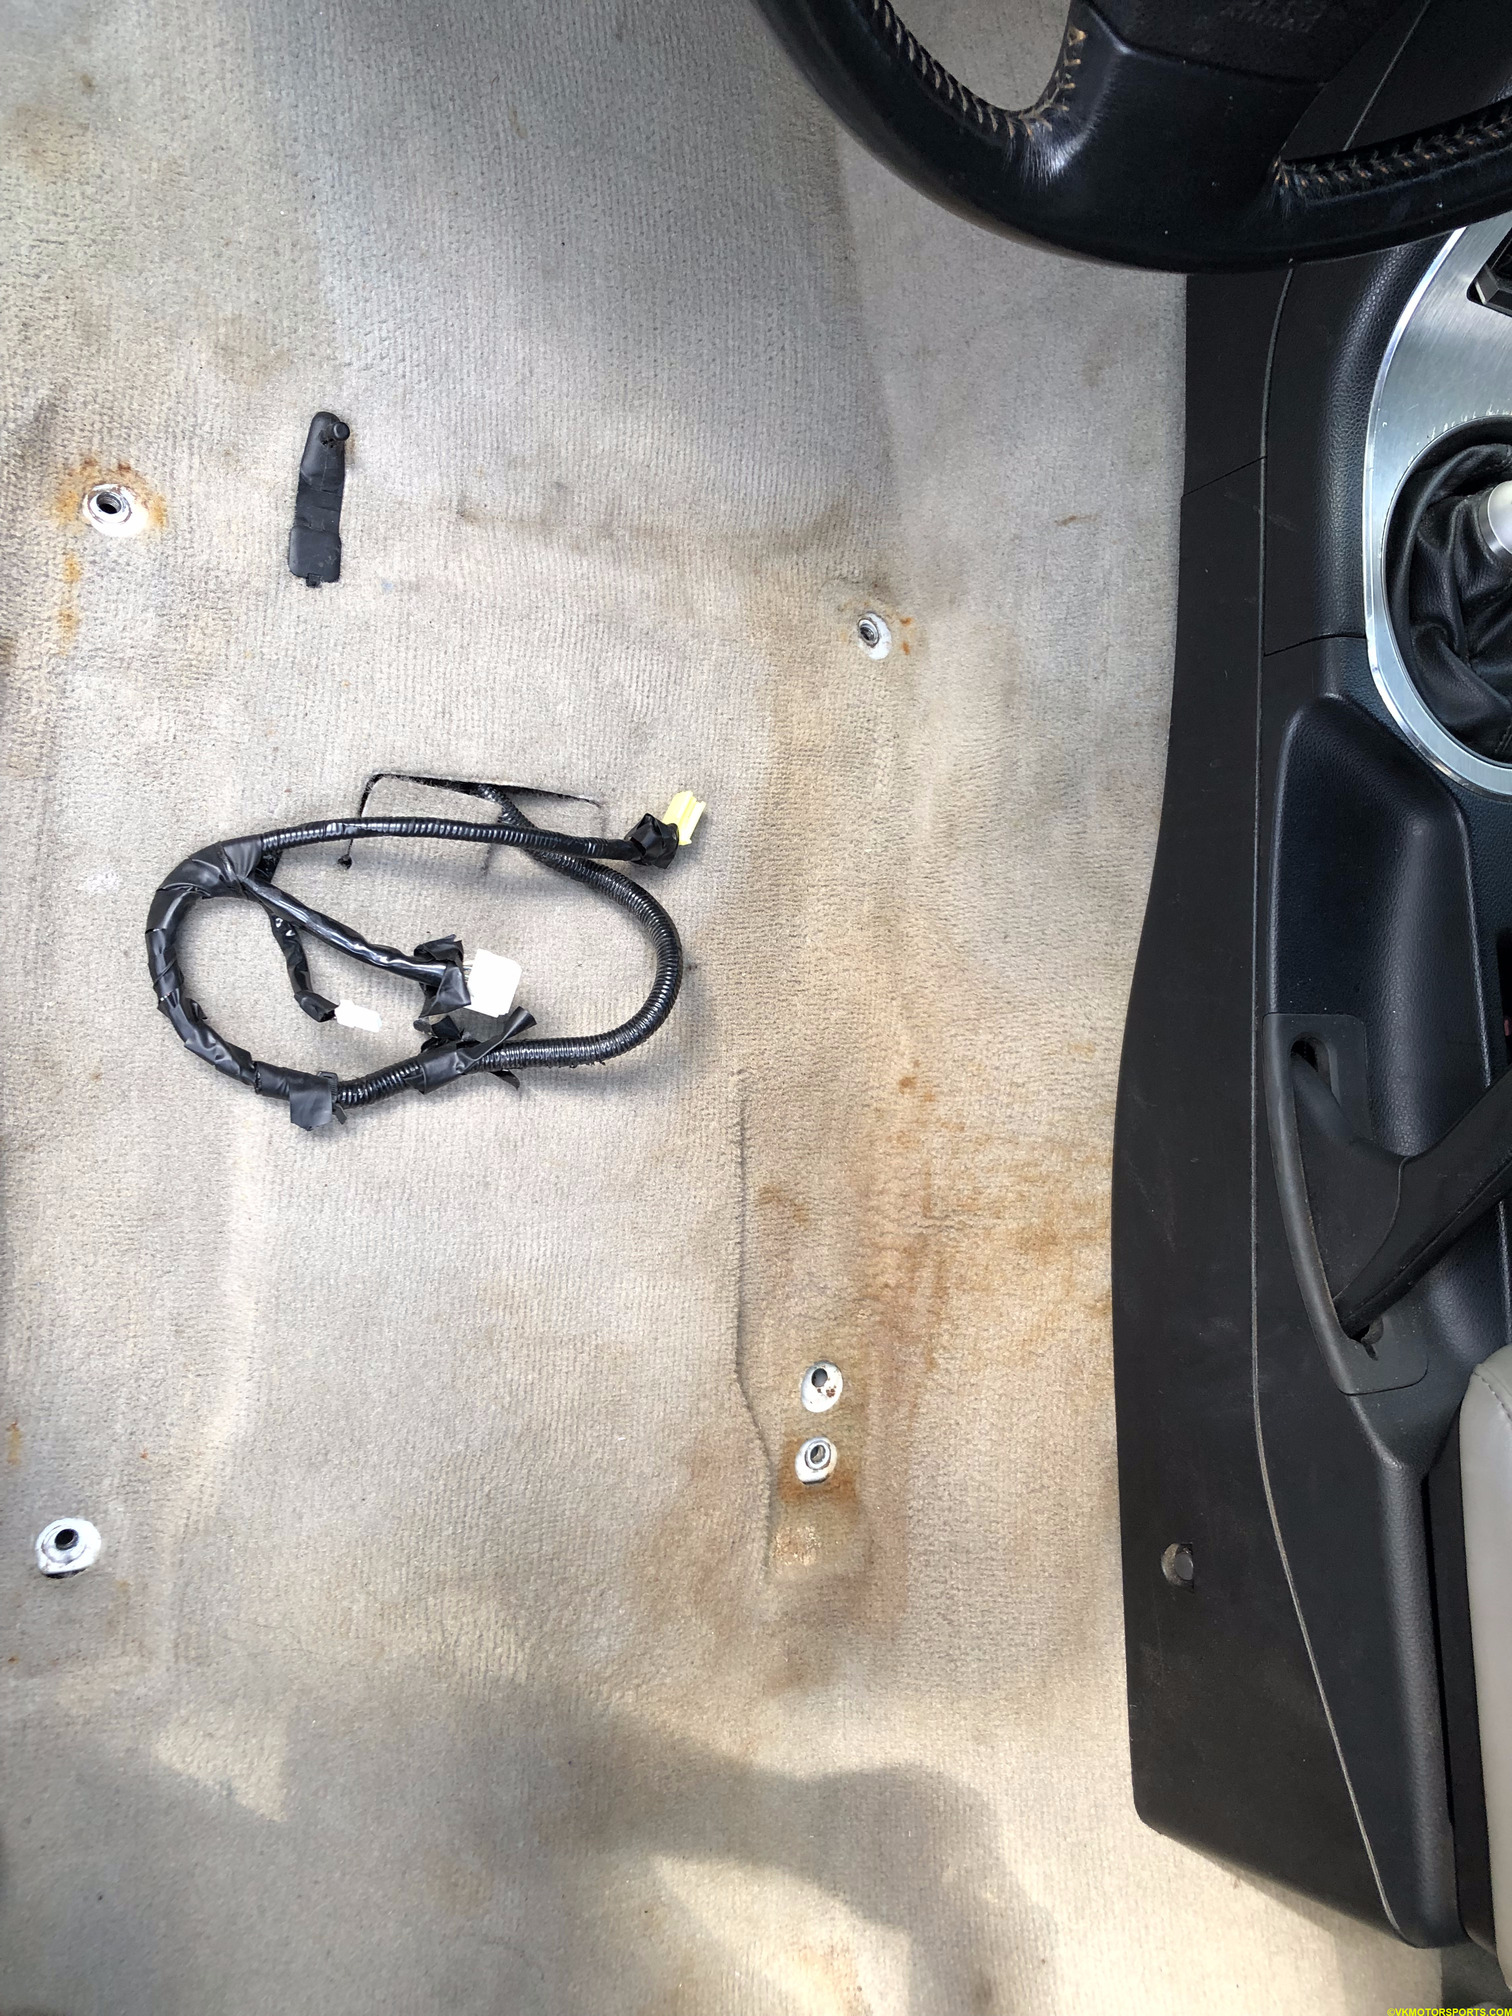 Figure 5d. Cleaned carpet on the driver side
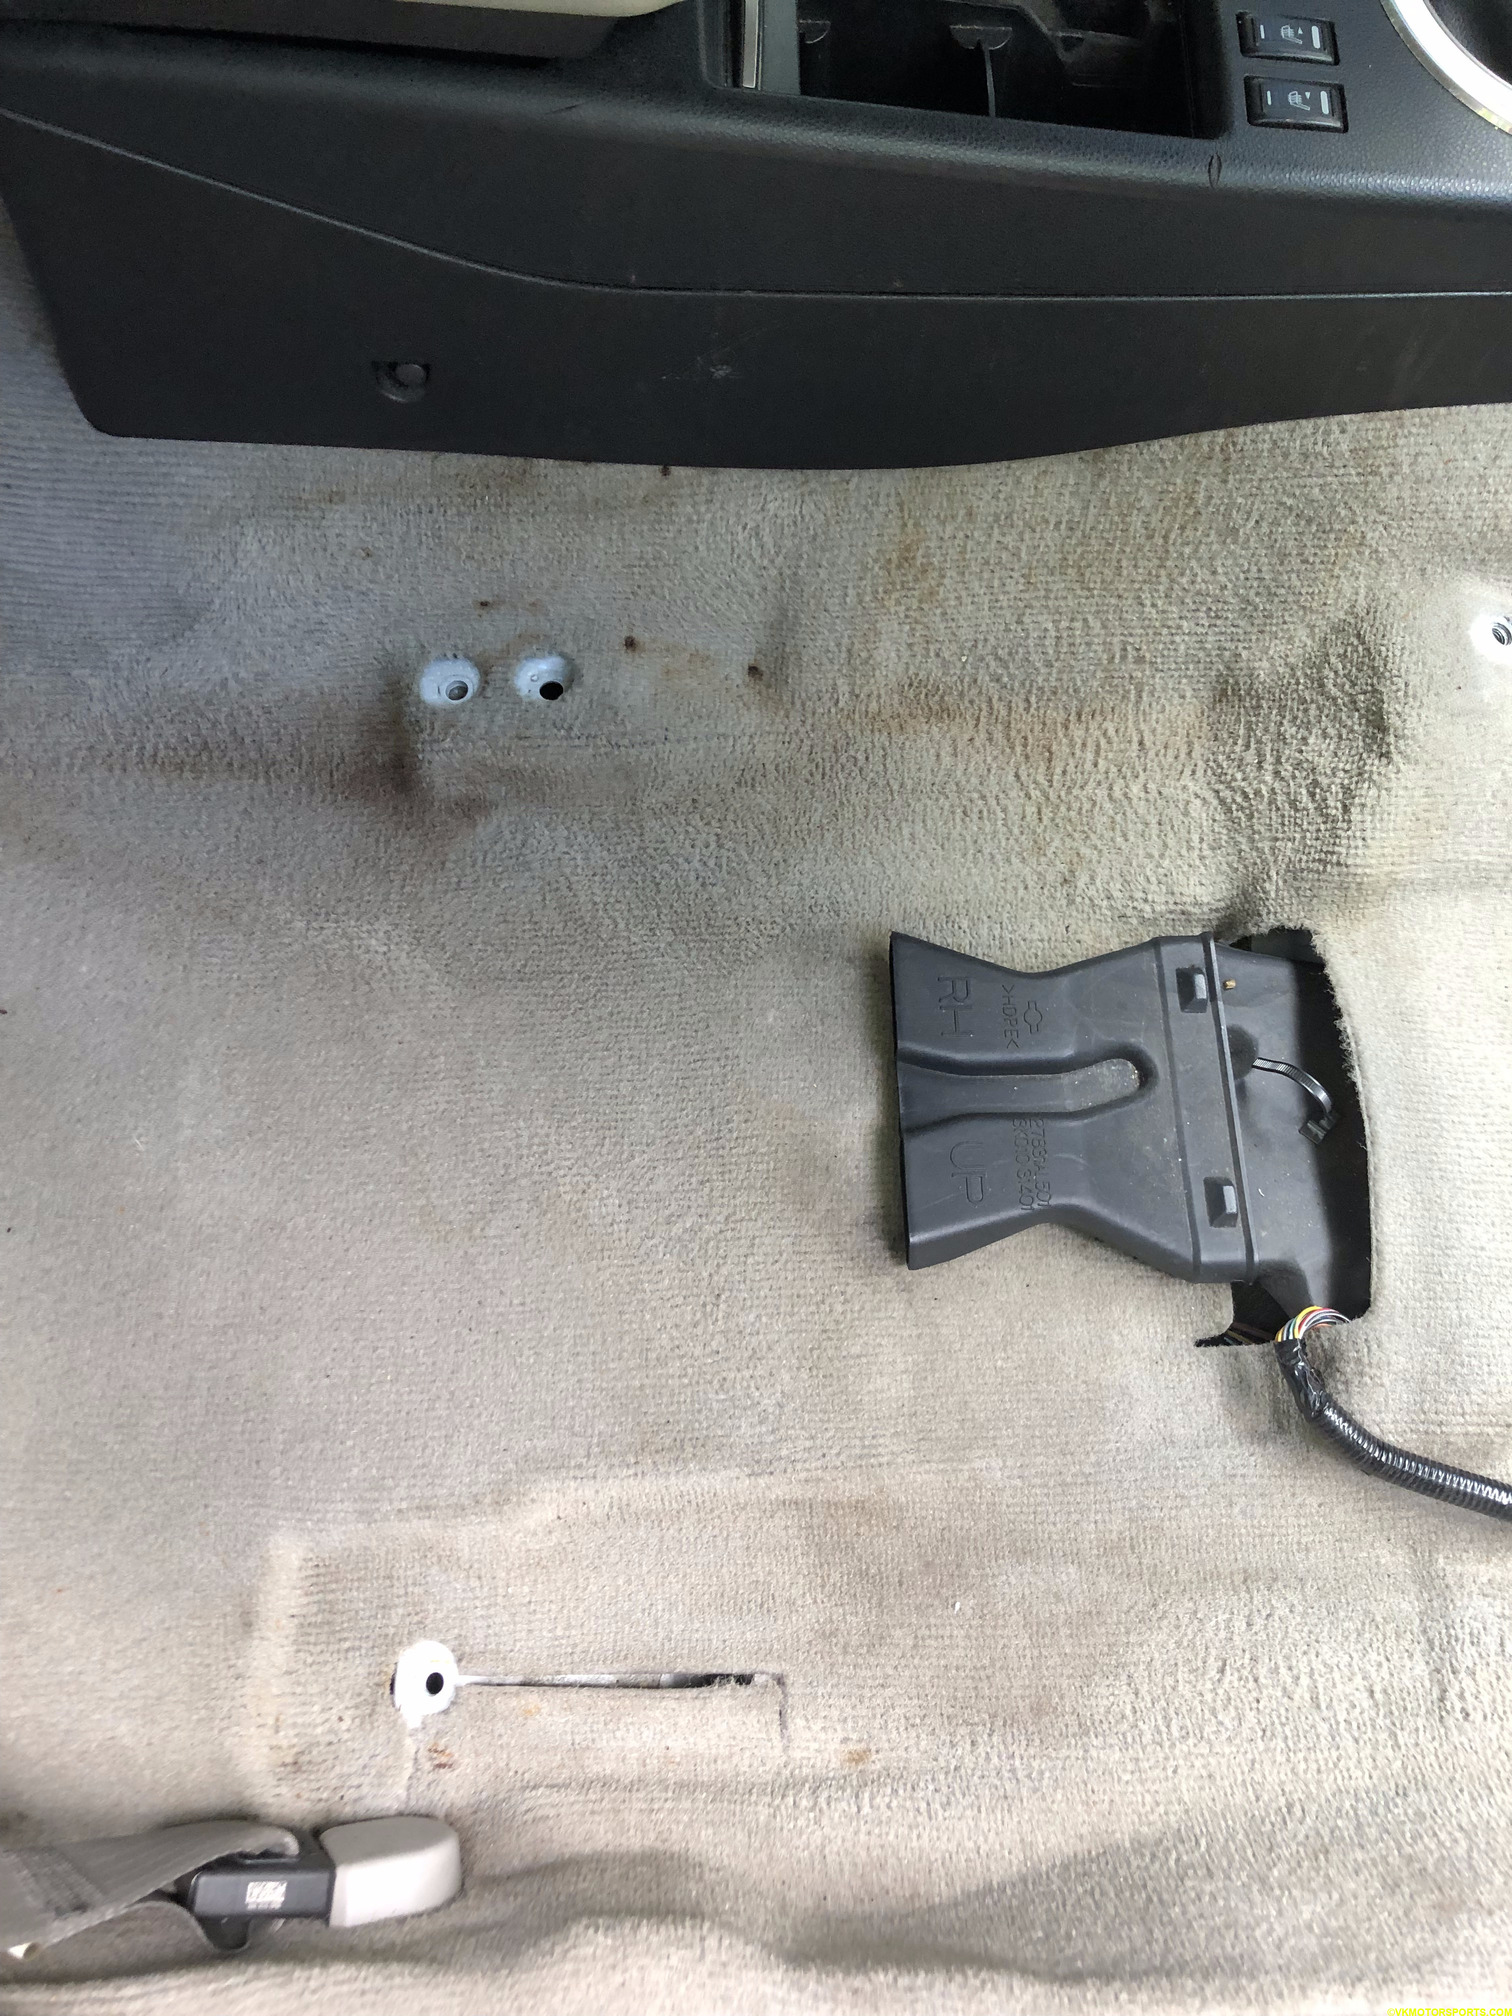 Figure 5e. Cleaned carpet on the passenger side
INSTALL OF THE REPLACEMENT SEATS
If you are installing replacement stock seats, the installation is the same as the removal. But if you are installing aftermarket or racing seats, below is the process you want to follow.
Step 6: Gather the seats you need (Figure 6a) and place it on a workbench or in my case, a cheap plastic 6ft table from Home Depot as shown in Figure 6b. I started with the passenger seat first, since if I made a mistake, I could put the stock driver seat back in the car and still be able to drive the car.
Figure 6c shows the passenger seat bracket, made by Planted Technology, model SB075PA (Figure 6d) that we will be attaching the seat to.
NOTE: Since I purchased the seats used, the sliders were already bolted on them. If that is not the case, it is a simple alignment of 4 holes and 4 bolts using a 6mm hex key or a T6 socket.
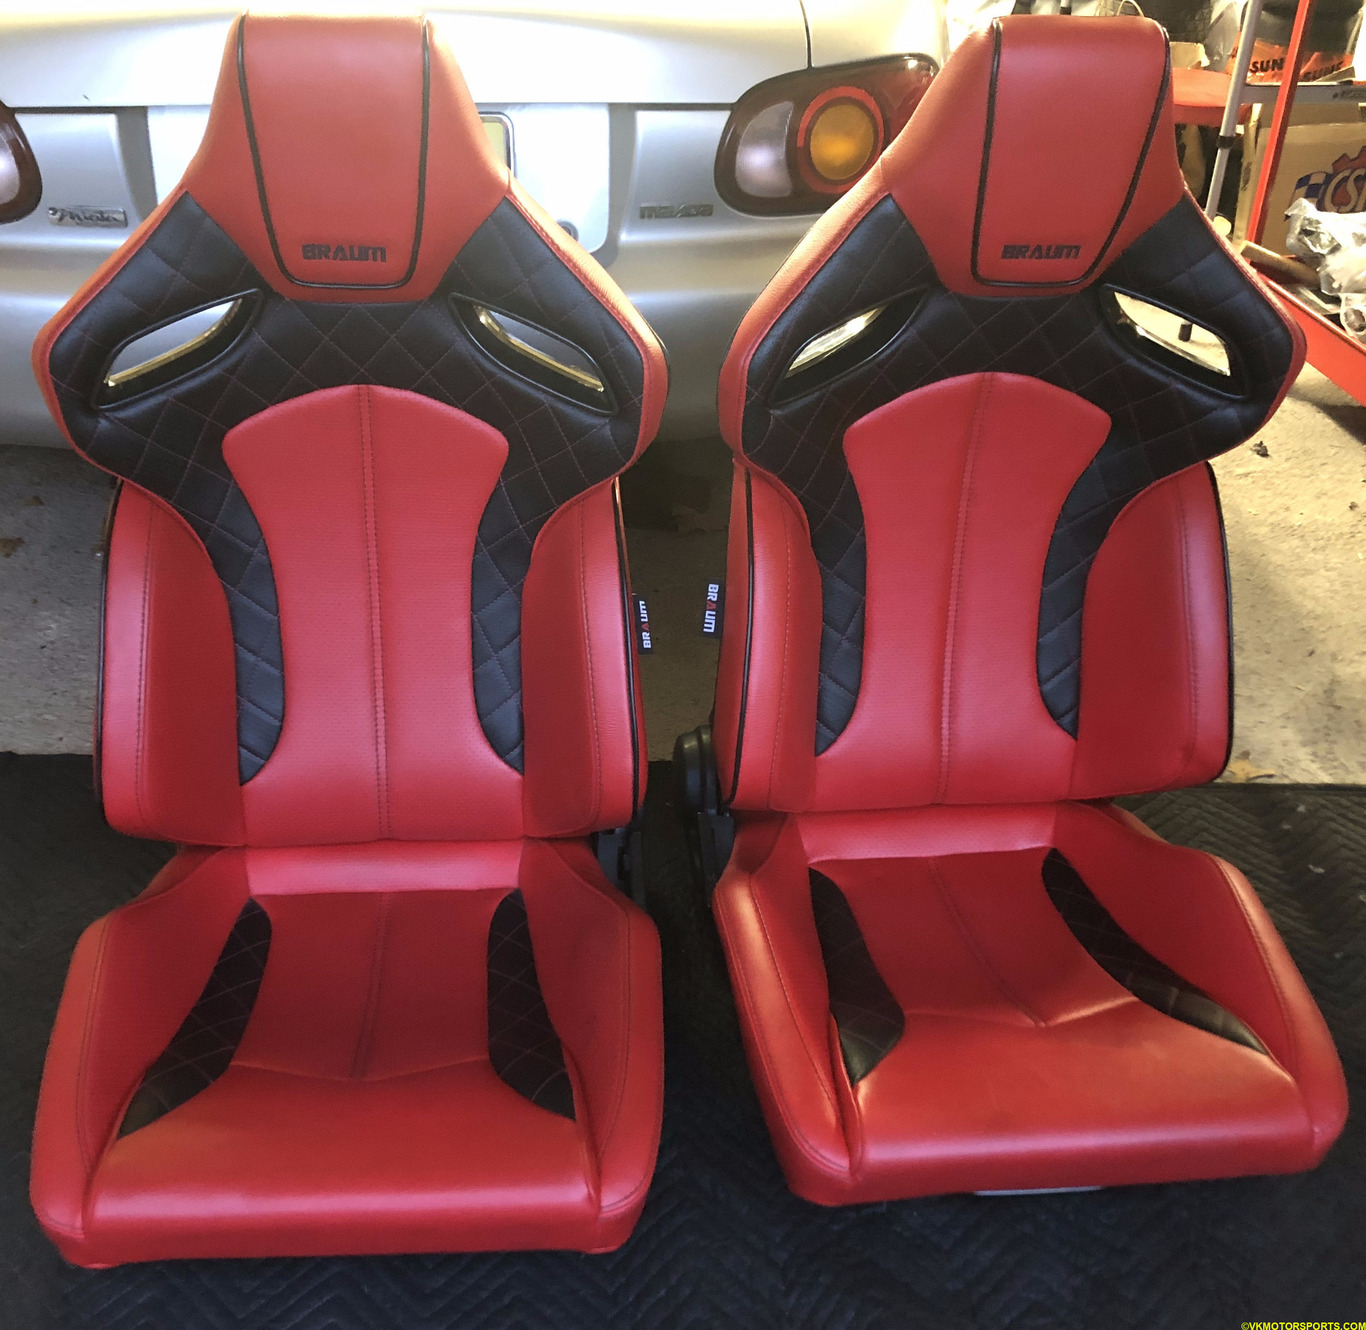 Figure 6a. A pair of Braum Racing seats I want to install
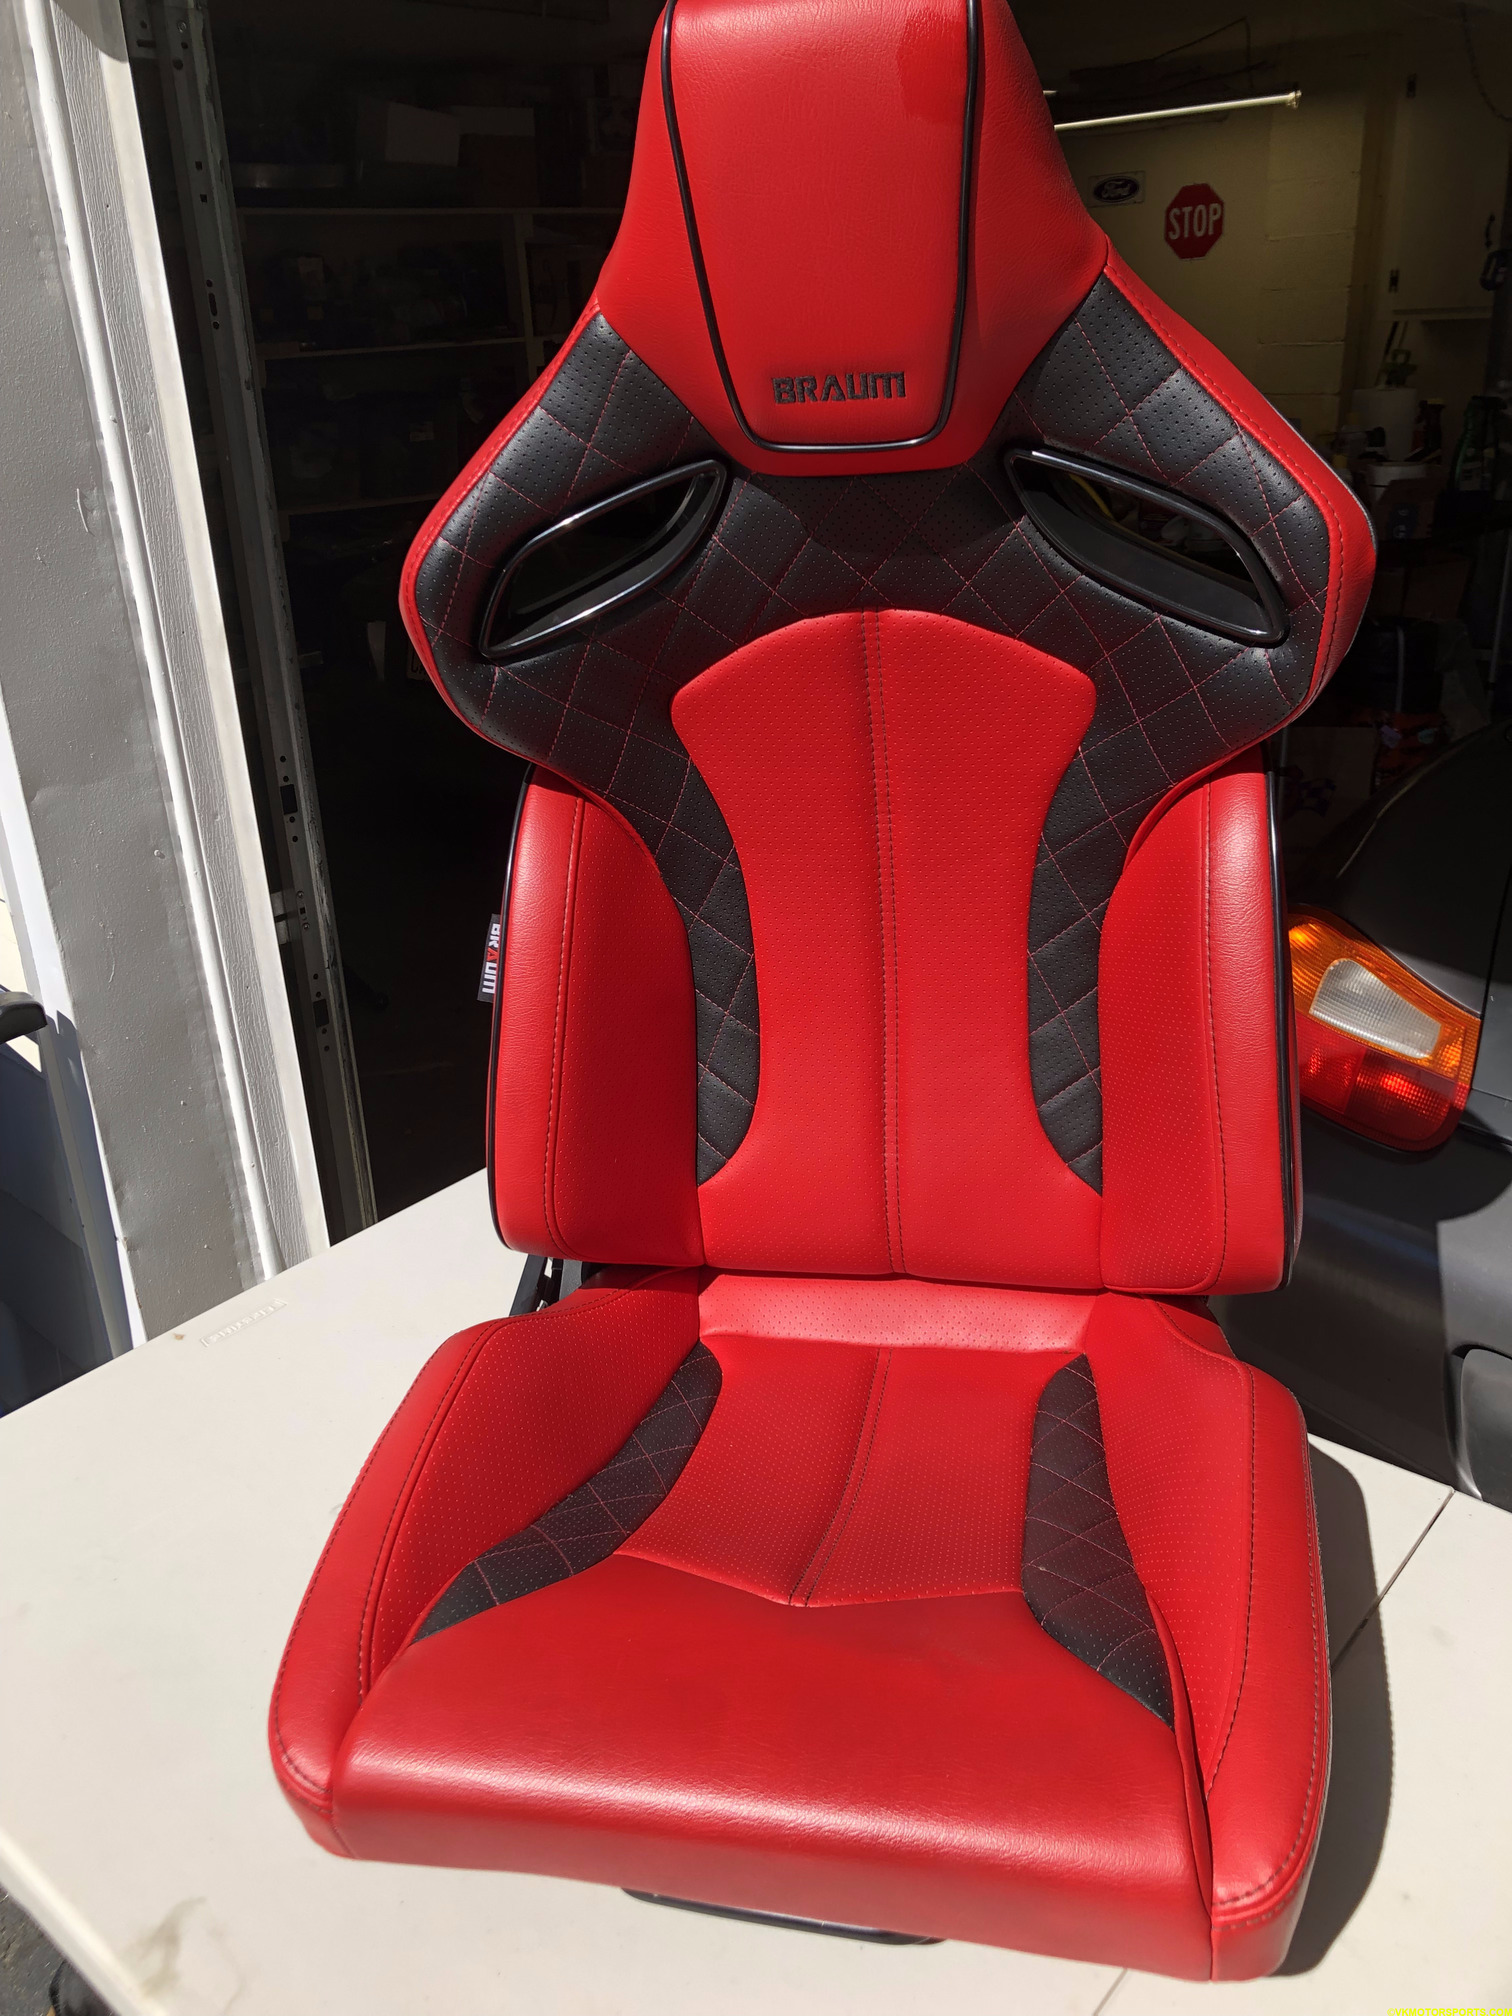 Figure 6b. Place the Braum passenger seat on the workbench
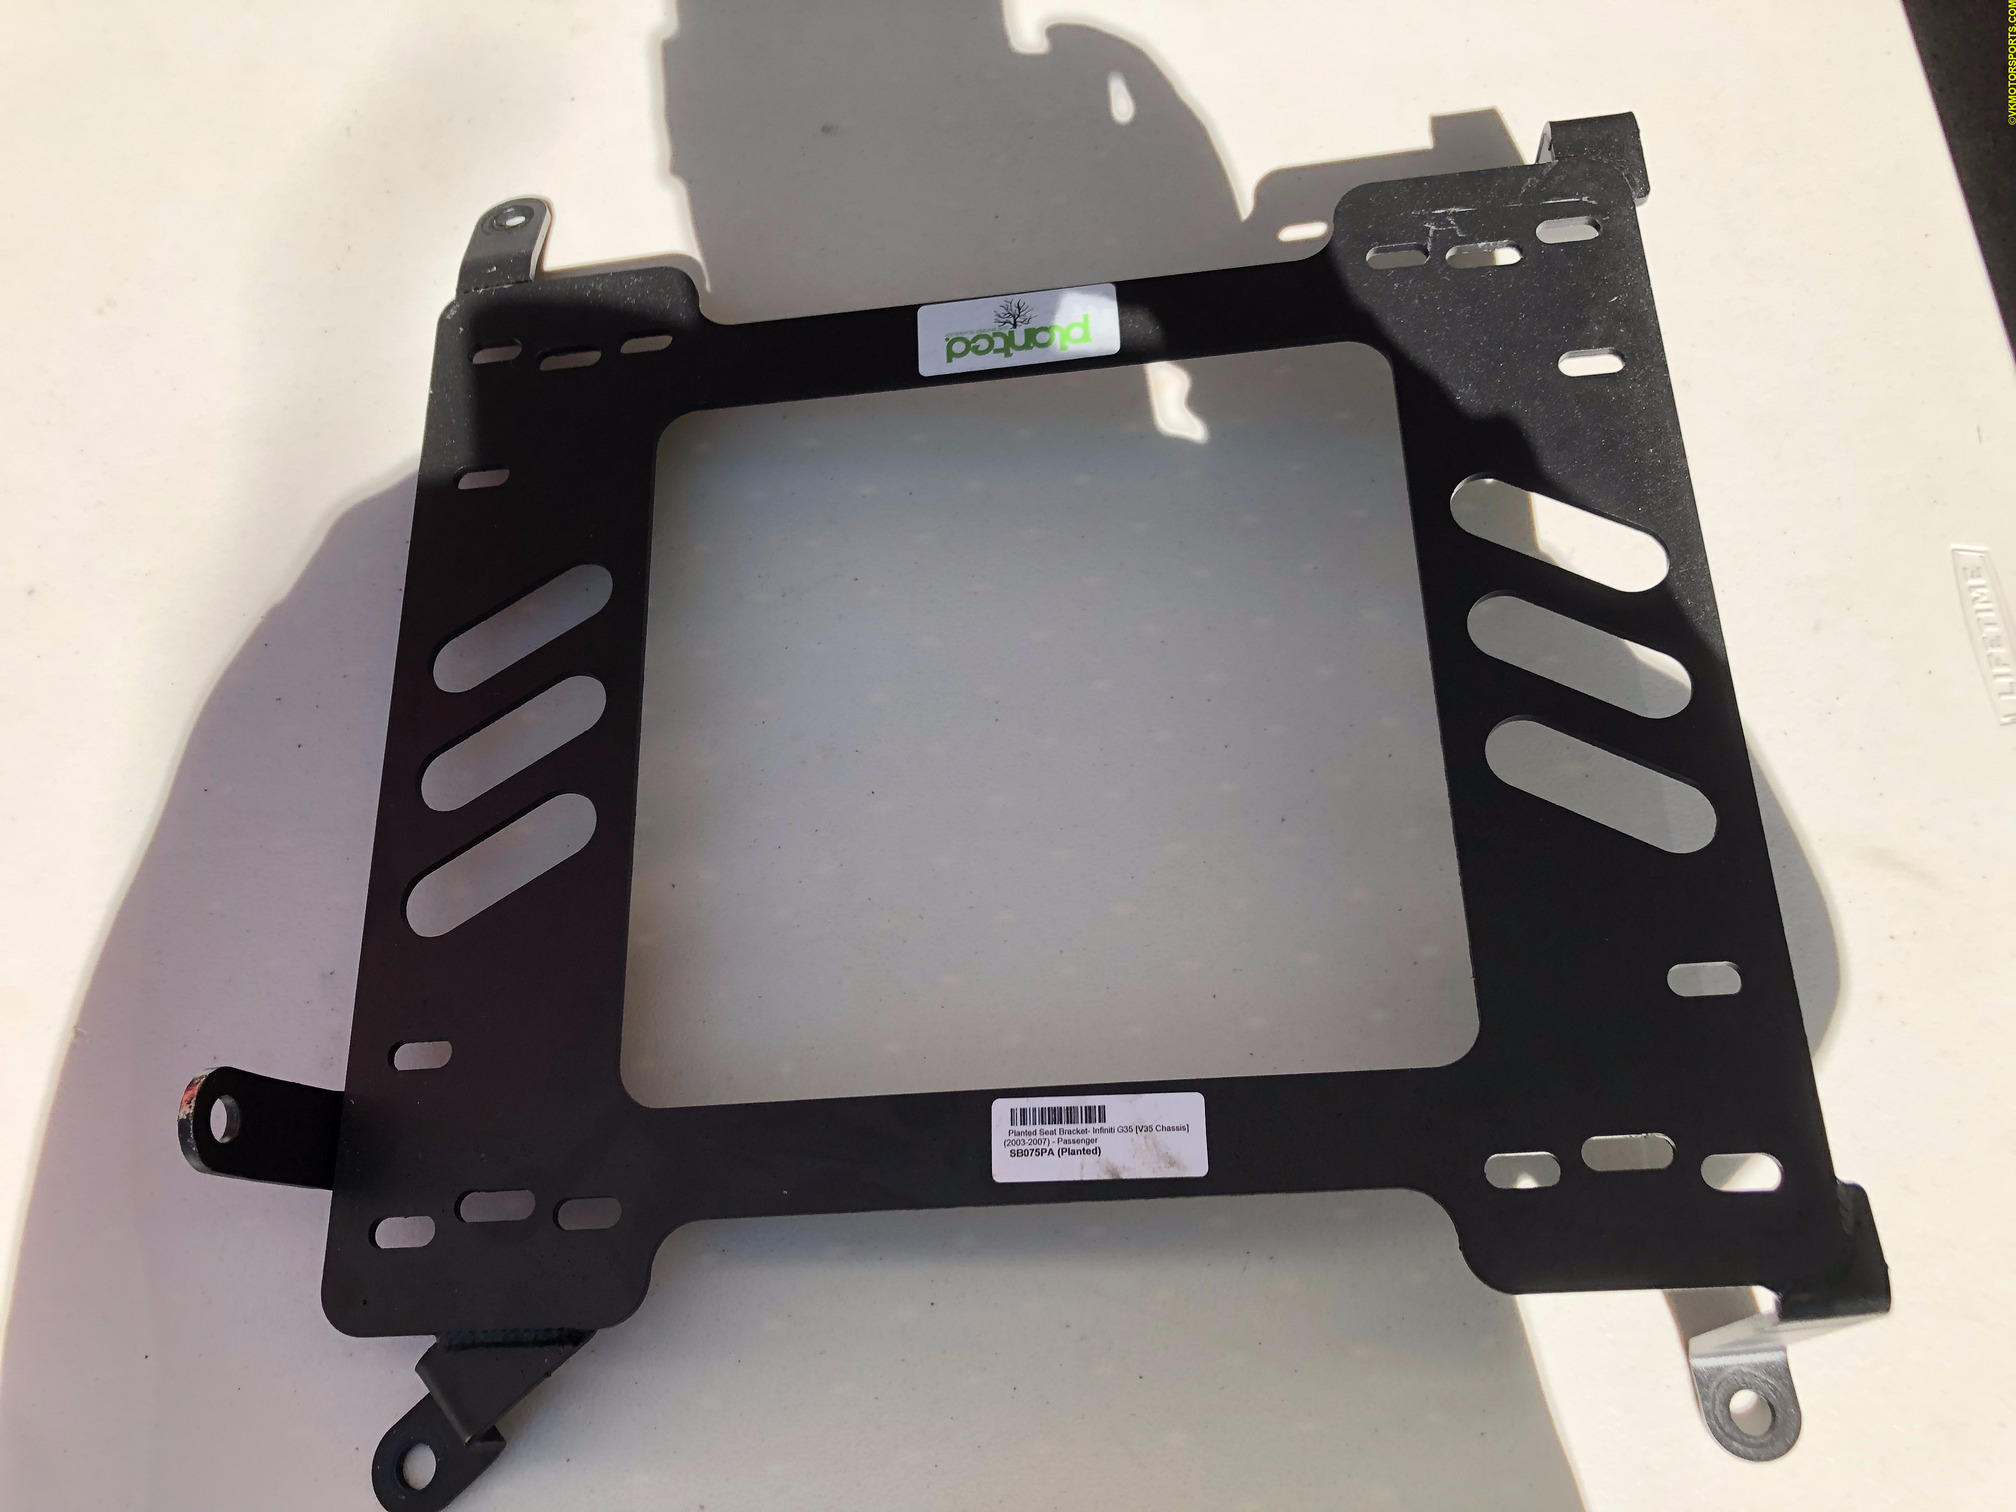 Figure 6c. Seat bracket for the passenger seat made by Planted Technology
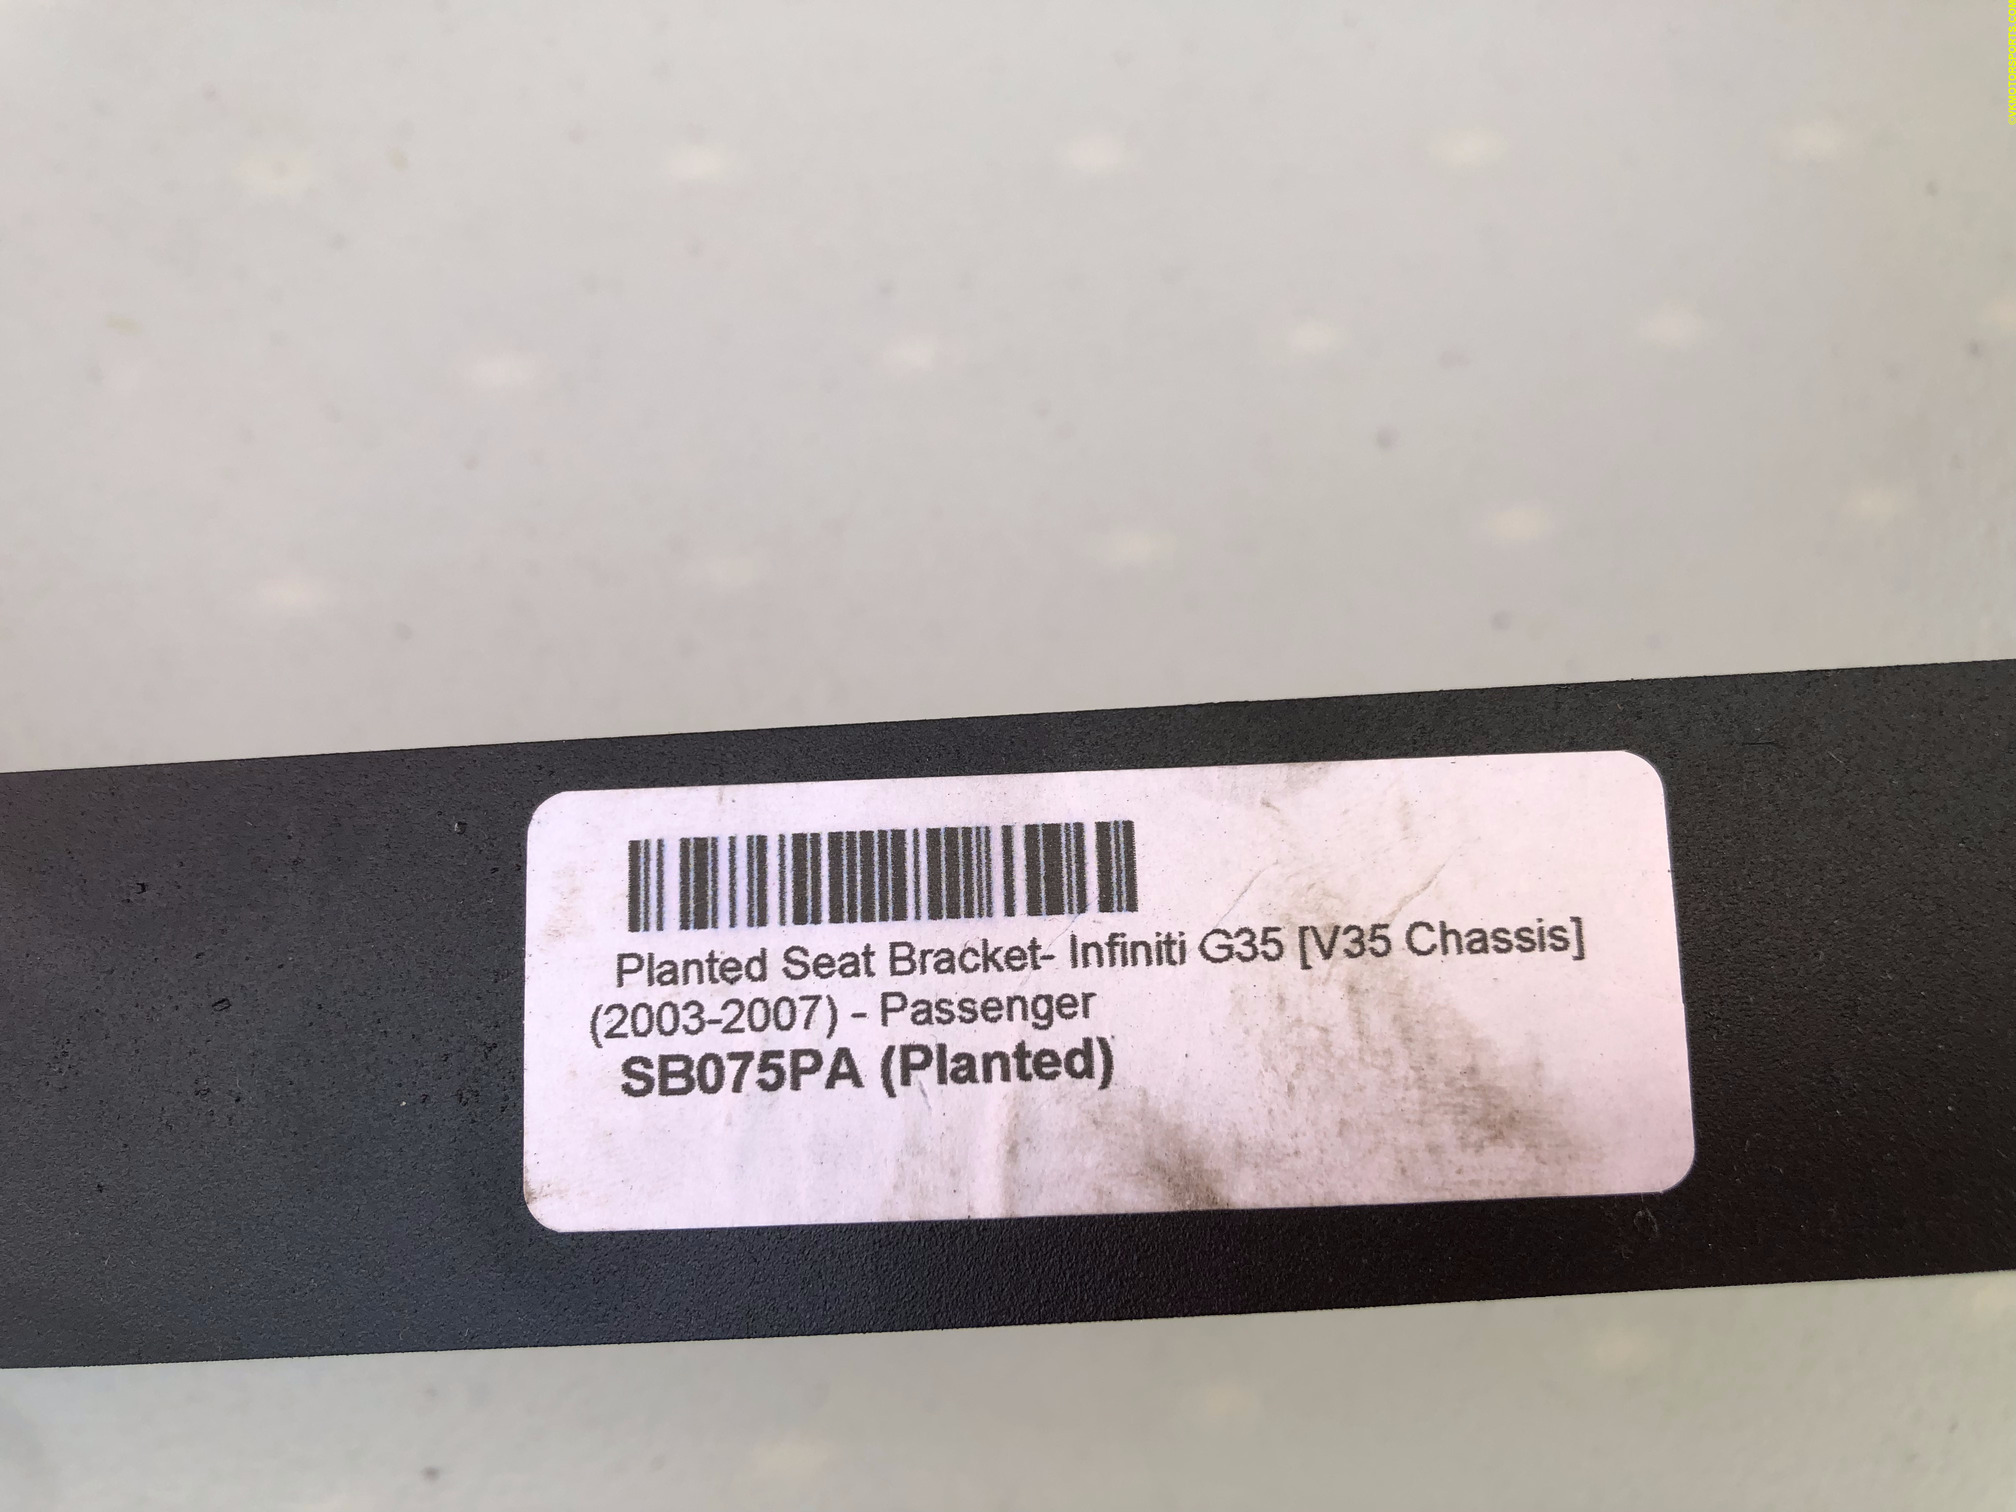 Figure 6d. Closeup of the label - model
 SB075PA
Step 7: Before you do anything, align the bracket to the holes in the car where the seat belt bolts will go in and hold the bracket. Figure 7 shows this clearly with the red circle showing that the hole is aligned and the red arrow showing where the seat belt buckle, that was removed in Step 5, will be attached.
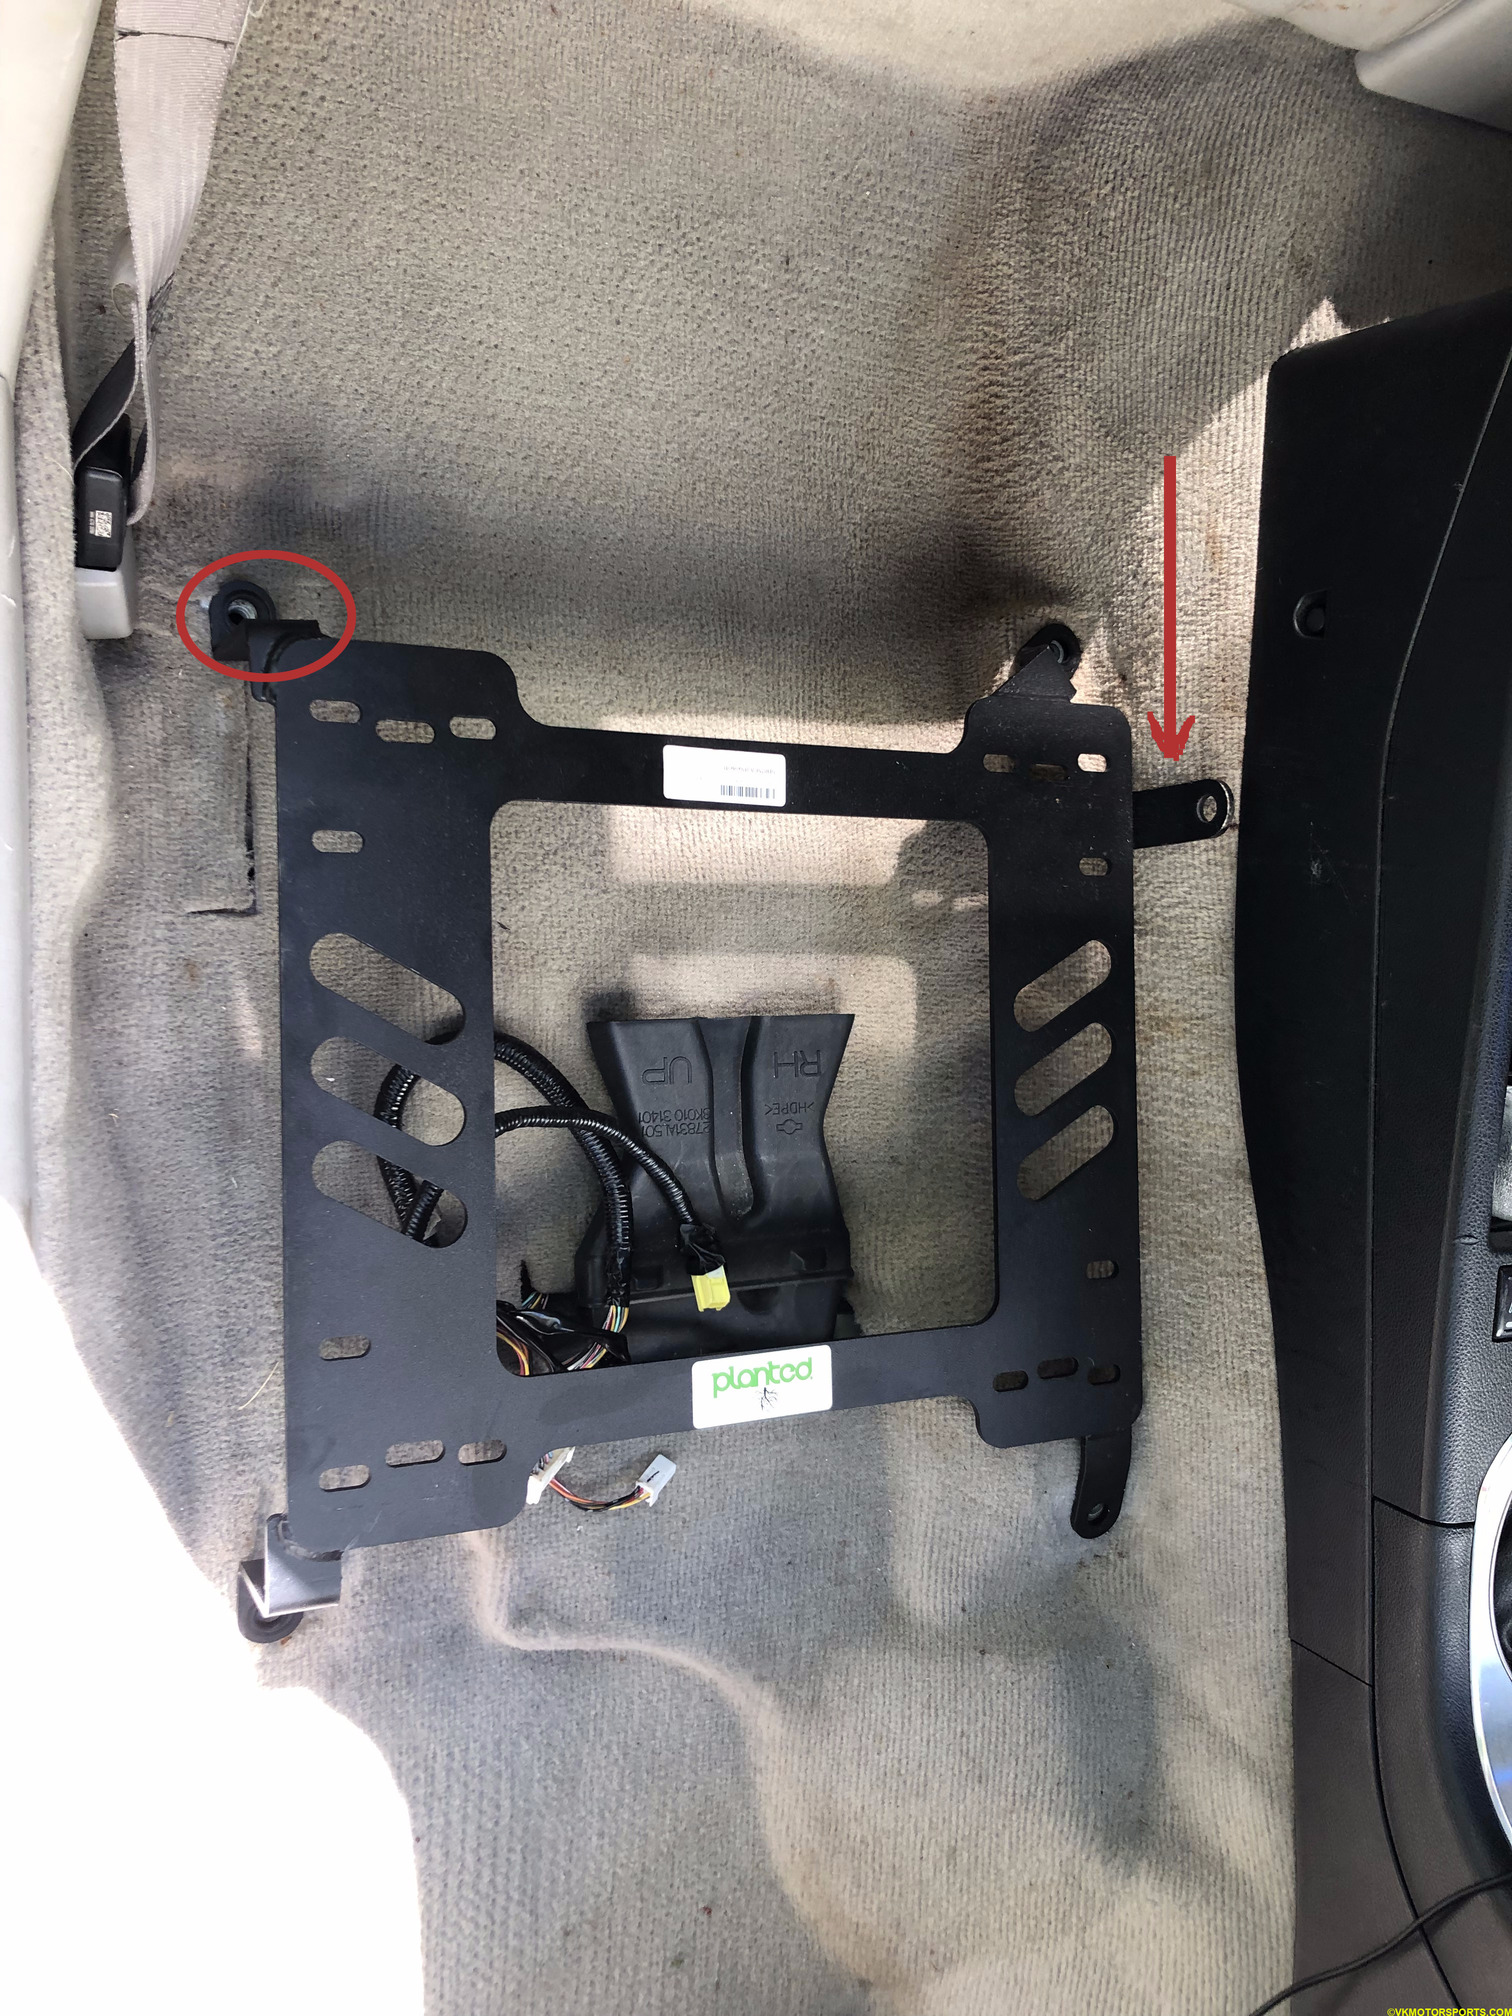 Figure 7. Bracket must align with the holes in the car body
Step 8: Remove the seat belt buckle from the stock seat using a 14mm socket (Figures 8a and 8b). Install the seat belt buckle to the seat bracket first, to the hole pointed by the red arrow in Figure 7, as it is easier this way. You will need a M12-1.25 hex nut (Figure 8c) to hold the bolt in place and it will need to be torqued to 32-40 ft-lb as shown in Figure 8e. The final product should look like Figure 8d. The hex nut required a 19mm box wrench to hold it in place while I used the 14mm socket on the bolt to tighten it.
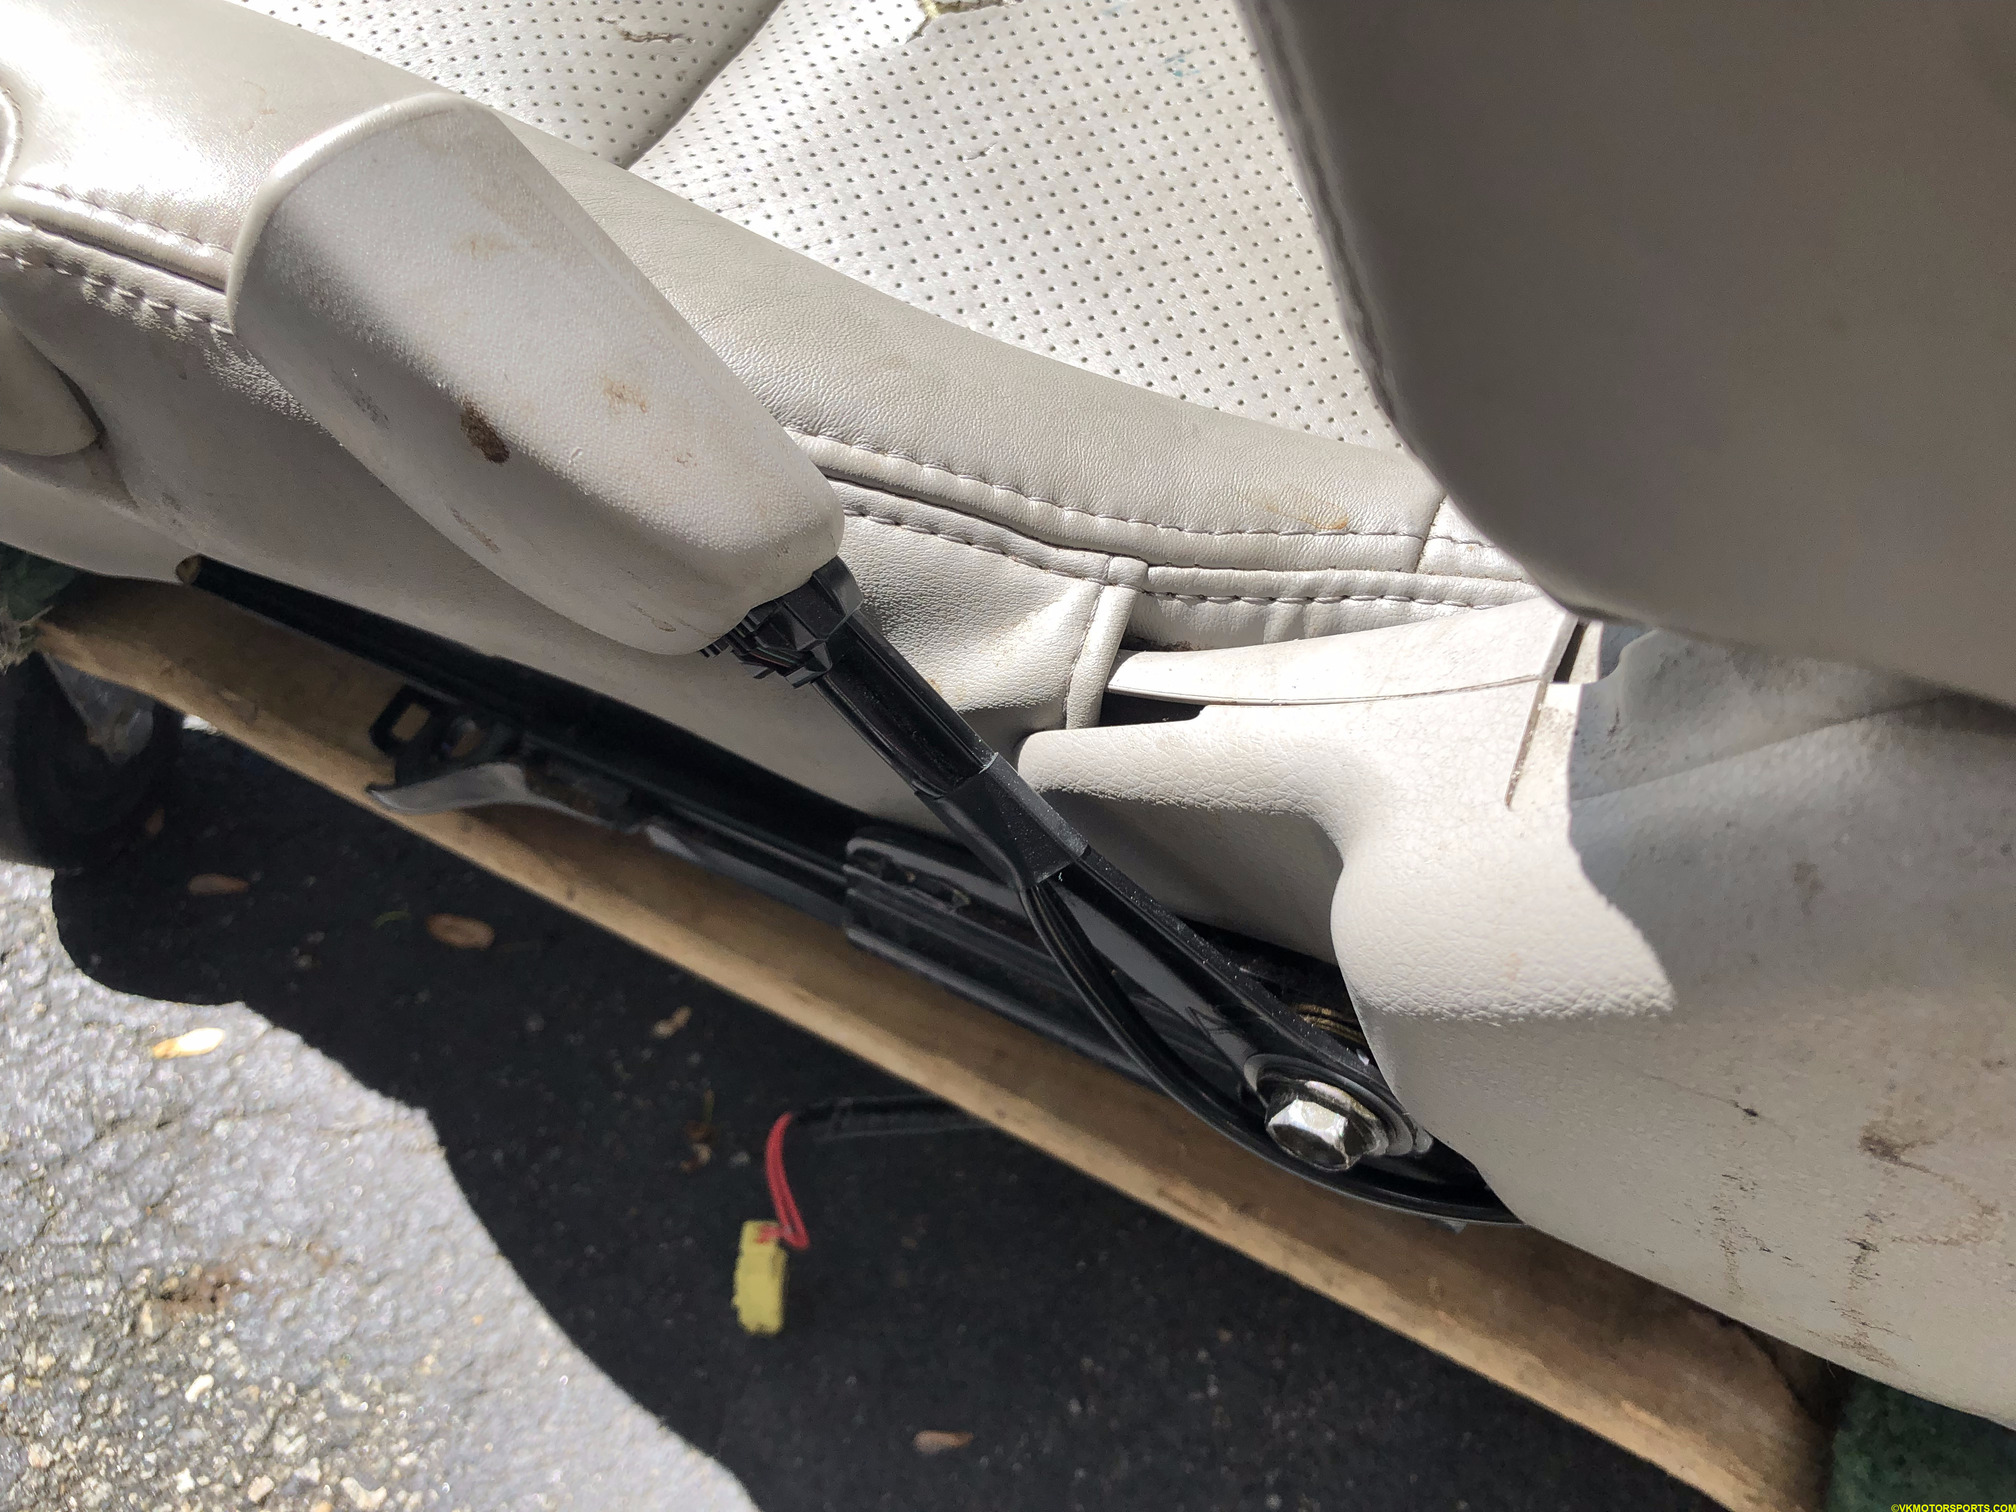 Figure 8a. Remove the seat belt buckle from the stock seat
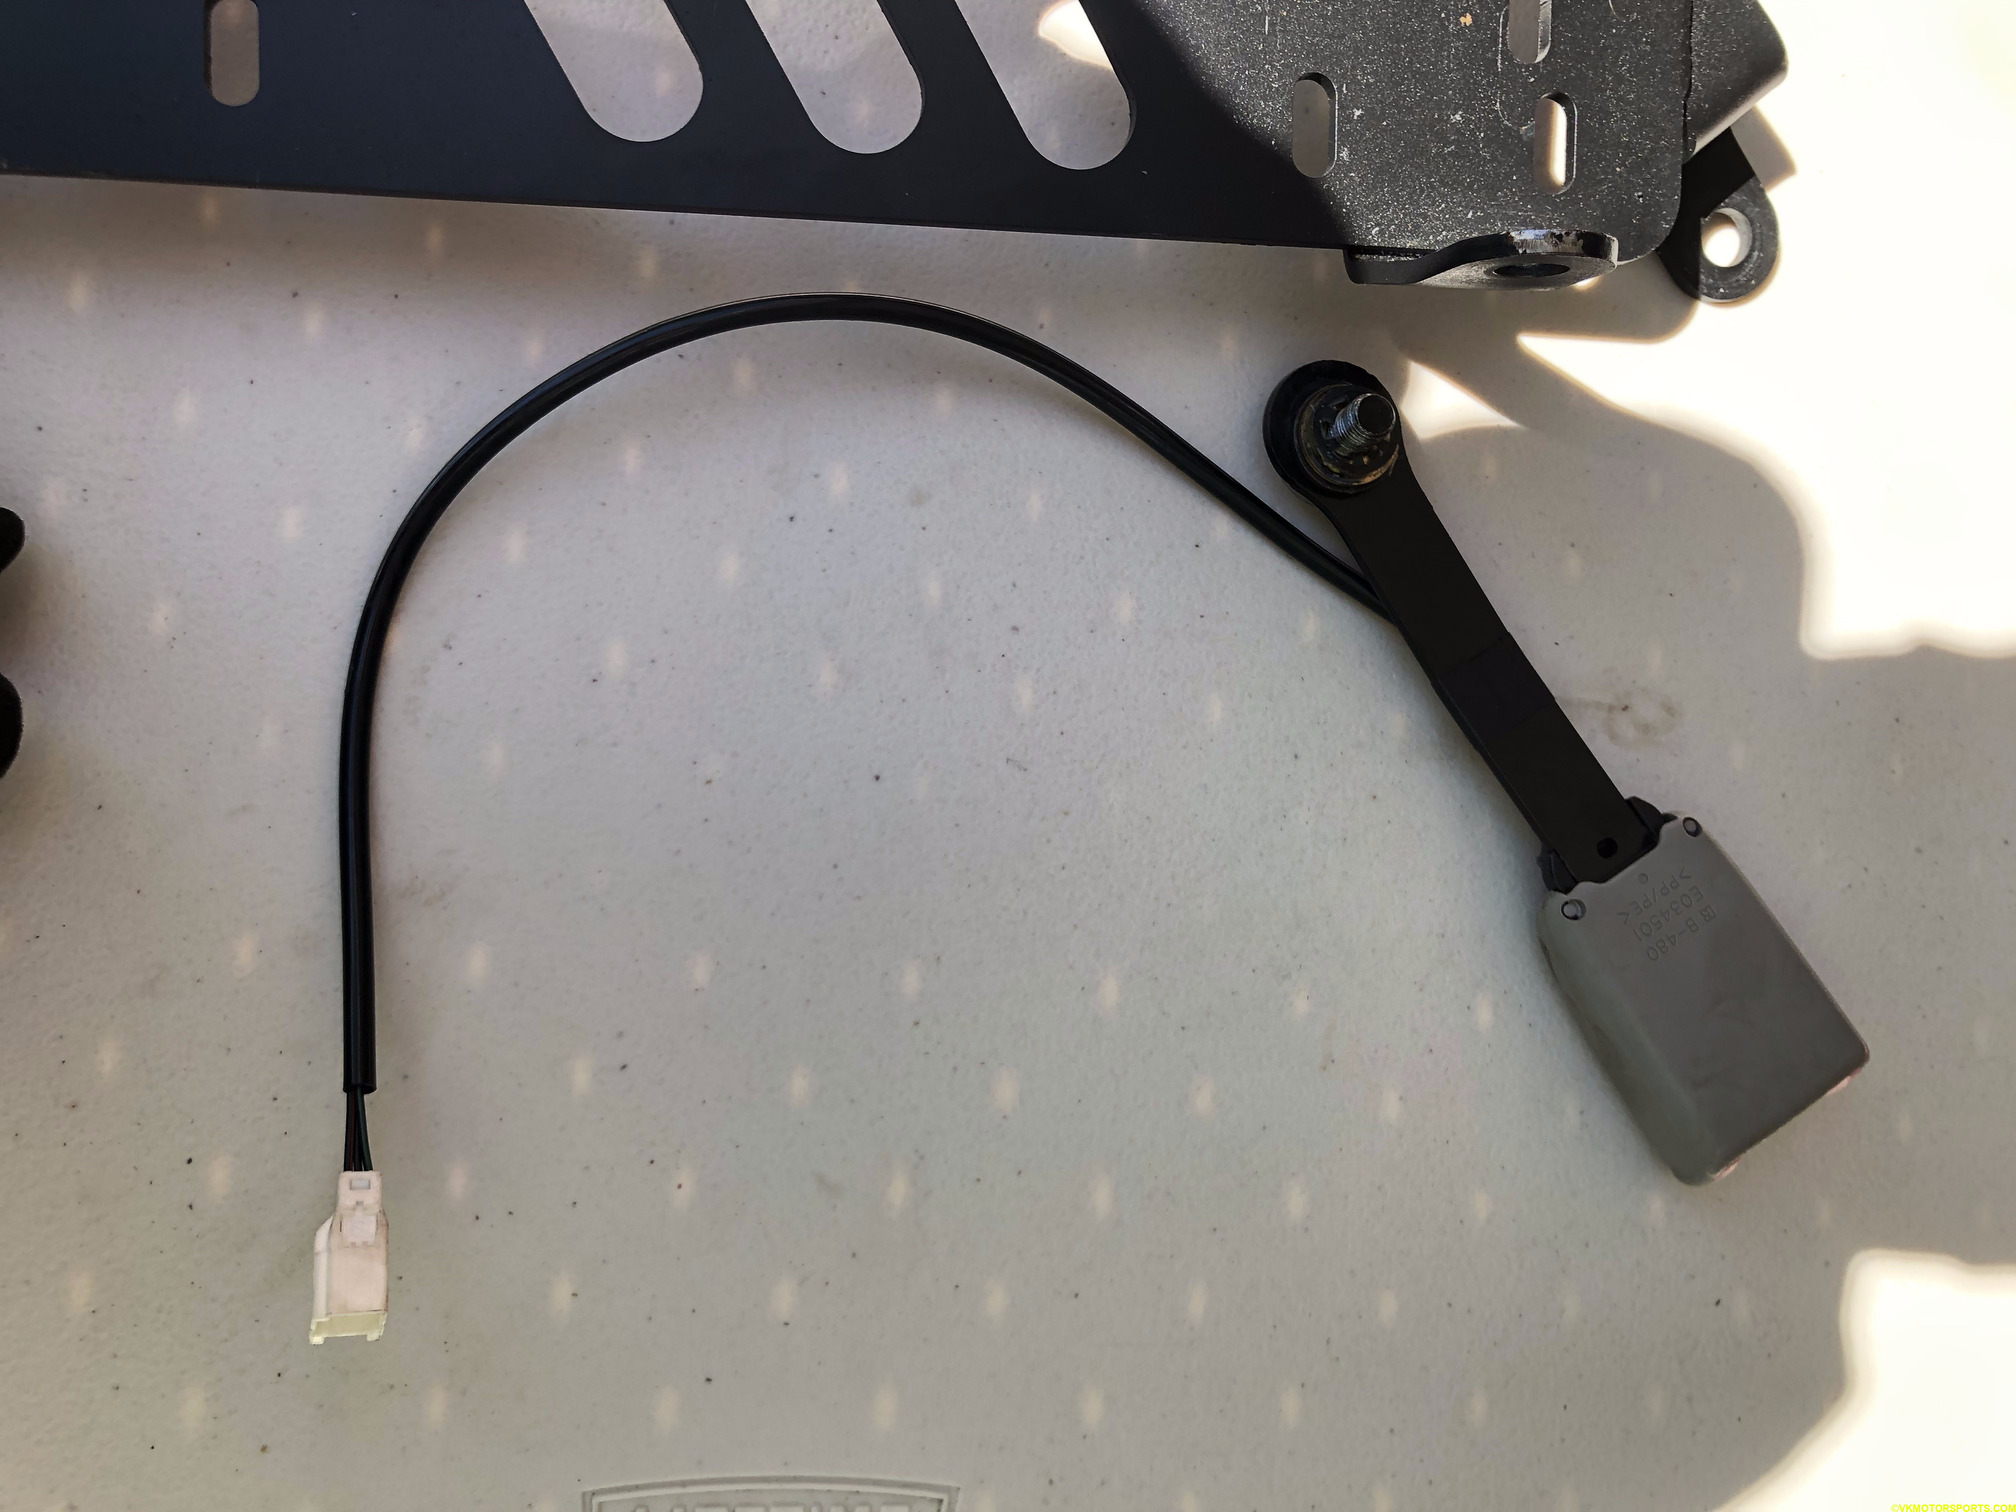 Figure 8b. Seat belt buckle has to be bolted to the bracket
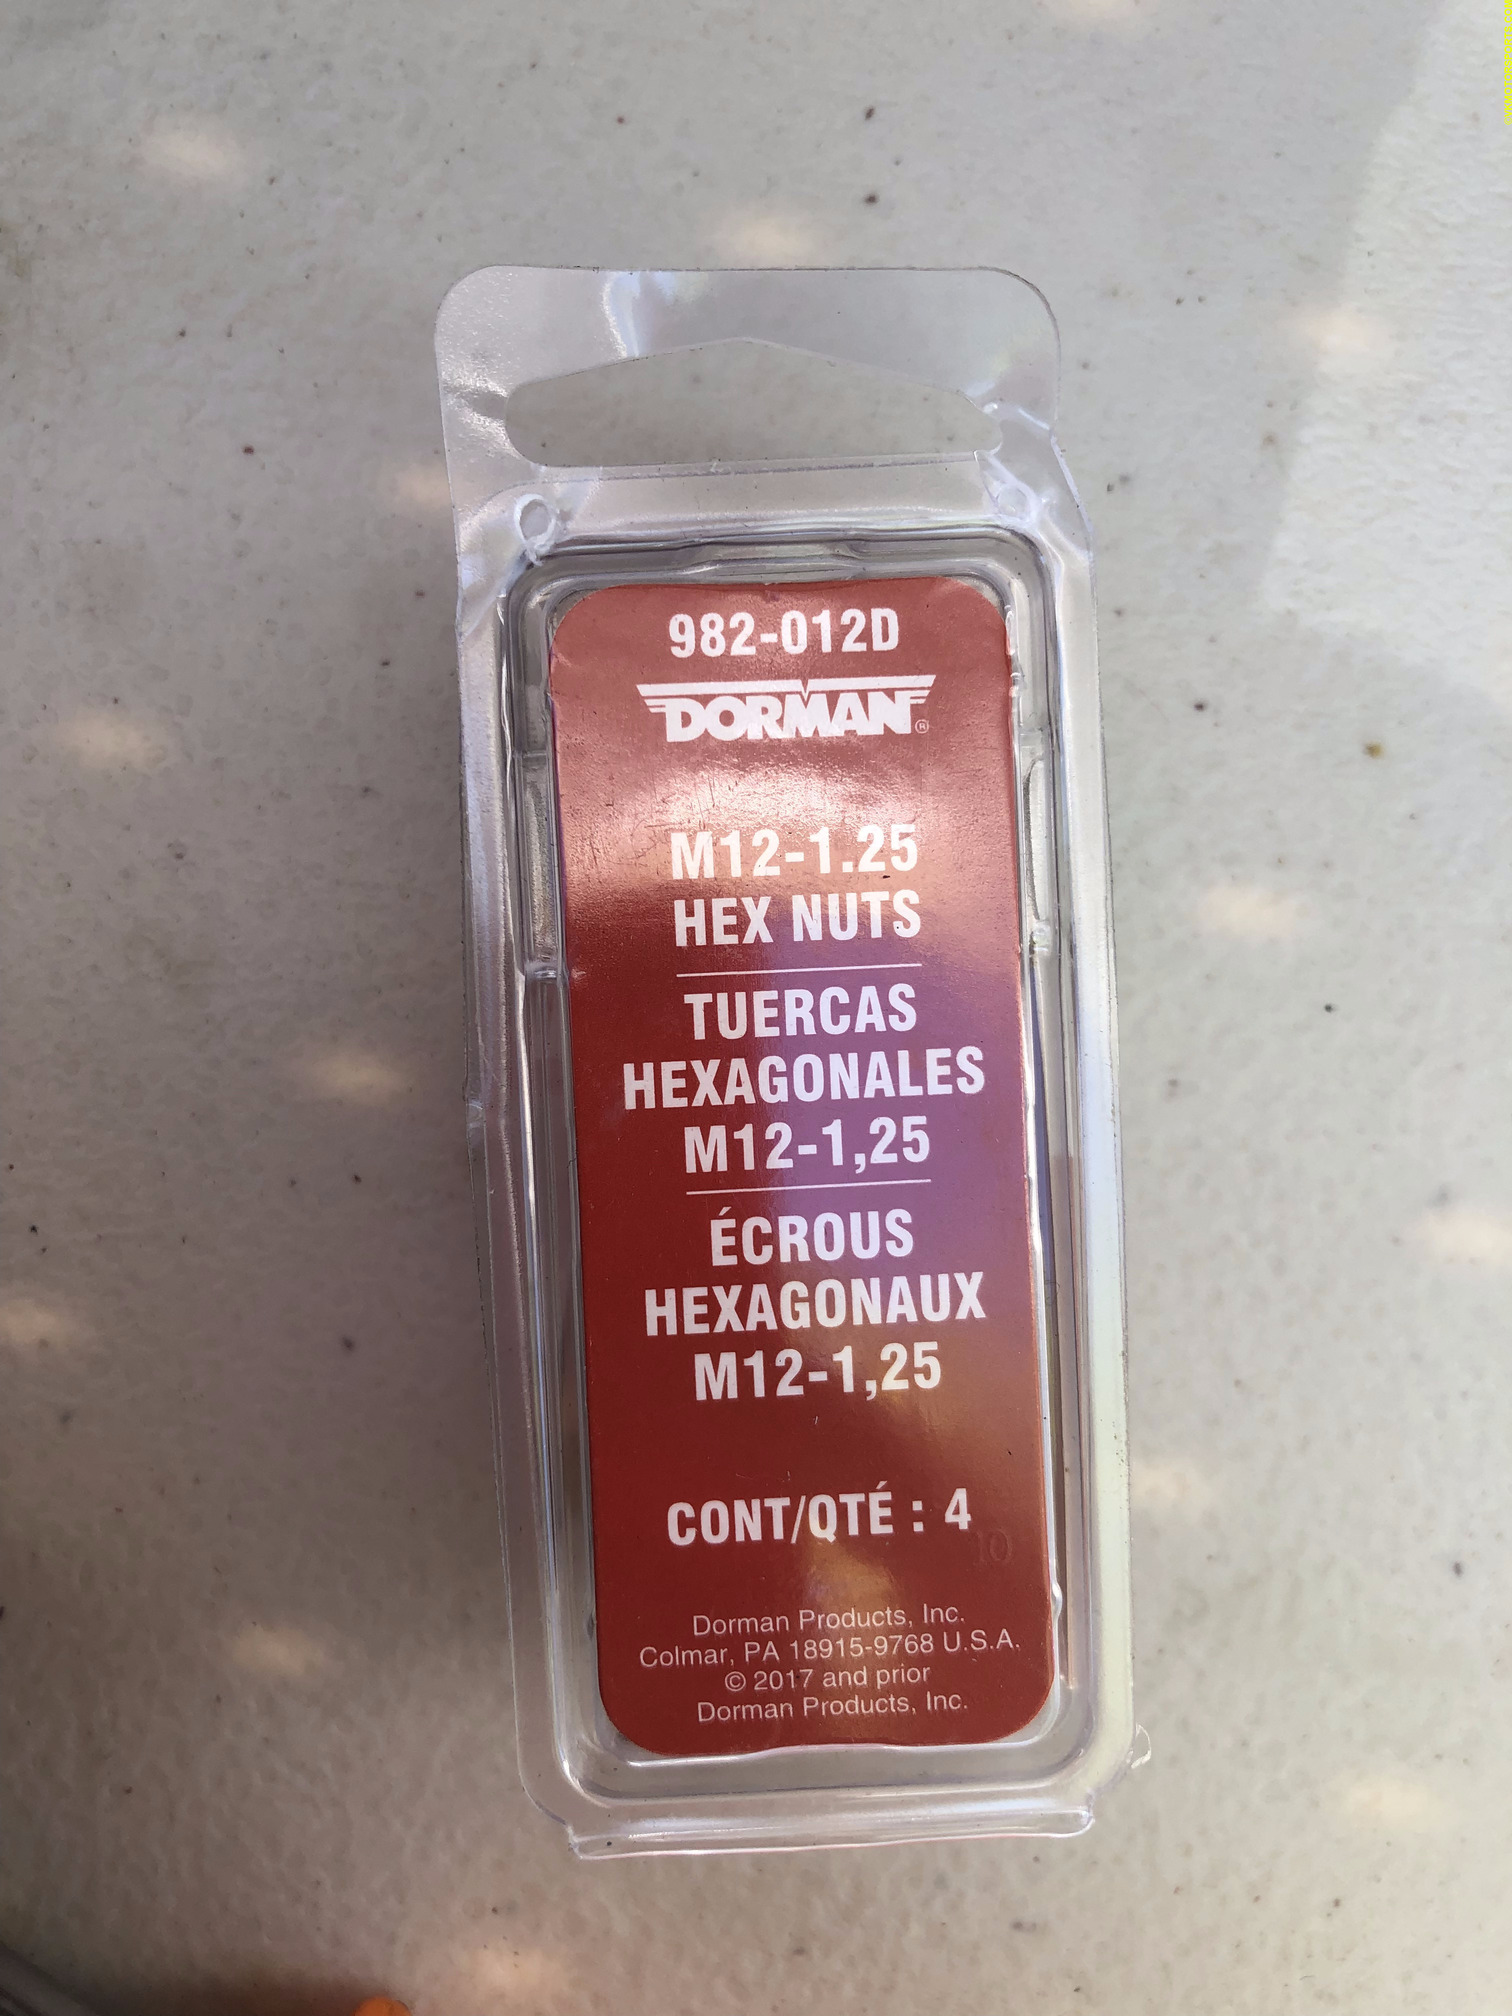 Figure 8c. Dorman M12-1.25 hex nut from an auto parts store
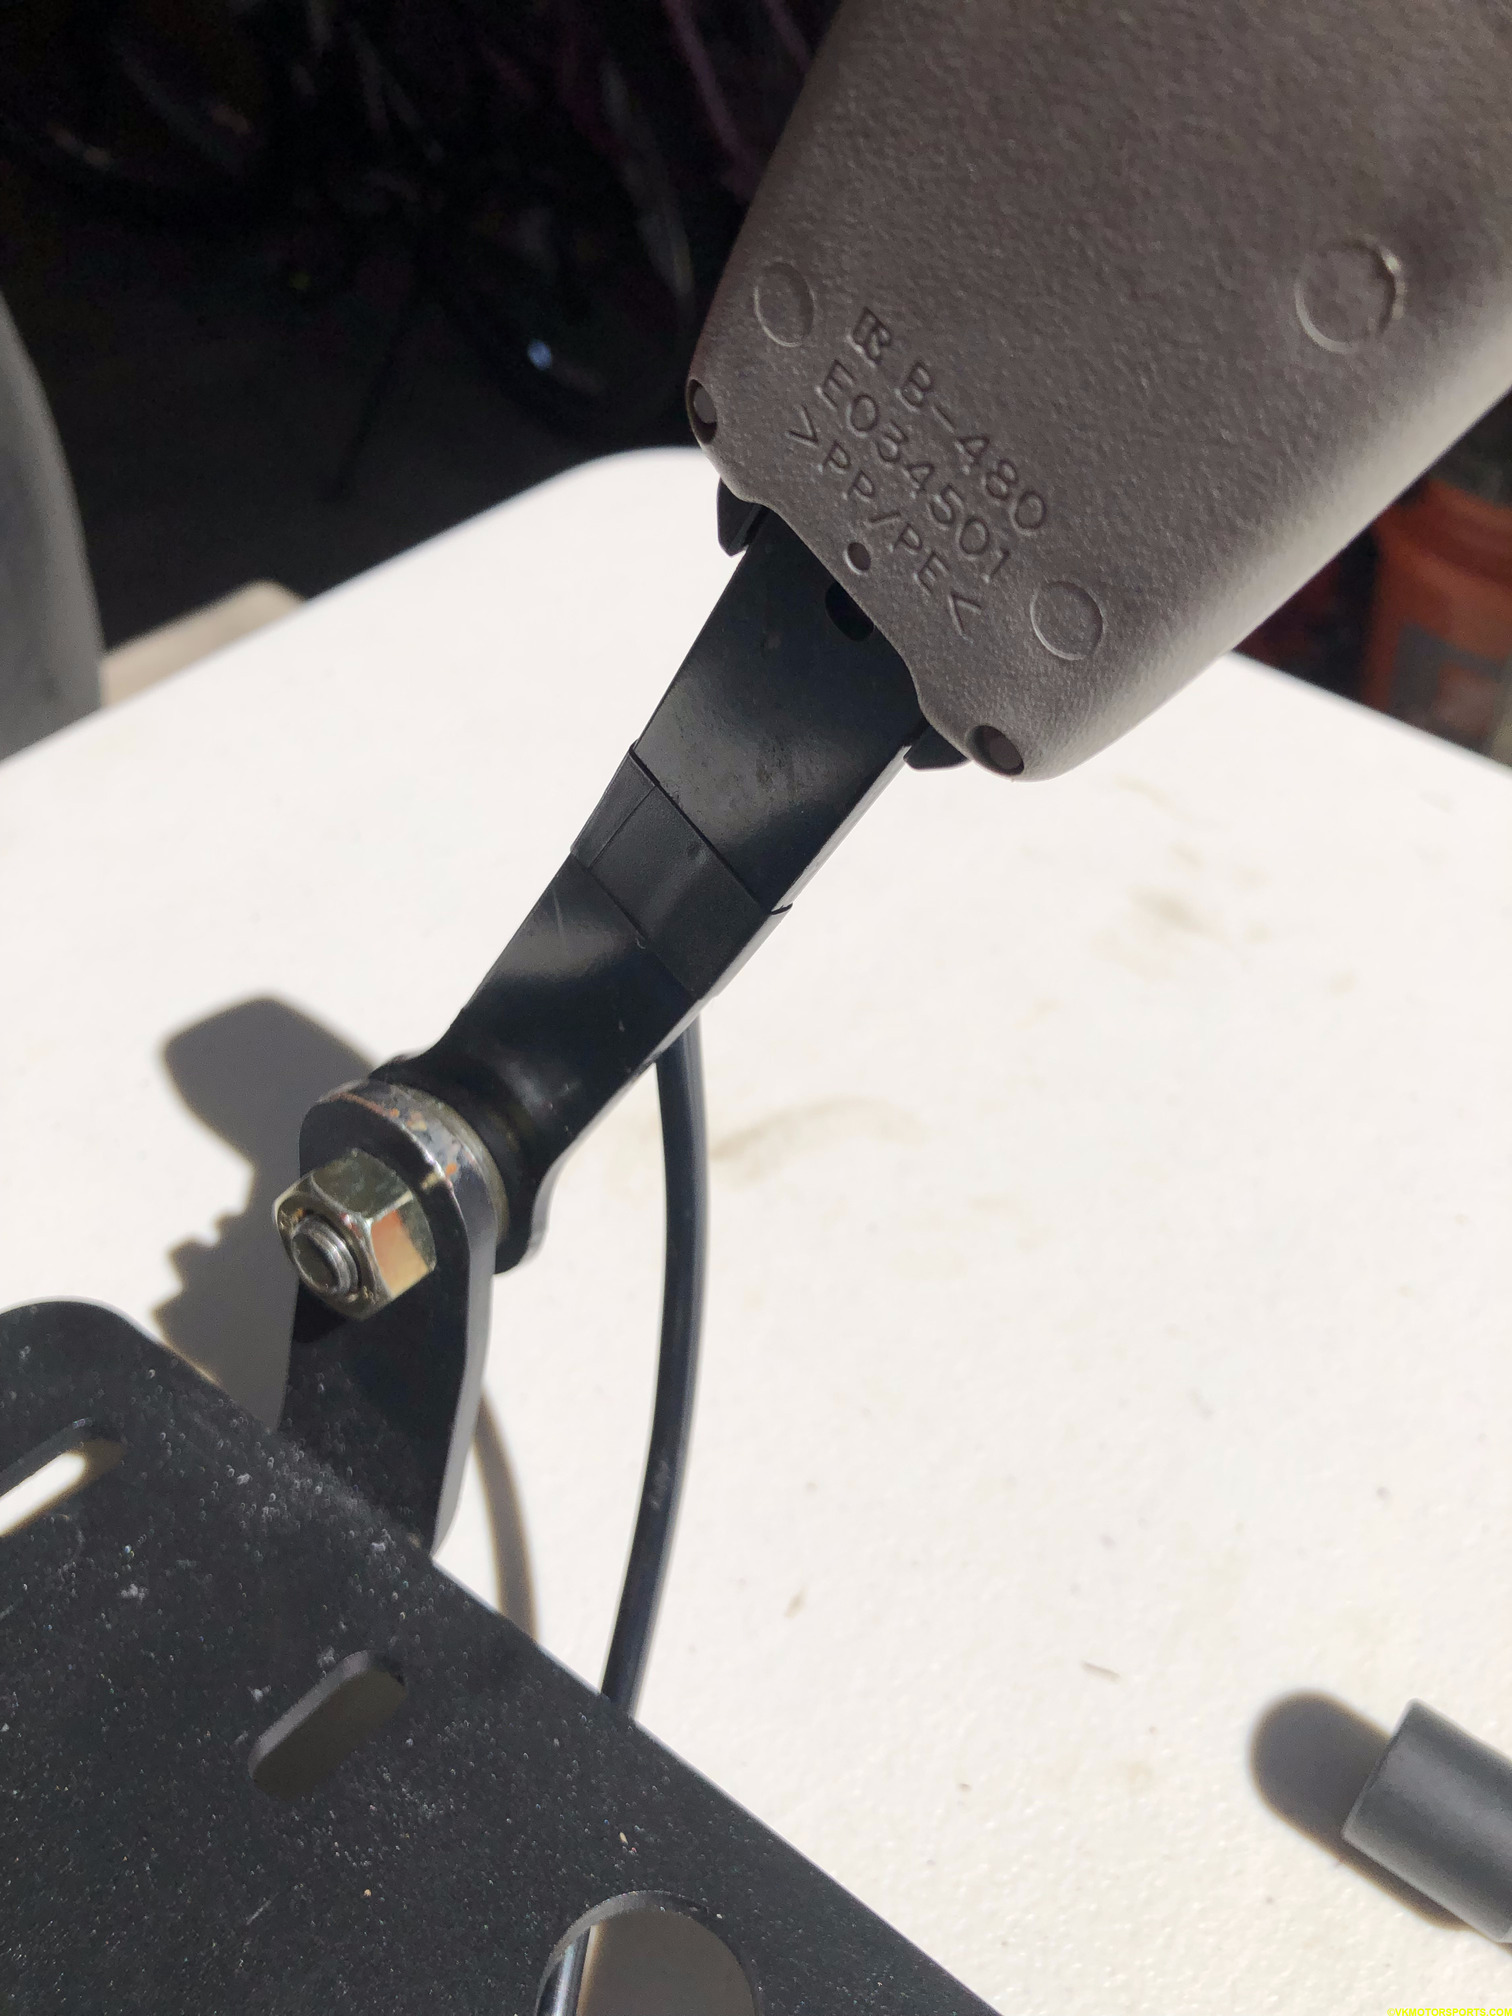 Figure 8d. Seat belt buckle fully bolted to the bracket
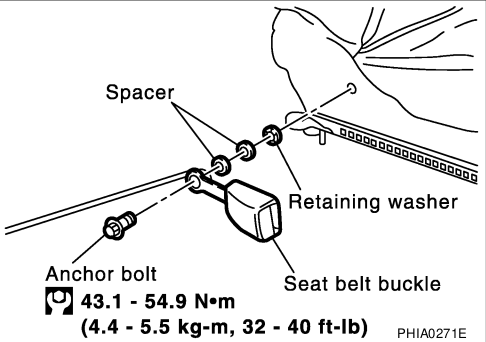
Figure 8e. Seat belt buckle torque from the service manual
Step 9: Now mount the seat to the bracket using the 4 bolts that came with the seat rails. Since I purchased used seats, I used the Sparco 50001 Bottom Mount Seat Hardware which comes with 4 long bolts for the slider to attach to the bracket, 4 nuts, and 4 short bolts for the slider to attach to the seats. You also need a 13mm socket for tightening the nut and 6mm Hex Allen Key for holding the bolt in place while you tighten the nut.
You will need some finessing of the seat rails back and forth to get them to align correctly on the bracket while you tighten each bolt. I used a rubber mallet and it came in handy to get the rails to move forward and backward, since they are tight and designed to move only when a heavy human is sitting on the seat.
Figure 9a shows how I have extended the rails forward and inserted the bolt in, and then Figure 9b shows how the nut has to be placed on the bolt. Figure 9c shows all the 4 bolts aligned and tightened and can be a reference for you on how to arrange them along the holes on the seat bracket. I ended up removing the seat belt buckle to do this as I struggled a bit to get it working, and then bolted the seat belt buckle back, as in Step 8, after it was done.
The process is the same for the driver’s seat as seen in Figure 9d. Remember to attach the seat belt buckle and run the buckle wire through one of the holes in the bracket as shown in Figure 9e.
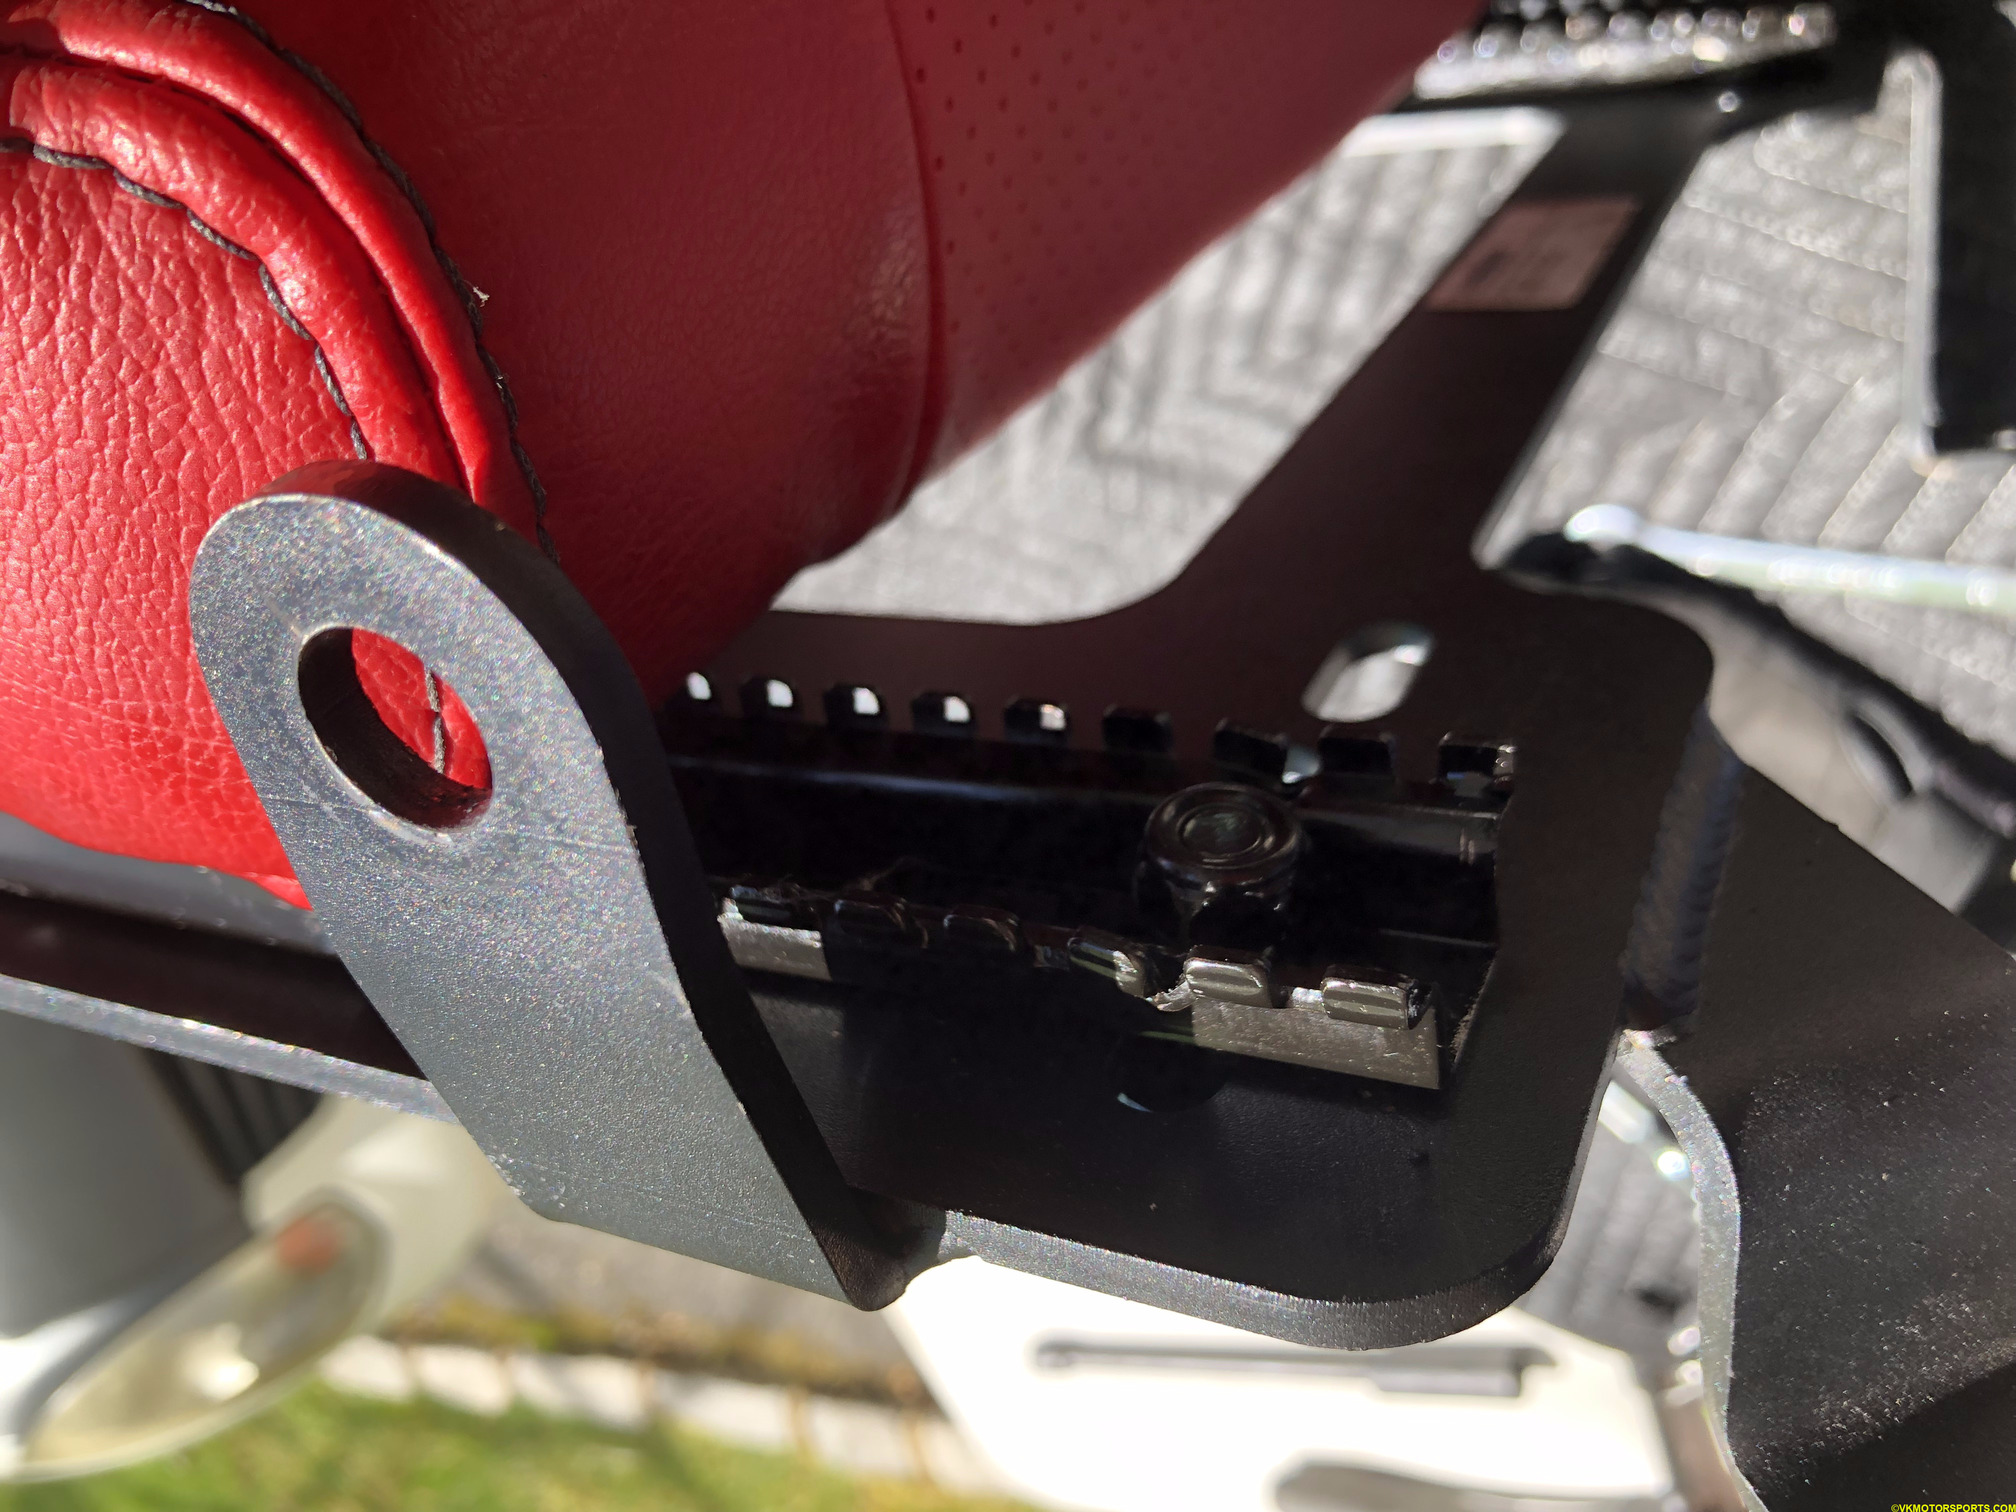 Figure 9a. Extend the seat rails to expose the grooves and align the hole with the bracket
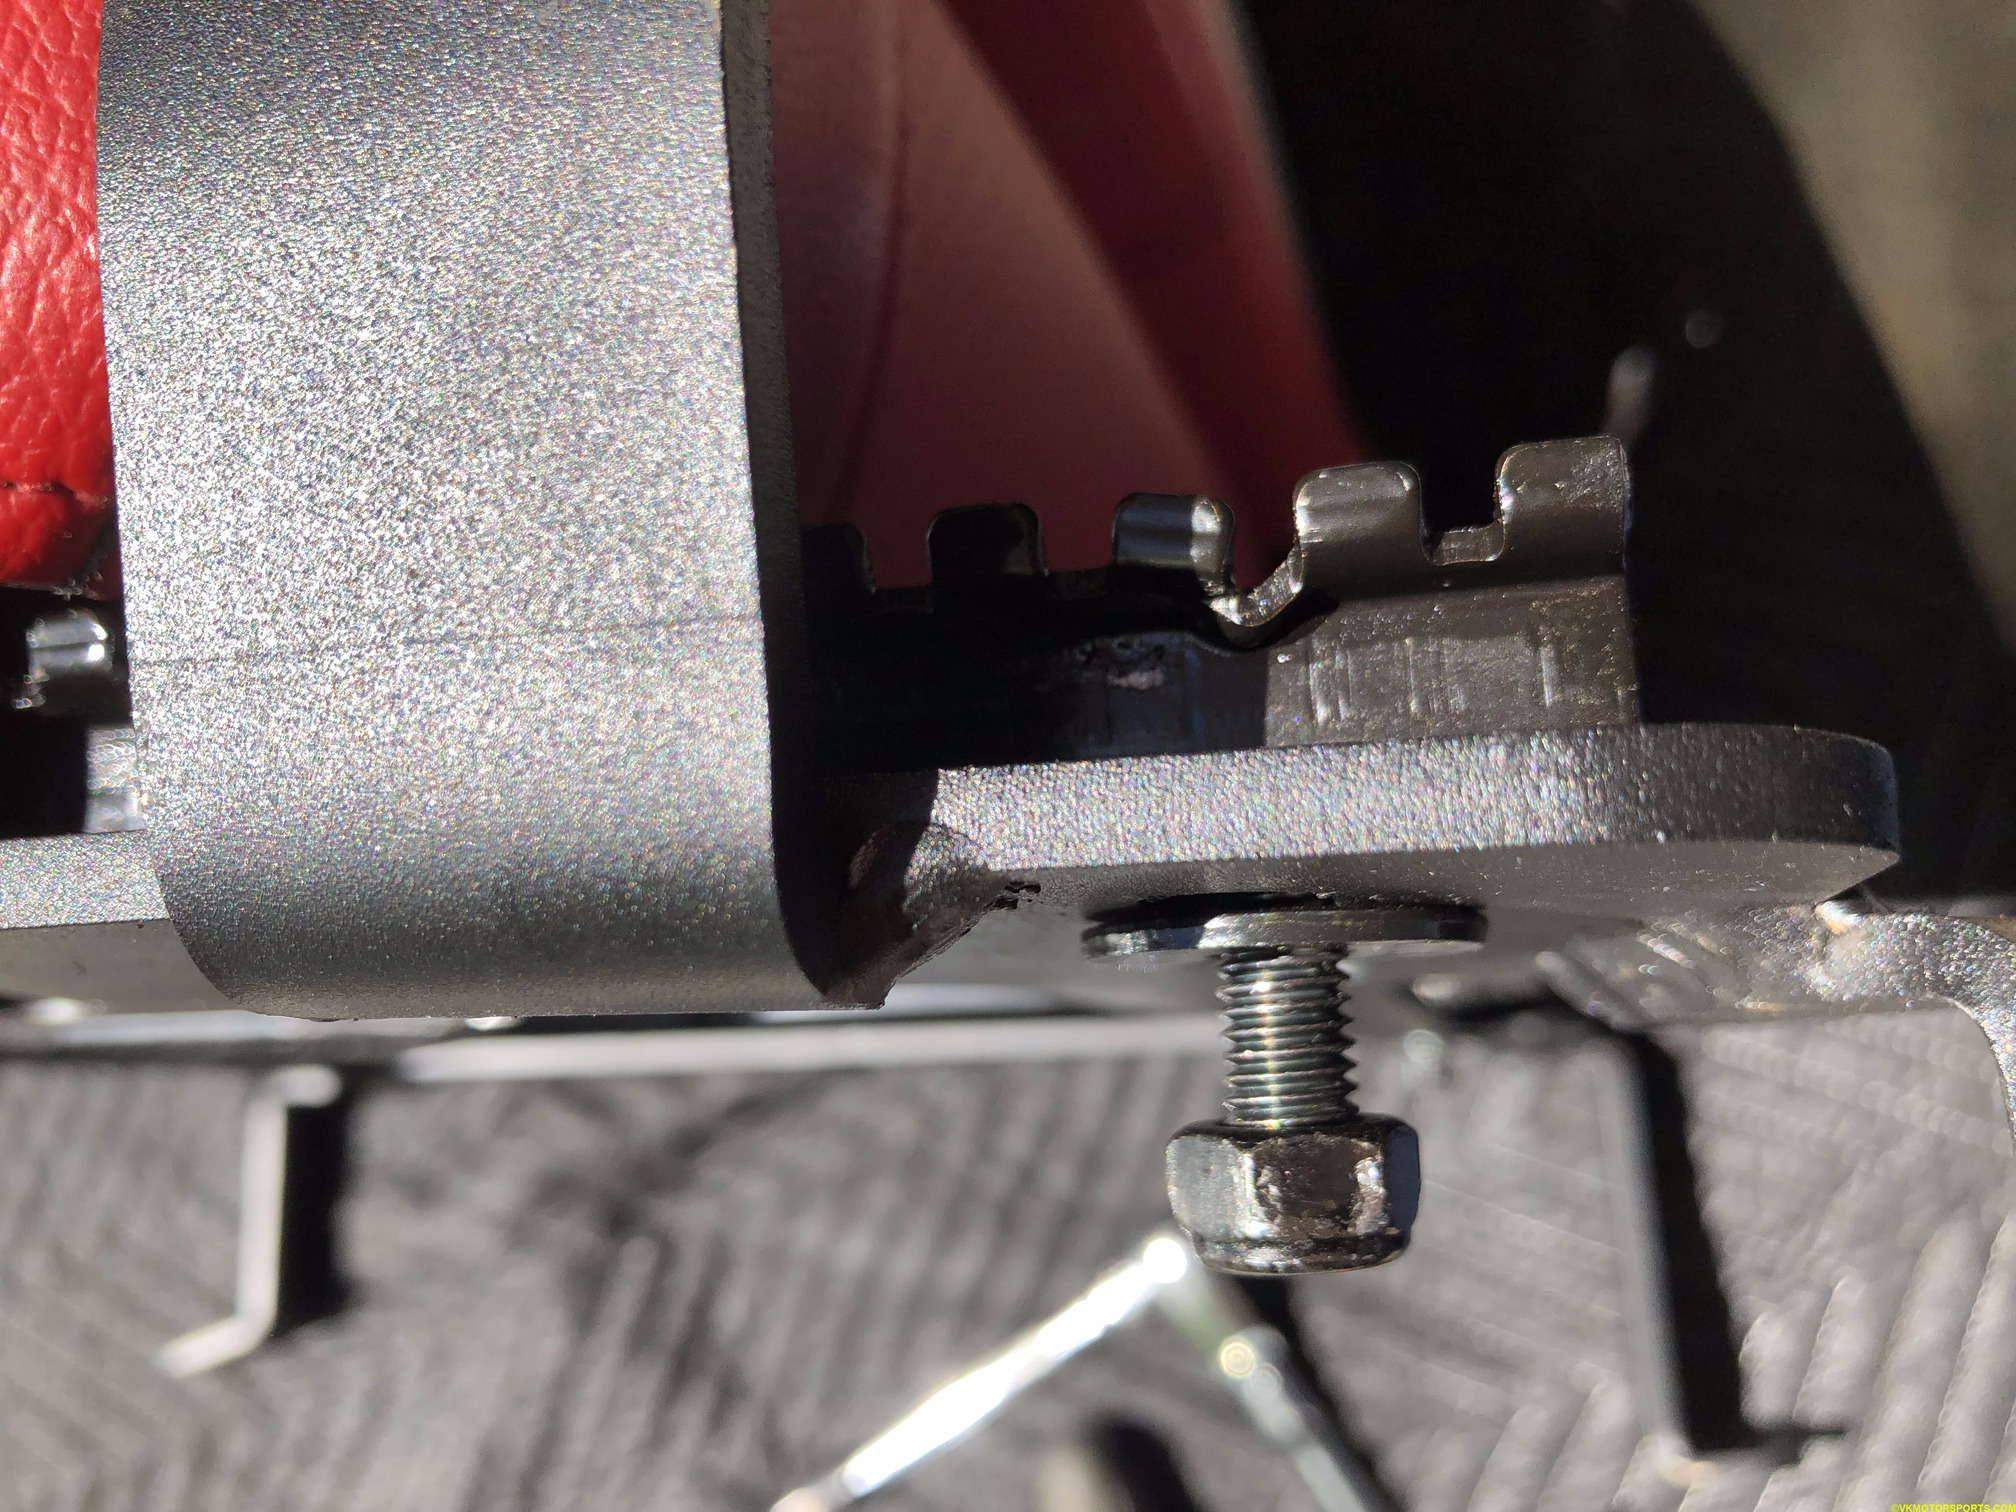 Figure 9b. Make sure the nut is outside the bracket with the washer for tightening
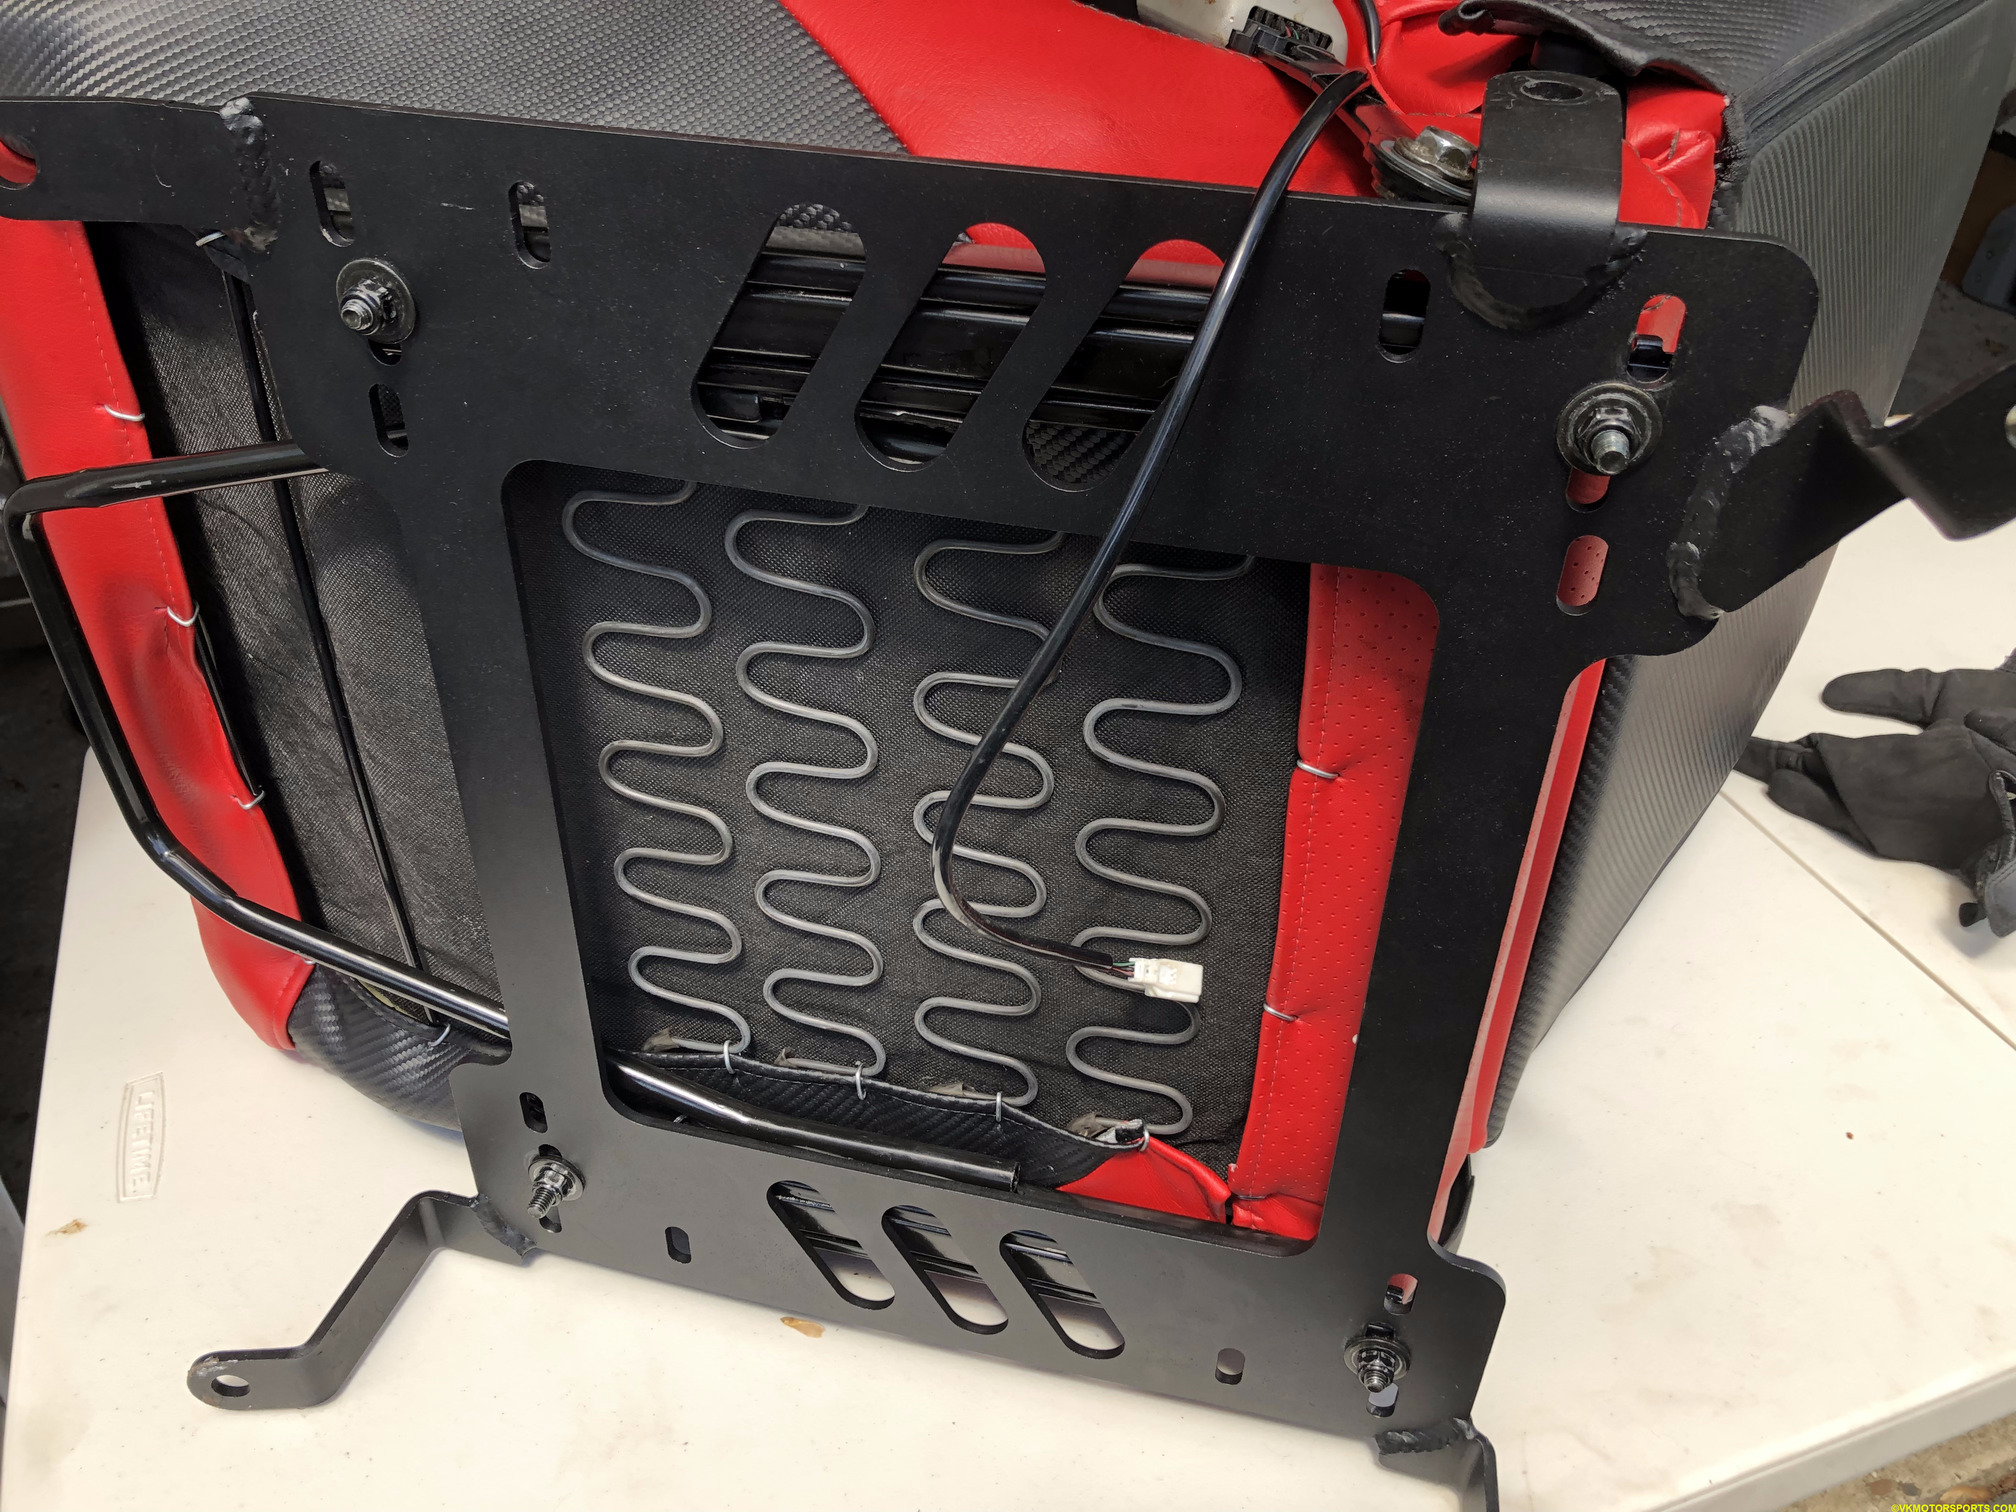 Figure 9c. View of the seat bolted to the bracket from the bottom showing the 4 bolts
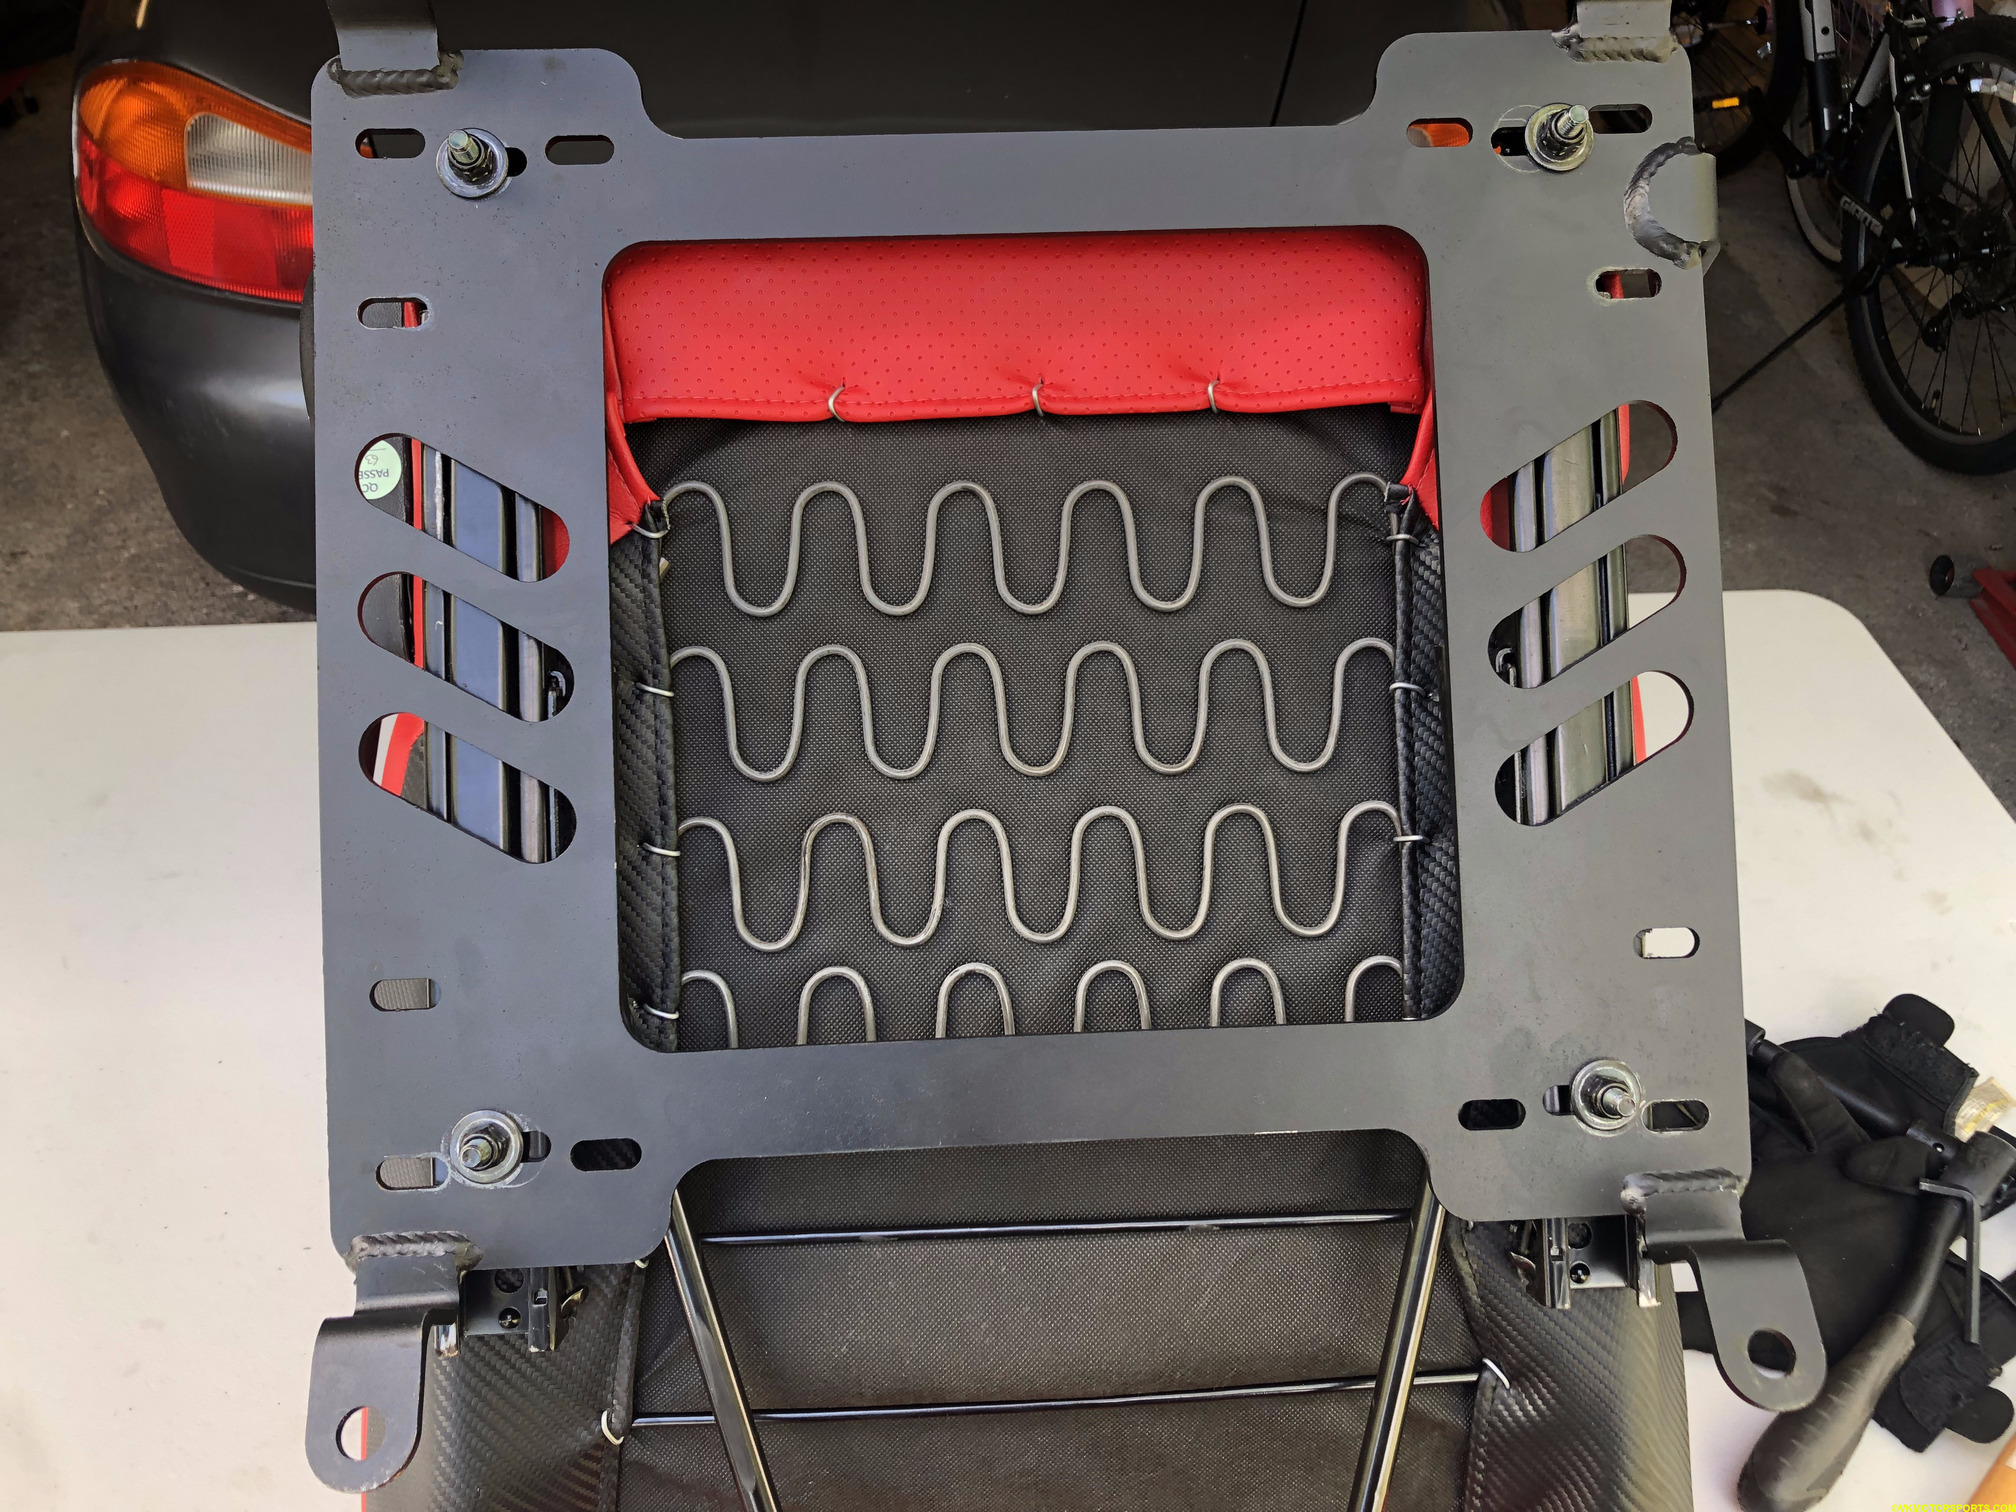 Figure 9d. View of the seat bolted to the bracket for the driver's seat
 Figure 9e. View of the seat belt buckle attached to the bracket with its wiring through the hole
Step 10: Now place the bolted seat and bracket combo in the car and install the stock seat bolts in place, for both front (Figure 10a) and rear (Figure 10b). Make sure you torque them to 32-40 ft-lb as shown in Figure 10c from the service manual.
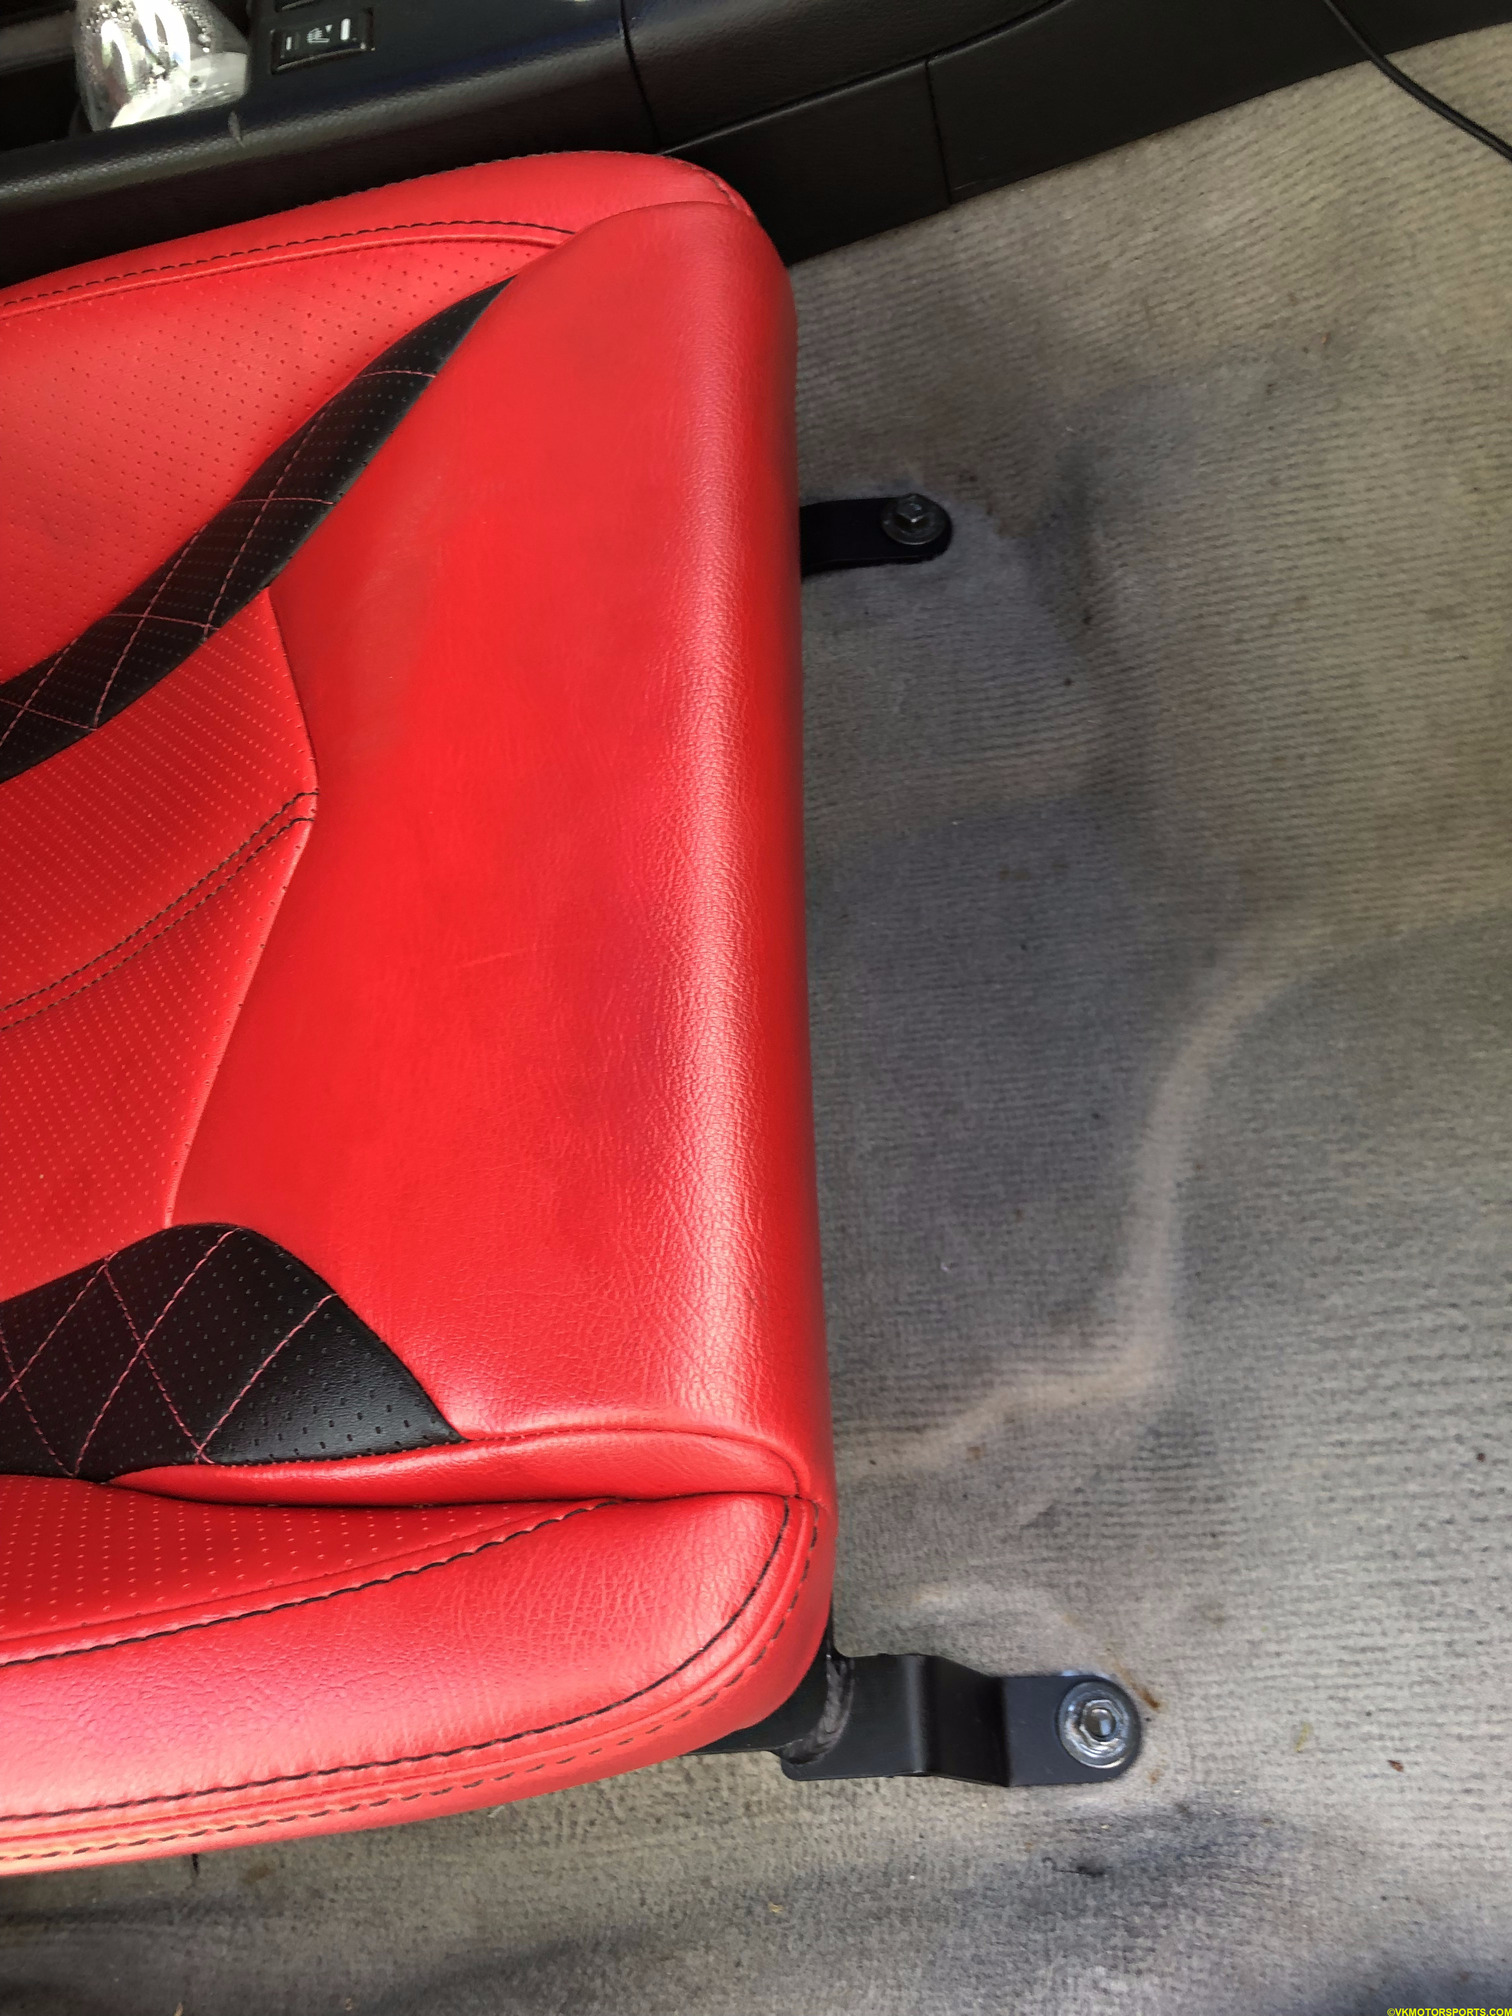 Figure 10a. Seat bracket bolted in the front
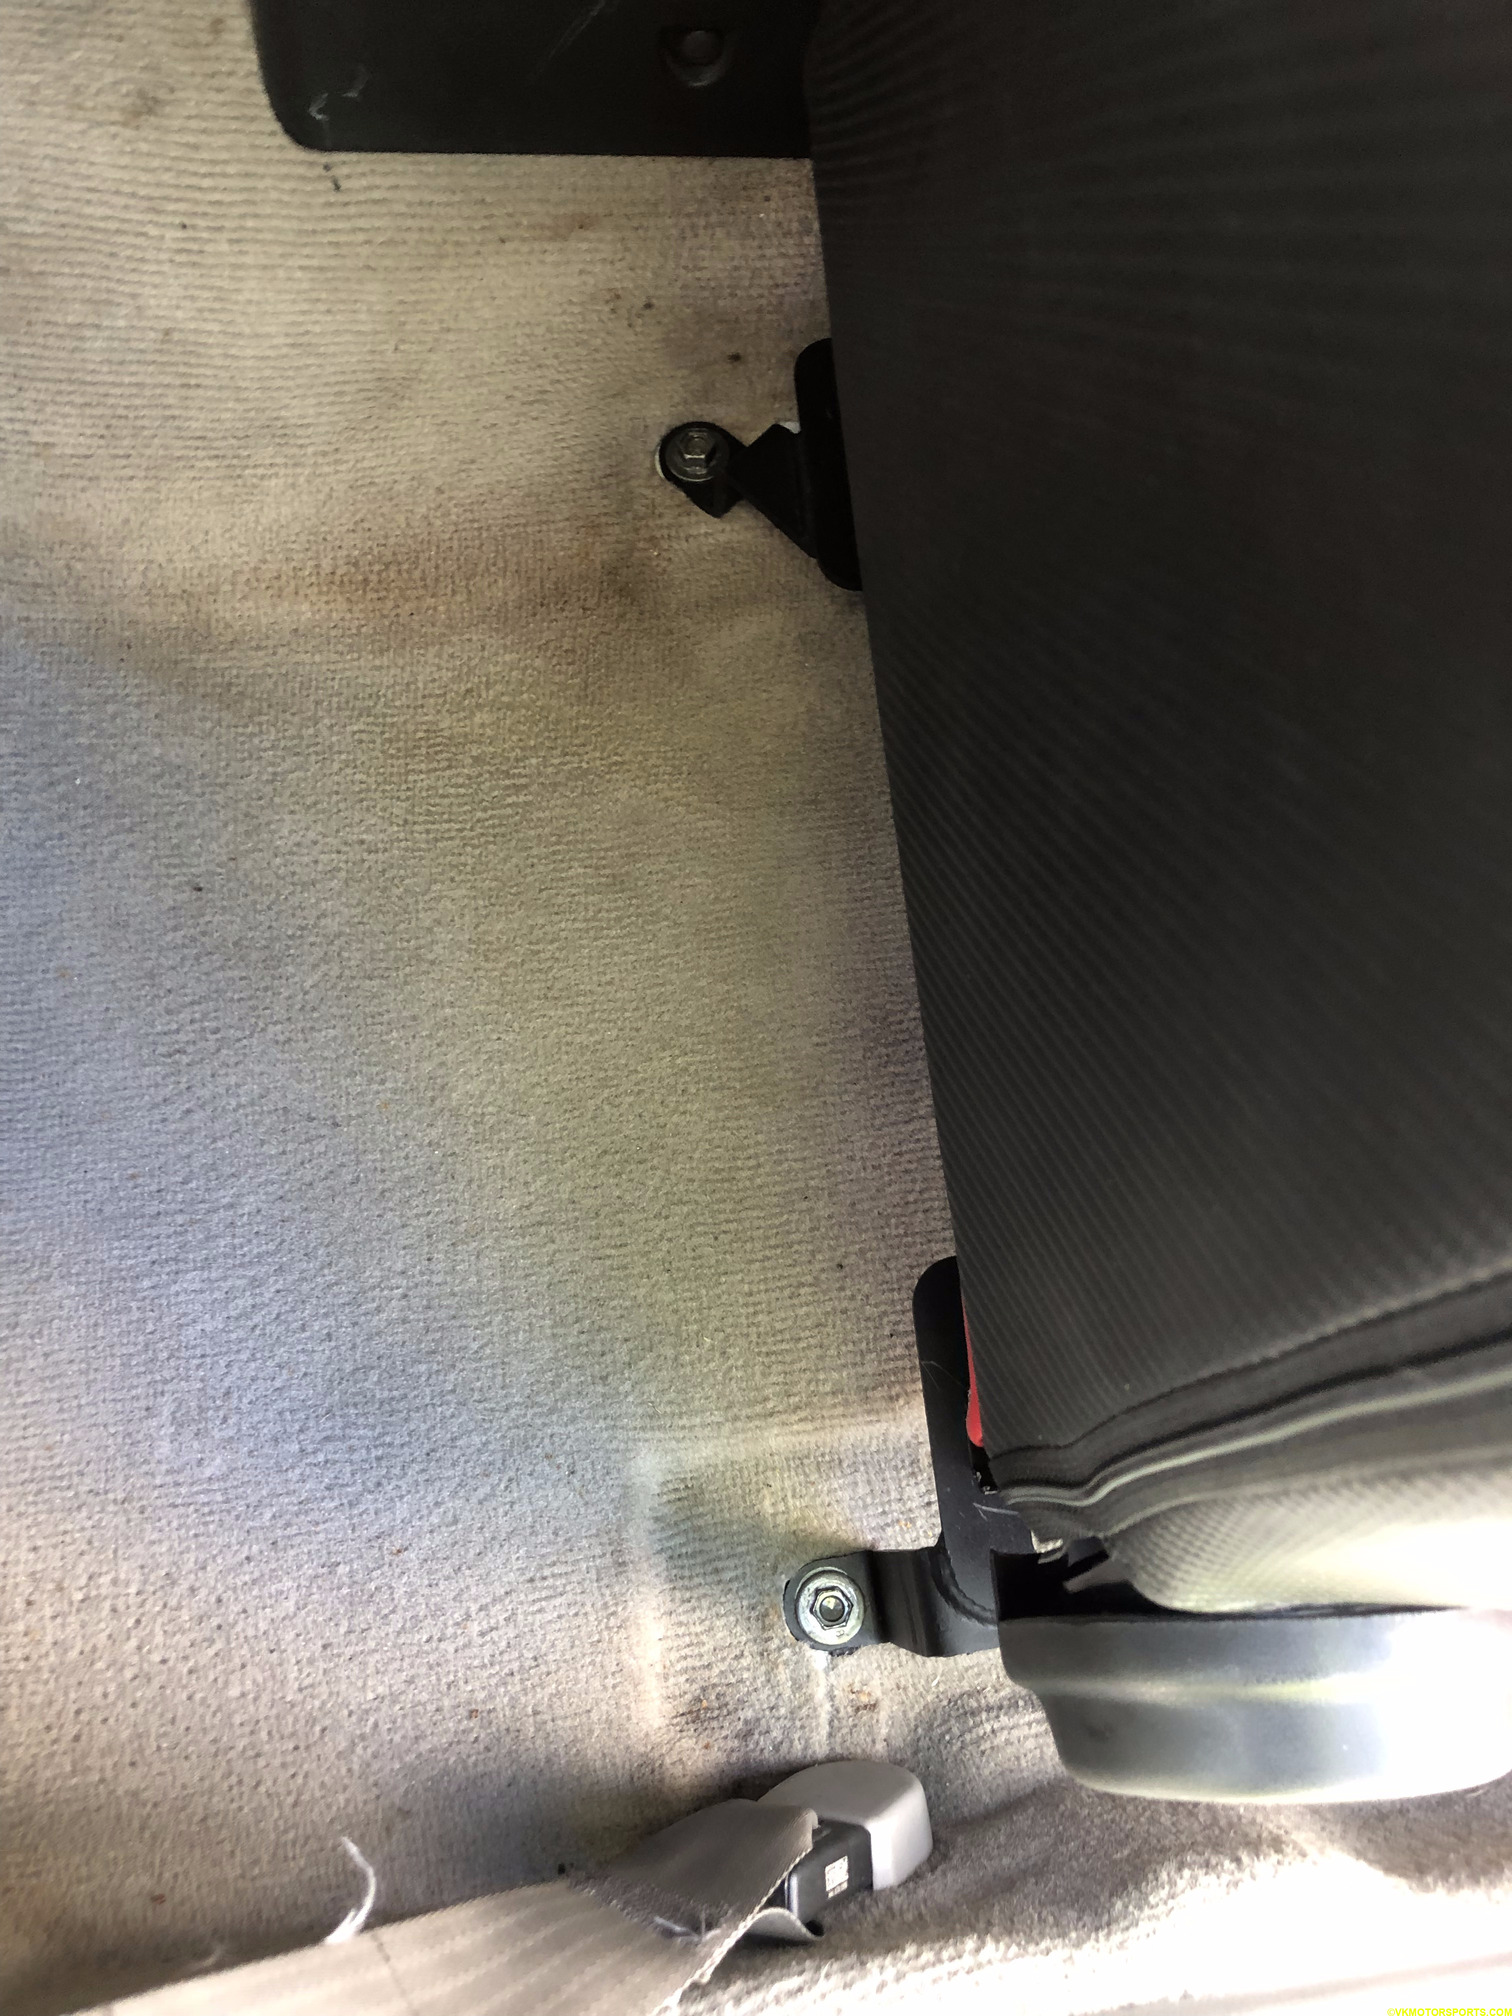 Figure 10b. Seat bracket bolted in the rear
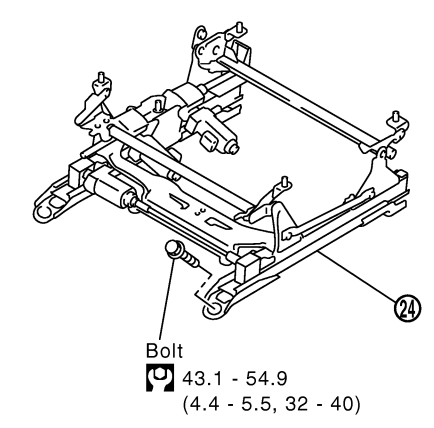
Figure 10c. Seat bracket torque specifications from the service manual
Step 11: Connect the seat belt buckle connector (as seen in Figure 9e) to the small white connector as marked by a circle in Figure 11a. It will just click and fit perfectly. Now test the stock seat belt on the seat by attaching it to the buckle and turning on the ignition to see if the car dash shows a light for no seatbelt (Figure 11b for illustration) and check the fit, and your comfort.
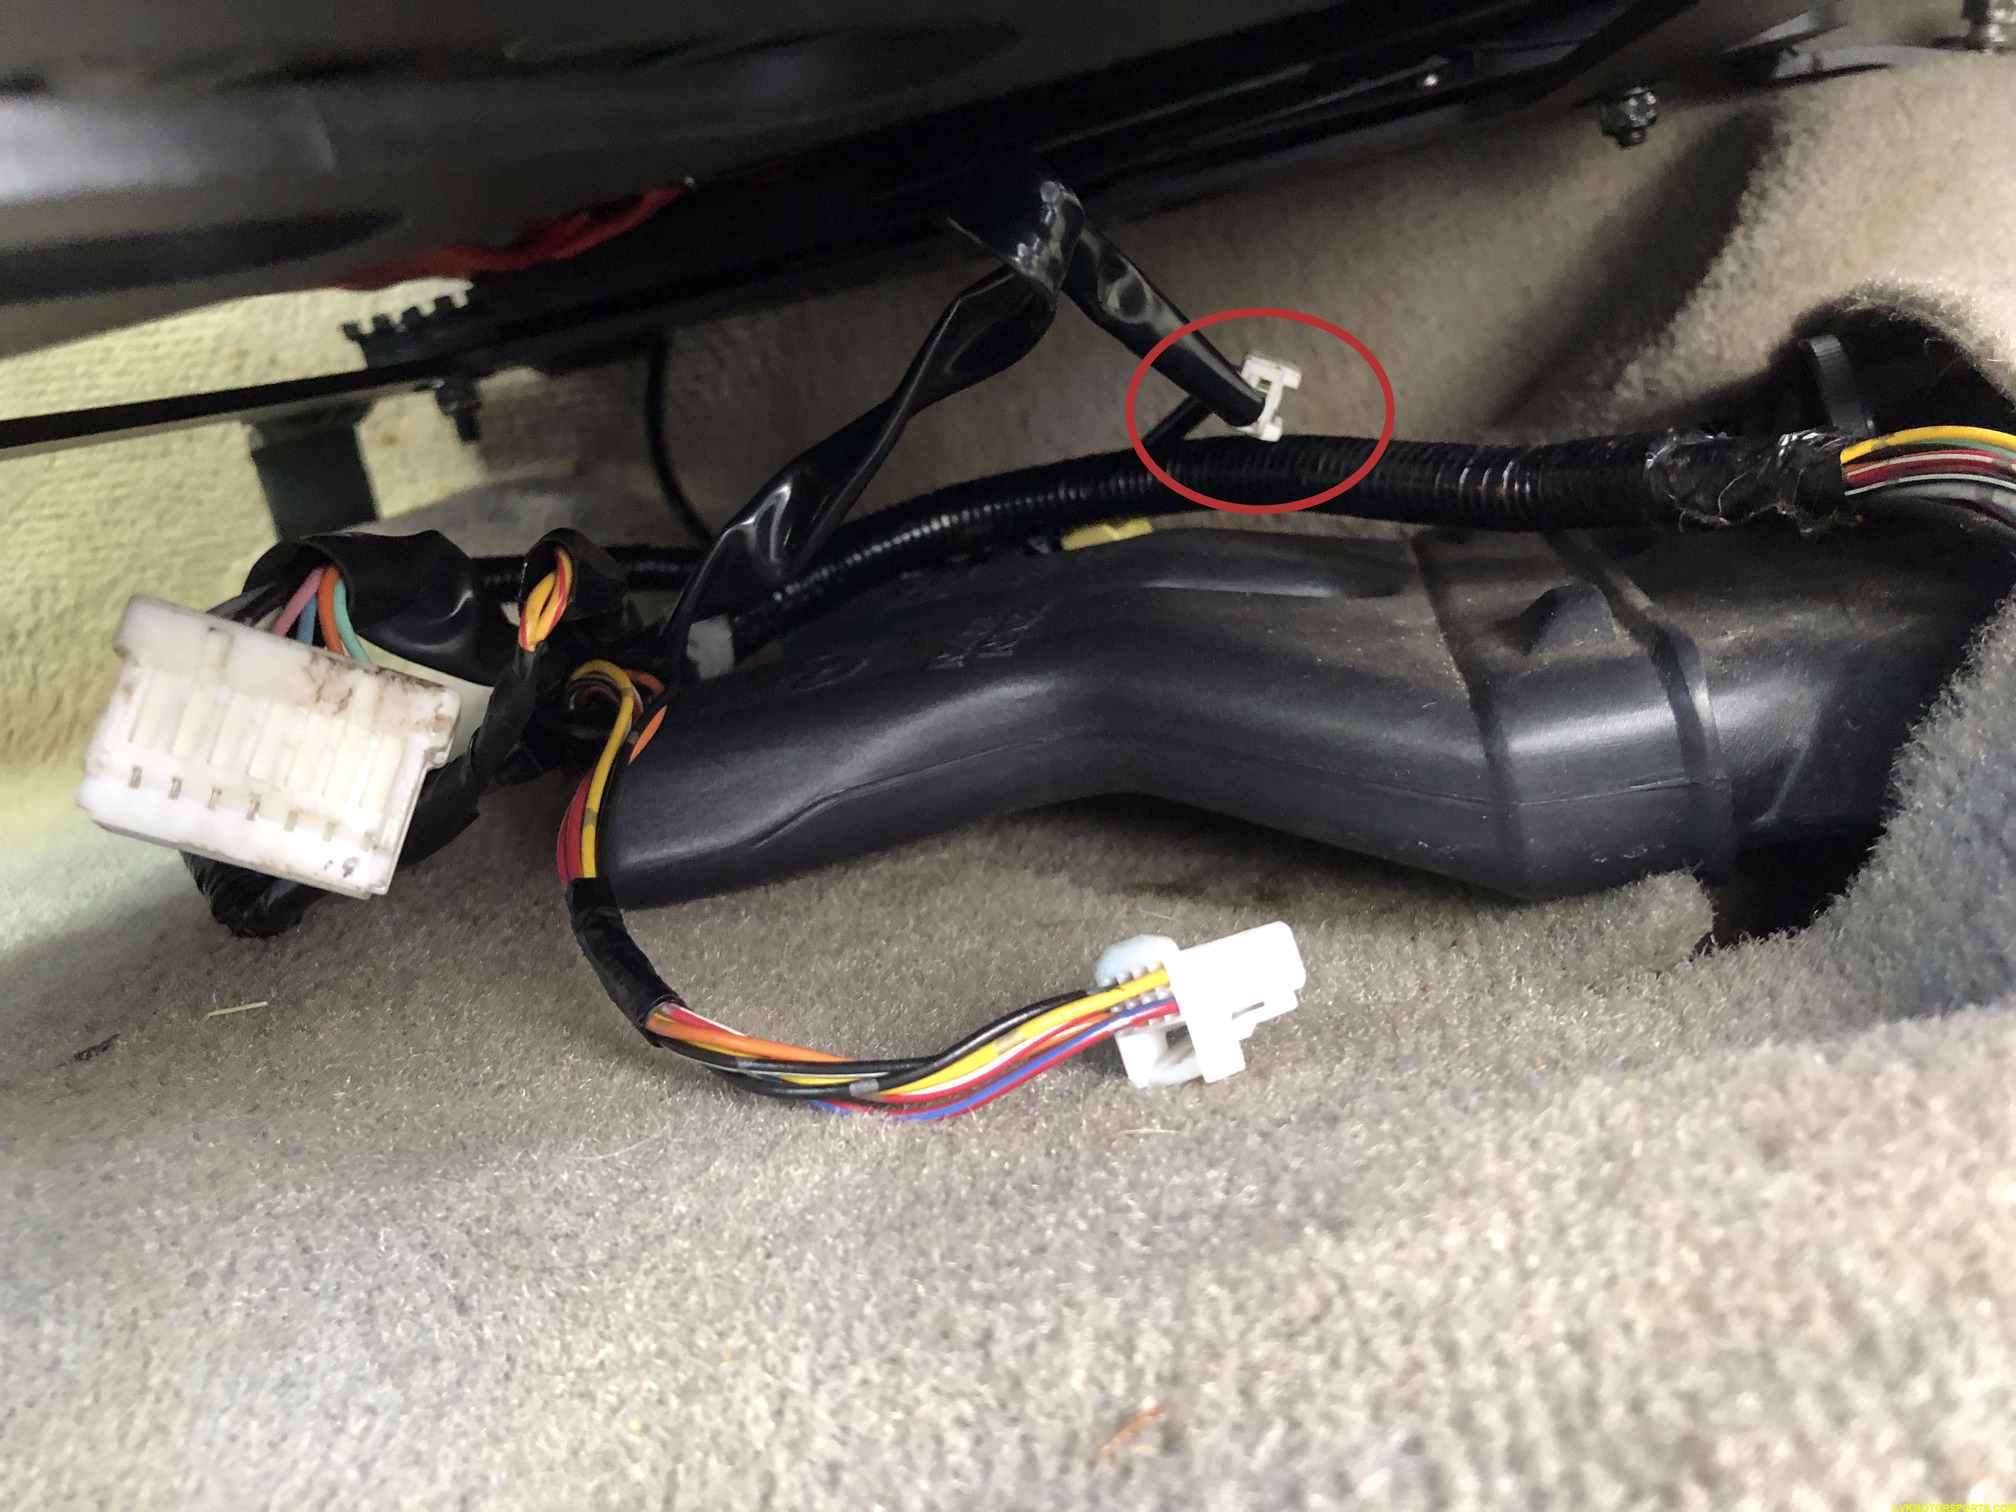 Figure 11a. Connect the seat belt buckle to the small white connector marked by the red circle
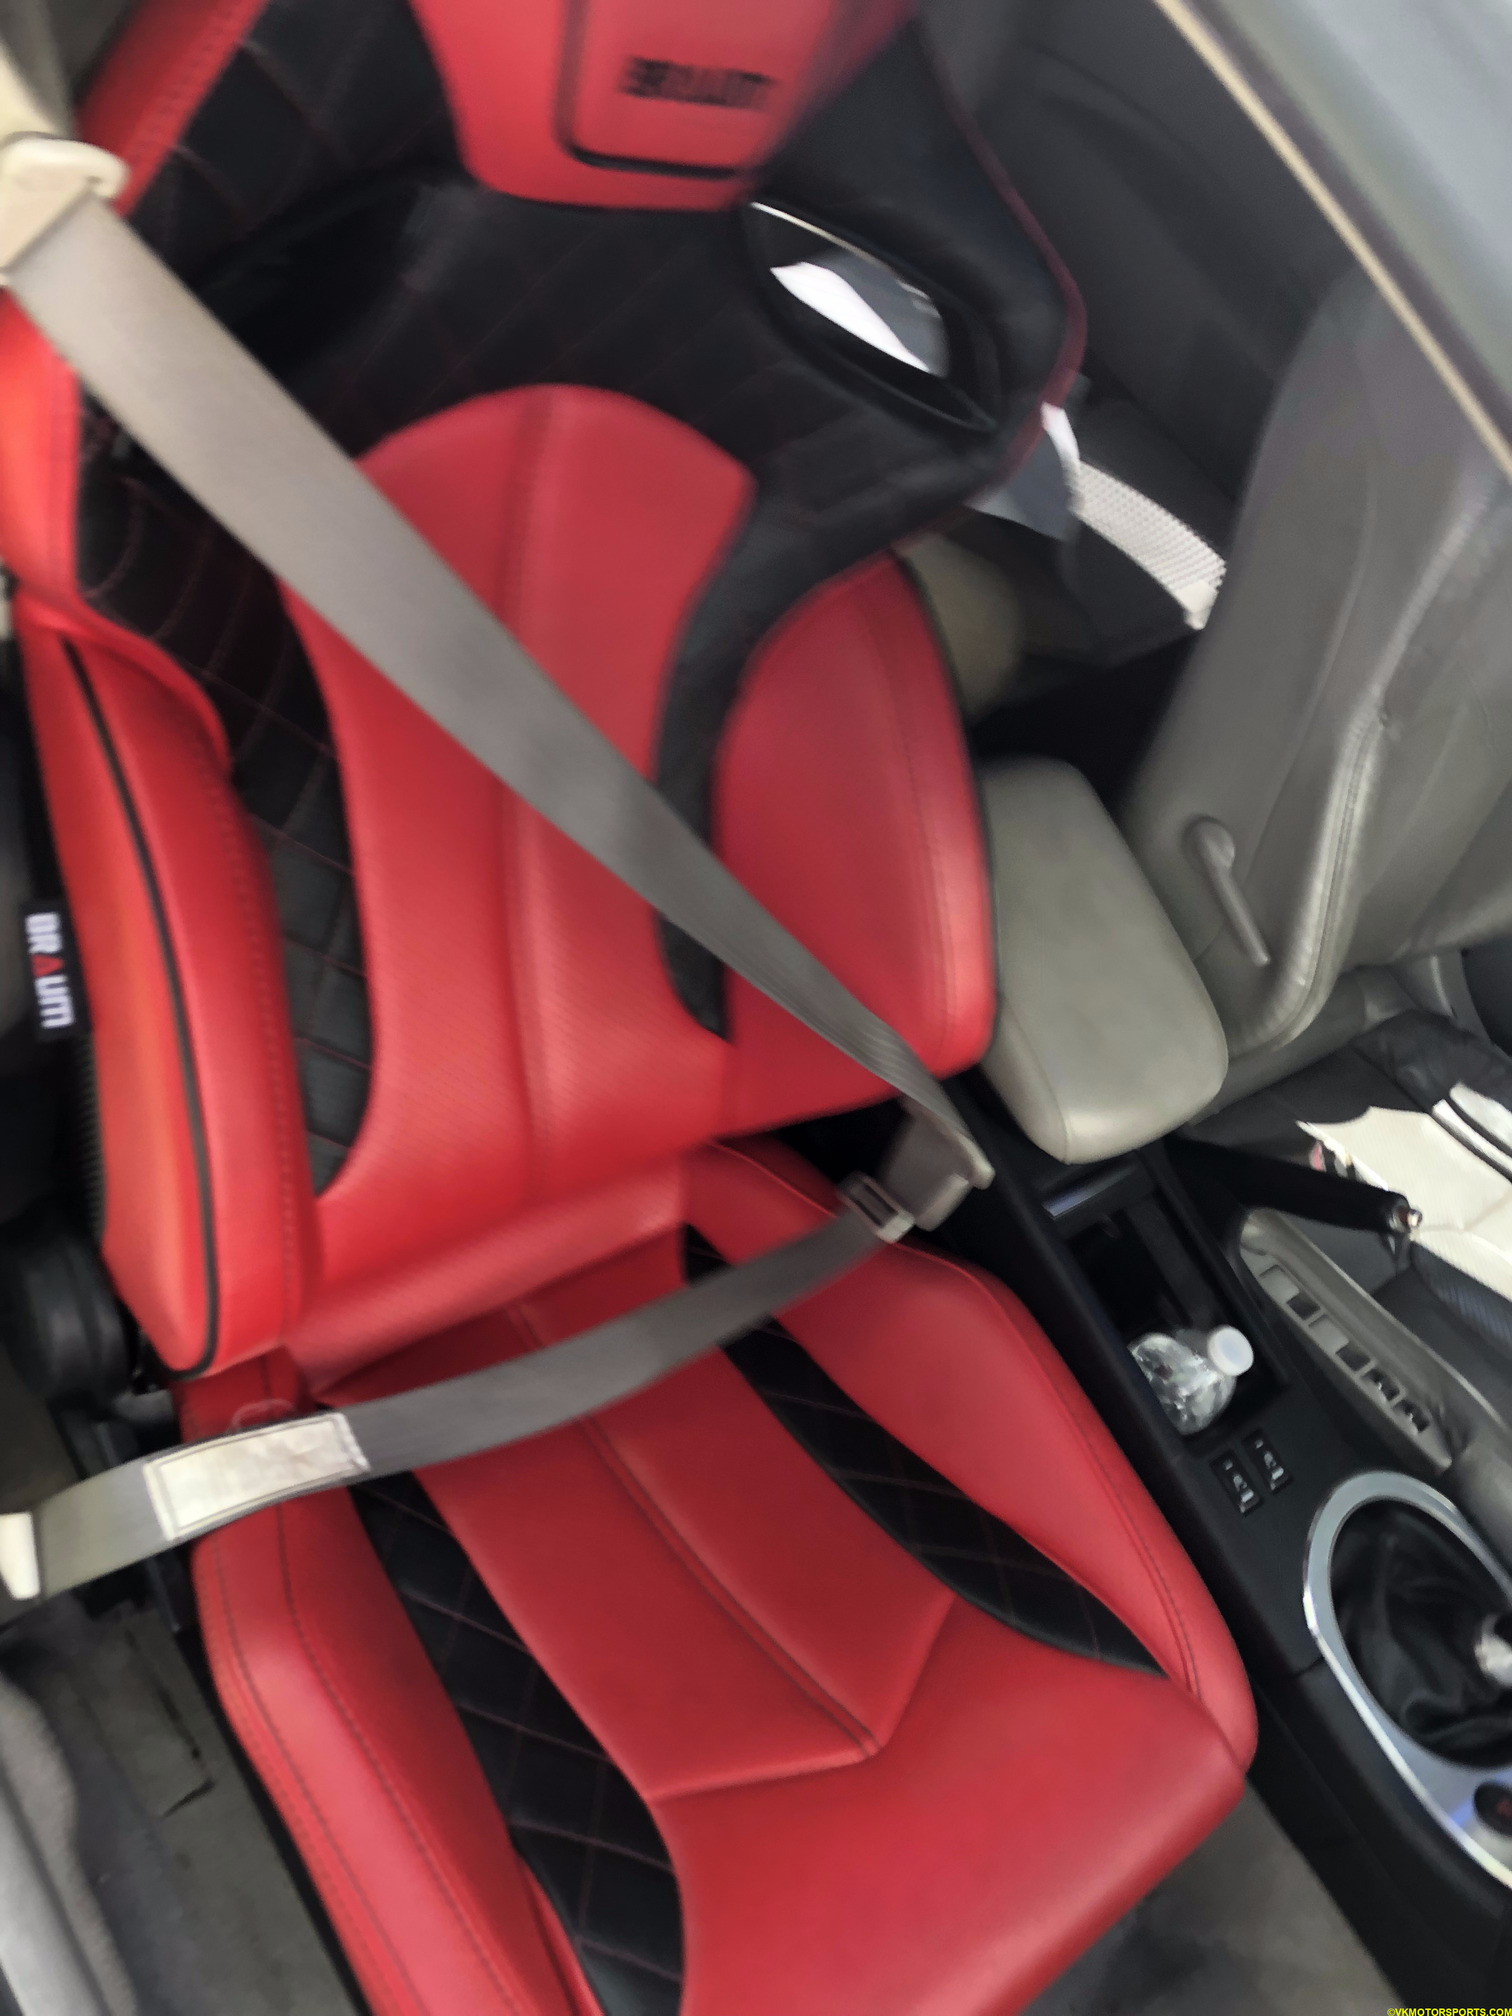 Figure 11b. Check the seat belt fitting
Repeat the same for the driver’s seat as well and now as seen in Figure 12, I have replace the stock seats with beautiful red Braum Racing seats. The seats are very comfortable.
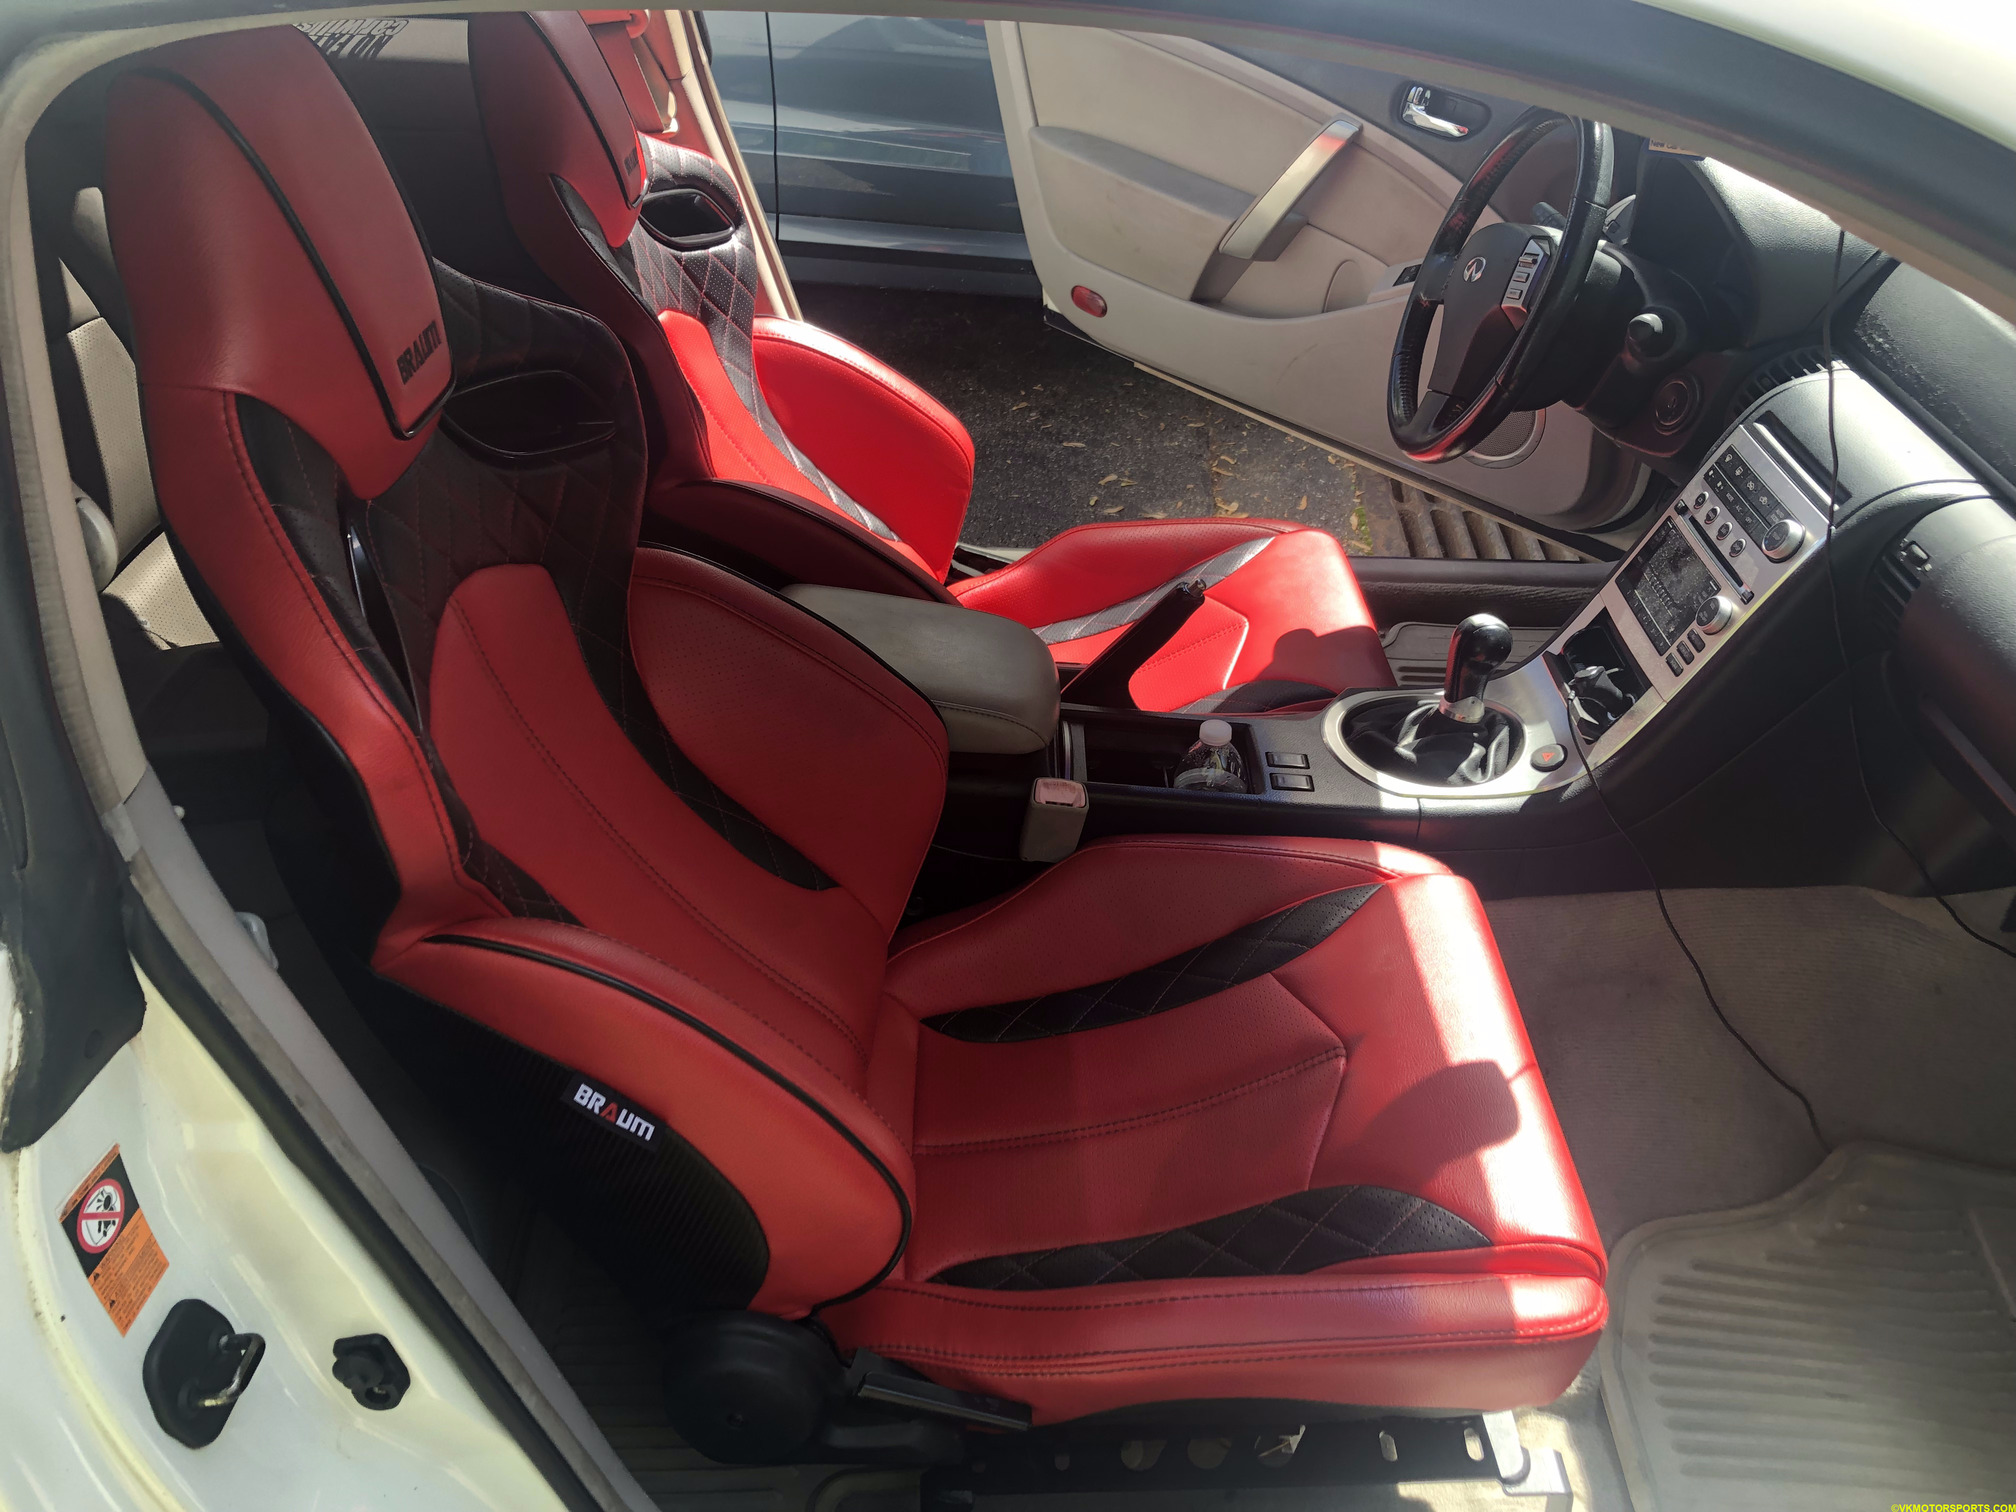 Figure 12. View of Braum Racing seats installed in a G35 coupe