The Miata’s shifter was getting worse as time progressed, so I decided to perform a shifter rebuild. I purchased the 5-speed transmission shifter rebuild kit from Flyin’
Miata, which you can also get from 5X Racing. In addition to the shifter, I also wanted to replace the center console boot which is the exterior
boot, part number NC-10-64-331A which I ended up purchasing from Tasca Parts.
The process for the shifter rebuild is outlined in this post. This post has several pictures, so may take some time to load.
This process consists of several steps that must be performed in the order that I have enumerated here to get it done right the first time.
Step 1: Make sure you have purchased the full shifter rebuild kit, the large replacement boot, the external shift boot, 75W-90 transmission oil for the turret (if you have a 5-speed you need this). The bottom white polyurethane shifter bushing can also be replaced with a more expensive bronze one from 5XRacing, but since we want to keep the Miata stock we use the standard one.
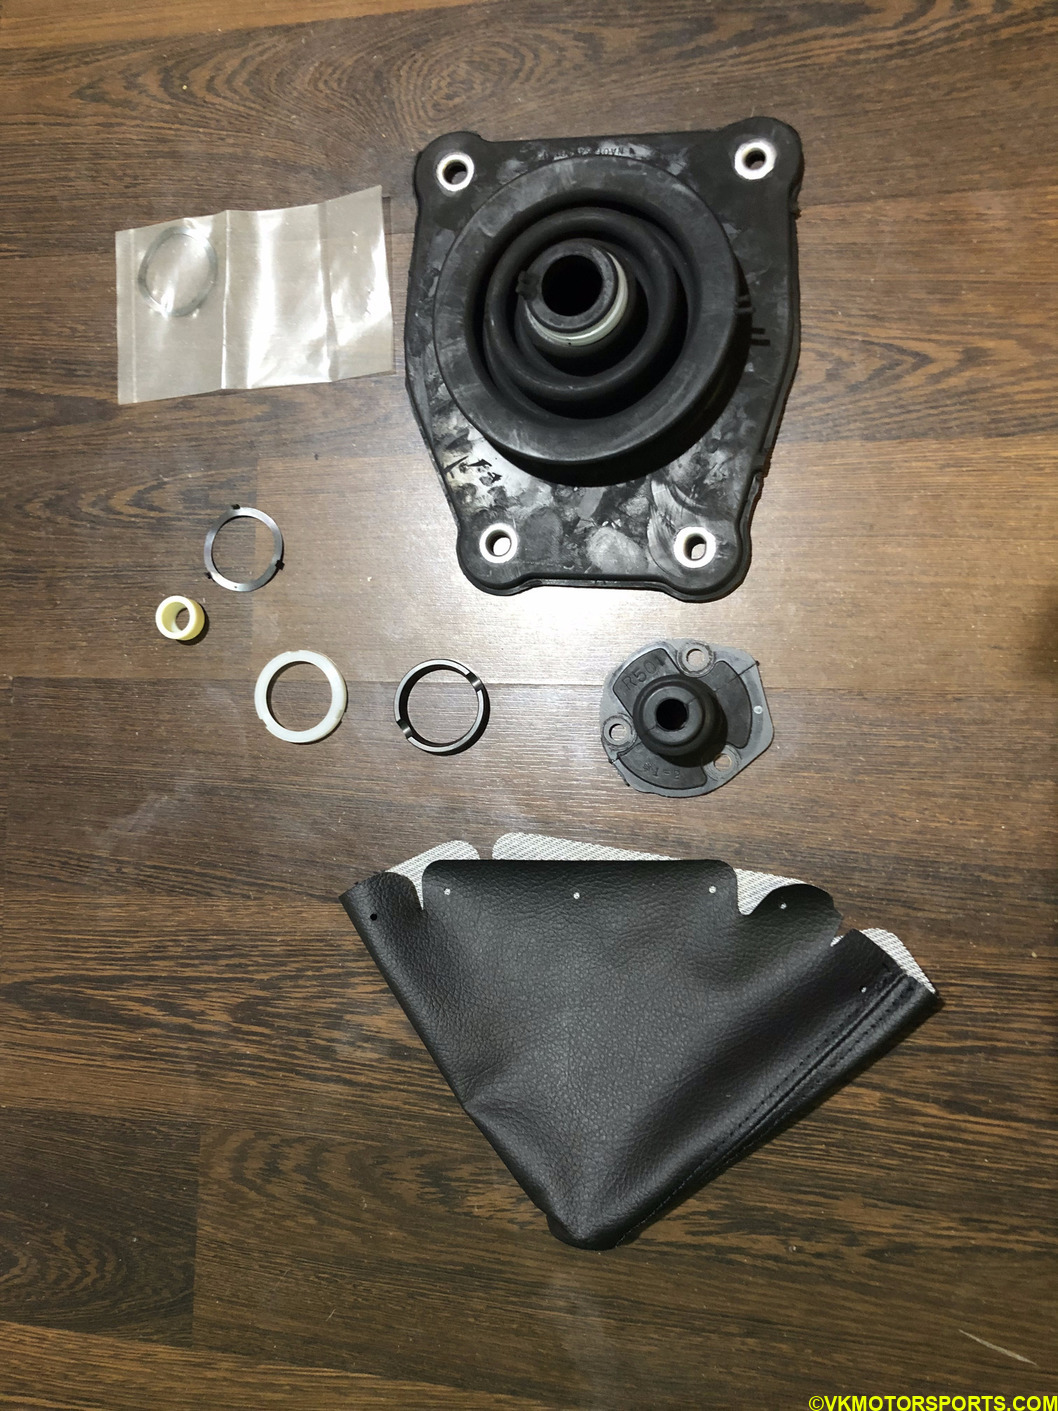 Figure 1a. Parts for the shifter rebuild
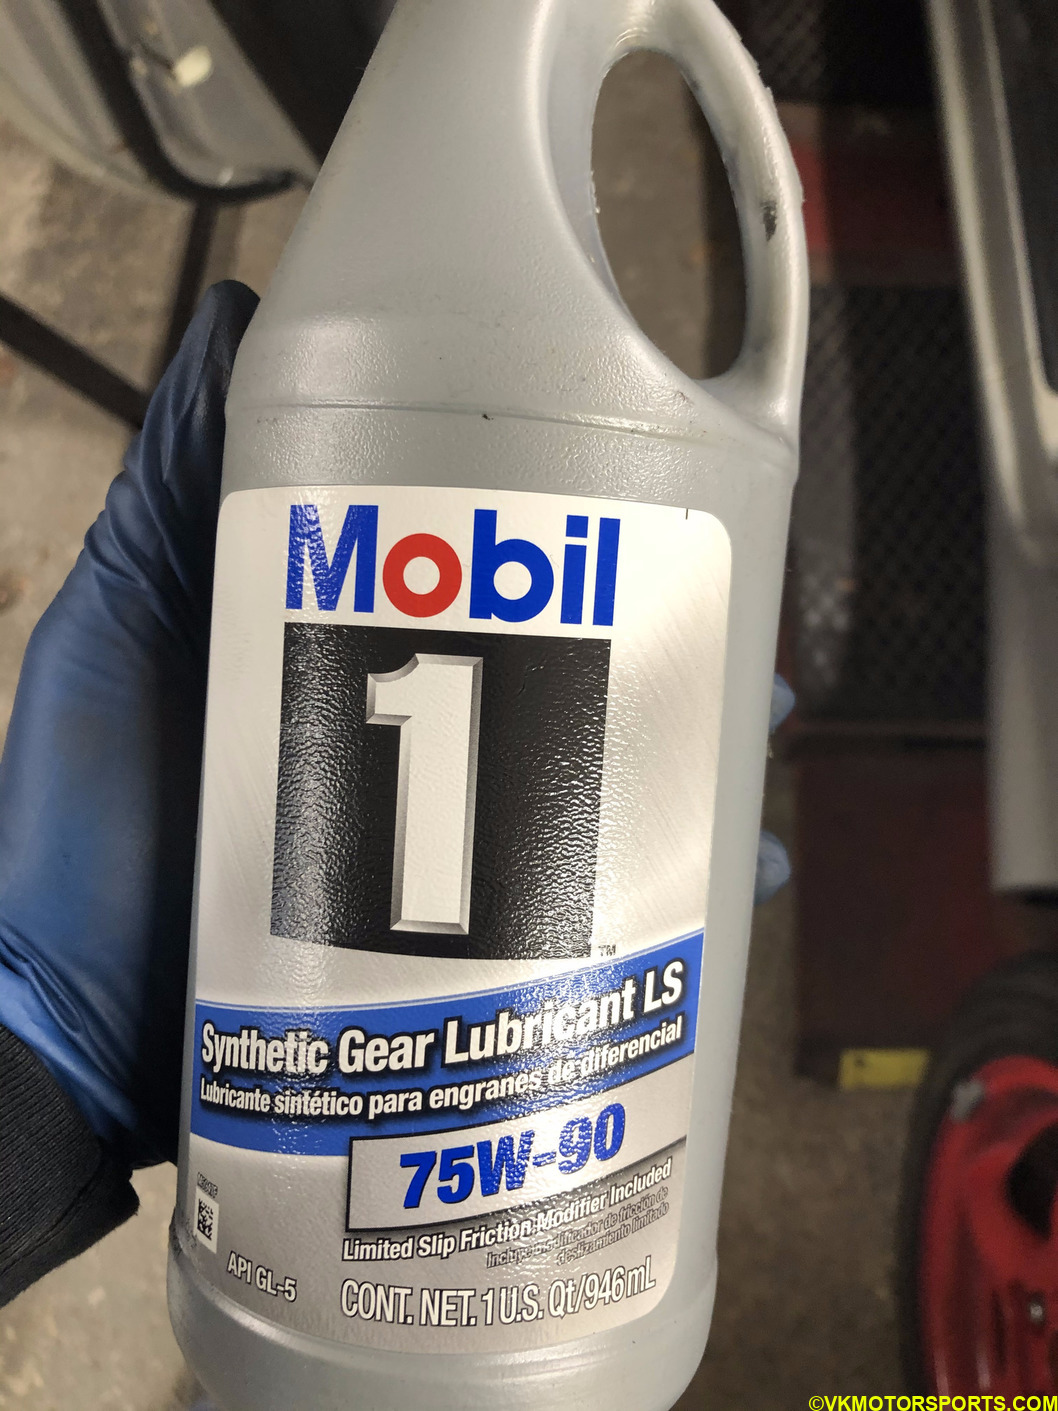 Figure 1b. 75W-90 transmission oil for the shifter turret
Step 2: Start with removing the center console first. There are a total of 5 screws to be removed, 2 inside the storage compartment (Figure 2a), 1 inside the ashtray (Figure 2d) and two screws with caps on the front of the console (Figure 2e). Remember to keep the screws safely (Figure 2f) and not lose them. Remove the shift knob (Figure 2b and 2c) as well. You will need to remove the electrical connector for the window switch (Figure 2g).
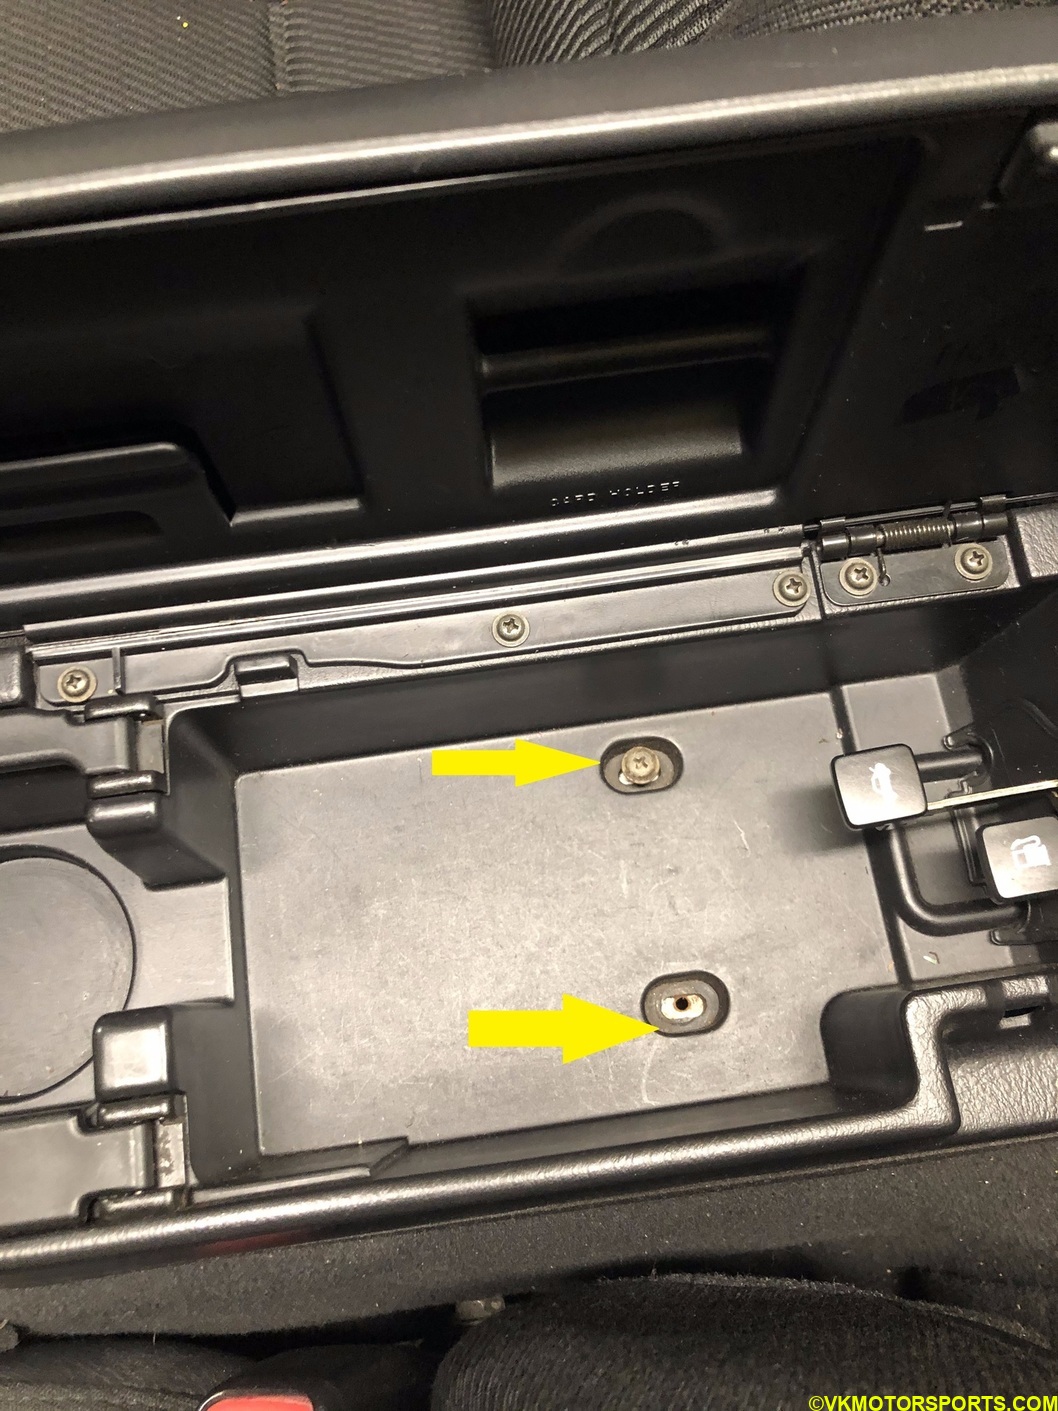 Figure 2a. Two screws in the center console storage compartment
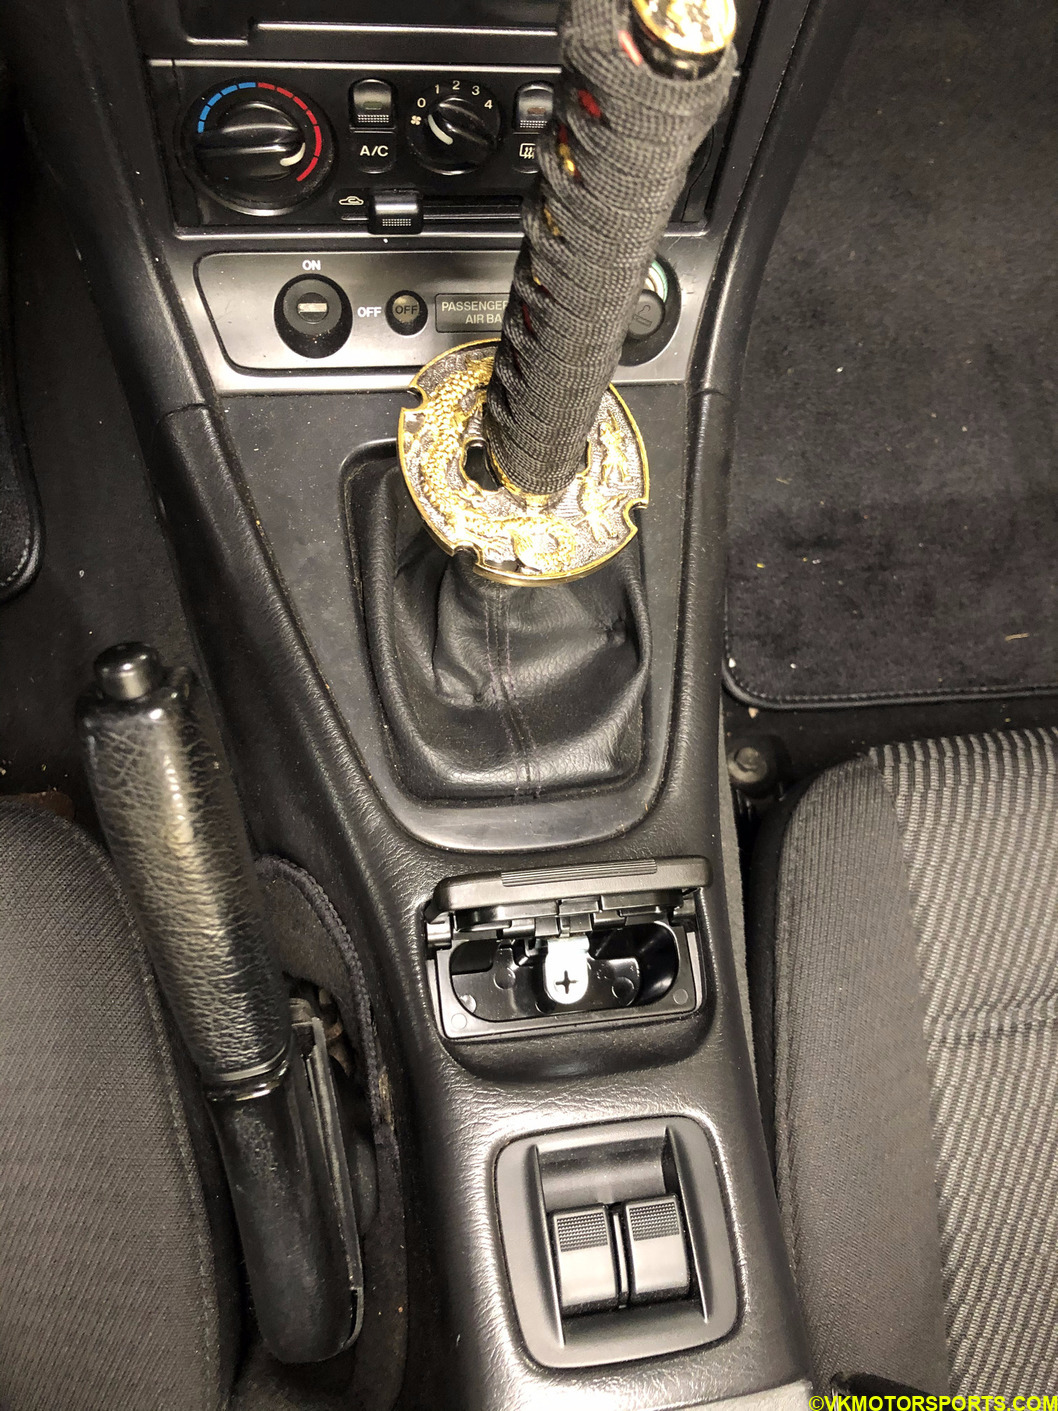 Figure 2b. You will need to remove the shift knob and the ashtray
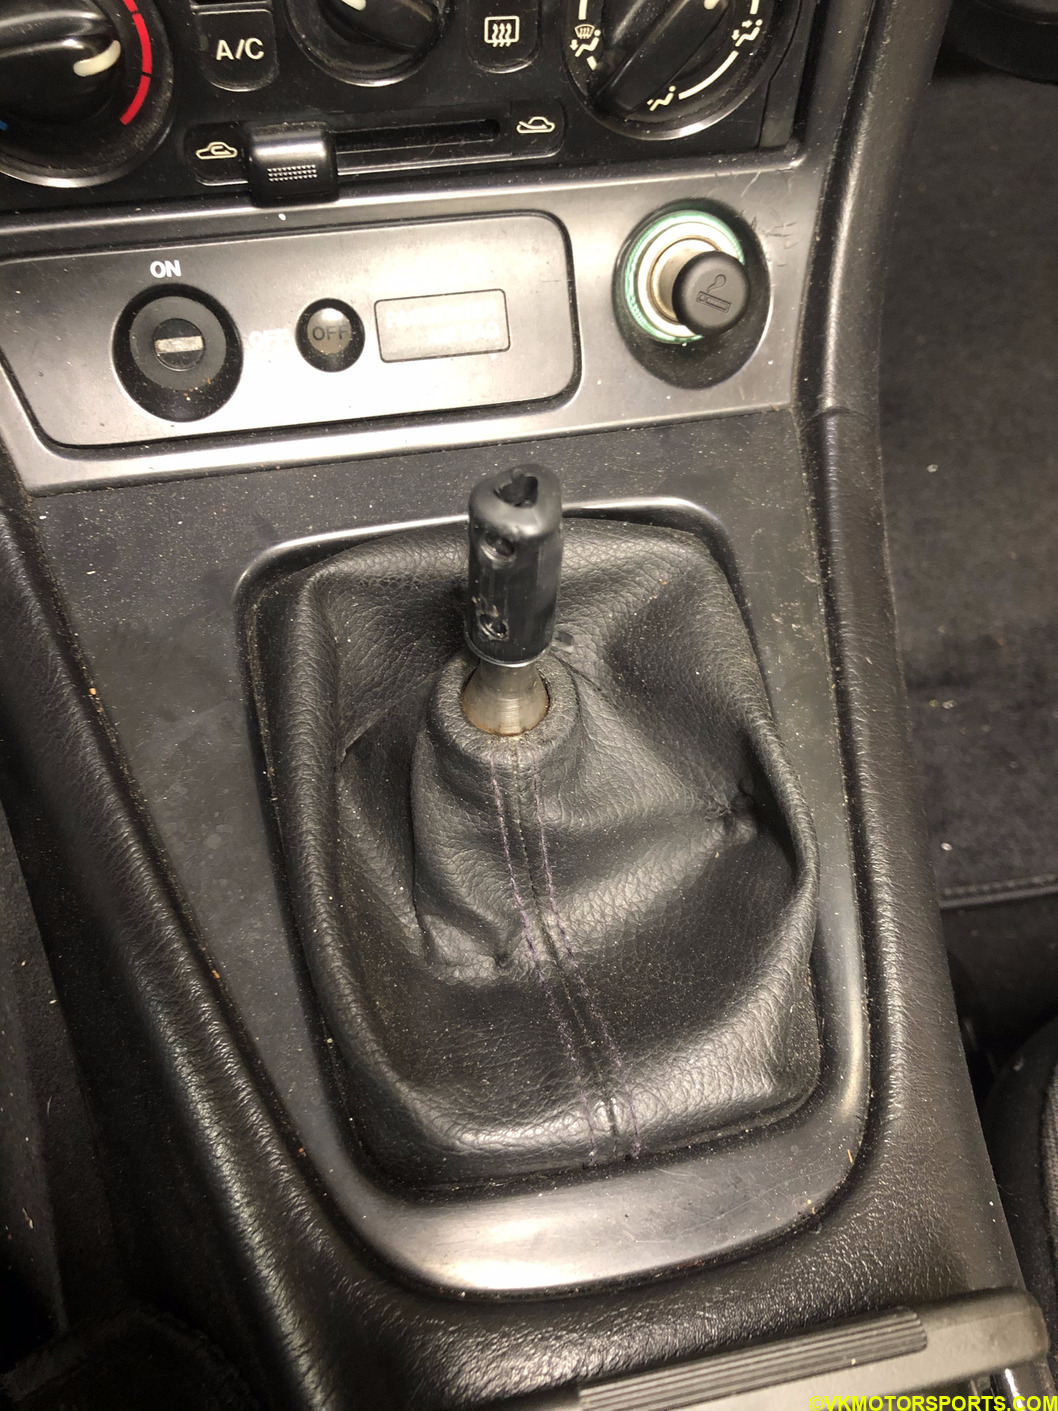 Figure 2c. Shift knob removed
You need to pull the ashtray out to find the ashtray screw.
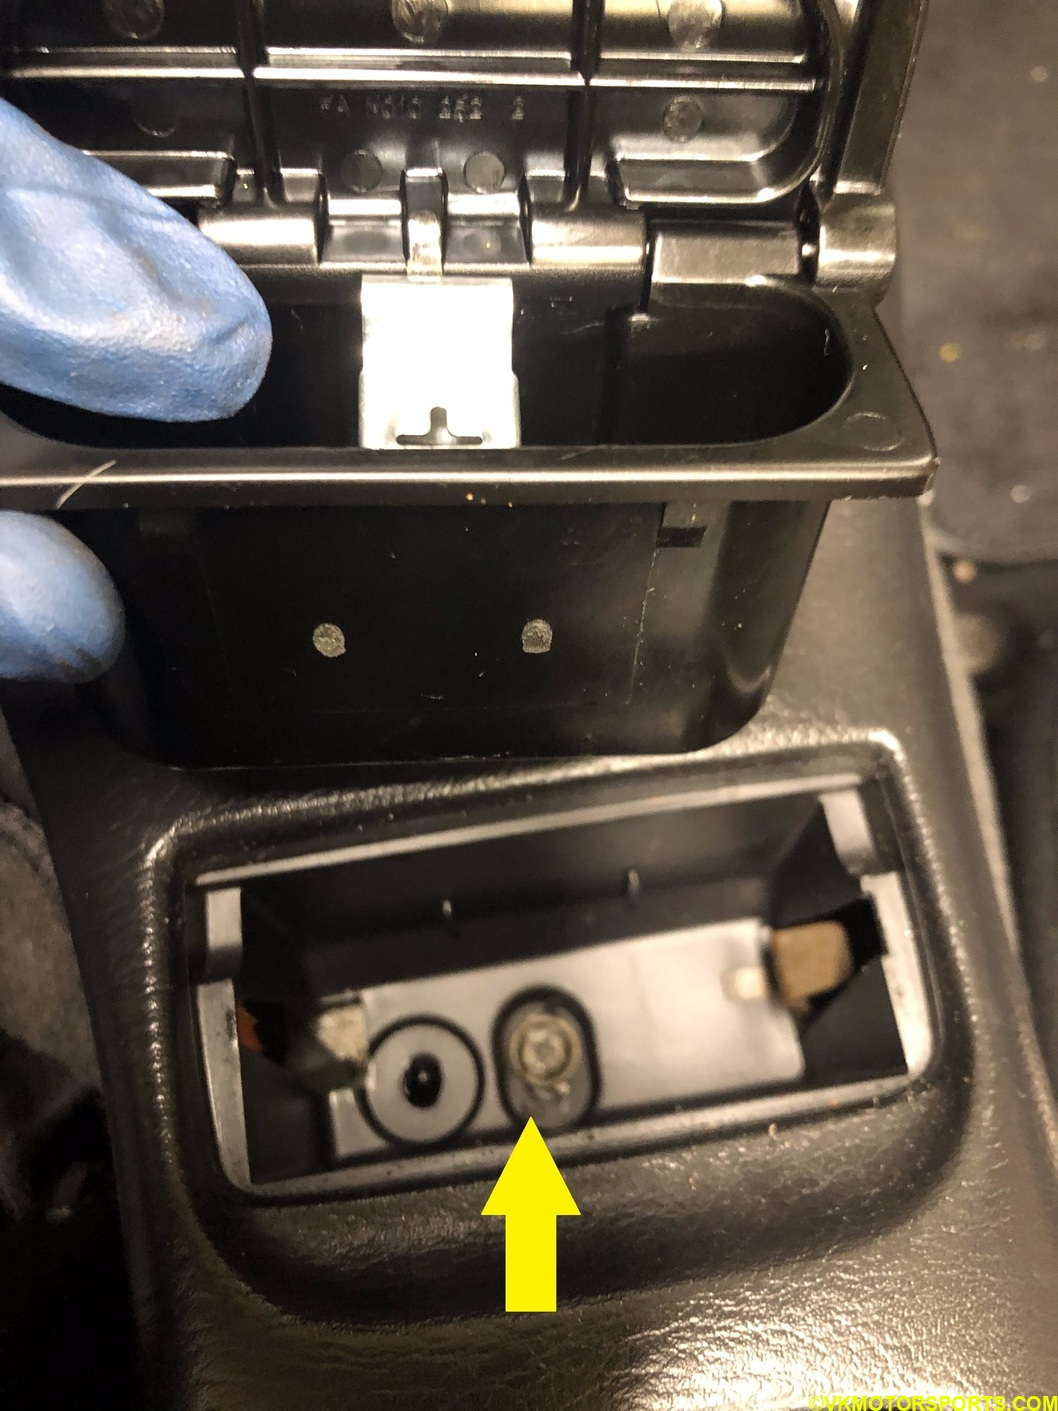 Figure 2d. One screw in the ashtray
There is one screw on the driver side in the front of the center console, and one on the passenger side. You have to use a flat screwdriver to flip the cap open to get access to the screw head.
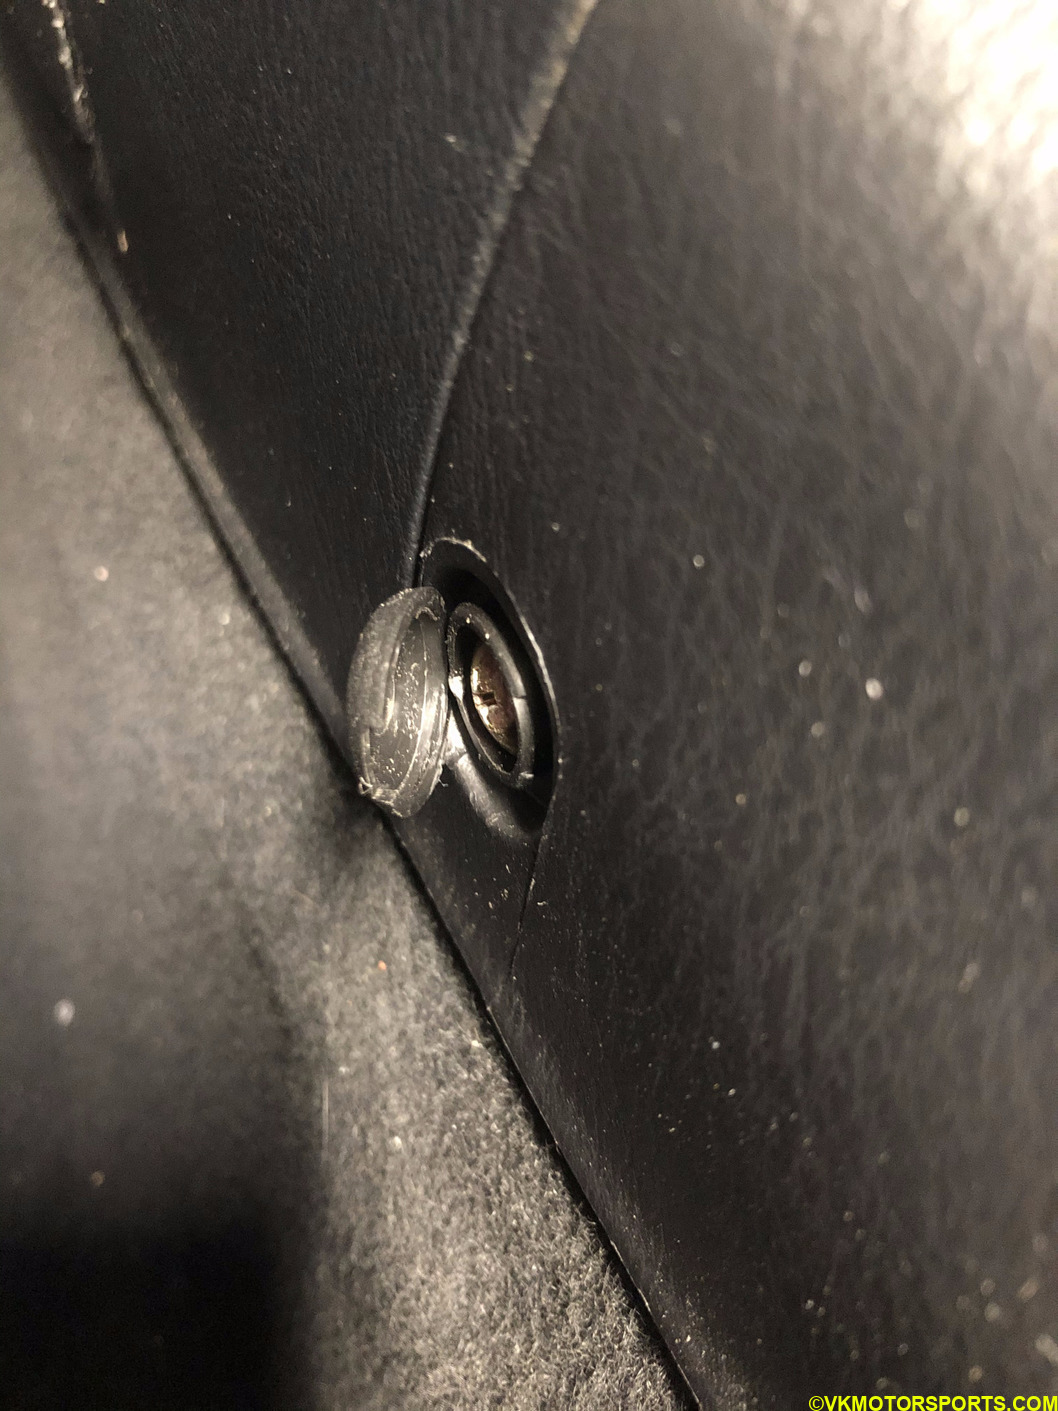 Figure 2e. Front screw with cap on driver’s side
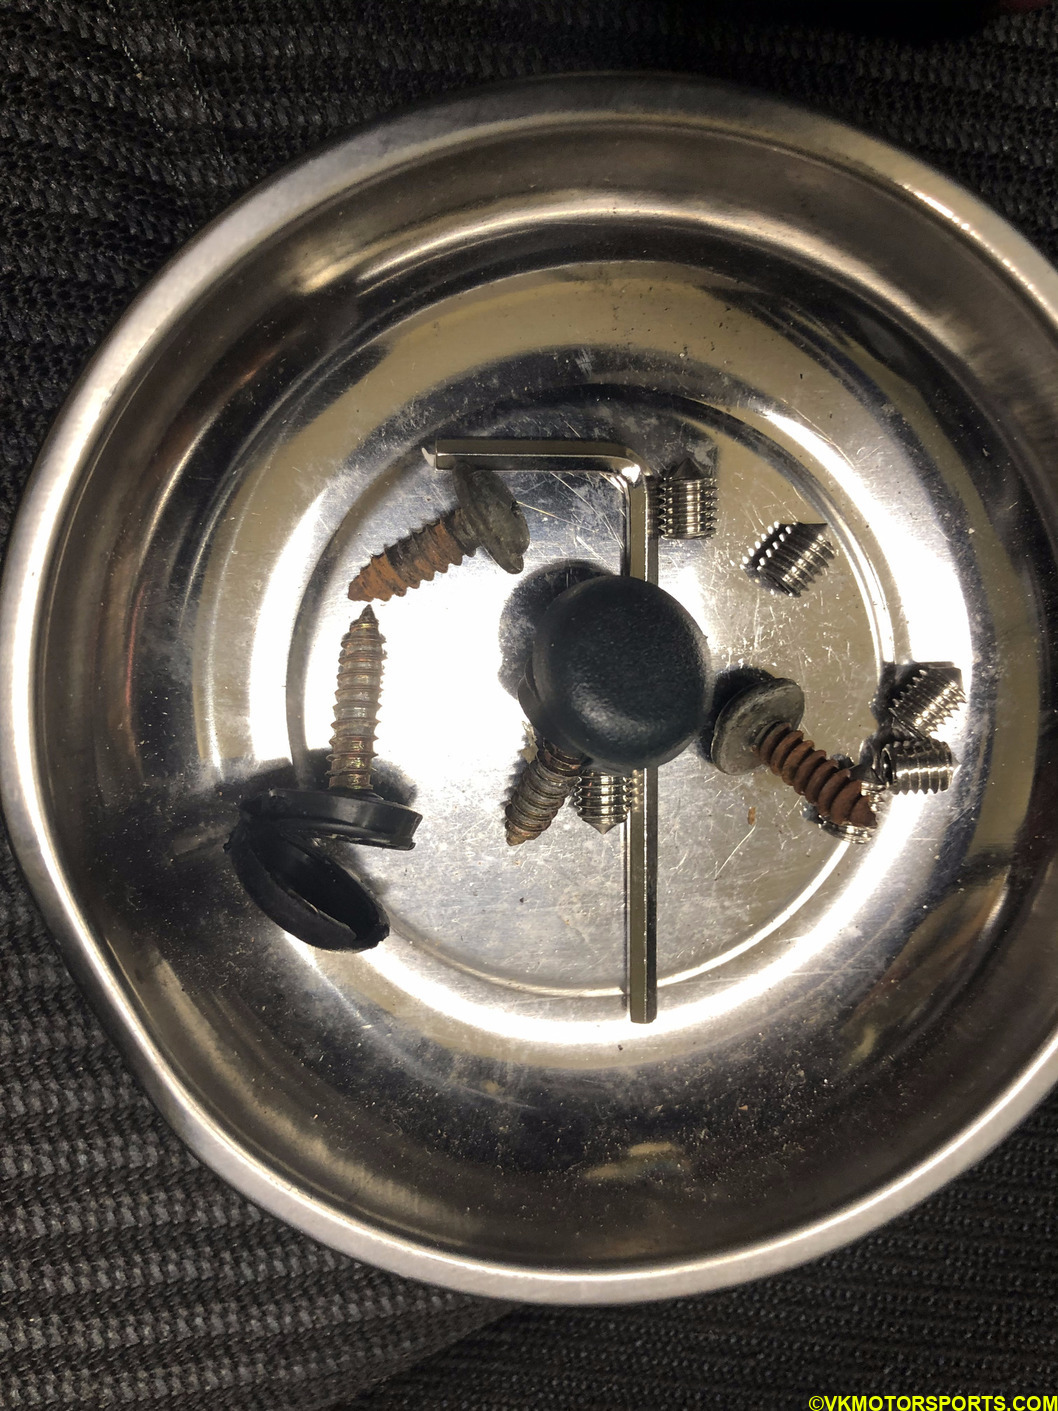 Figure 2f. Keep screws safely
Carefully remove the window switch connector. You can use a flat screw driver to press on the connector tab to disconnect the connector from the switch.
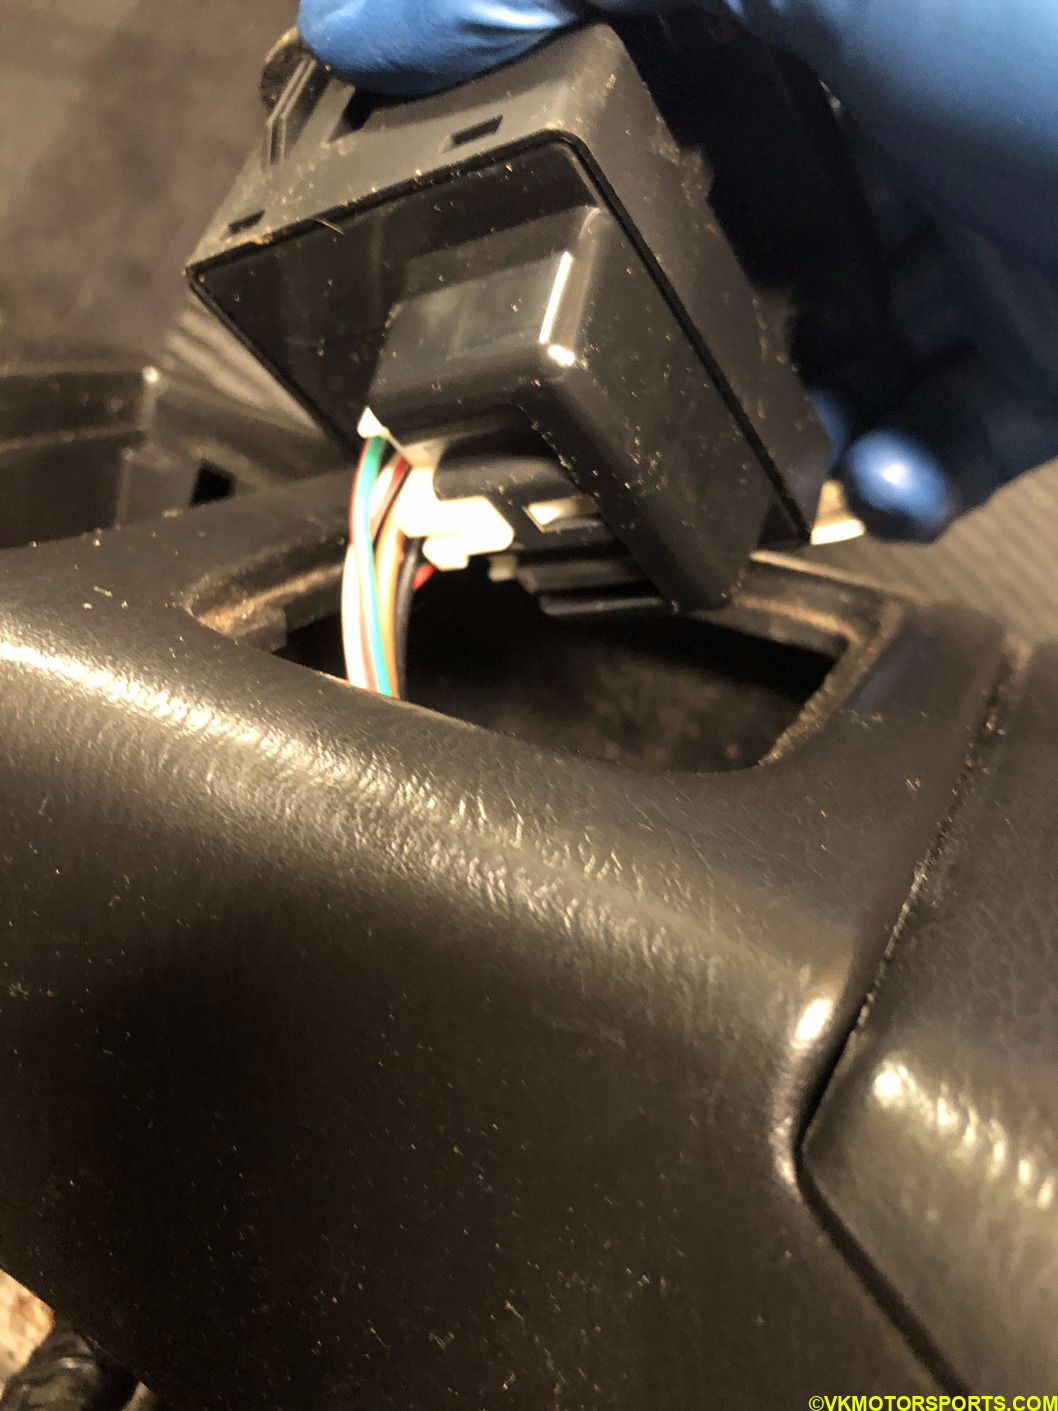 Figure 2g. Remove the window switch connector carefully
Finally, lift the console up and keep it on the side, for the console shift boot replacement we will do in Step 14.
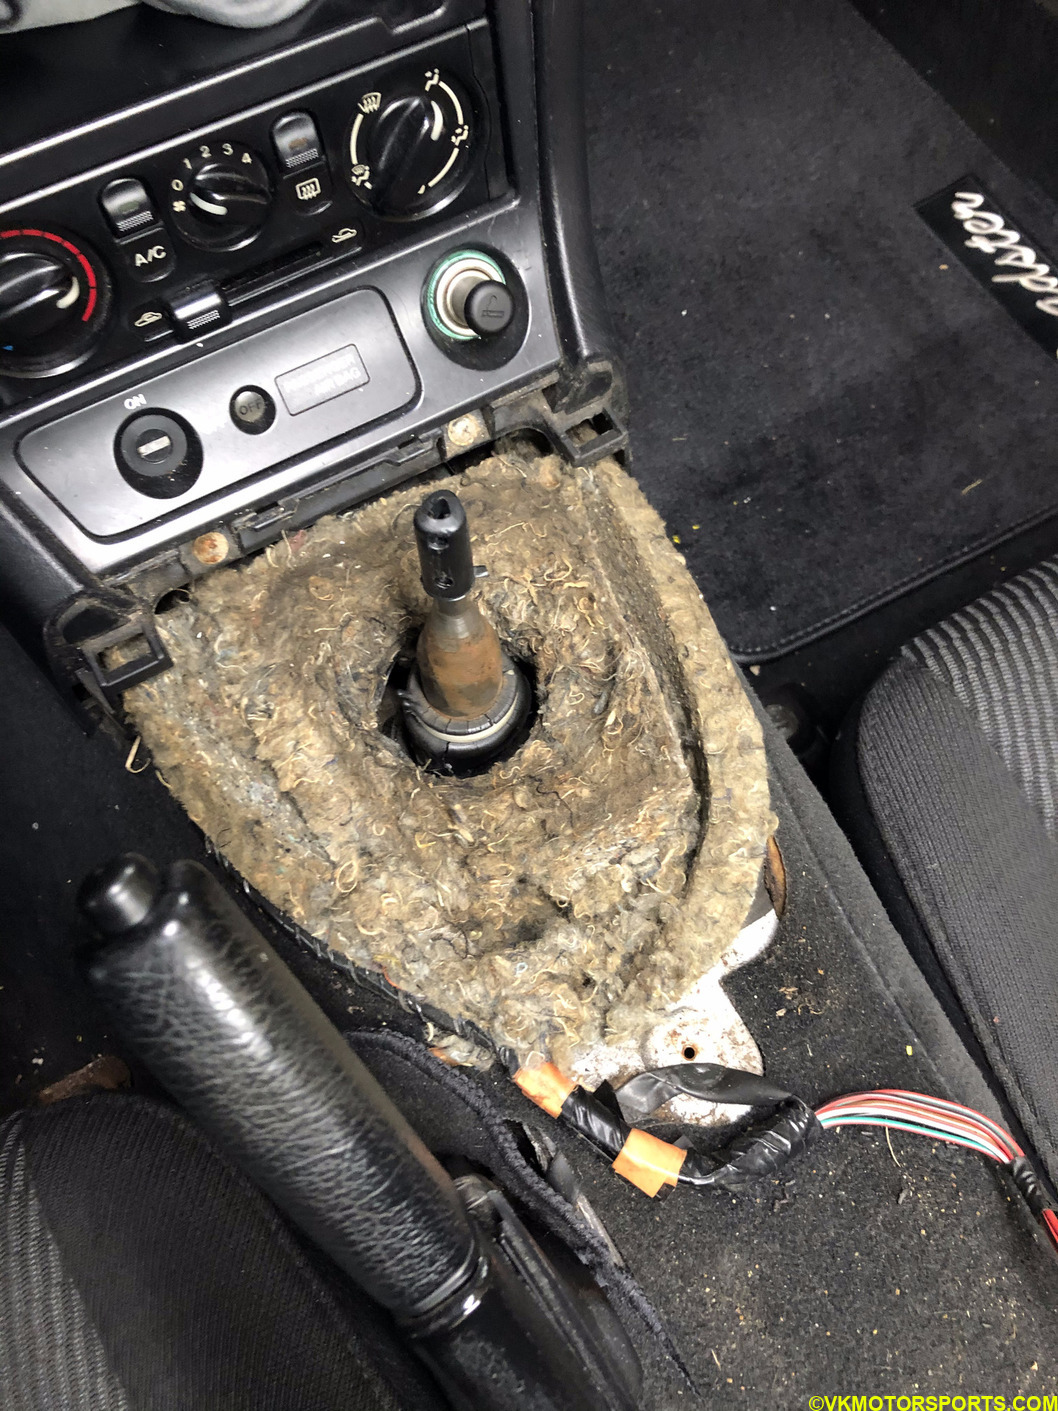 Figure 2h. Center console removed
Step 3: Keep a large sheet of paper or plastic on the passenger seat (Figure 3a) to prevent any dirt or transmission oil from staining your car’s interior.
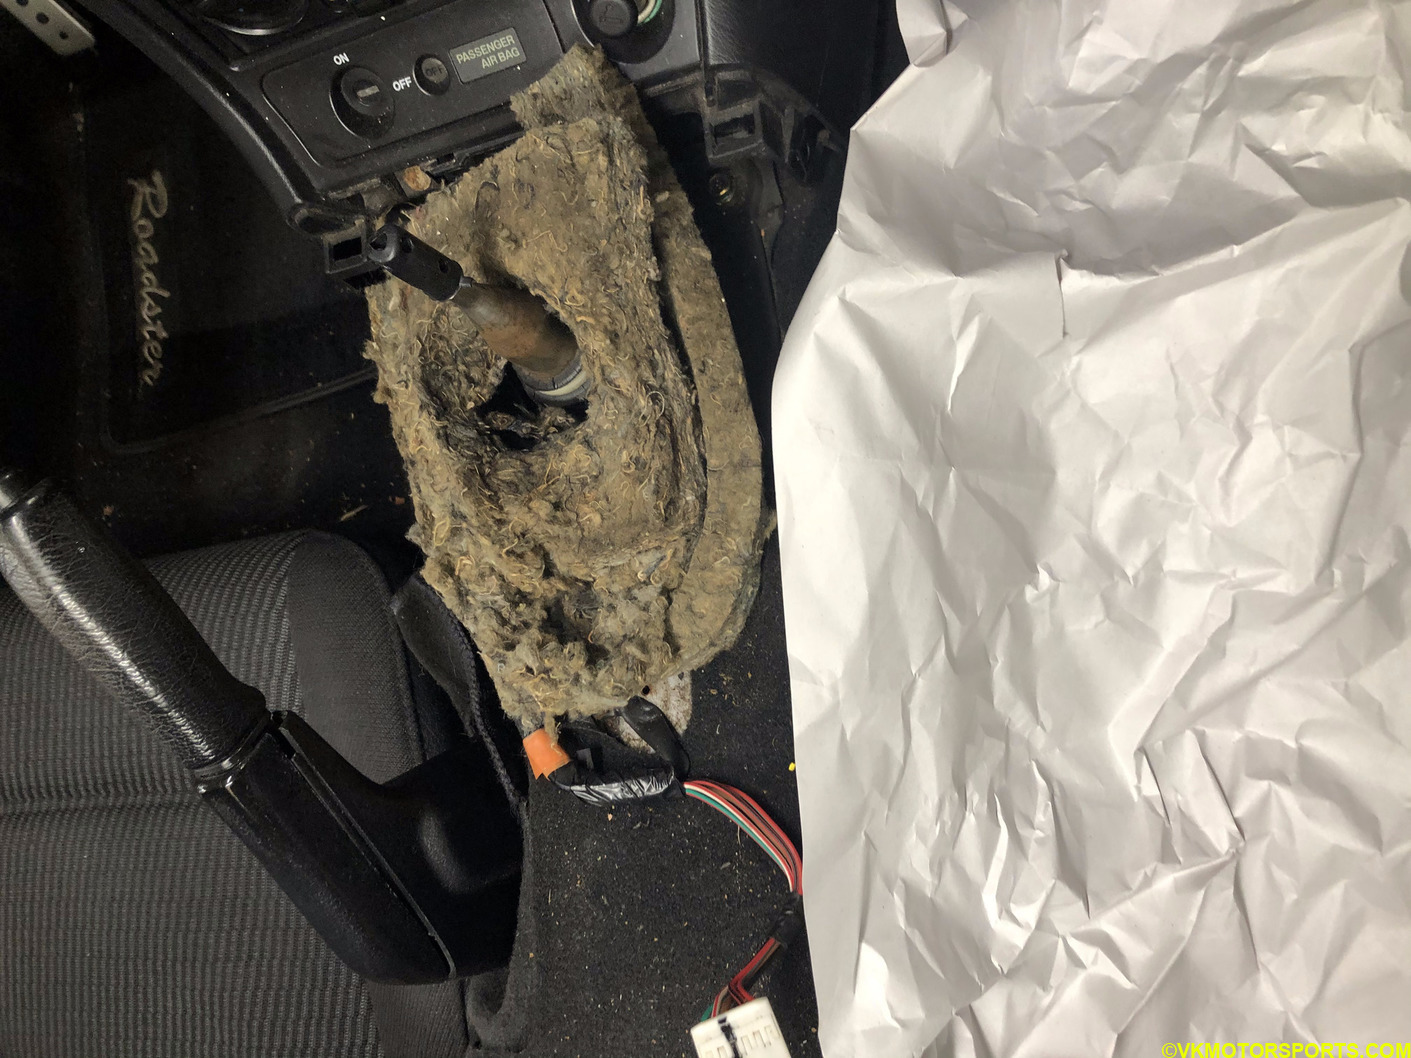 Figure 3a. Keep a sheet of paper nearby to capture the shifter contents
Remove the sound deadening to access the turret.
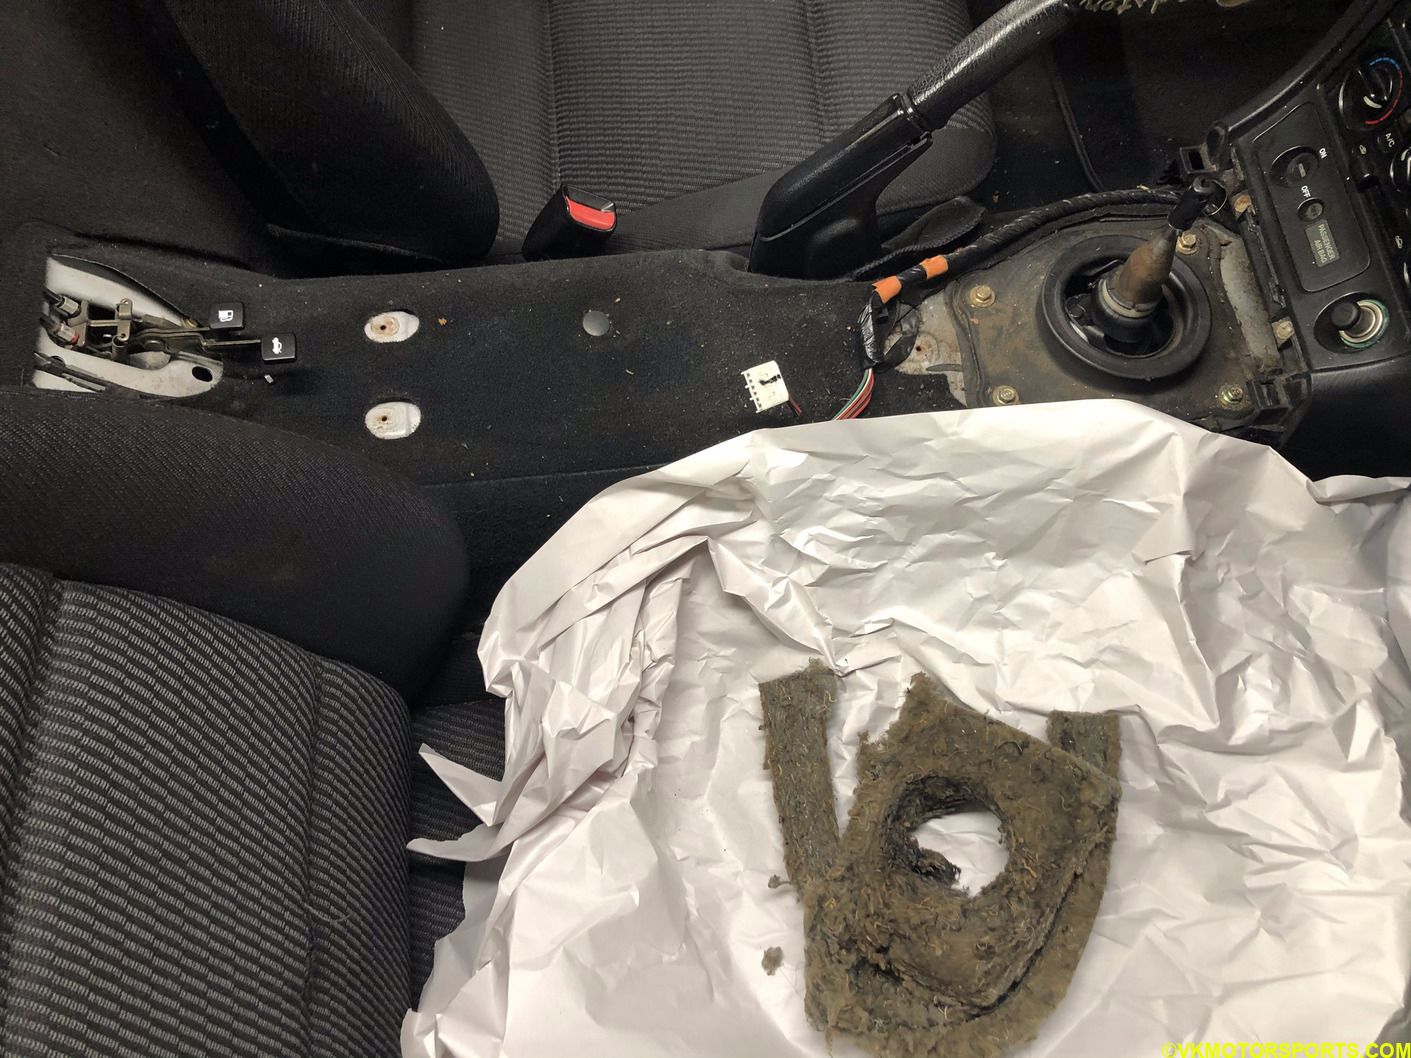 Figure 3b. Remove sound deadening to access the turret
As you can see the large rubber boot over the turret looks torn or damaged. Using a 10mm socket, open the bolts (Figure 3d) and remove the torn boot (Figure 3e).
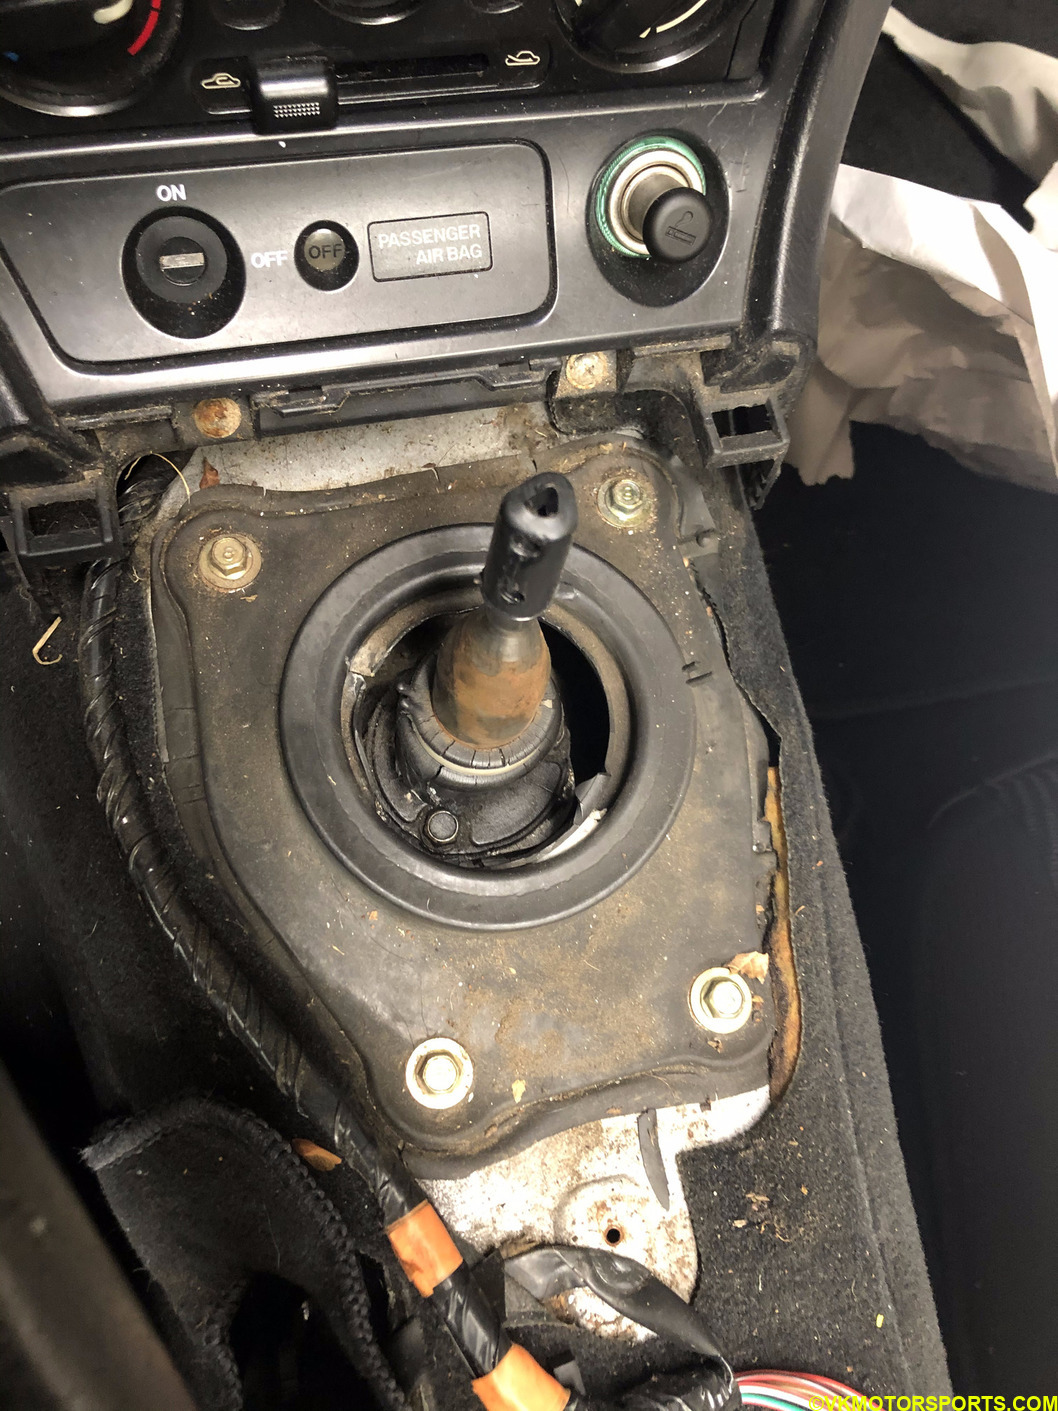 Figure 3c. Turret boot looks torn
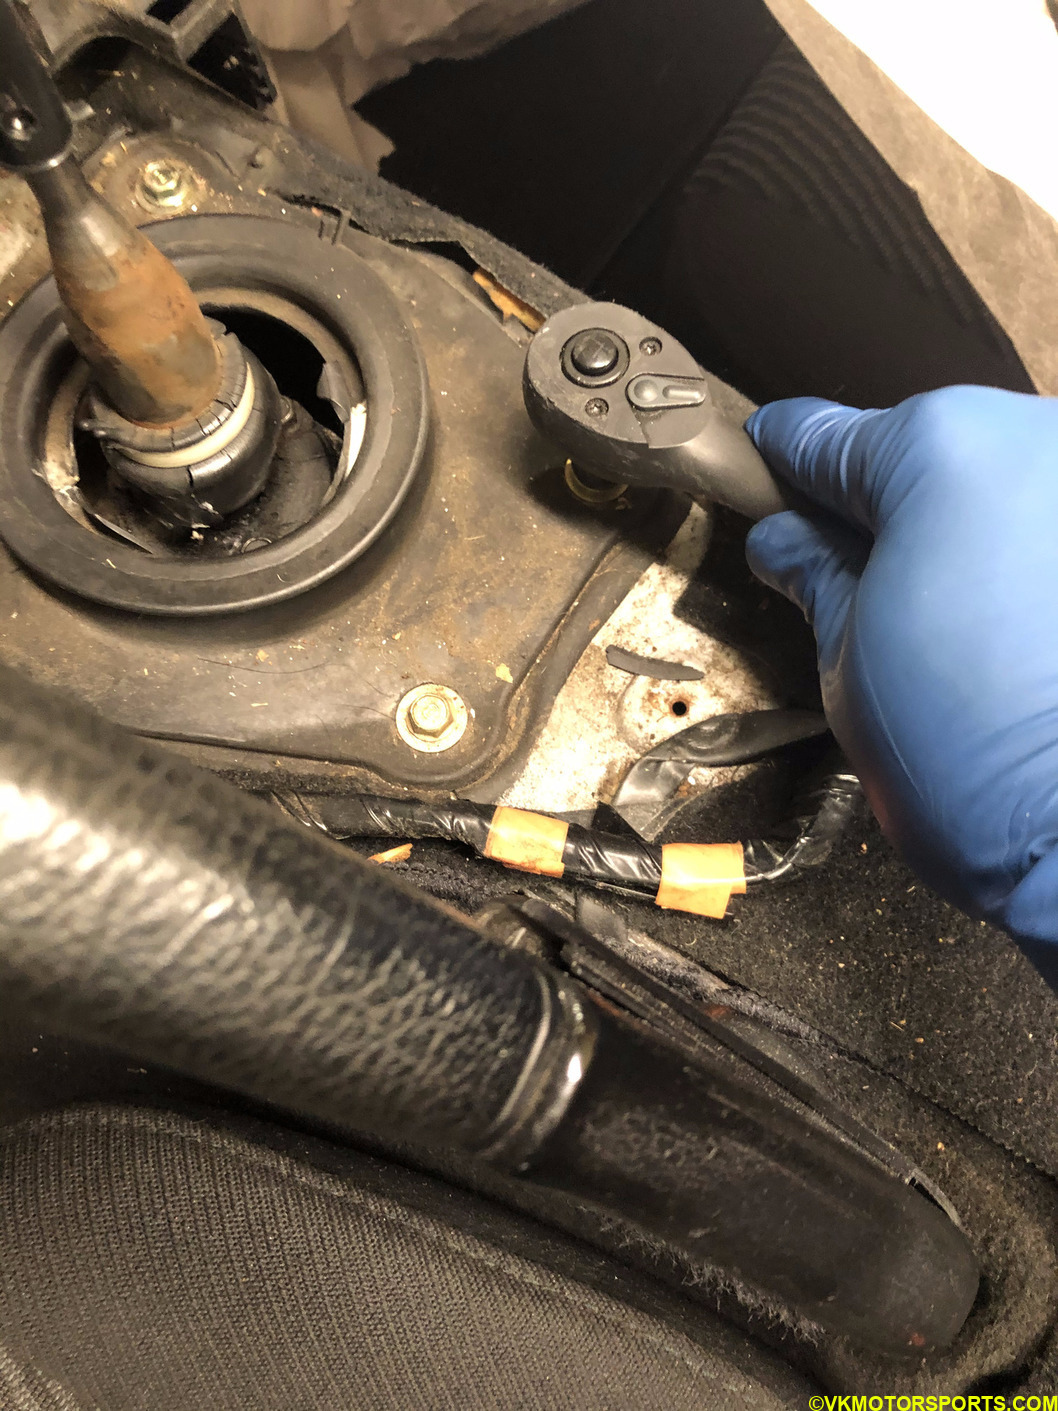 Figure 3d. 10mm Boot bolts
 Figure 3e. Torn boot removed
After removing the boot the turret is now visible.
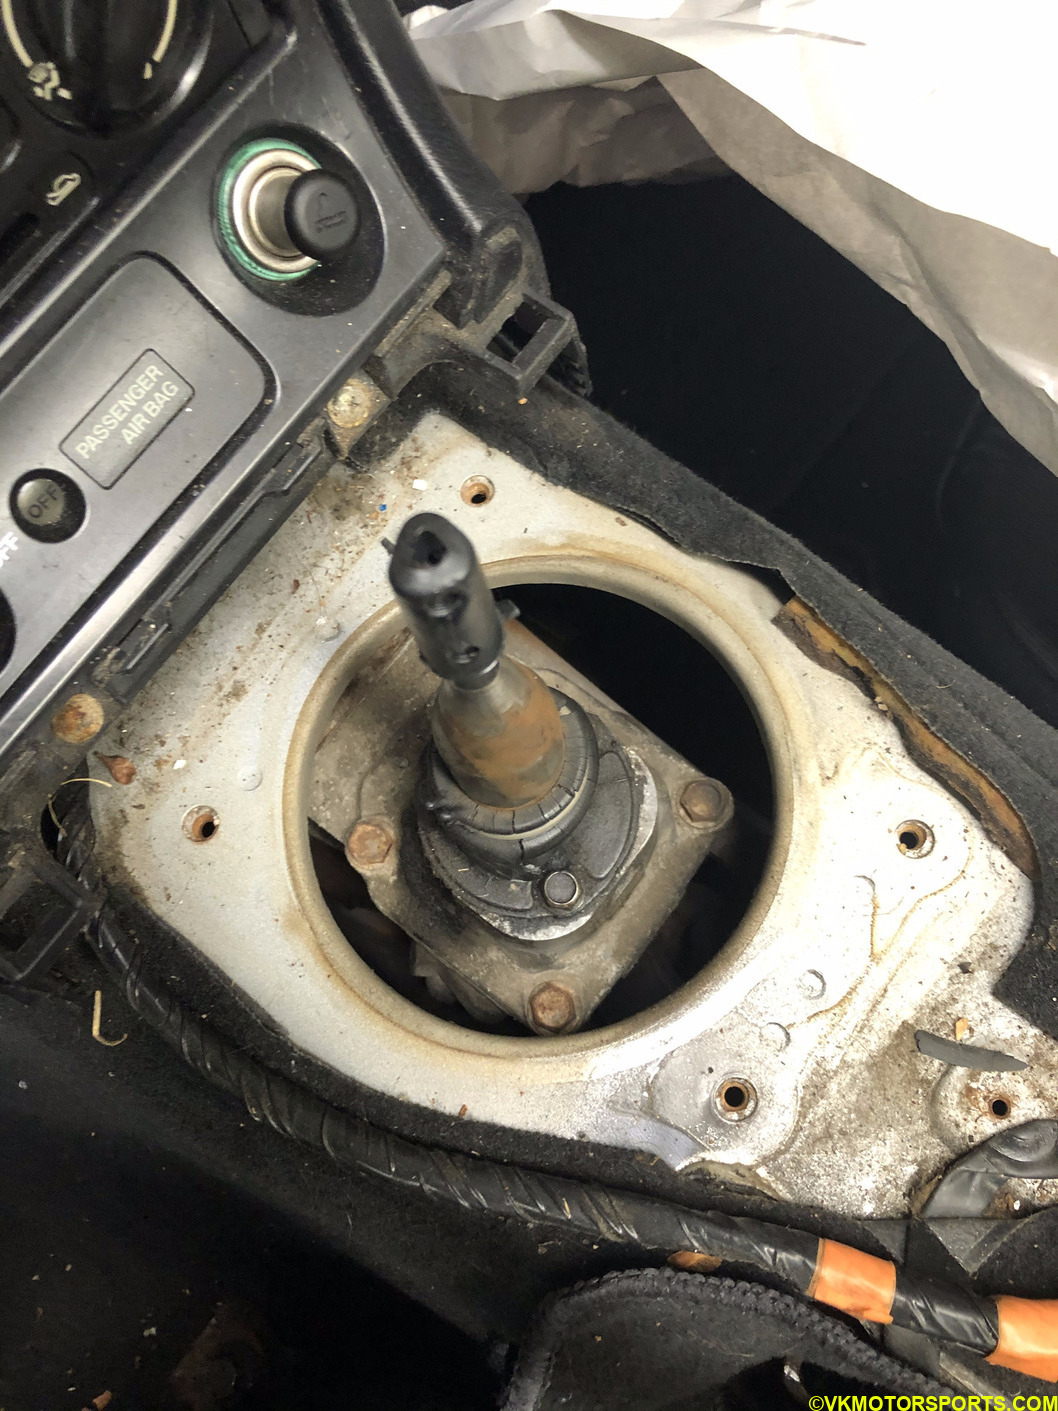 Figure 3f. Turret visible
Step 4: The turret has three bolts that need to be removed with a 10mm socket (Figure 4).
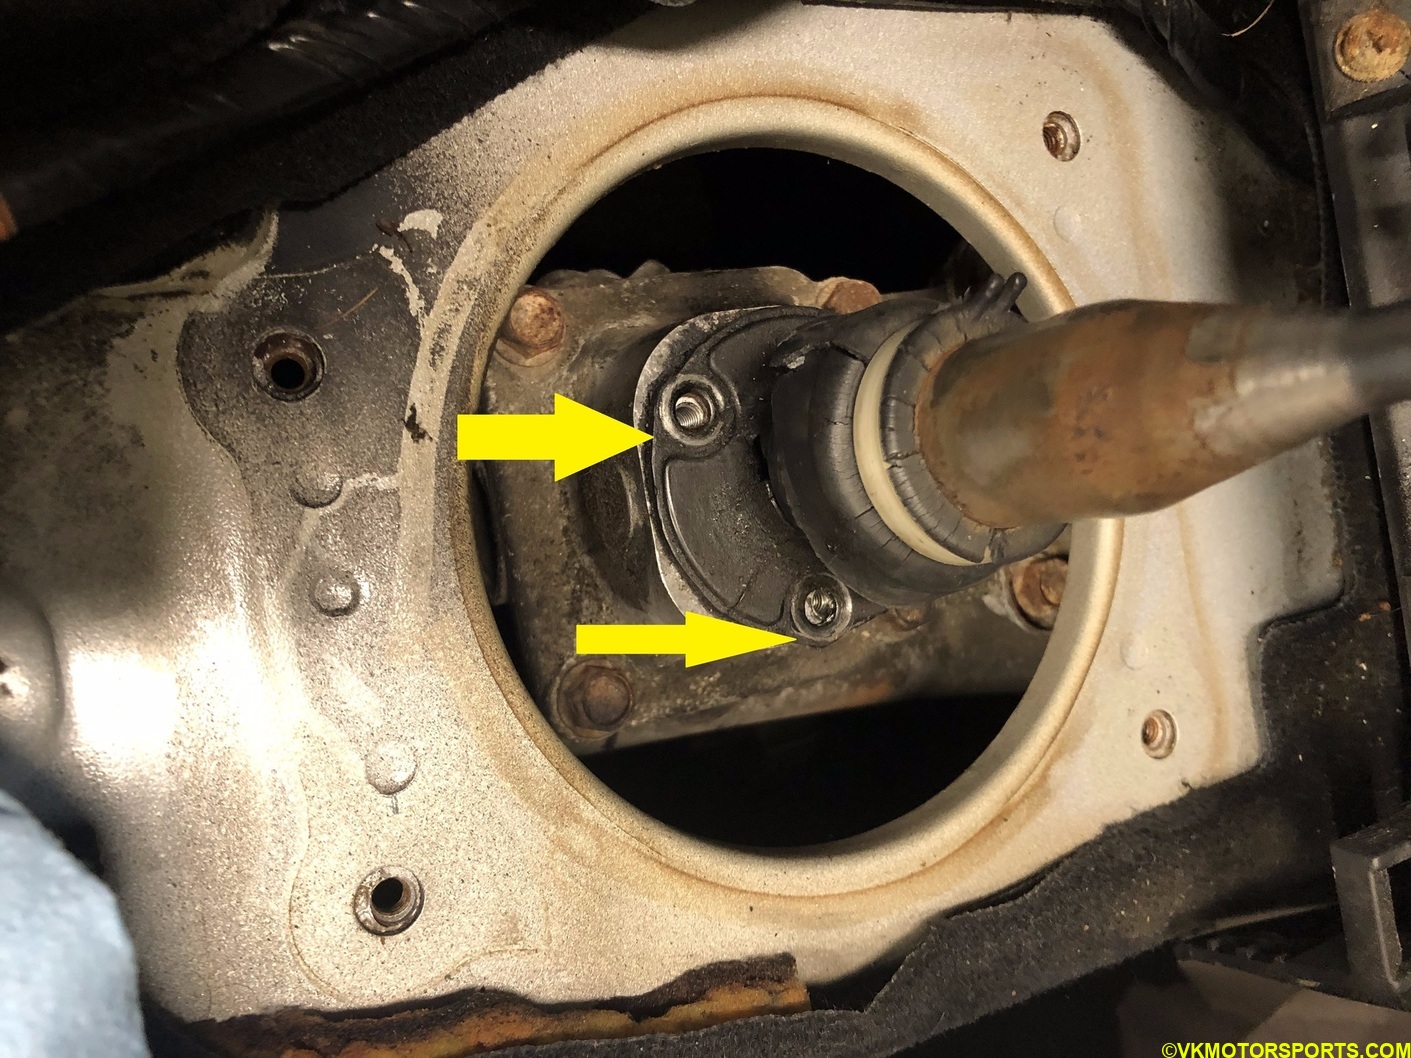 Figure 4. There are three turret bolts that need removal
Step 5: Carefully lift the shifter out by pulling on it (Figure 5a). Remember that the turret may have transmission fluid in it that may leak and stain your interior, which is why we had placed that sheet of paper in Step 3. As you can see in Figure 5b the shifter is now fully out of the turret and the polyurethane shifter bushing is visible.
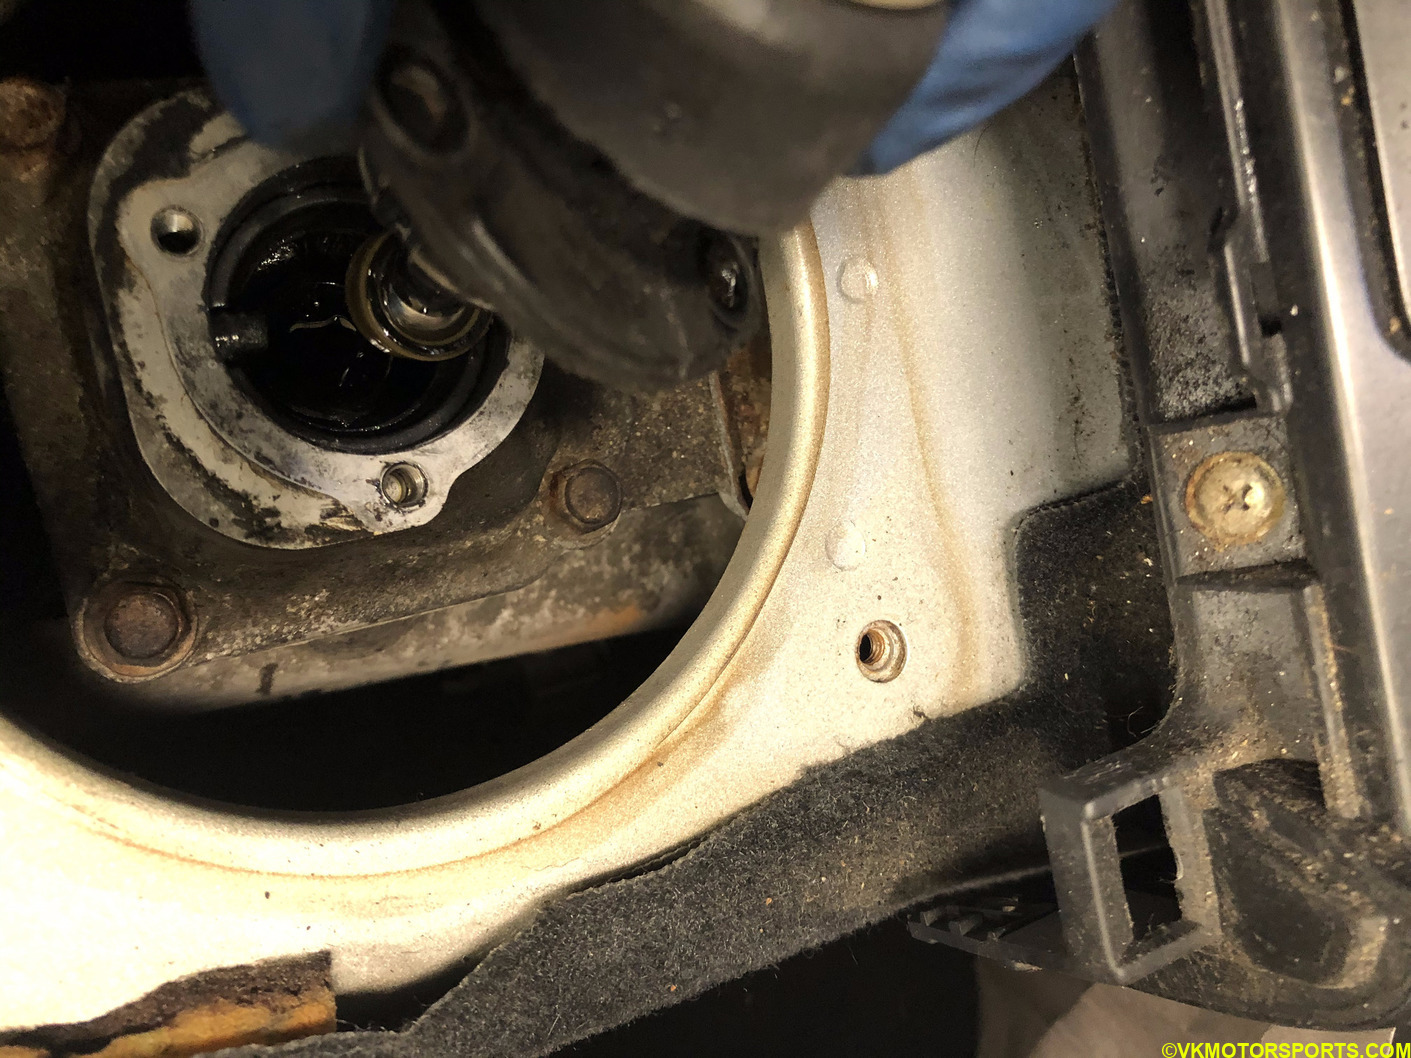 Figure 5a. Lift the shifter out
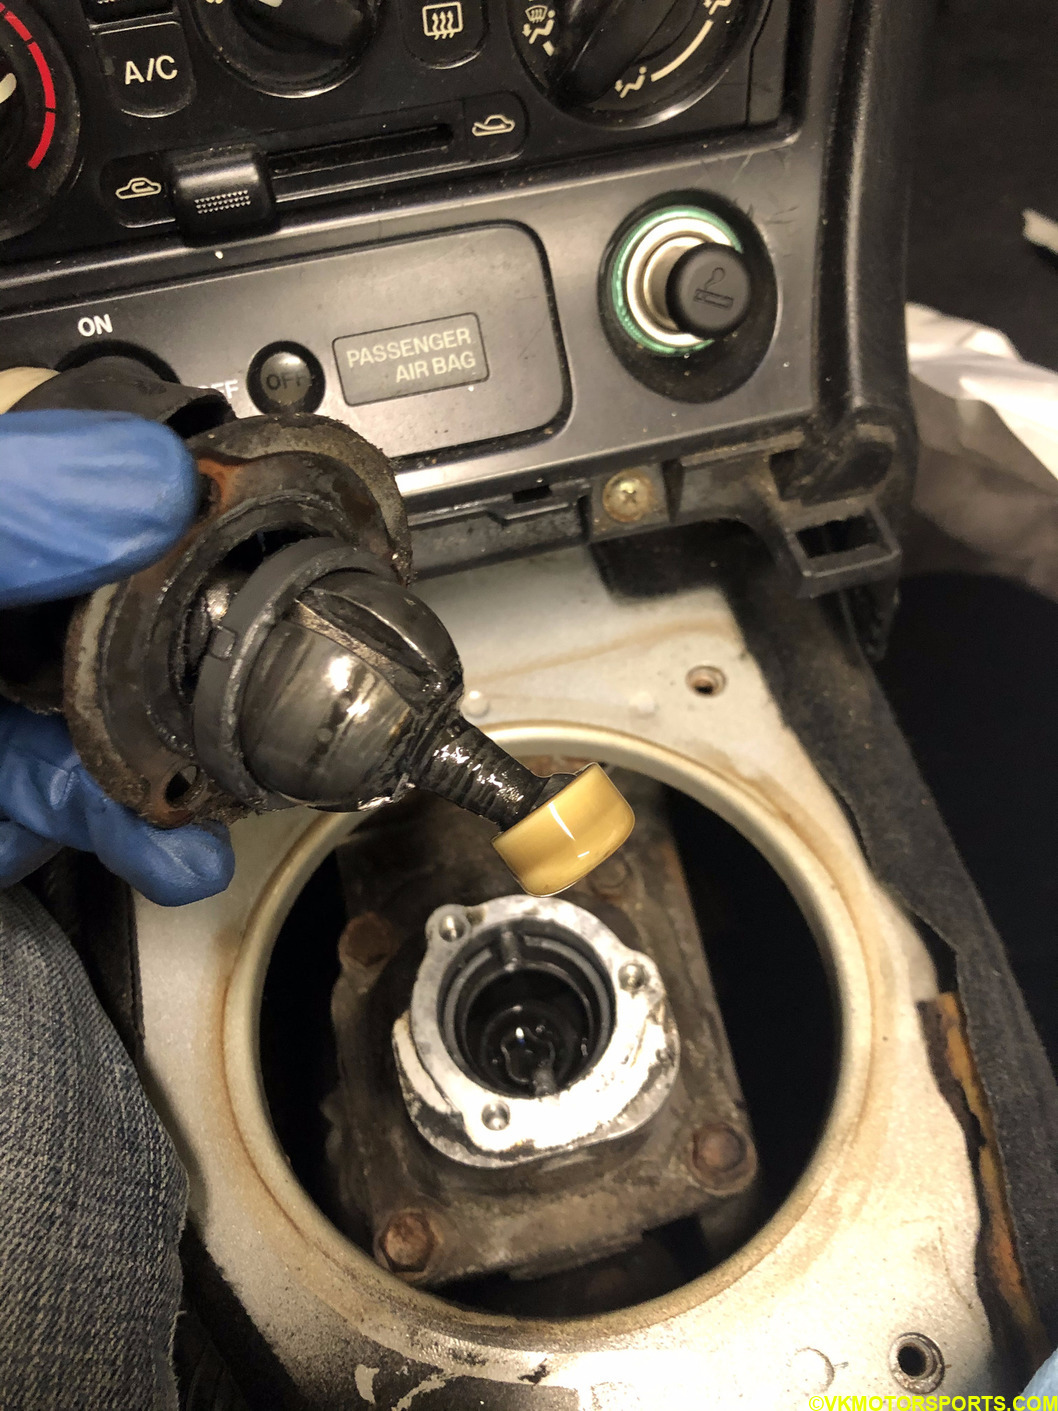 Figure 5b. Shifter is out of the turret
Now place the shifter in a plastic bag quickly so none of the old transmission fluid drops in your interior.
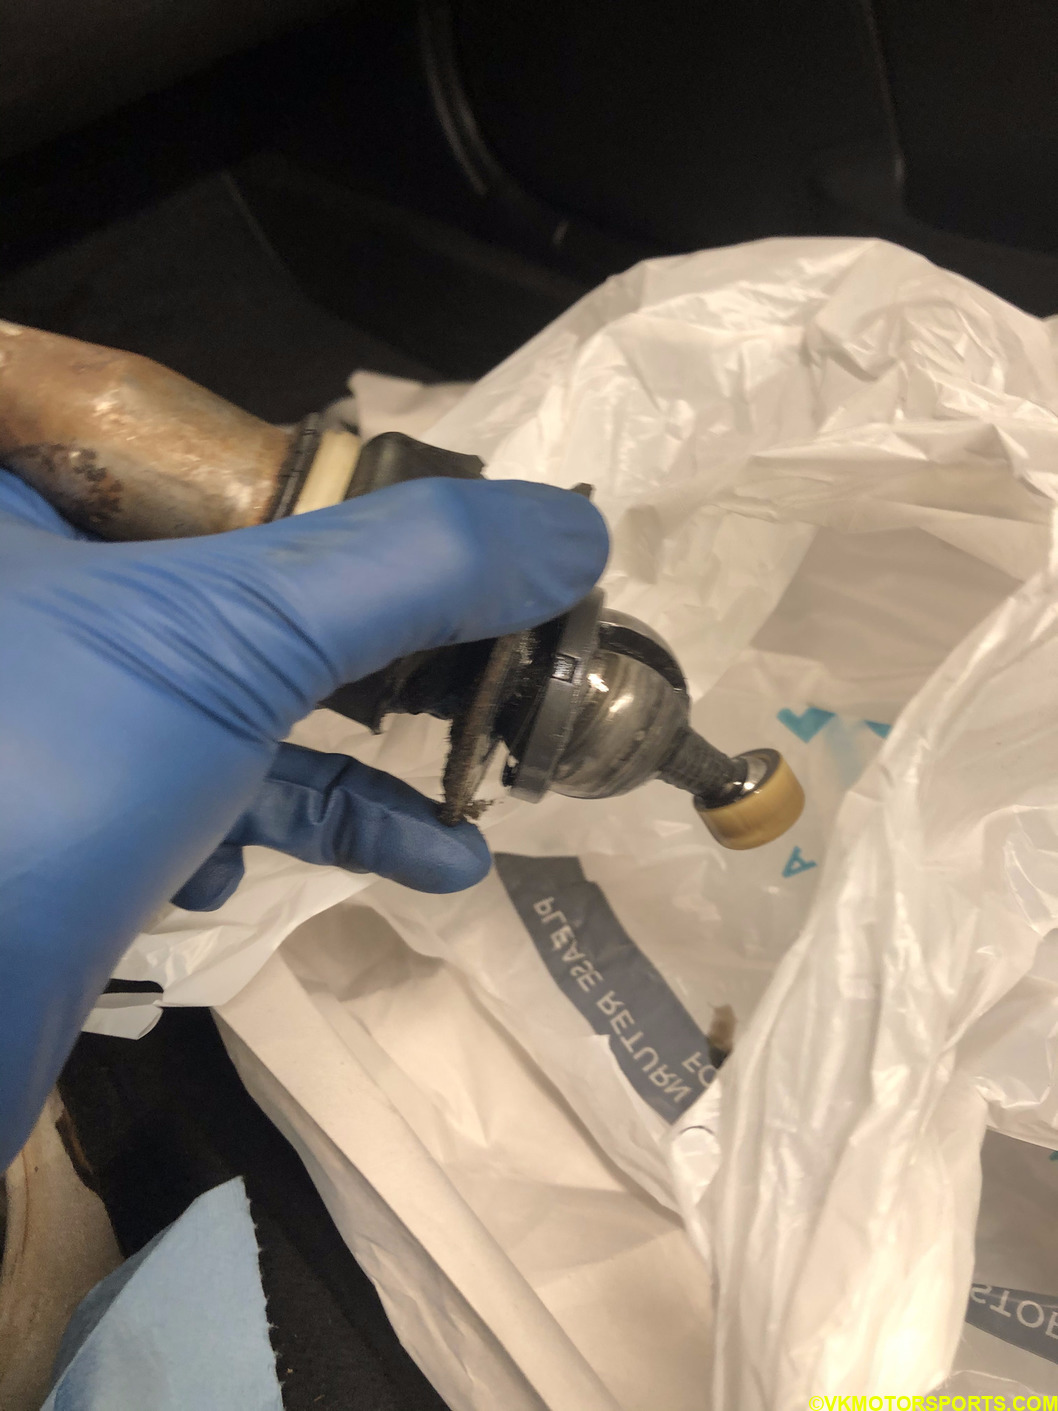 Figure 5c. Place shifter in a bag to prevent leaks of fluid in car interior
Step 6: As you can see in Figure 6a the small shifter shaft boot is also torn. We will be replacing all the bushings and boot on this shaft. You can remove the old ones using pliers or cutting tools and throw them away.
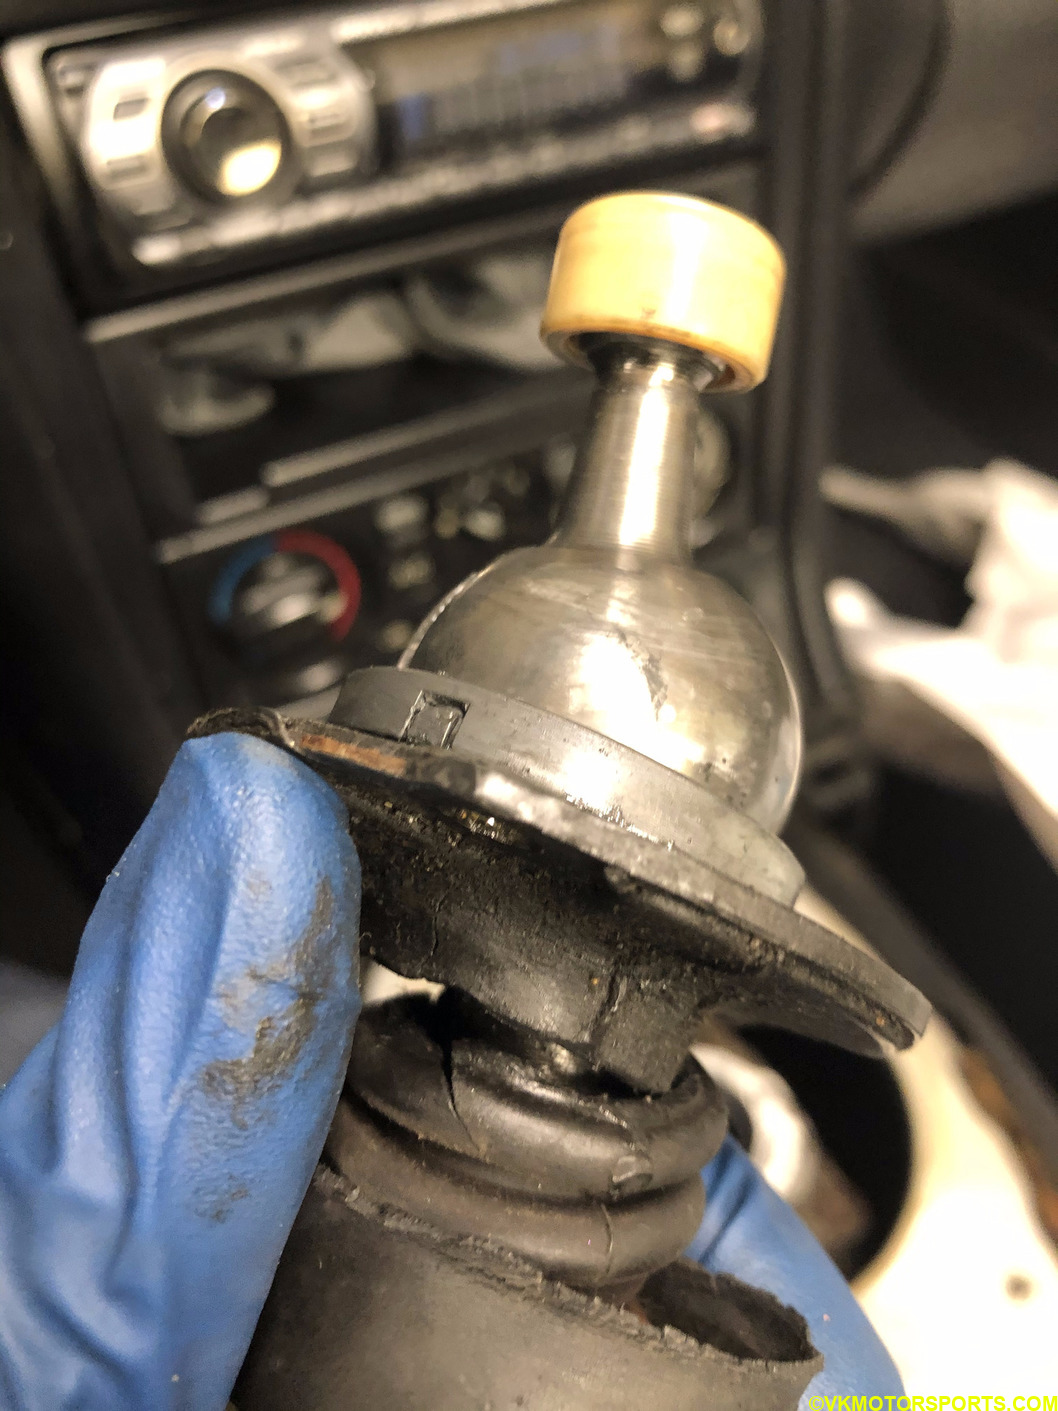 Figure 6a. Shifter shaft boot is torn
Once all the parts on the shifter shaft are removed, scrub the shifter with some sandpaper and clean it to your liking. Some folks use degreasers, soap and water to clean the shifter. I just wiped it down thorougly with shop towel and scrubbed the rust away with sandpaper.
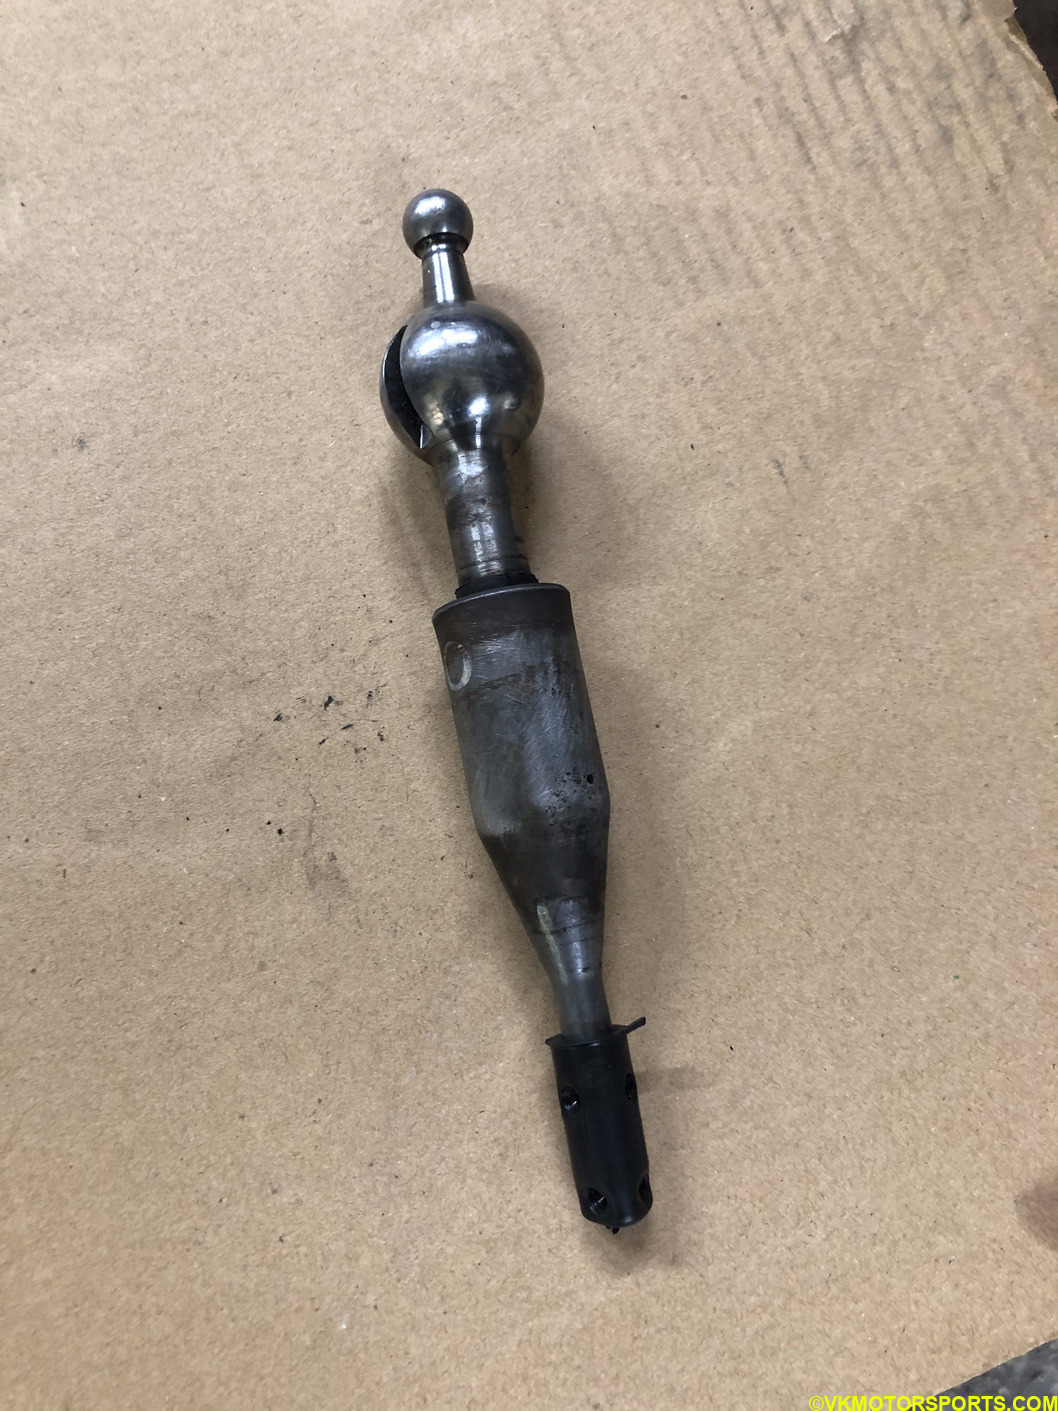 Figure 6b. Cleaned shifter shaft
Next I lubricate the shifter to allow for the bushings to fit in without problems. You may also use grease to lubricate the shifter but I just used the transmission fluid.
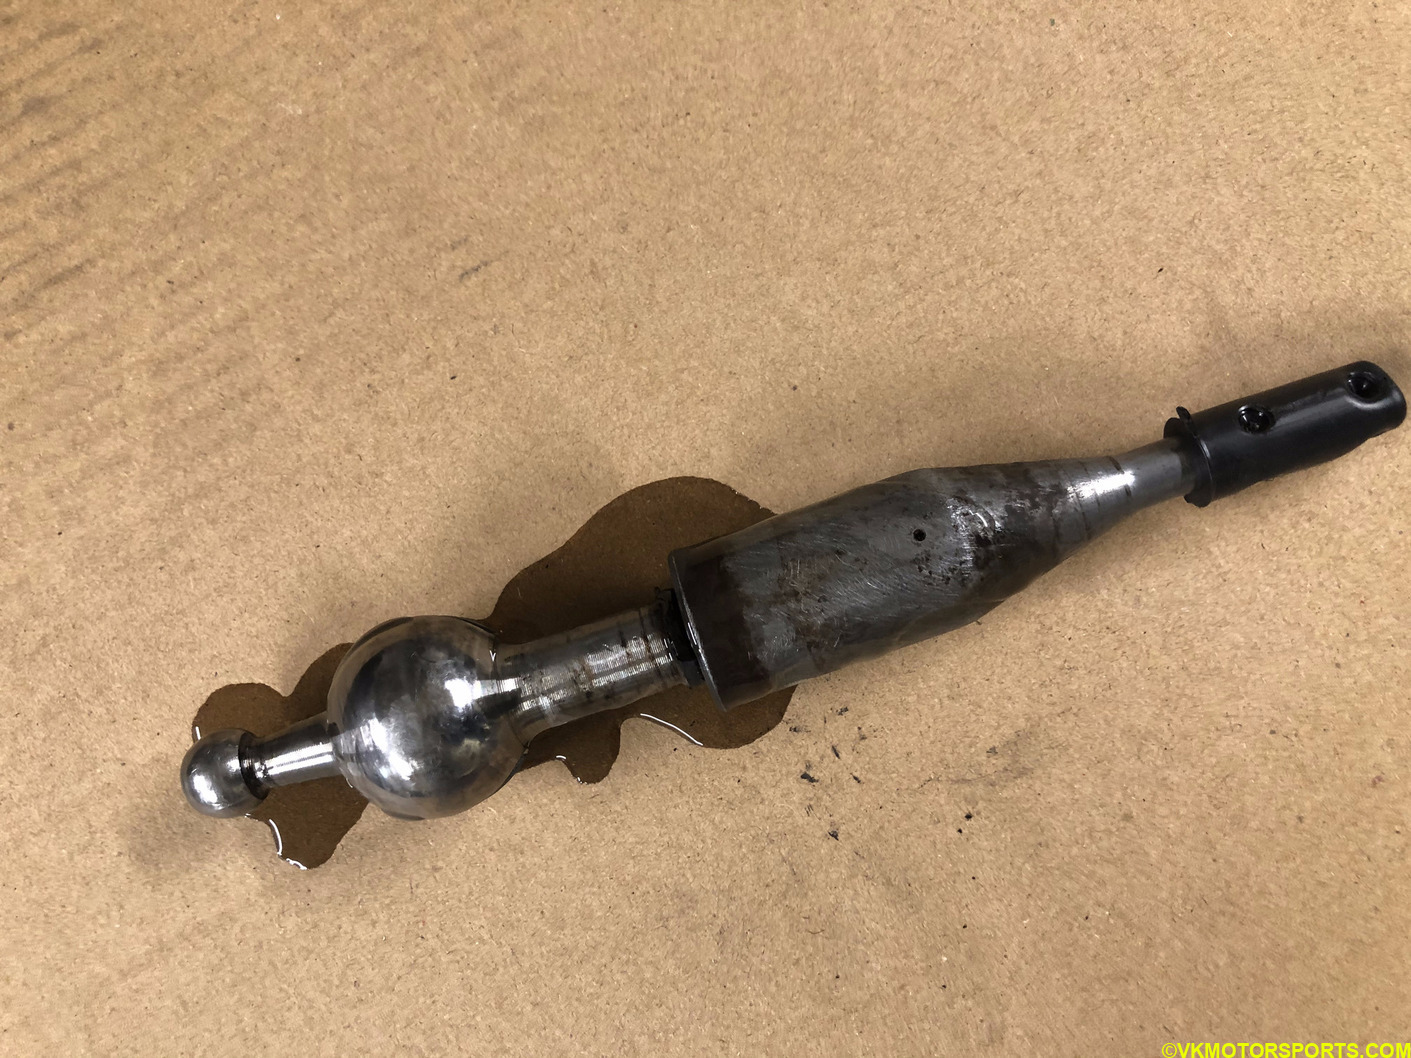 Figure 6c. Lubricate the shifter shaft with grease or transmission fluid
Step 7: Now install the small polyurethane (or bronze) bushing into the bottom ball of thie shifter (Figure 7a). You may need to use some force to push it into the shifter. Also install the white plastic bushing along with the clamp washer onto the larger ball of the shifter shaft.
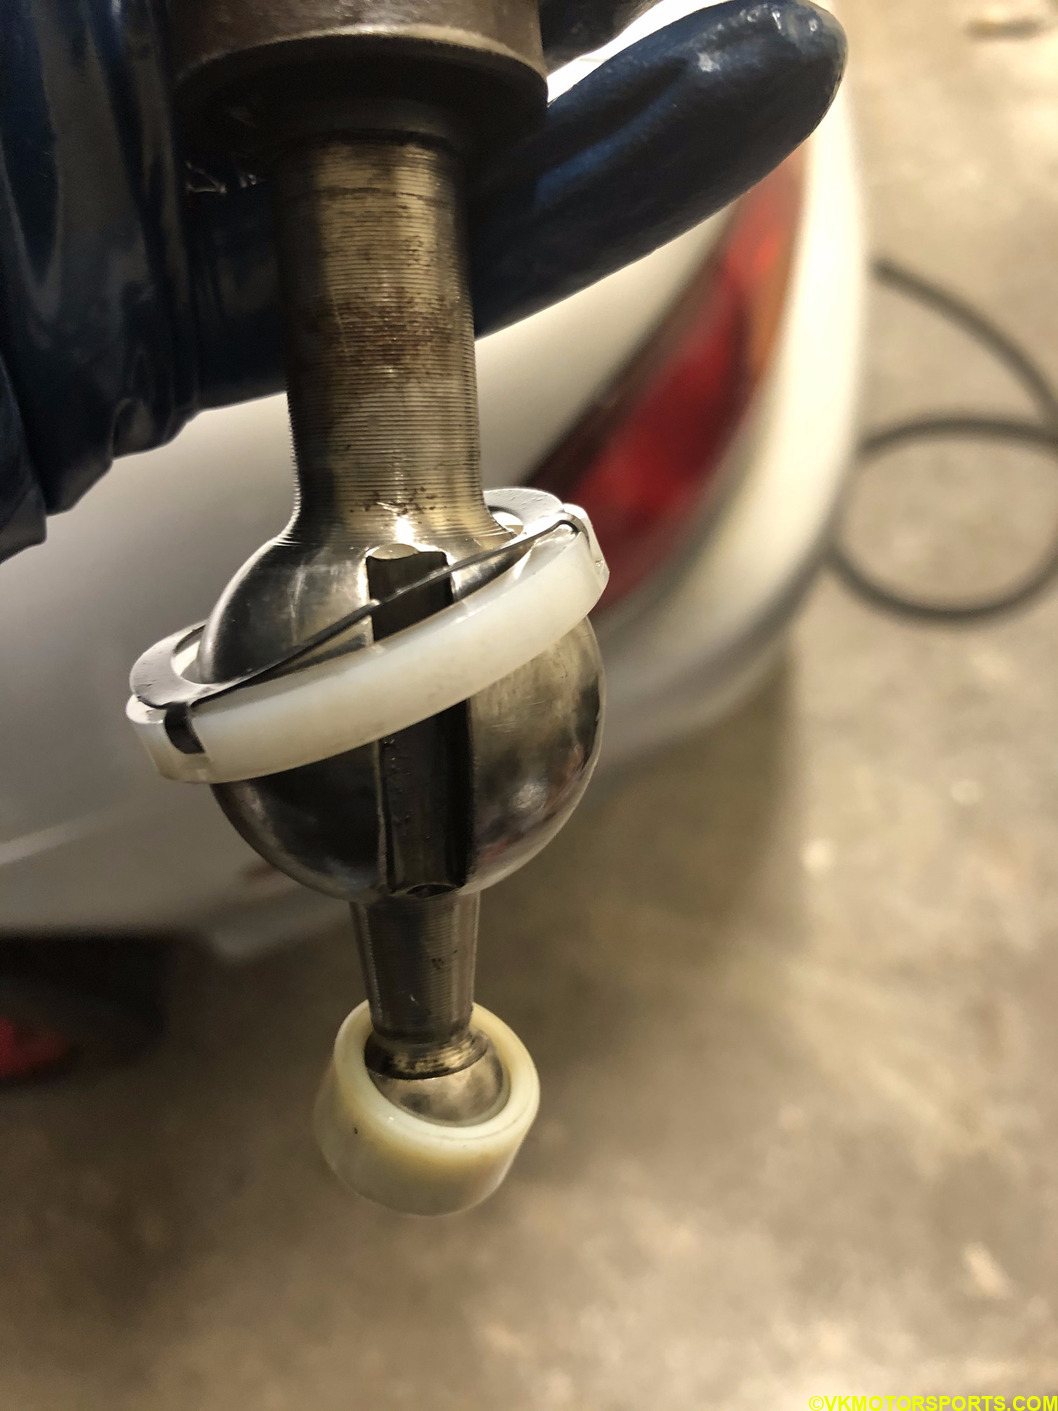 Figure 7a. Install polyurethane shifter bushing
Now push the new boot into the shifter. This is where some light oil on your fingers or on the shaft will help getting the boot in as seen in Figure 7b.
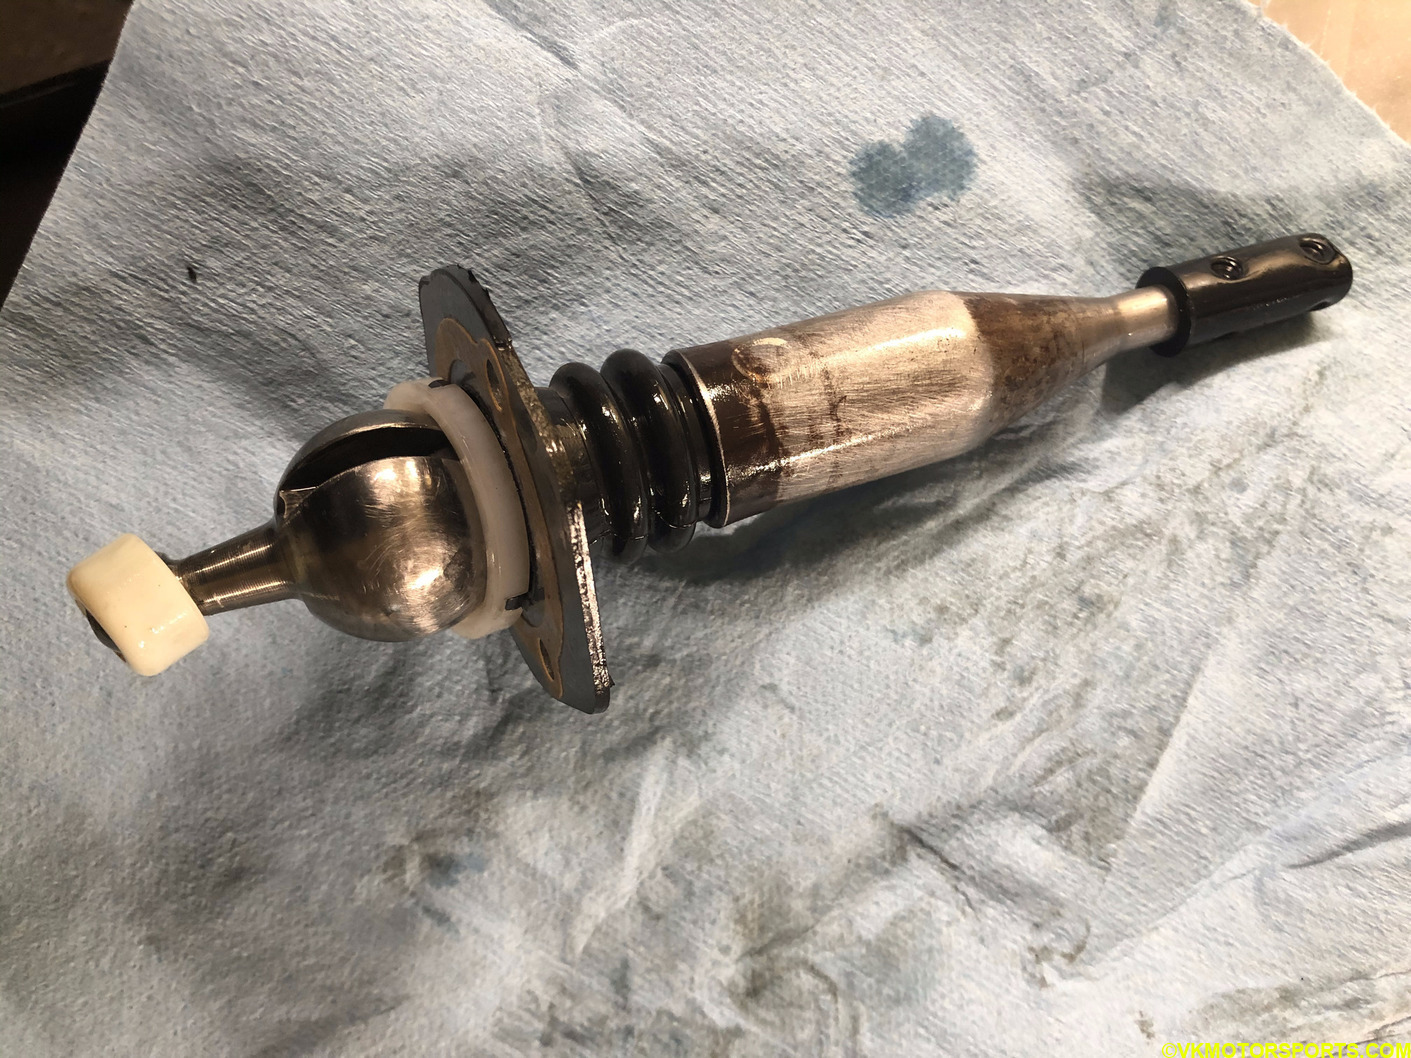 Figure 7b. Install shifter boot onto the shaft
Now the shifter is ready to be installed to the turret.
Step 8: Before you install the shifter into the turret, clean the turret. I used a turkey baster and then also a small syringe to remove the final drops of the dirty transmission fluid.
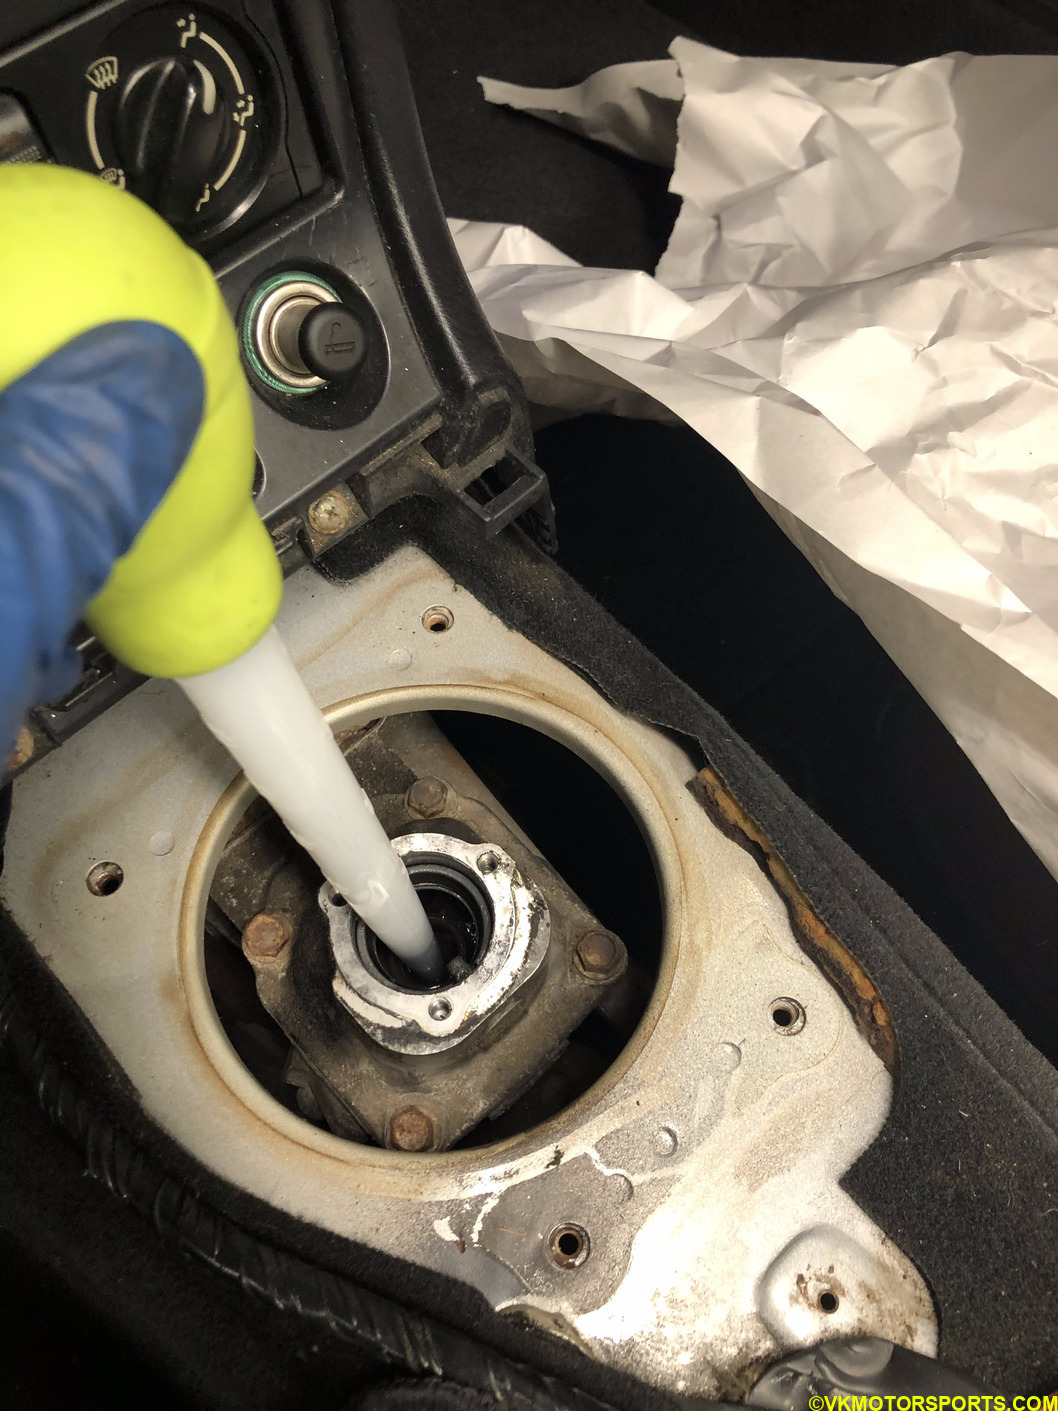 Figure 8a. Removing stale fluid from turret with turkey baster
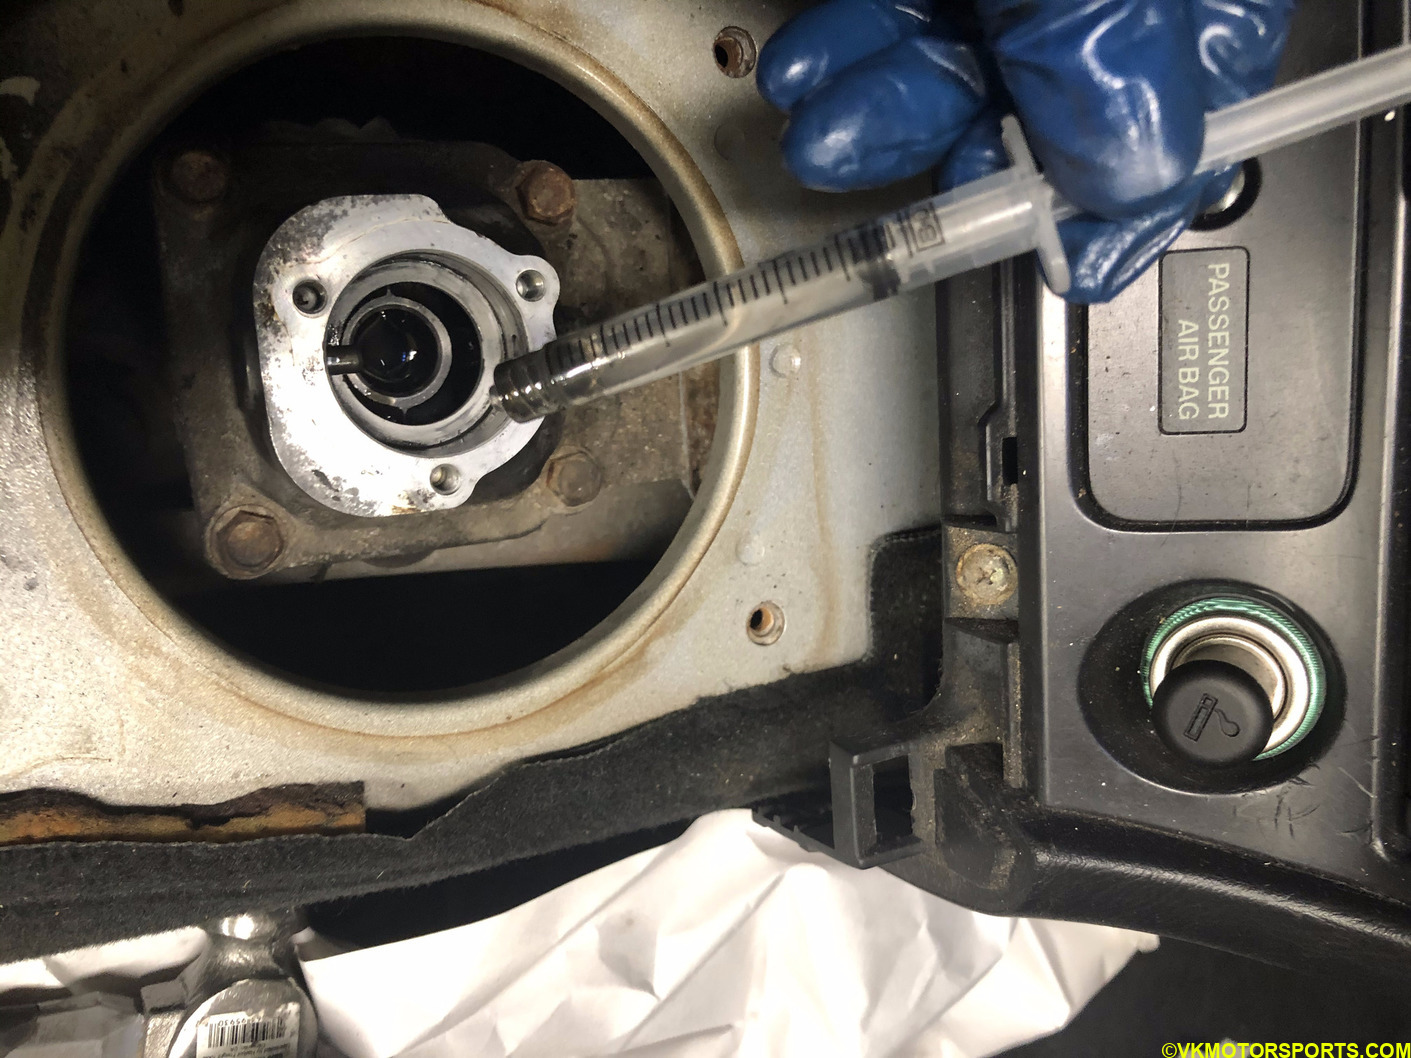 Figure 8b. Removing stale fluid from turret with syringe
I then used a shop towel to clean out the remaining fluid and wipe the turret fully.
Step 9: Next we need to install a new turret bushing. Figure 9a shows one of the two pins (yellow arrow) in the turret that need to be pushed out to remove the old bushing (red arrow) and install the new one. We only need to push out one pin. These pins are smooth and must not be scratched or dented.
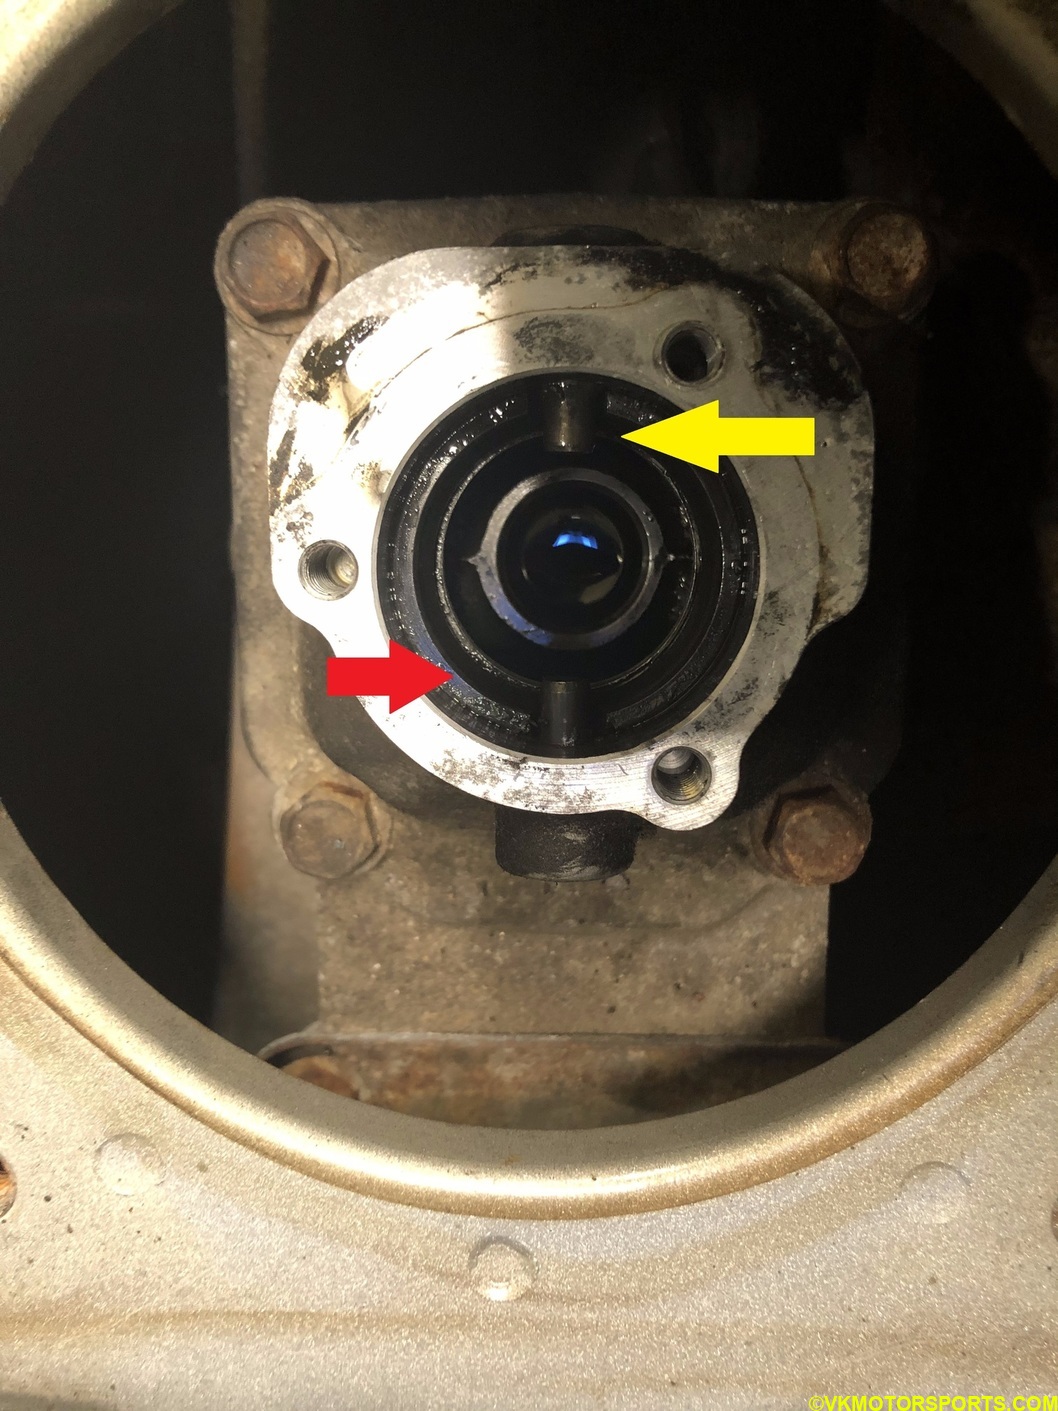 Figure 9a. Turret pin (yellow arrow) to be removed to extract old bushing (red arrow)
Using a long drive pin punch and a small bal peen hammer, I pushed the pin out carefully as seen in Figure 9b and Figure 9c with some light hammering.
 Figure 9b. Use punch to push the pin out
The yellow arrow in Figure 9c shows that the pin is out just enough, to lift the old turret bushing (red arrow) out using a flat screwdriver.
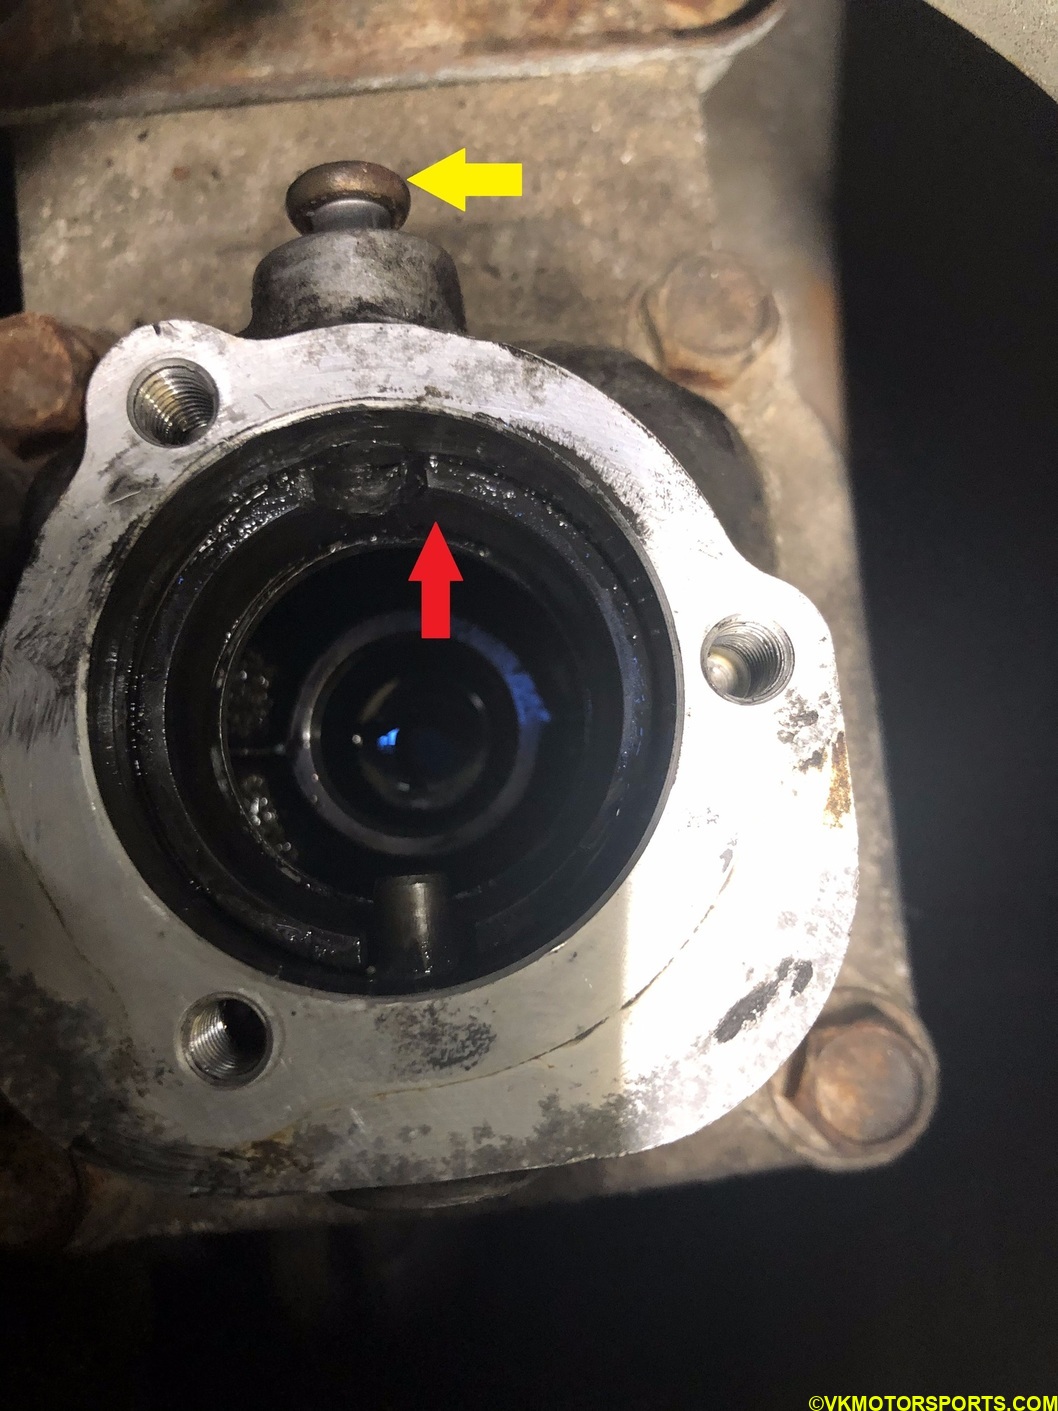 Figure 9c. Pin is pushed out
Remove the turret bushing and the old washer below it (Figure 9d). Wipe the turret again with a shop towel.
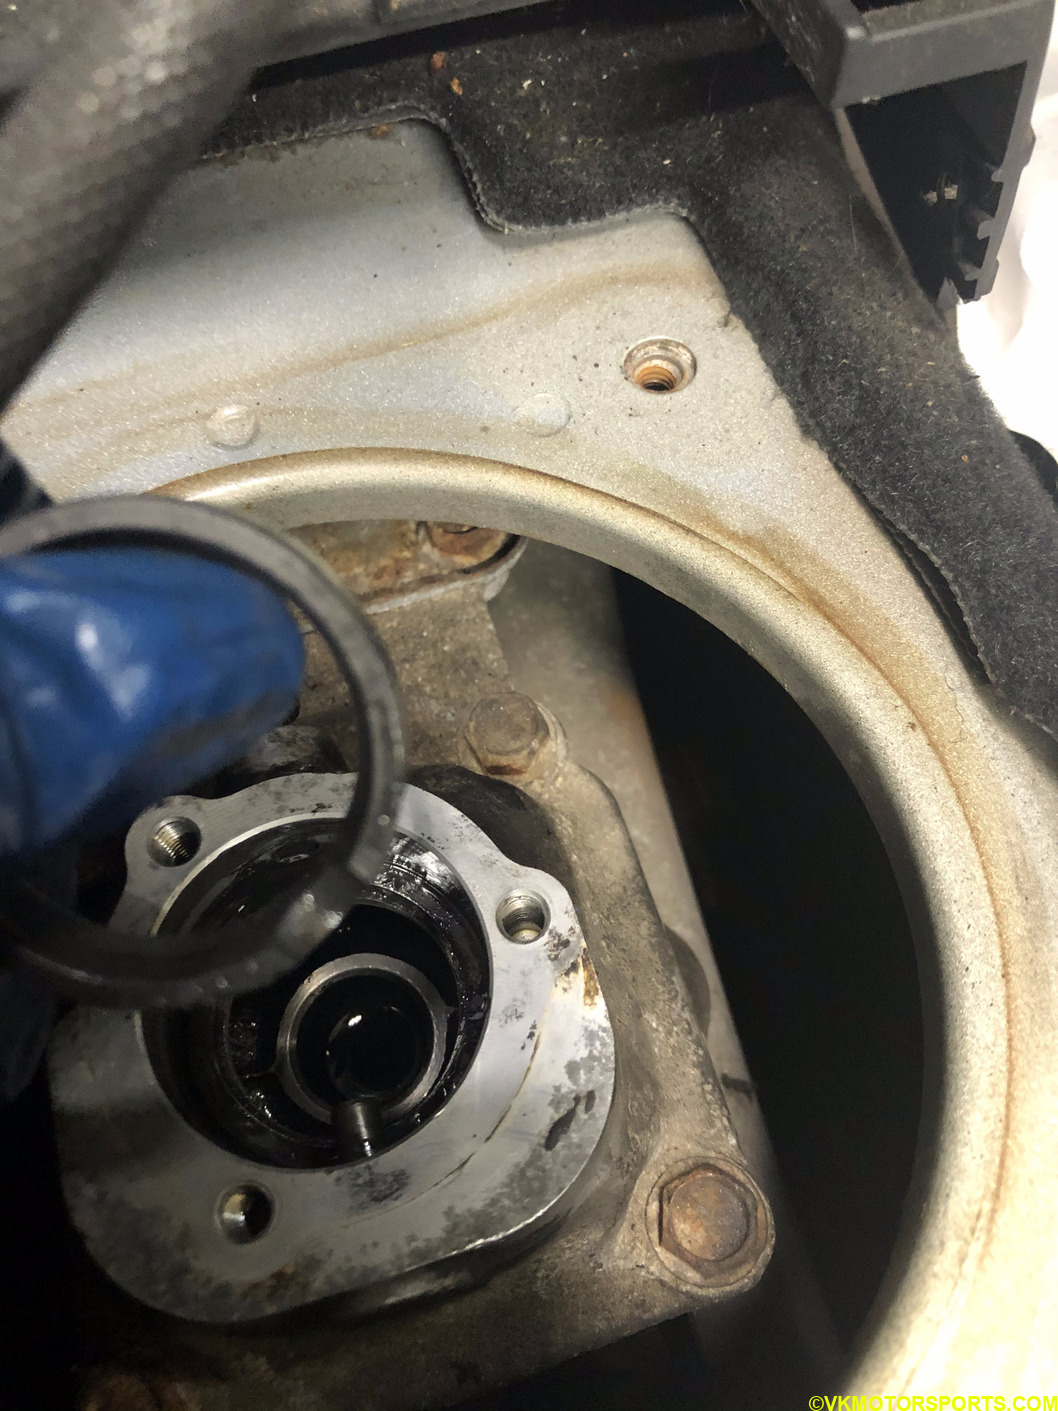 Figure 9d. Remove the turret bushing
Carefully install the new washer in position (Figure 9e) and then the new turret bushing (Figure 9f).
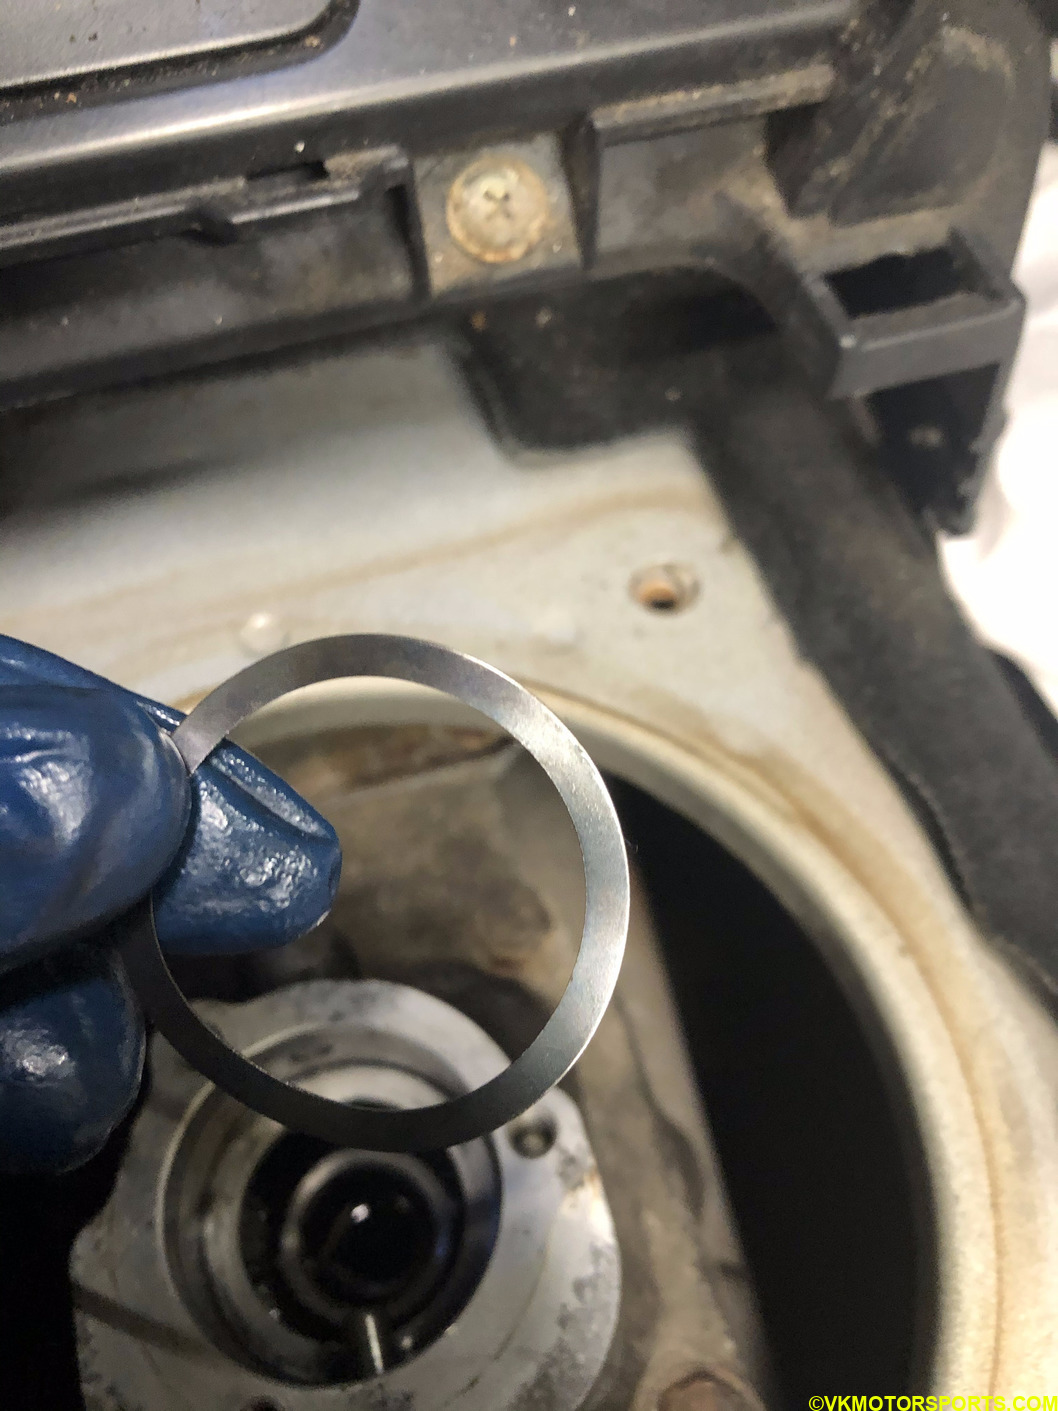 Figure 9e. Install washer into turret
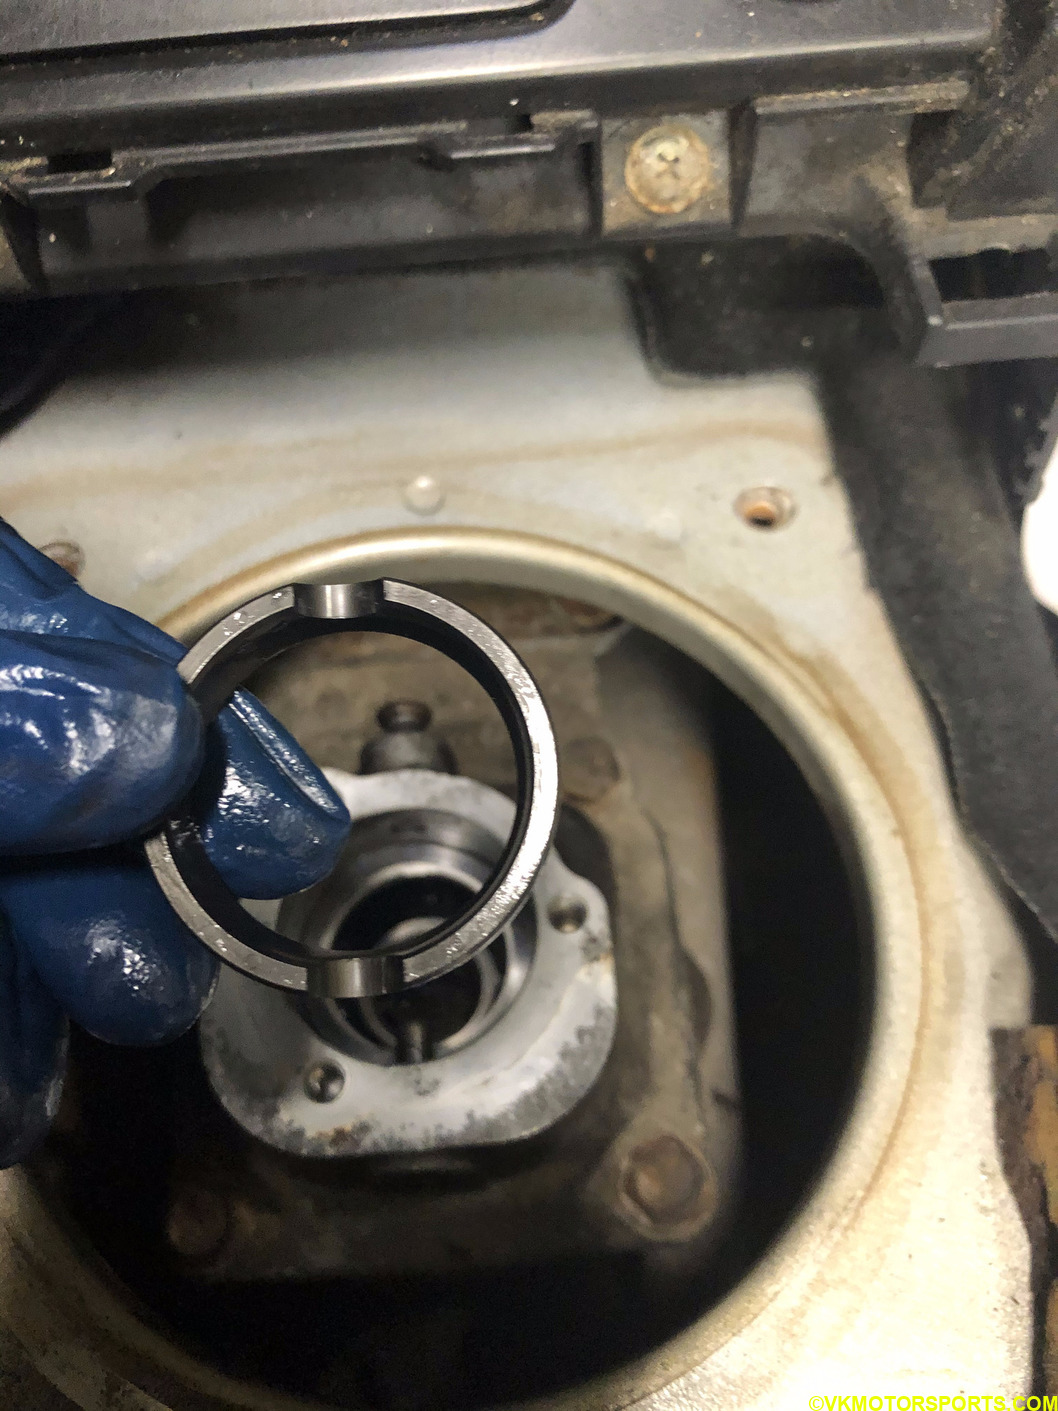 Figure 9f. Install bushing into turret
Now that the bushing is installed and fits perfectly (Figure 9g), using a large groove pliers push the pin back into position so that the bushing is now tightly fit (Figure 9h).
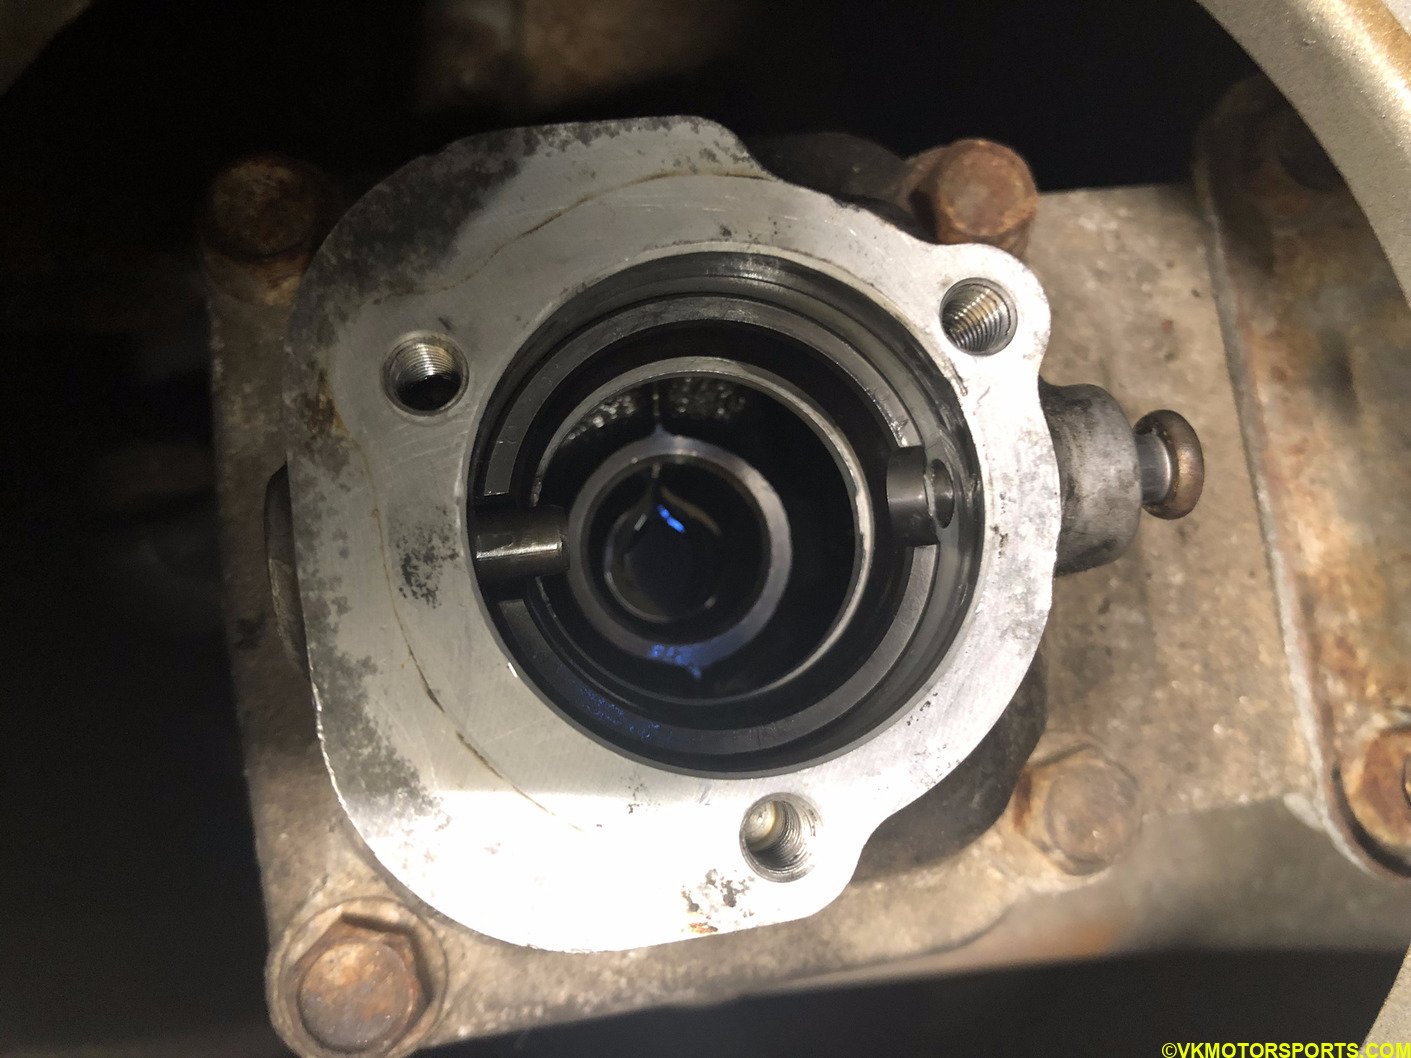 Figure 9g. The bushing is now installed in the turret
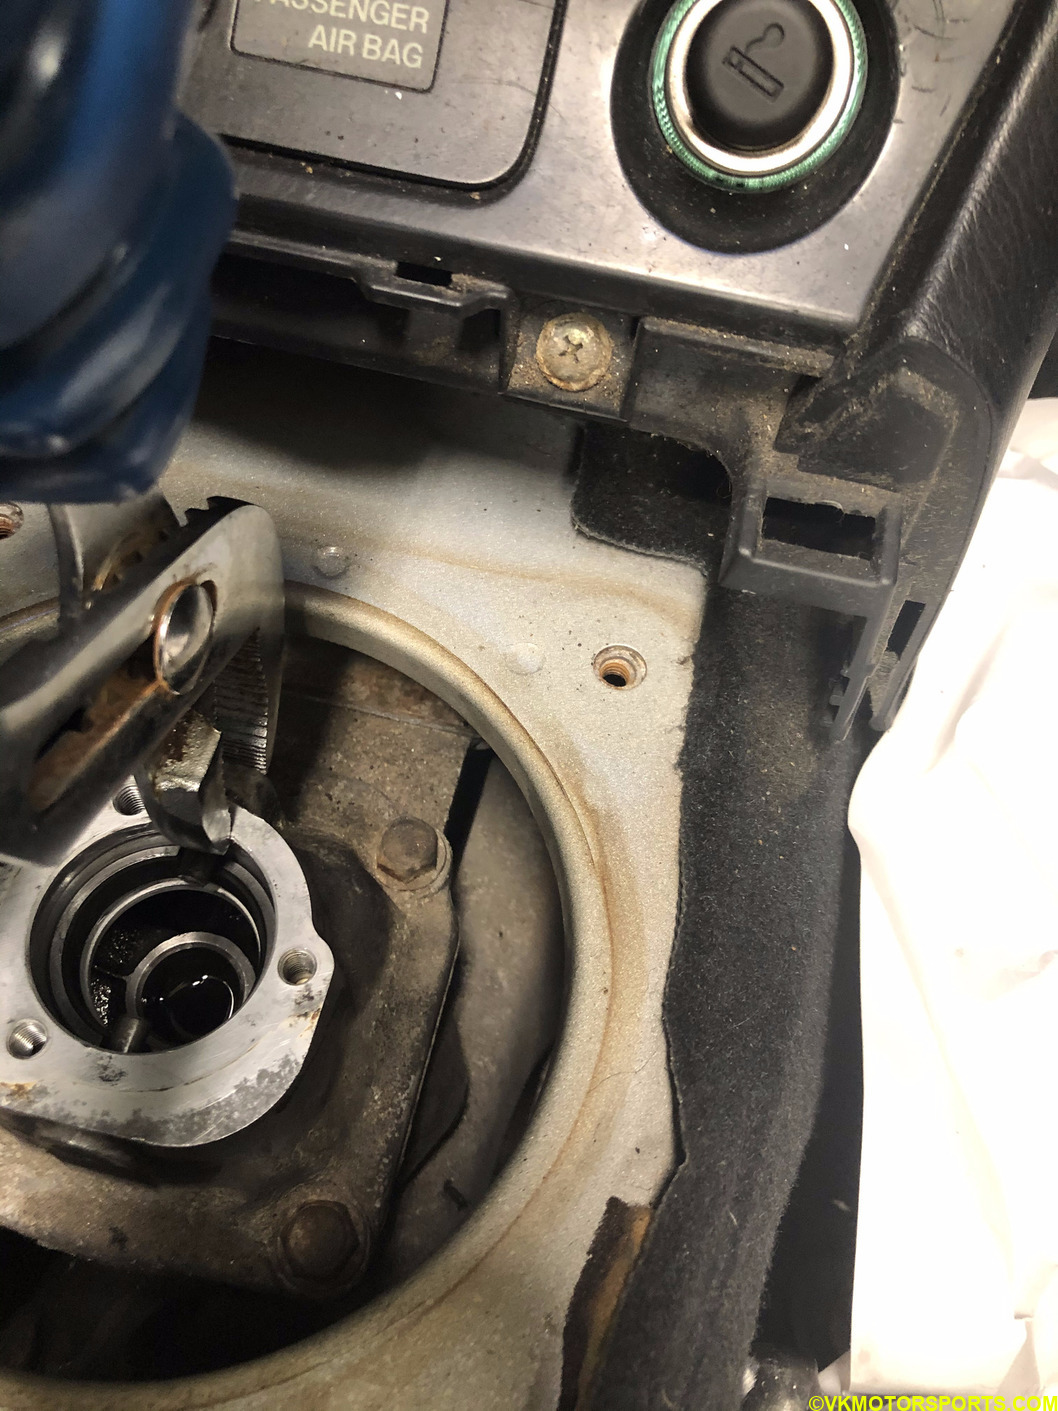 Figure 9h. Push the pin back in position using groove pliers
Step 10: Next we fill the turret with 90ml of transmission fluid 75W-90 (Figure 1b). This fluid has to be filled in for the 5-speed transmission and not for the 6-speed transmission which just needs grease.
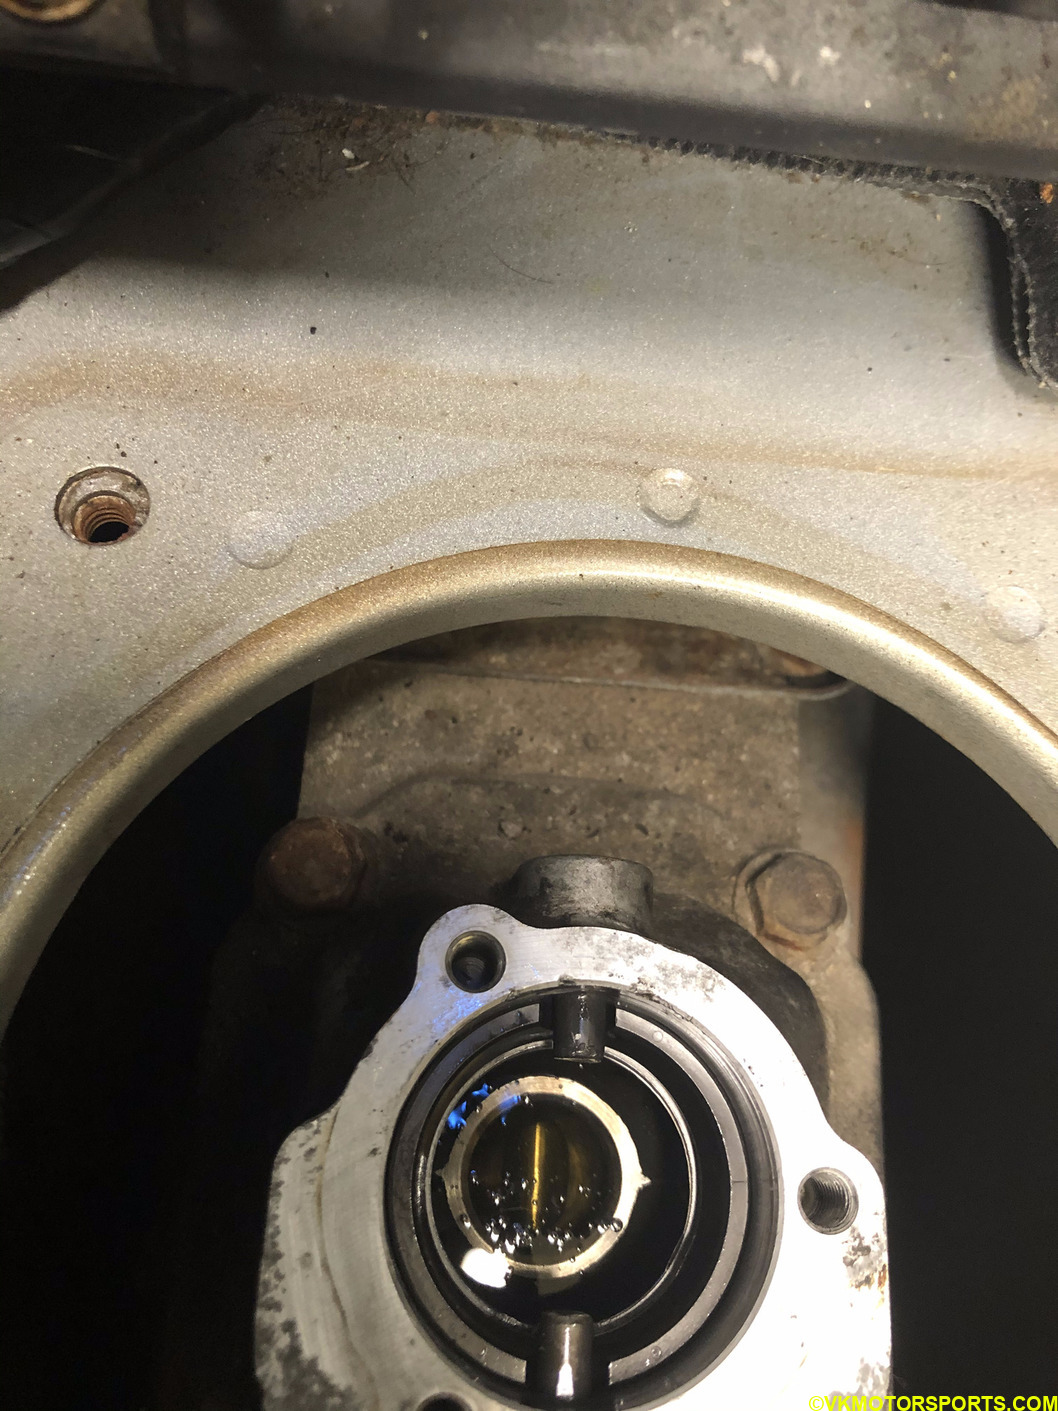 Figure 10. Fill turret with transmission fluida
Step 11: Next we install the shifter into the turret. The shifter shaft has a white spot (Figure 11a) that needs to be facing front (toward’s the car’s front) when inserted into the turret. There is also a white spot on the shifter boot that faces the front so that you can align the three holes of the turret with the three holes of the boot (Figure 11c). The shifter shaft has two slits in the ball that will fit onto the two pins in the turret, and you may have to adjust or jiggle the shifter in with some effort to get it to fit in nicely (Figure 11b). Once the shifter is in, align the holes on the turret with the holes on the boot and start bolting the shifter to the turret.
There are no specifications in the Haynes manual regarding the torque specifications for these bolts, but some Youtube videos say it is 9Nm. I just hand tightened them which should be enough.
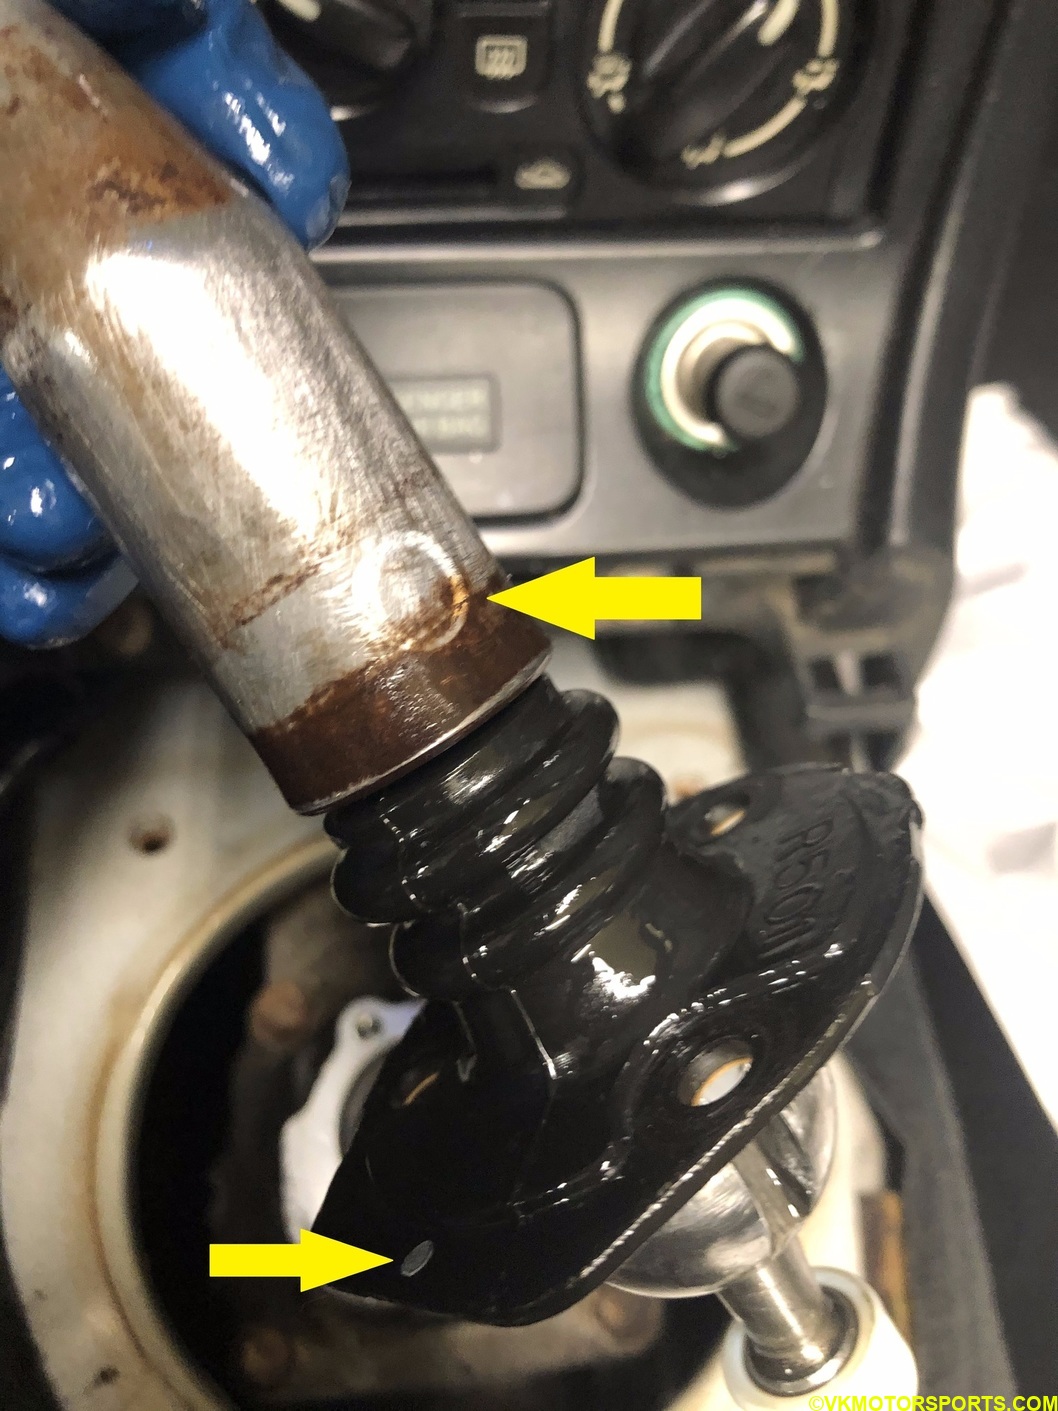 Figure 11a. White spots on the shifter shaft and the boot
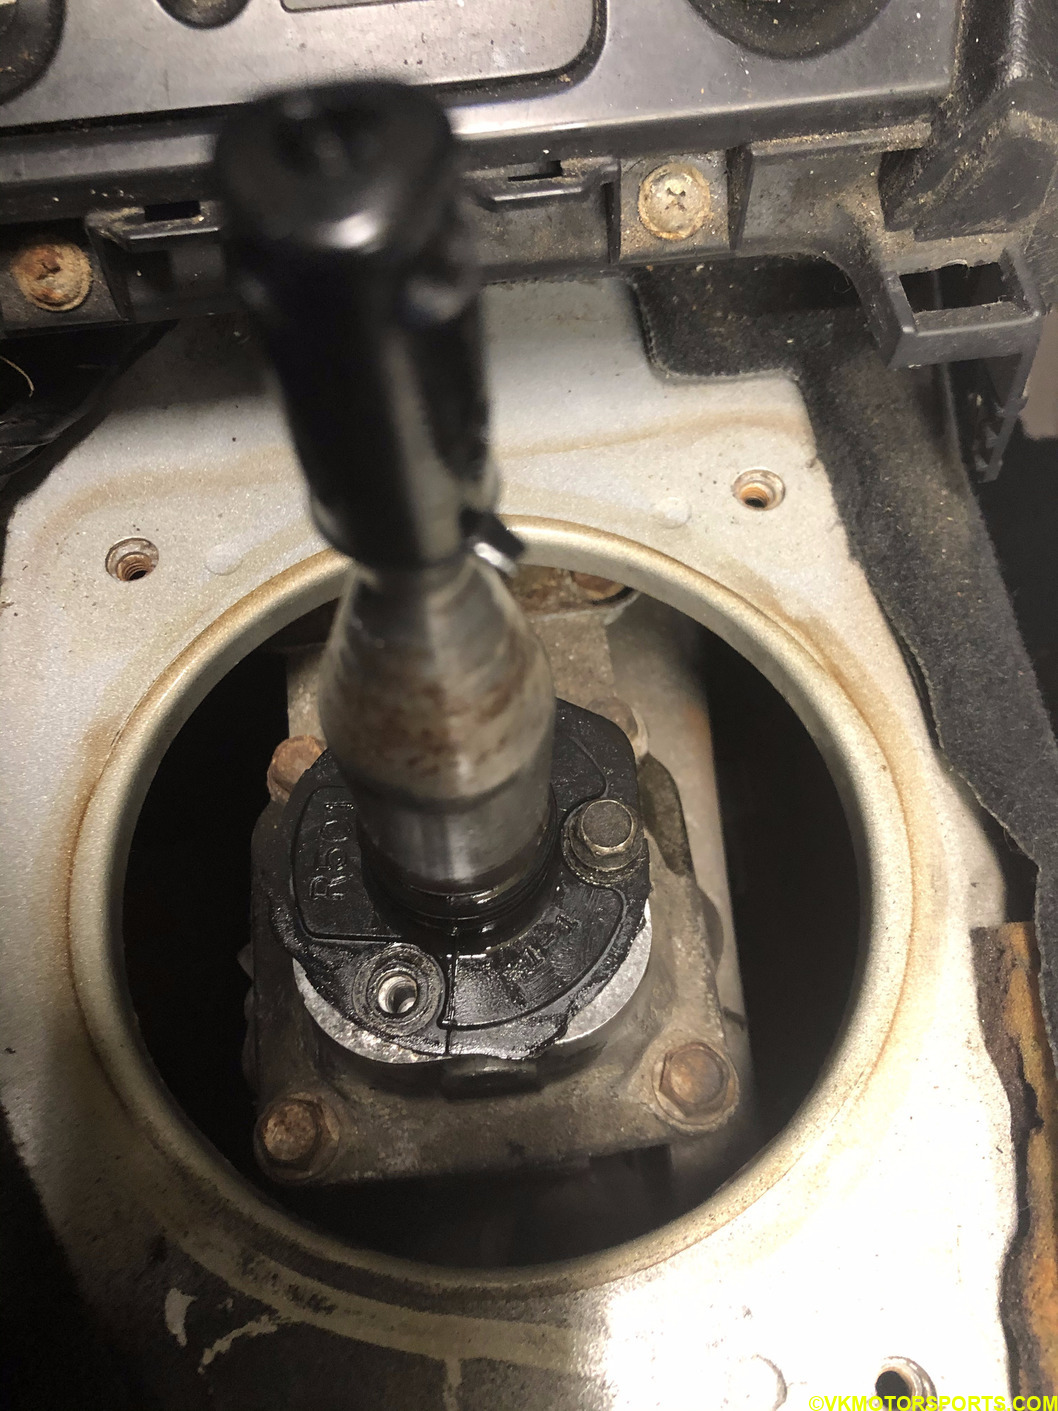 Figure 11b. Insert the shifter into the turret
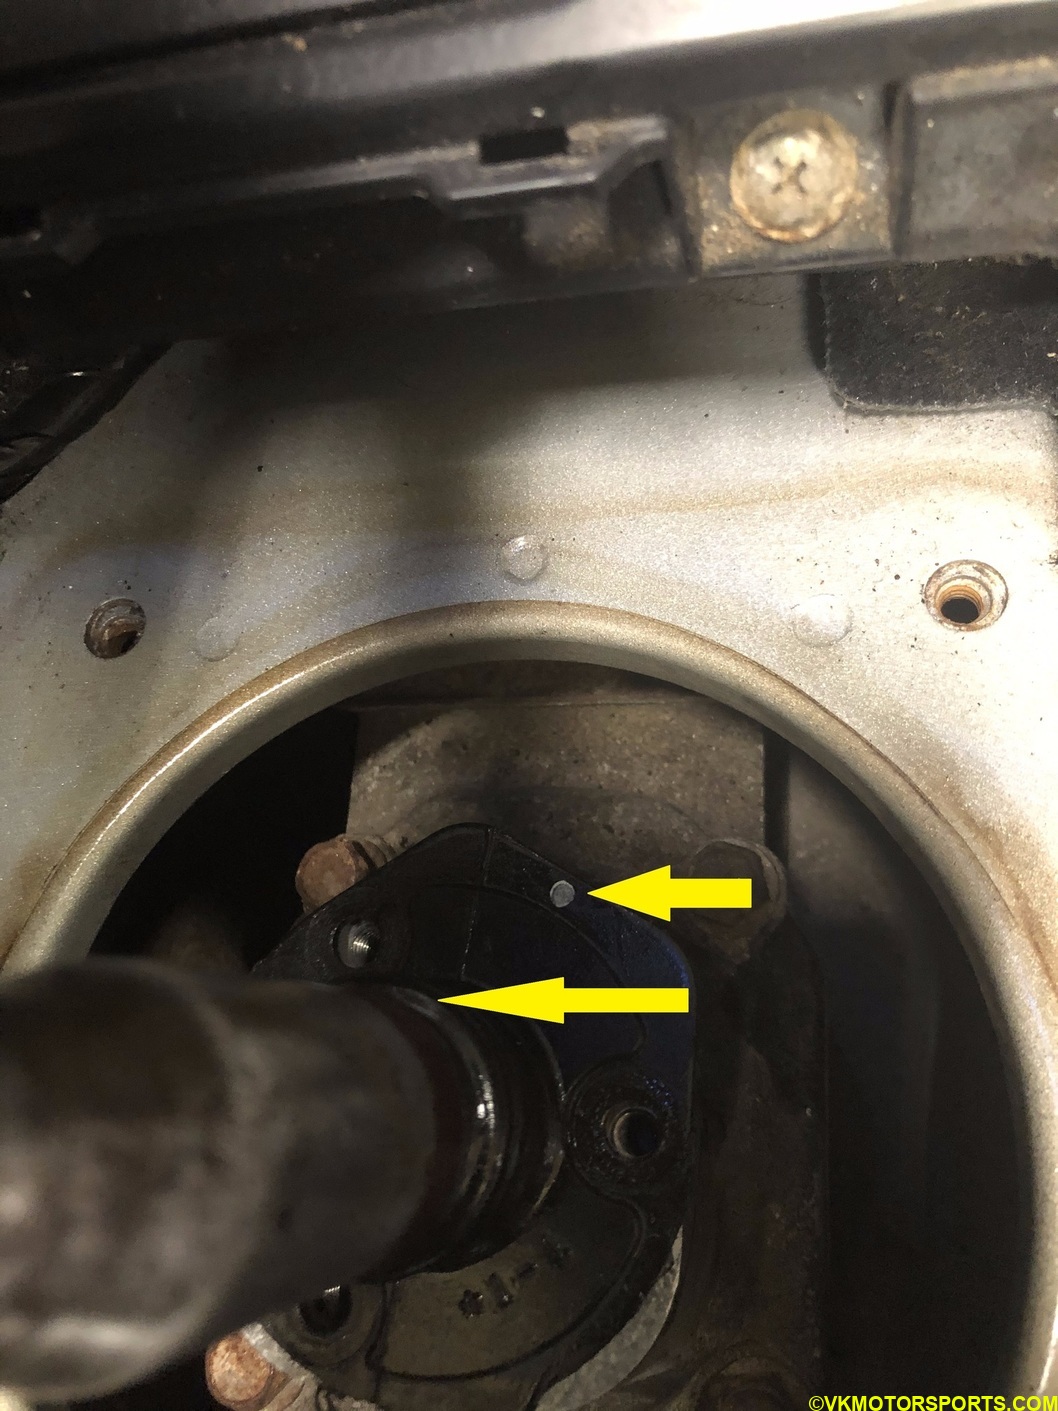 Figure 11c. Align the white spots and the bolt holes
Step 13: Now install the larger boot on the top of the surface of the center console area and bolt it with the 4 bolts (Figure 13a, 13b and 13c). There are no torque specifications given for these bolts in the Haynes manual so I hand tighted these as well.
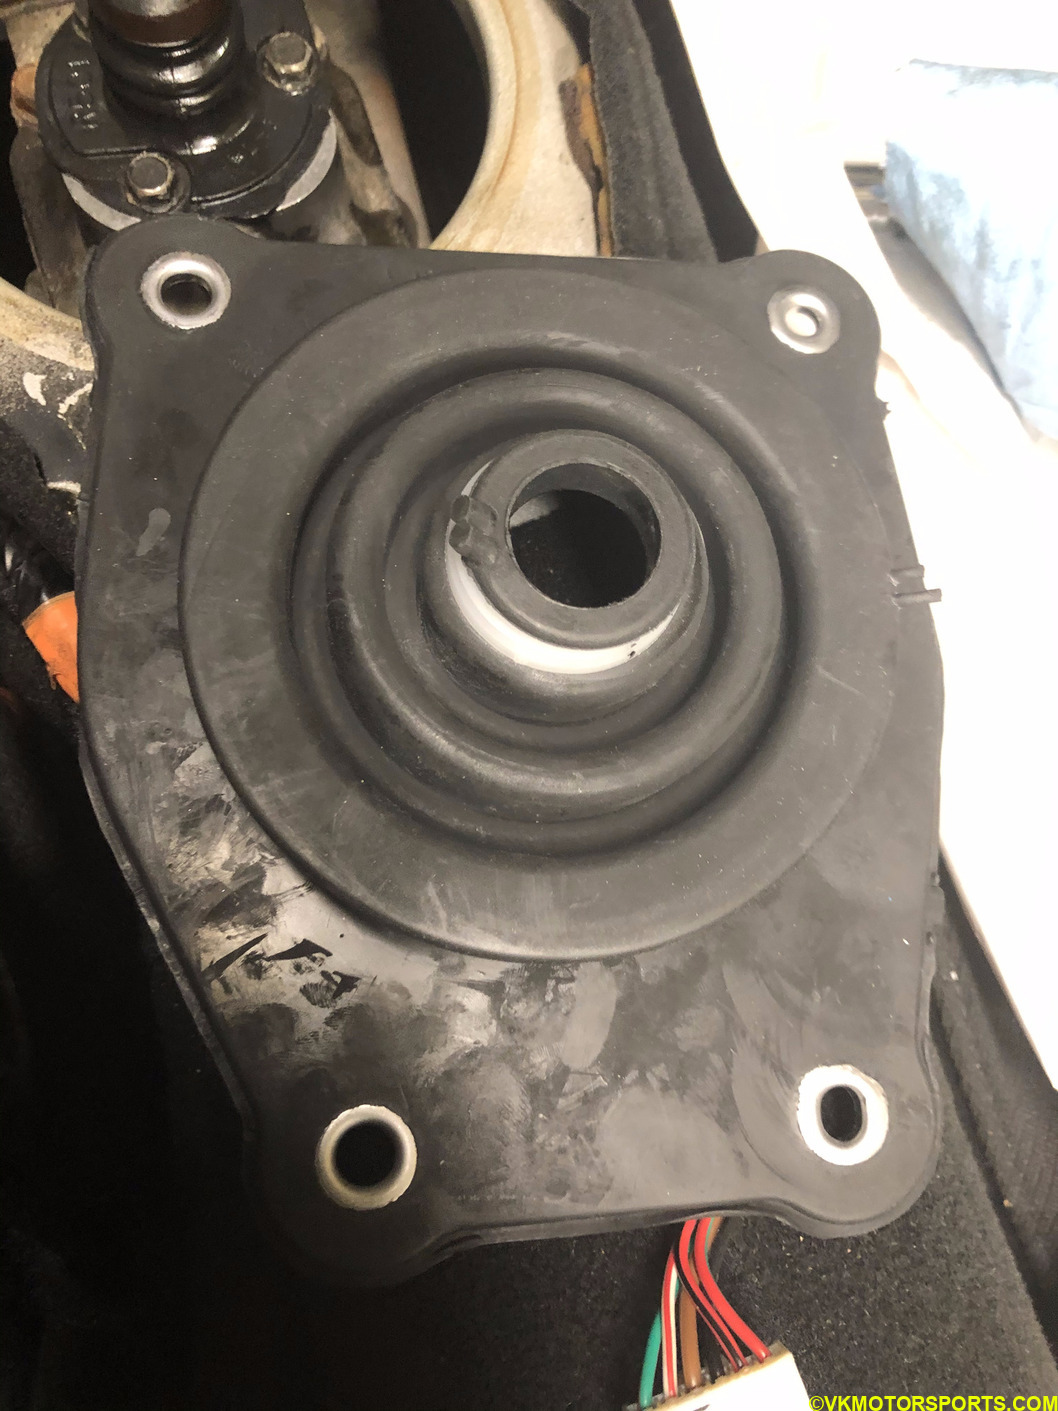 Figure 13a. The large boot goes on next
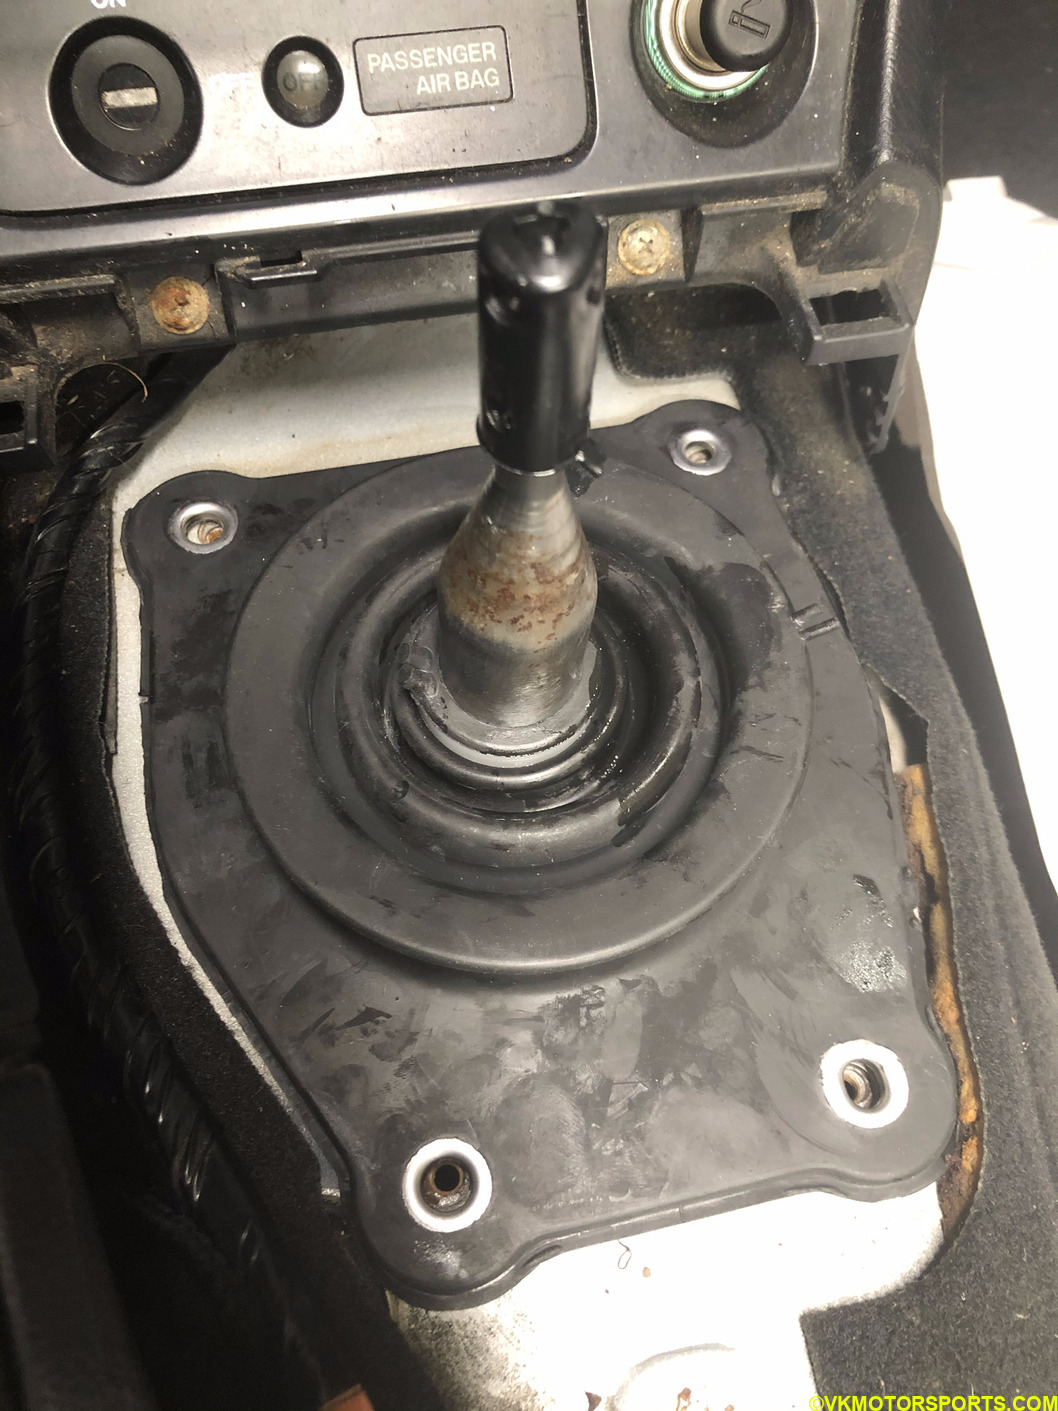 Figure 13b. Install large boot
 Figure 13c. Install boot bolts
Now install sound deadening material back onto the boot. If you have a replacement sound deadening material, now would be a good time to use that. I re-used my old material.
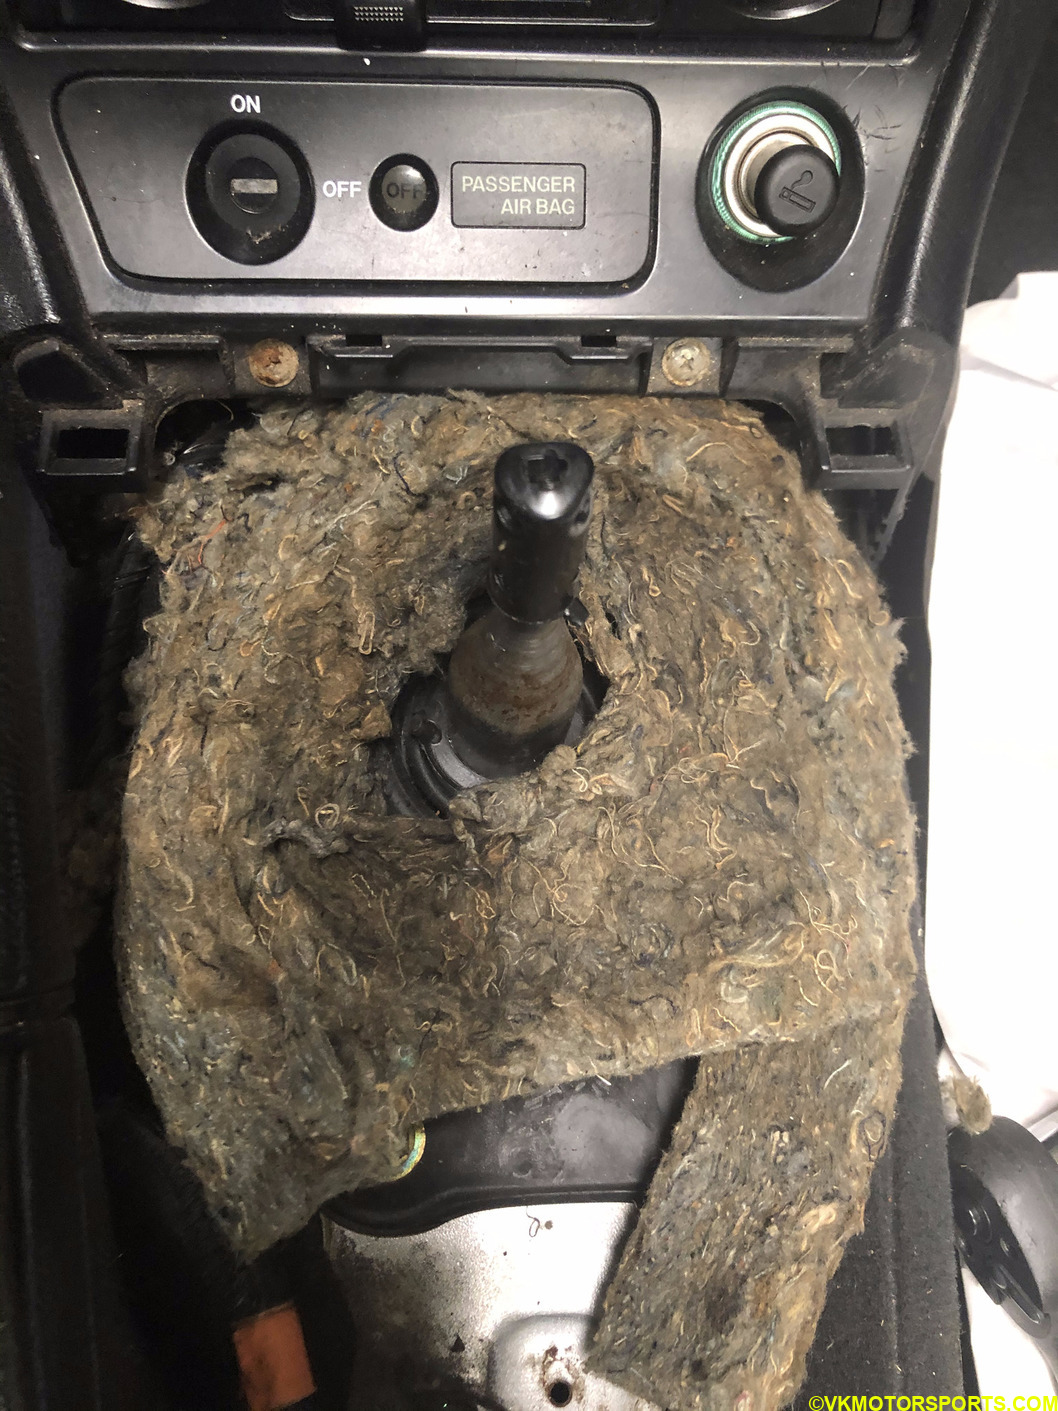 Figure 13d. Install sound deadening
Step 14: Before we install the center console, I wanted to change the center console boot as well as it was torn (Figure 14a). I purchased a replacement boot for this from an online Mazda dealer, Tasca Parts (Figure 14b and 14c).
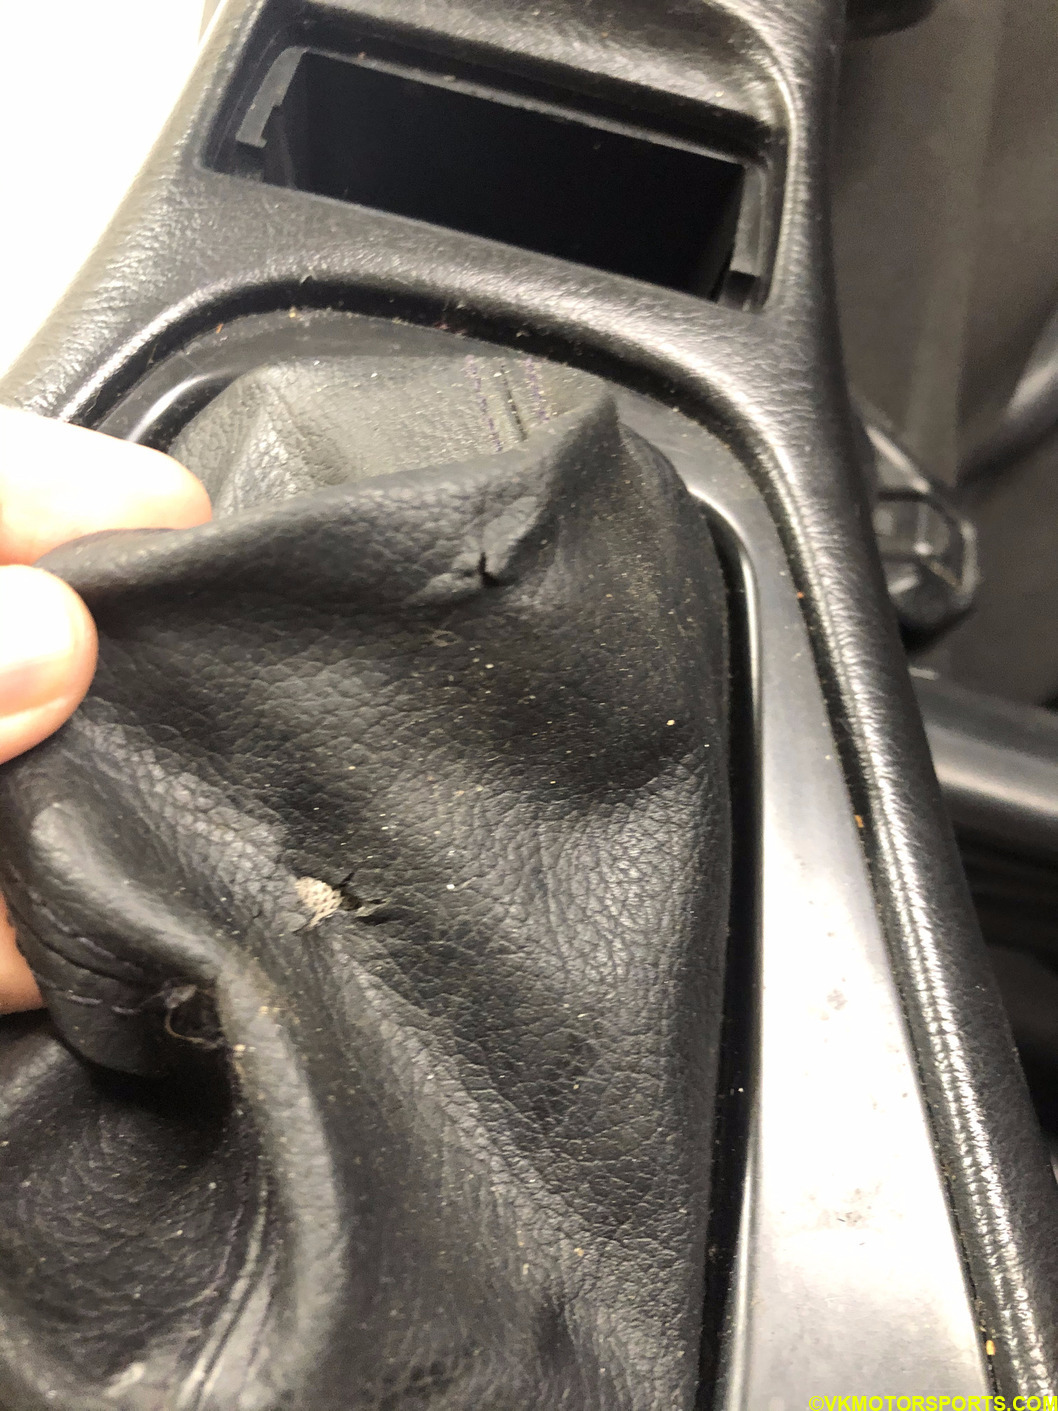 Figure 14a. Torn shifter console boot
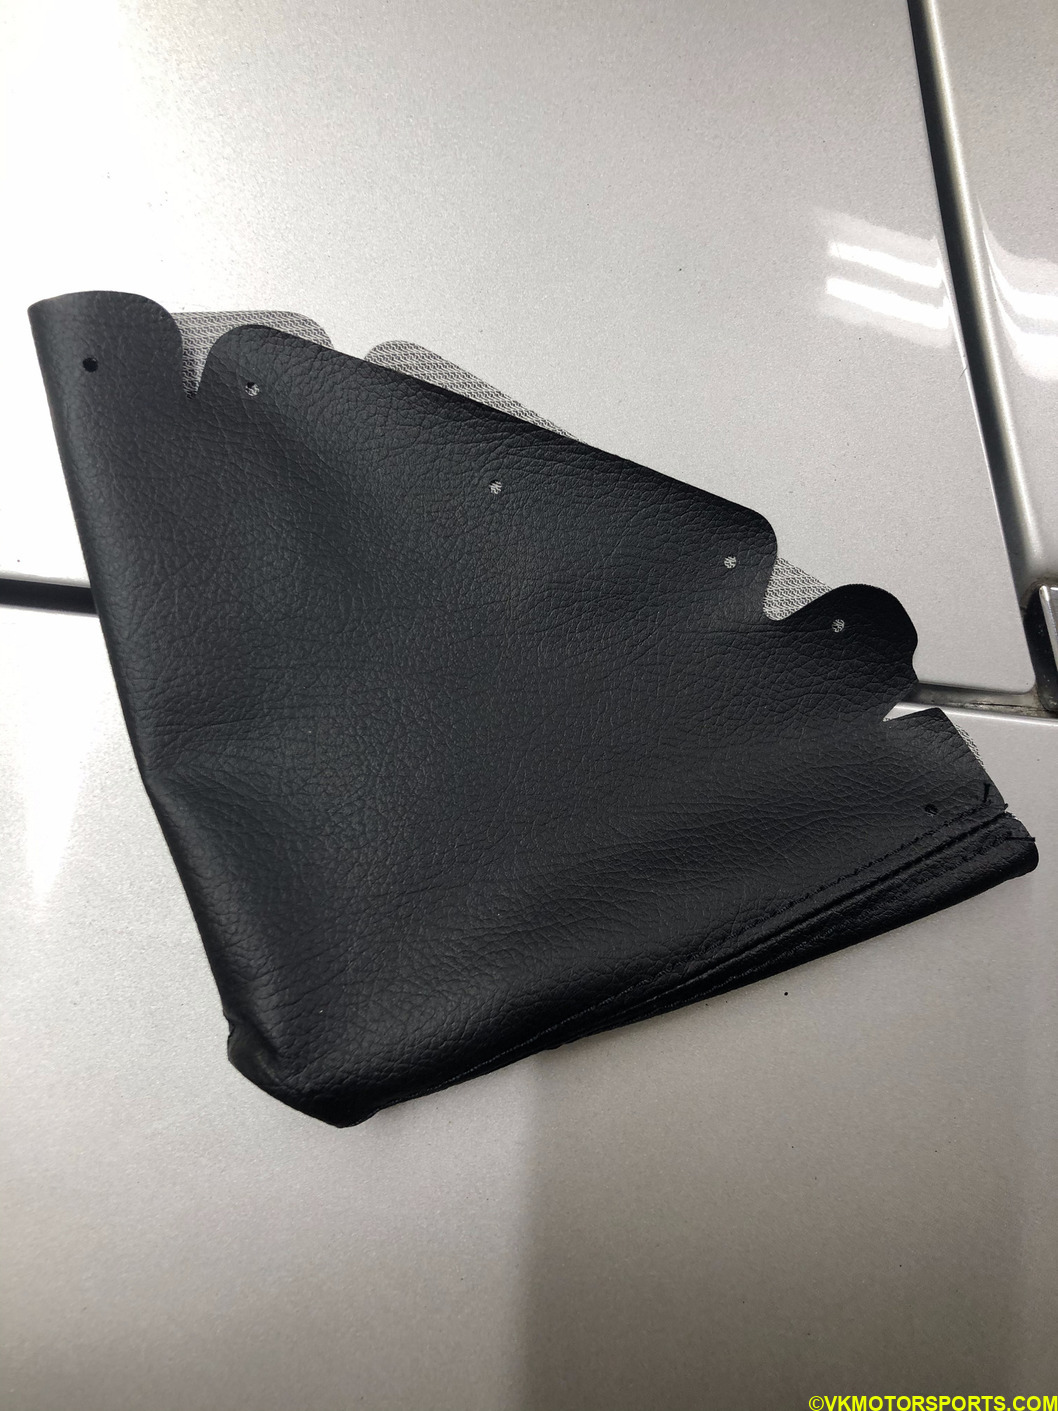 Figure 14b. New shifter console boot
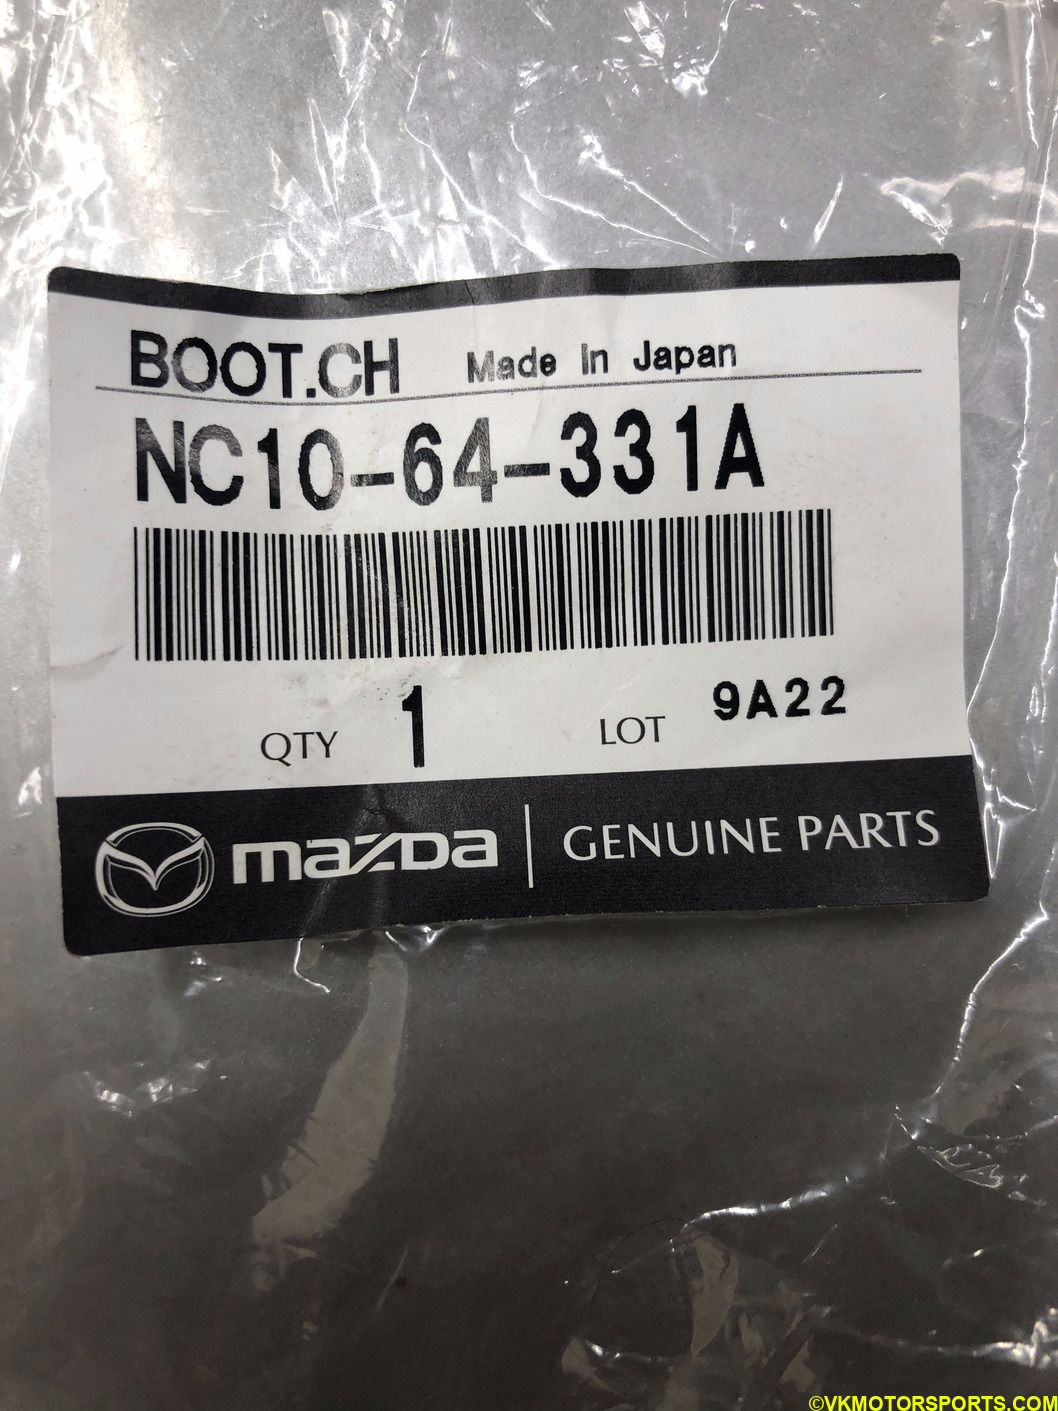 Figure 14c. Part number NC10-64-331A
Flip the center console to access the 4 screws (yellow arrows in Figure 14d) that need to be removed for taking the old boot out (Figure 14e). As you can see the boot is held by the pins/protrusions on the plastic frame (Figure 14f).
 Figure 14d. Remove these 4 screws
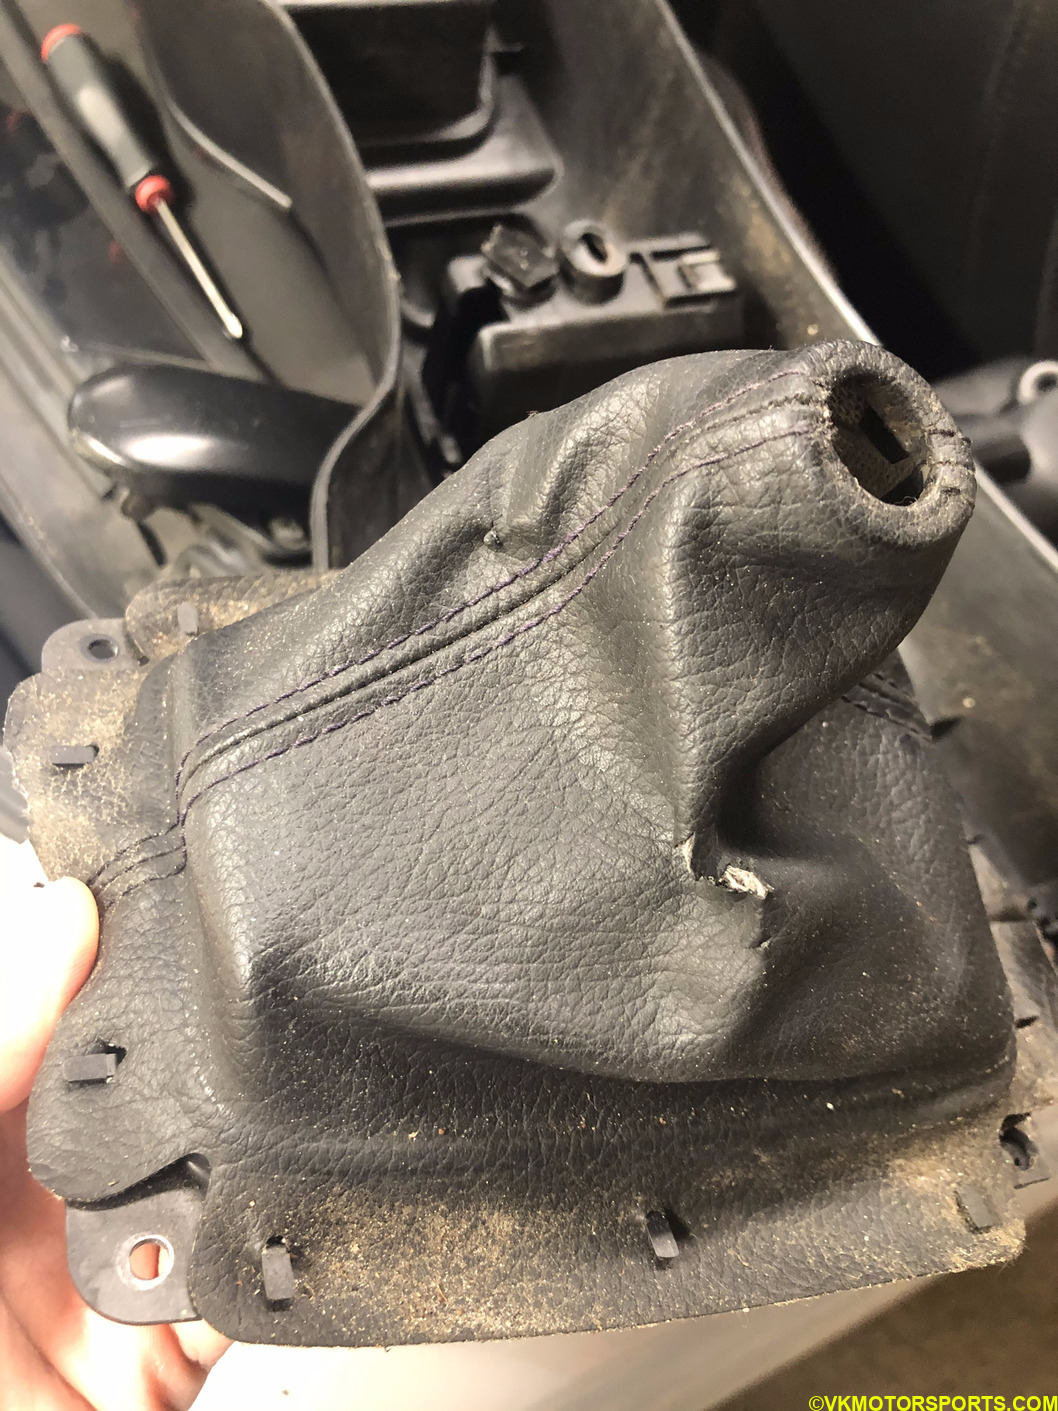 Figure 14e. Boot is now out of the console
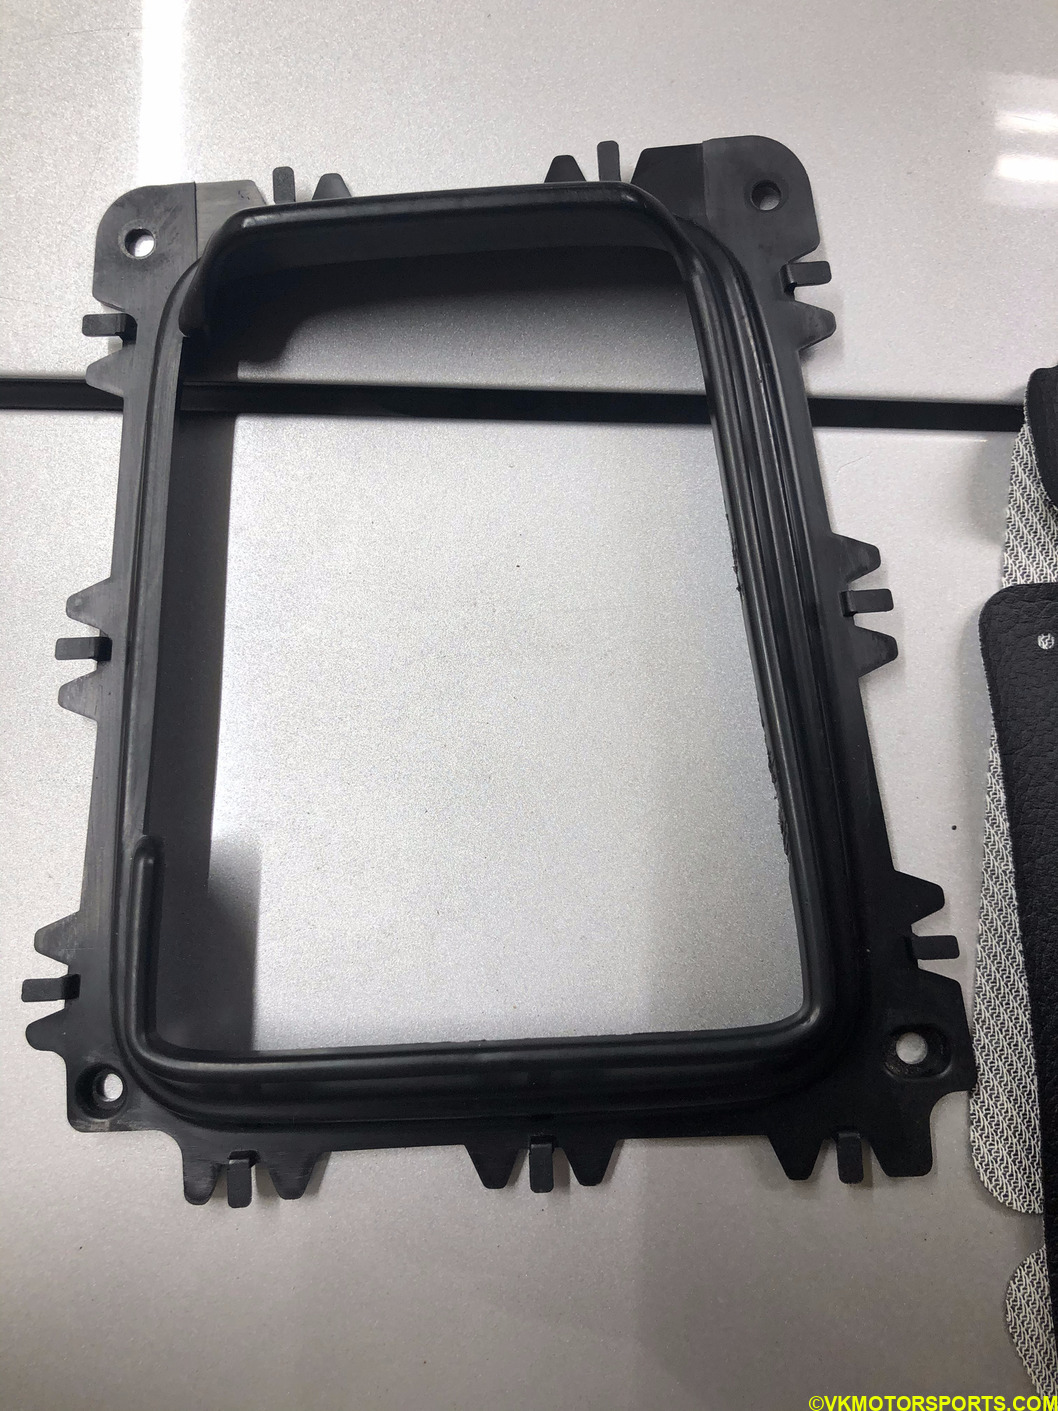 Figure 14f. Boot frame
One by one insert the new boot into the pins of the boot frame as shown in Figure 14g till it looks like in Figure 14h.
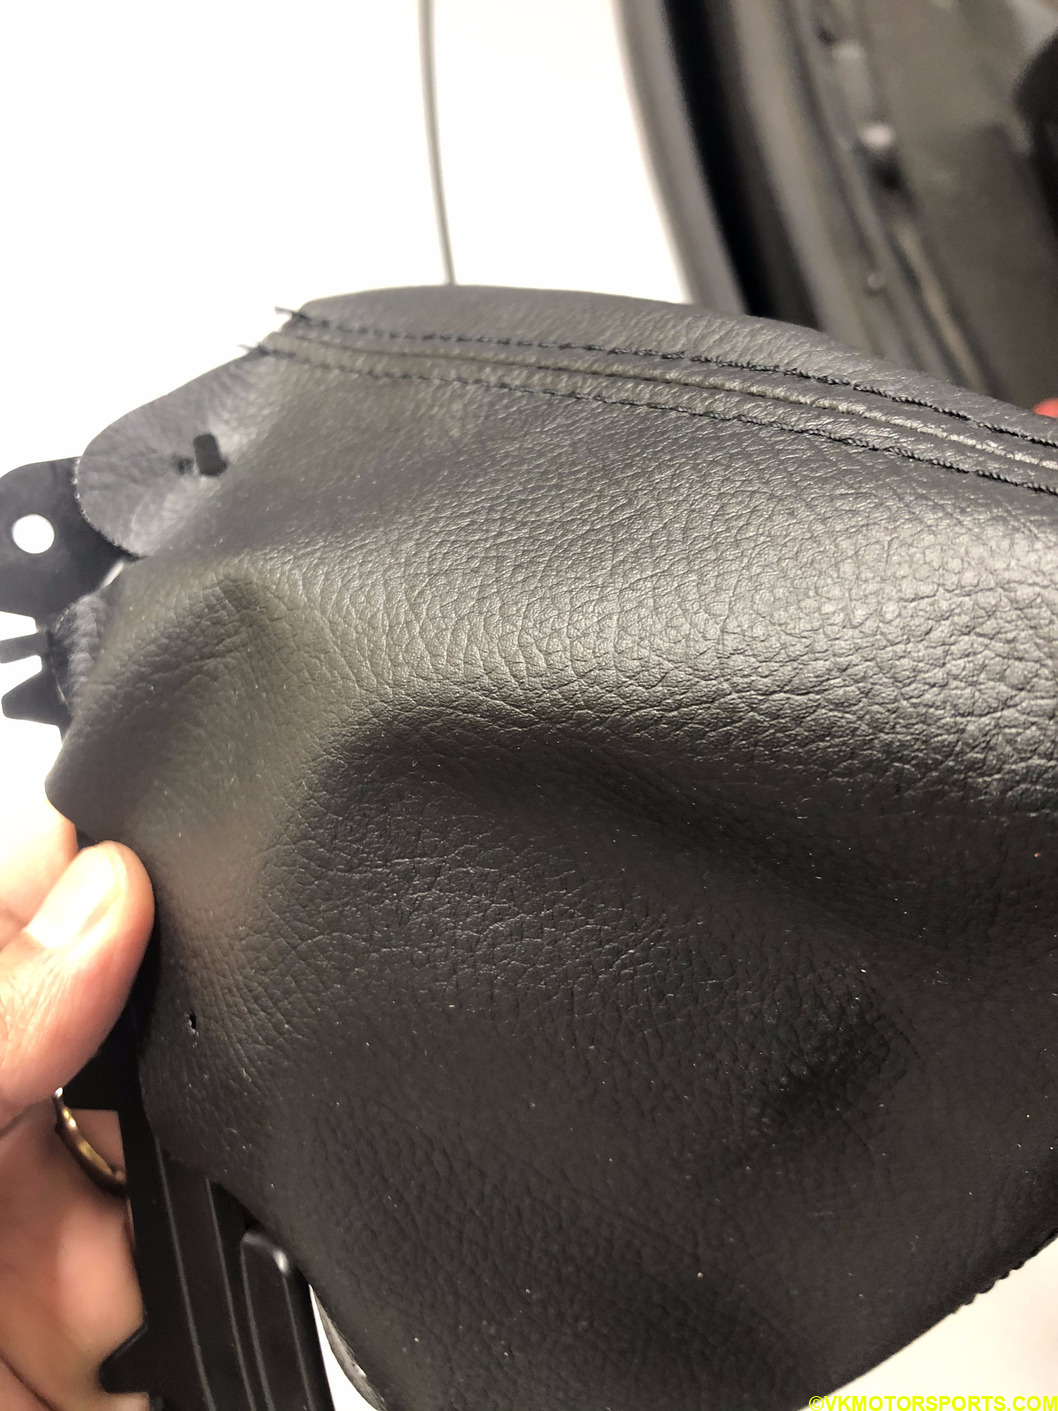 Figure 14g. Insert new boot into frame
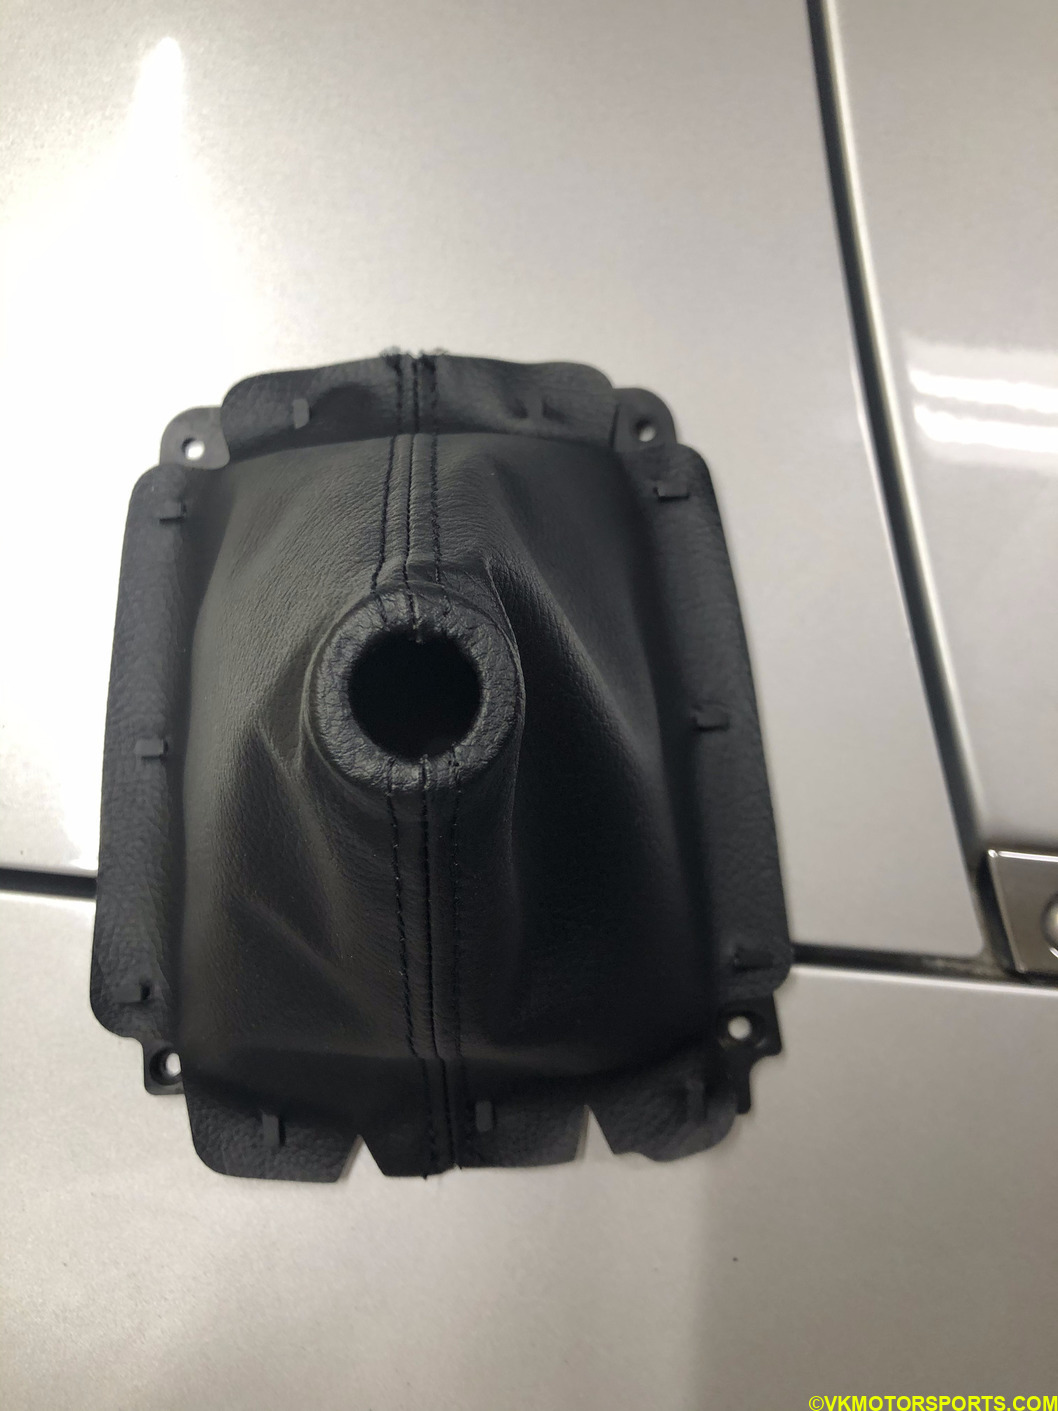 Figure 14h. Boot is fitted onto the frame
Now reinstall the 4 screws and fit the boot back onto the center console (Figure 14i).
 Figure 14i. Reinstall the boot into the center console using the 4 screws
Now the center console is ready to be installed into position.
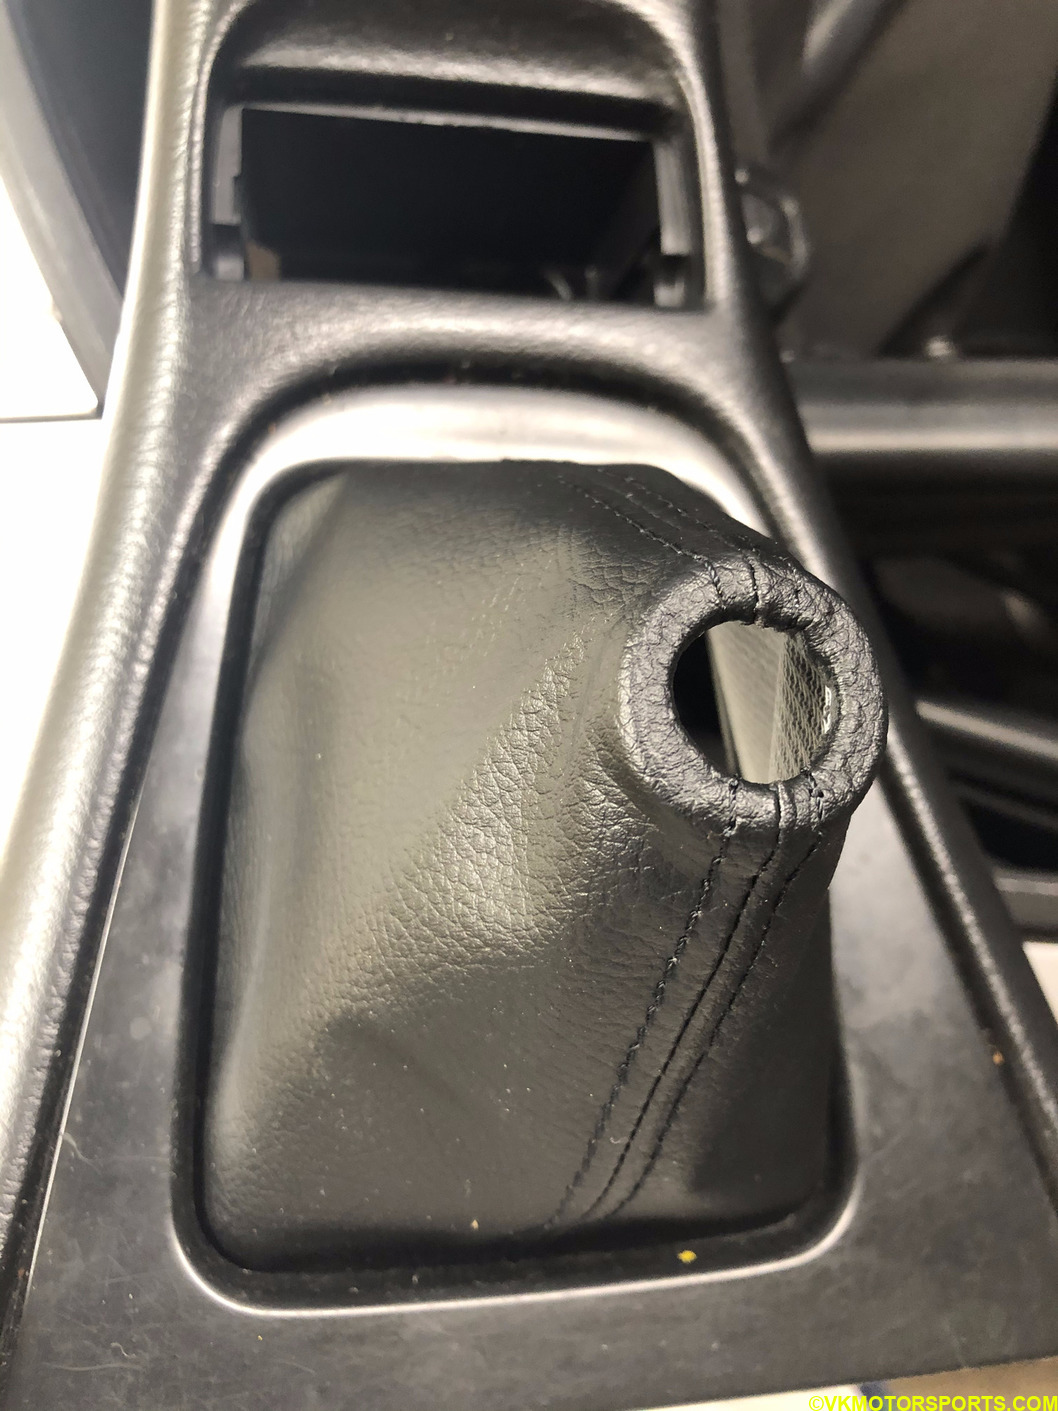 Figure 14i. Center console is now ready
Step 15: Install the center console in the same way you took it out in Step 2, and screw it back in correctly.
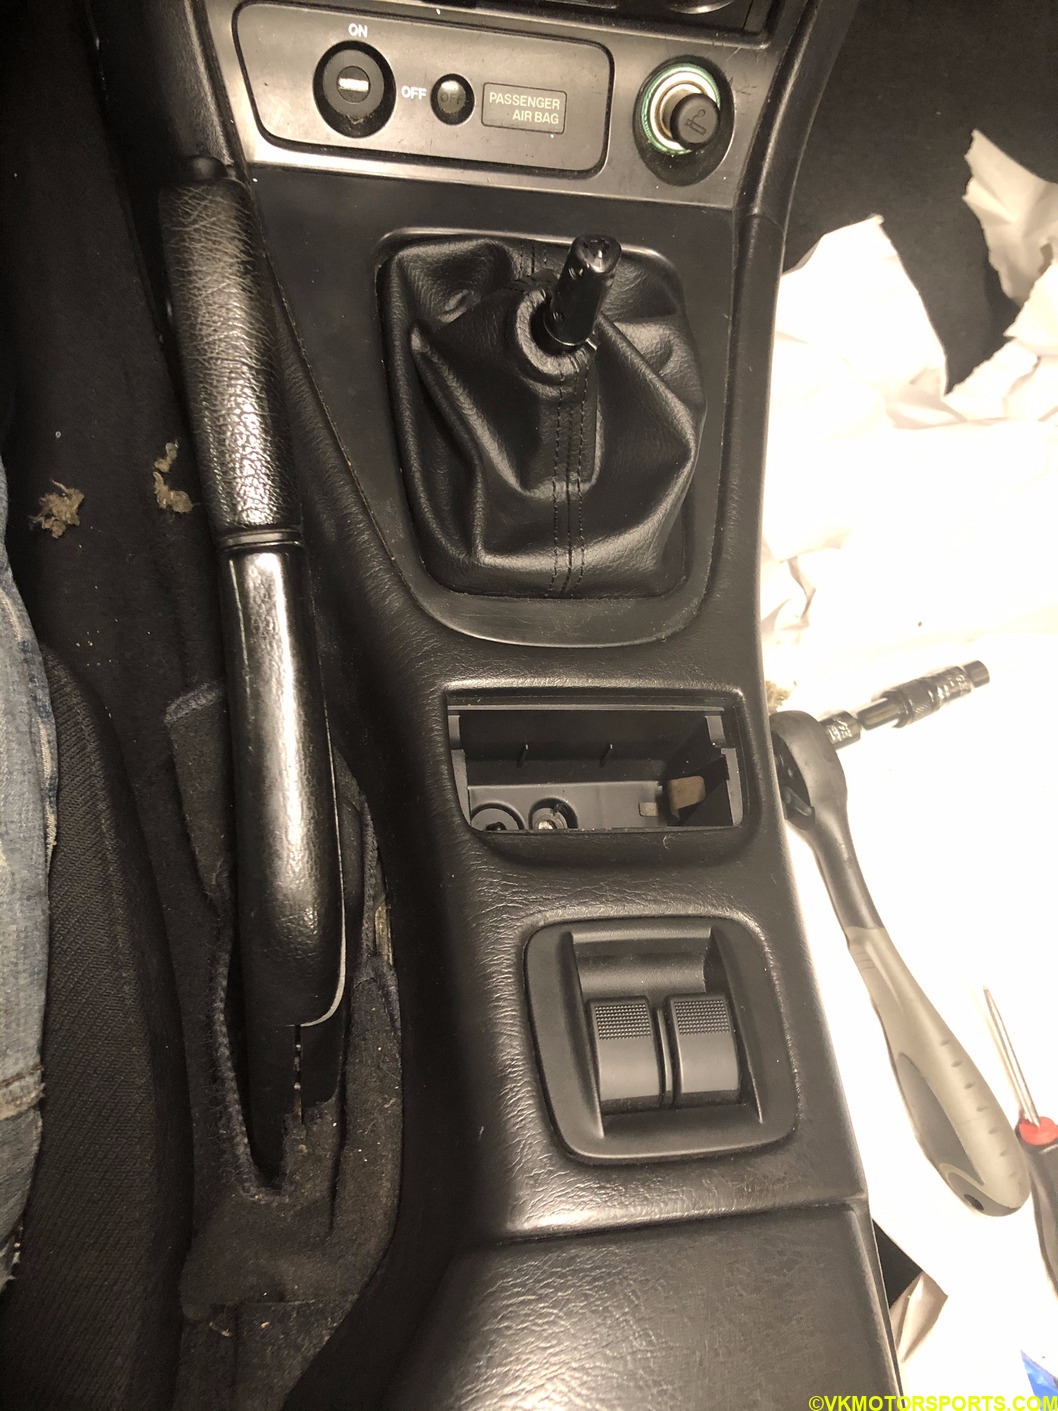 Figure 15. Install center console back into place
Step 16: Install the shift knob back on to the shifter shaft.
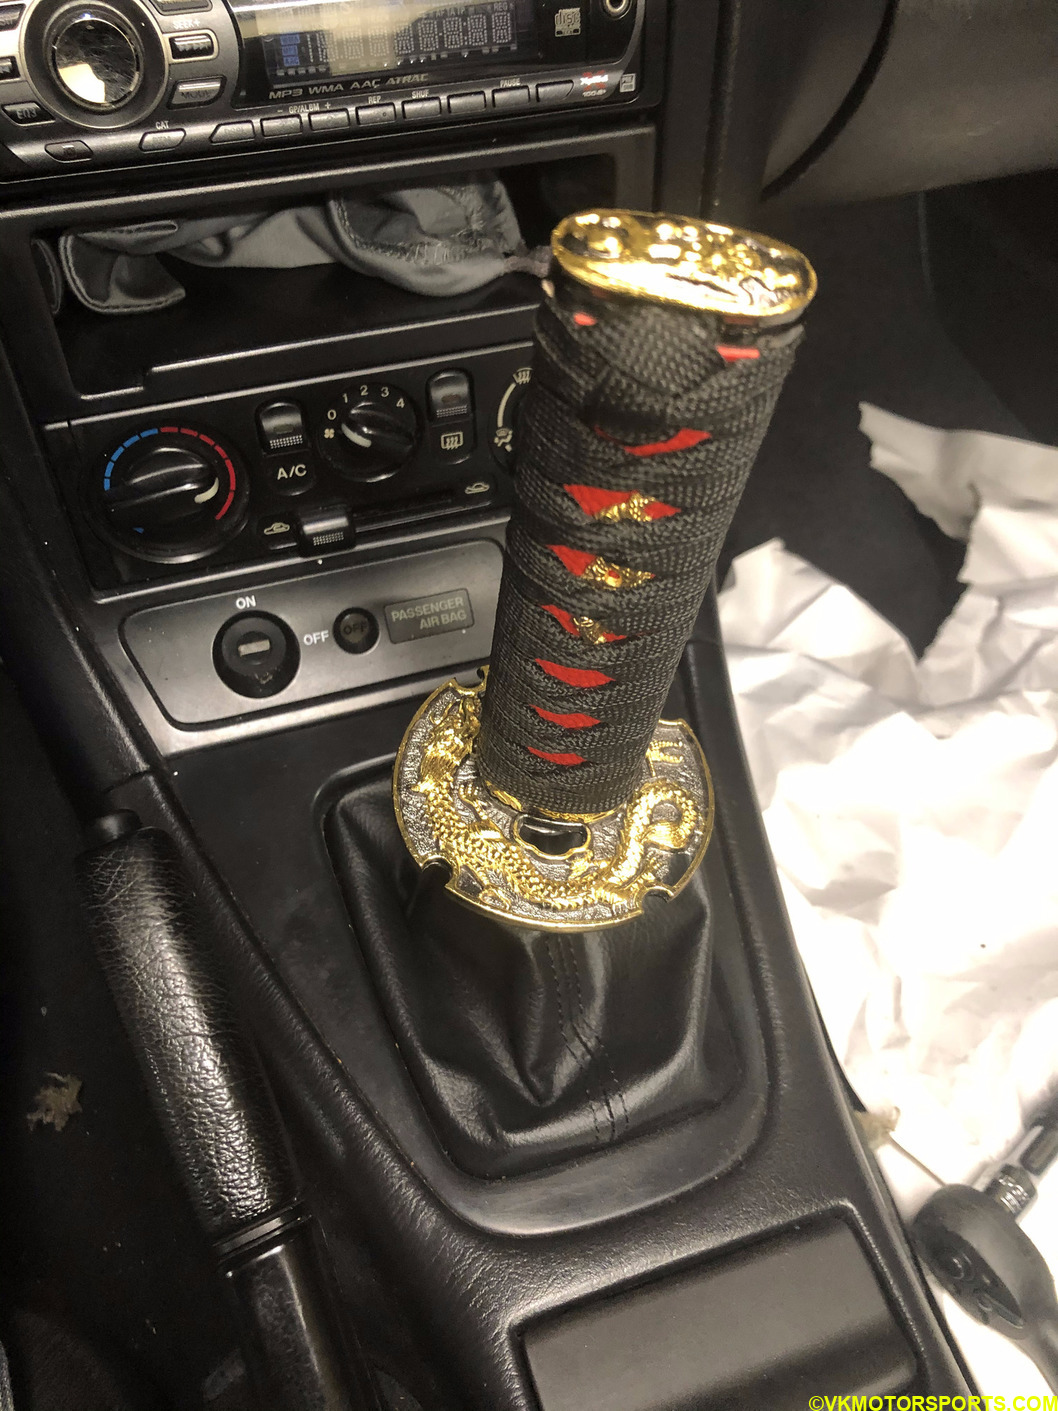 Figure 16. Install the shifter knob
This procedure took a little more than an hour to complete, but now the shifter works really well. Looking forward to changing the transmission fluid next.