On the 2008 Toyota 4Runner Limited, I have a weird problem of the security alarm going off at random times during the day or night. This disturbs neighbors and annoys the hell out of me. So I took it to the dealership sometime in January 2025, and they said I had an aftermarket alarm system and removed it. The dealership blamed it on that.
A few months later, the random beeping was back. I searched on the internet forums and decided that maybe it is the sunroof drains not draining. So I purchased some weed whacker string and cleaned the sunroof drains, following this video.
It is now November 2025, and the random beeping alarm is back. I got tired of disconnecting the battery before traveling for work, so I purchased and installed a battery kill switch. This post describes how to perform this install. It is really easy to do and can be done in 5 minutes with simple hand tools for $20.
PARTS REQUIRED
We need the parts listed below. Some of these you may already have in your toolbox.
INSTALLATION PROCESS
First step is to disconnect the battery negative terminal as seen in Figure 1. If you have a cap for the battery terminal, like I do, place that on the terminal to avoid accidental connection from the negative terminal. This cap is just something I saved when I purchased the battery new. You can also just wrap some electrical tape around it temporarily to insulate the terminal. Do not use duct tape as it may leave a residue.
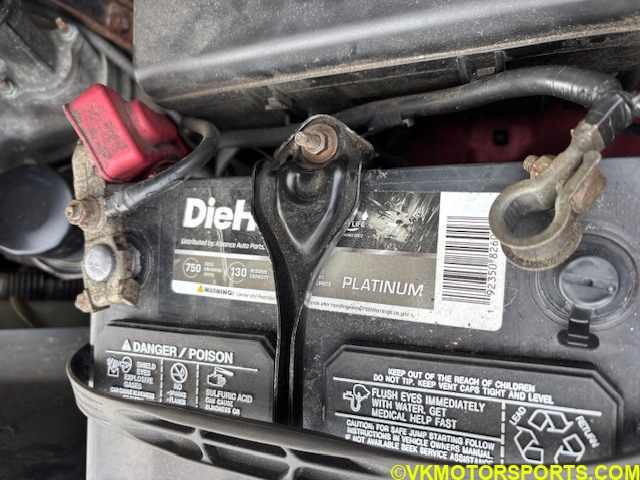
Figure 1. Disconnect the negative terminal of the battery
Next we unpack the Nilight Remote Battery Disconnect Switch as seen in Figure 2. It has many parts:
- the relay
- two remote controllers
- a flexible silver-colored aluminum negative terminal
- a black negative cable
- a brass terminal connector for the negative terminal of the battery
- a red positive battery terminal connector cable
- additional connectors for extensions
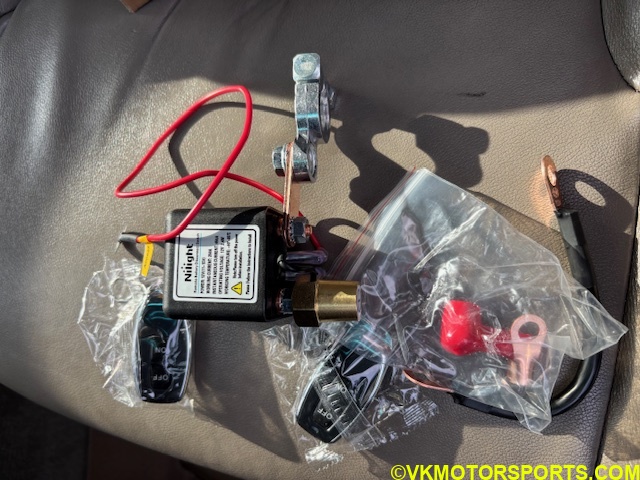
Figure 2. Unpacked contents of the Nilight kill switch
Next you should view the connection schema as shown in Figure 3 and make sure the switch is connected correctly as shown in Figure 4.
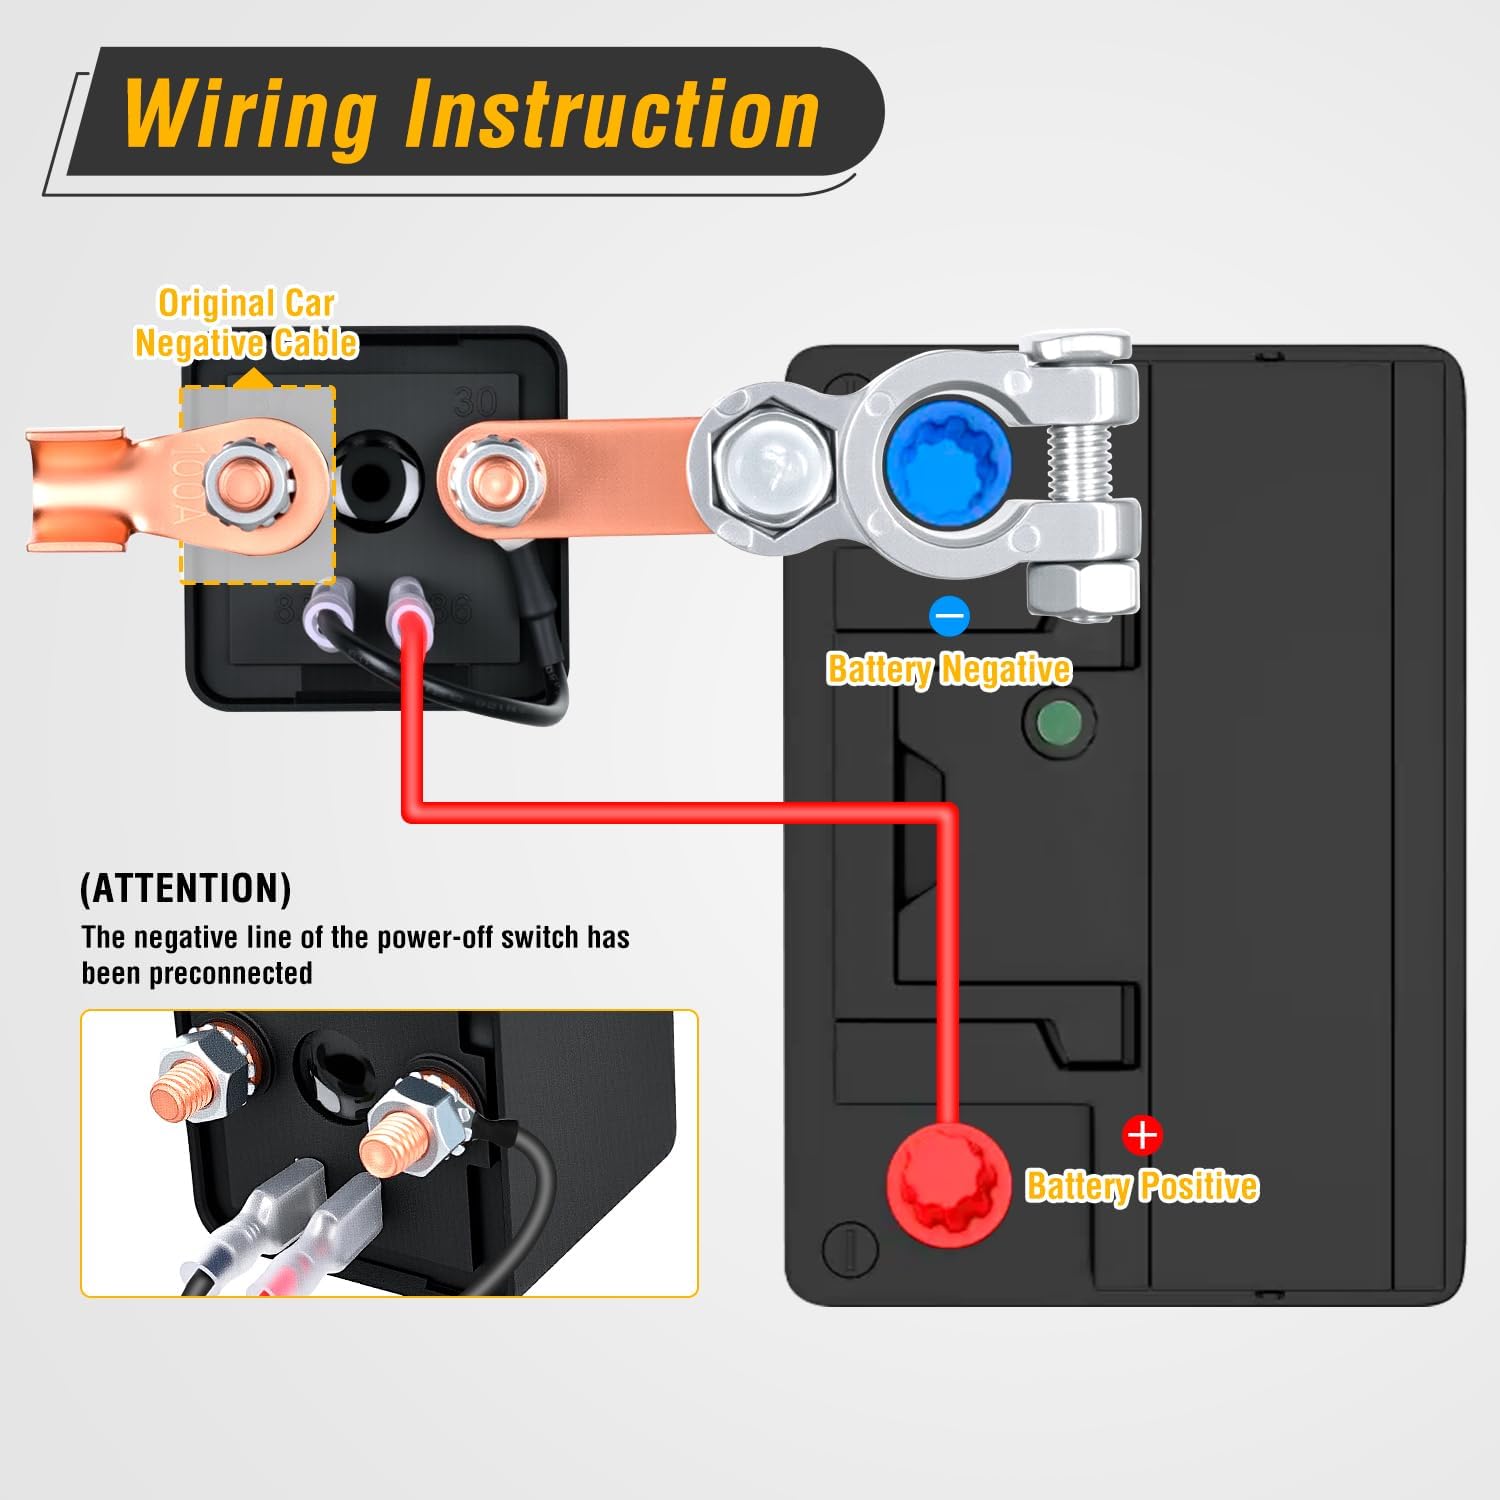
Figure 3. Connection schema for the Nilight remote battery disconnect switch
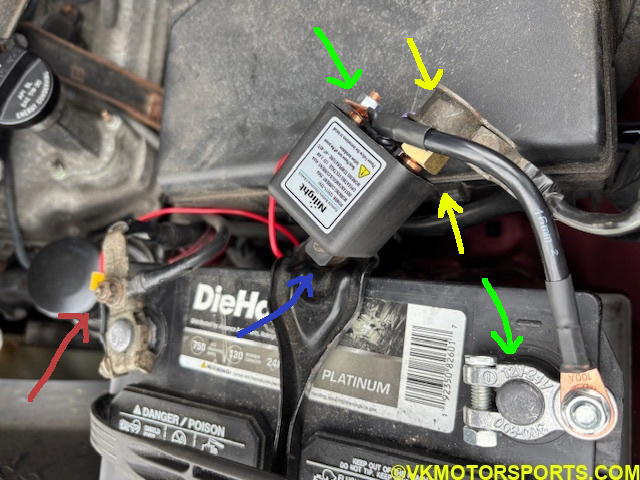
Figure 4. View of the kill switch installed on the battery
The positive red cable, shown by the red arrow in figure 4, is connected to the positive terminal by loosening the nut a bit, inserting the cable connector and tightening the nut back.
The short length negative black cable should be connected to the negative terminal connector provided by Nilight to the battery negative terminal and to the free terminal on the relay as shown by the green arrow in figure 4.
The negative terminal connector of the 4runner should then be connected to the brass terminal on the Nilight relay as shown by the yellow arrow in figure 4. It may so happen that you have to screw in the brass terminal onto the Nilight relay. Make sure you tighten it but not overtighten it.
You may need a 13mm socket wrench for the Nilight battery terminal connector shown by the green arrow in figure 4.
Once all this is installed, test it with the remote control. Your key in the ignition will not turn on the car until you hit the On button on the remote control.
If your tests succeed, tighten up all the nuts on the individual terminals to make sure they do not move.
The Nilight relay can be fixed onto the battery holder clamp as shown by the blue arrow in figure 4, to keep it stable in position.
That is it. You have now successfully installed a battery remote disconnect switch to handle security alarm issues.
NOTE: I still recommend you take your vehicle to the dealership to get the security issues diagnosed. It could be broken wires or water leaks causing it.