In the previous post I described how to change the oil on the 2012 Subaru WRX that I purchased last year. In this post I describe how to change the brake pads. It is a very easy process and can be done in an hour or two, depending on your capability.
REQUIREMENTS
- 19mm socket
- 14mm socket
- Socket wrench
- Breaker bar
- Torque wrench
- Brake cleaner
- Permatex brake pad lubricant
- Brake pads - both front and rear
Lifting or Jacking Up the WRX
First step is to jack up the WRX at the jacking points mentioned in the user manual, or use ramps or use a lift like the one I have.
Make sure you do this safely and the vehicle is stable on the jack stands or ramps or lift before you go under it.
Remove the Wheels
Using a 19mm socket, a breaker bar, as seen in Figure 1, and a socket wrench, take off one wheel at a time. You can do the brake pads change one wheel at a time or can take off all the wheels at once if the whole car is up on a lift.
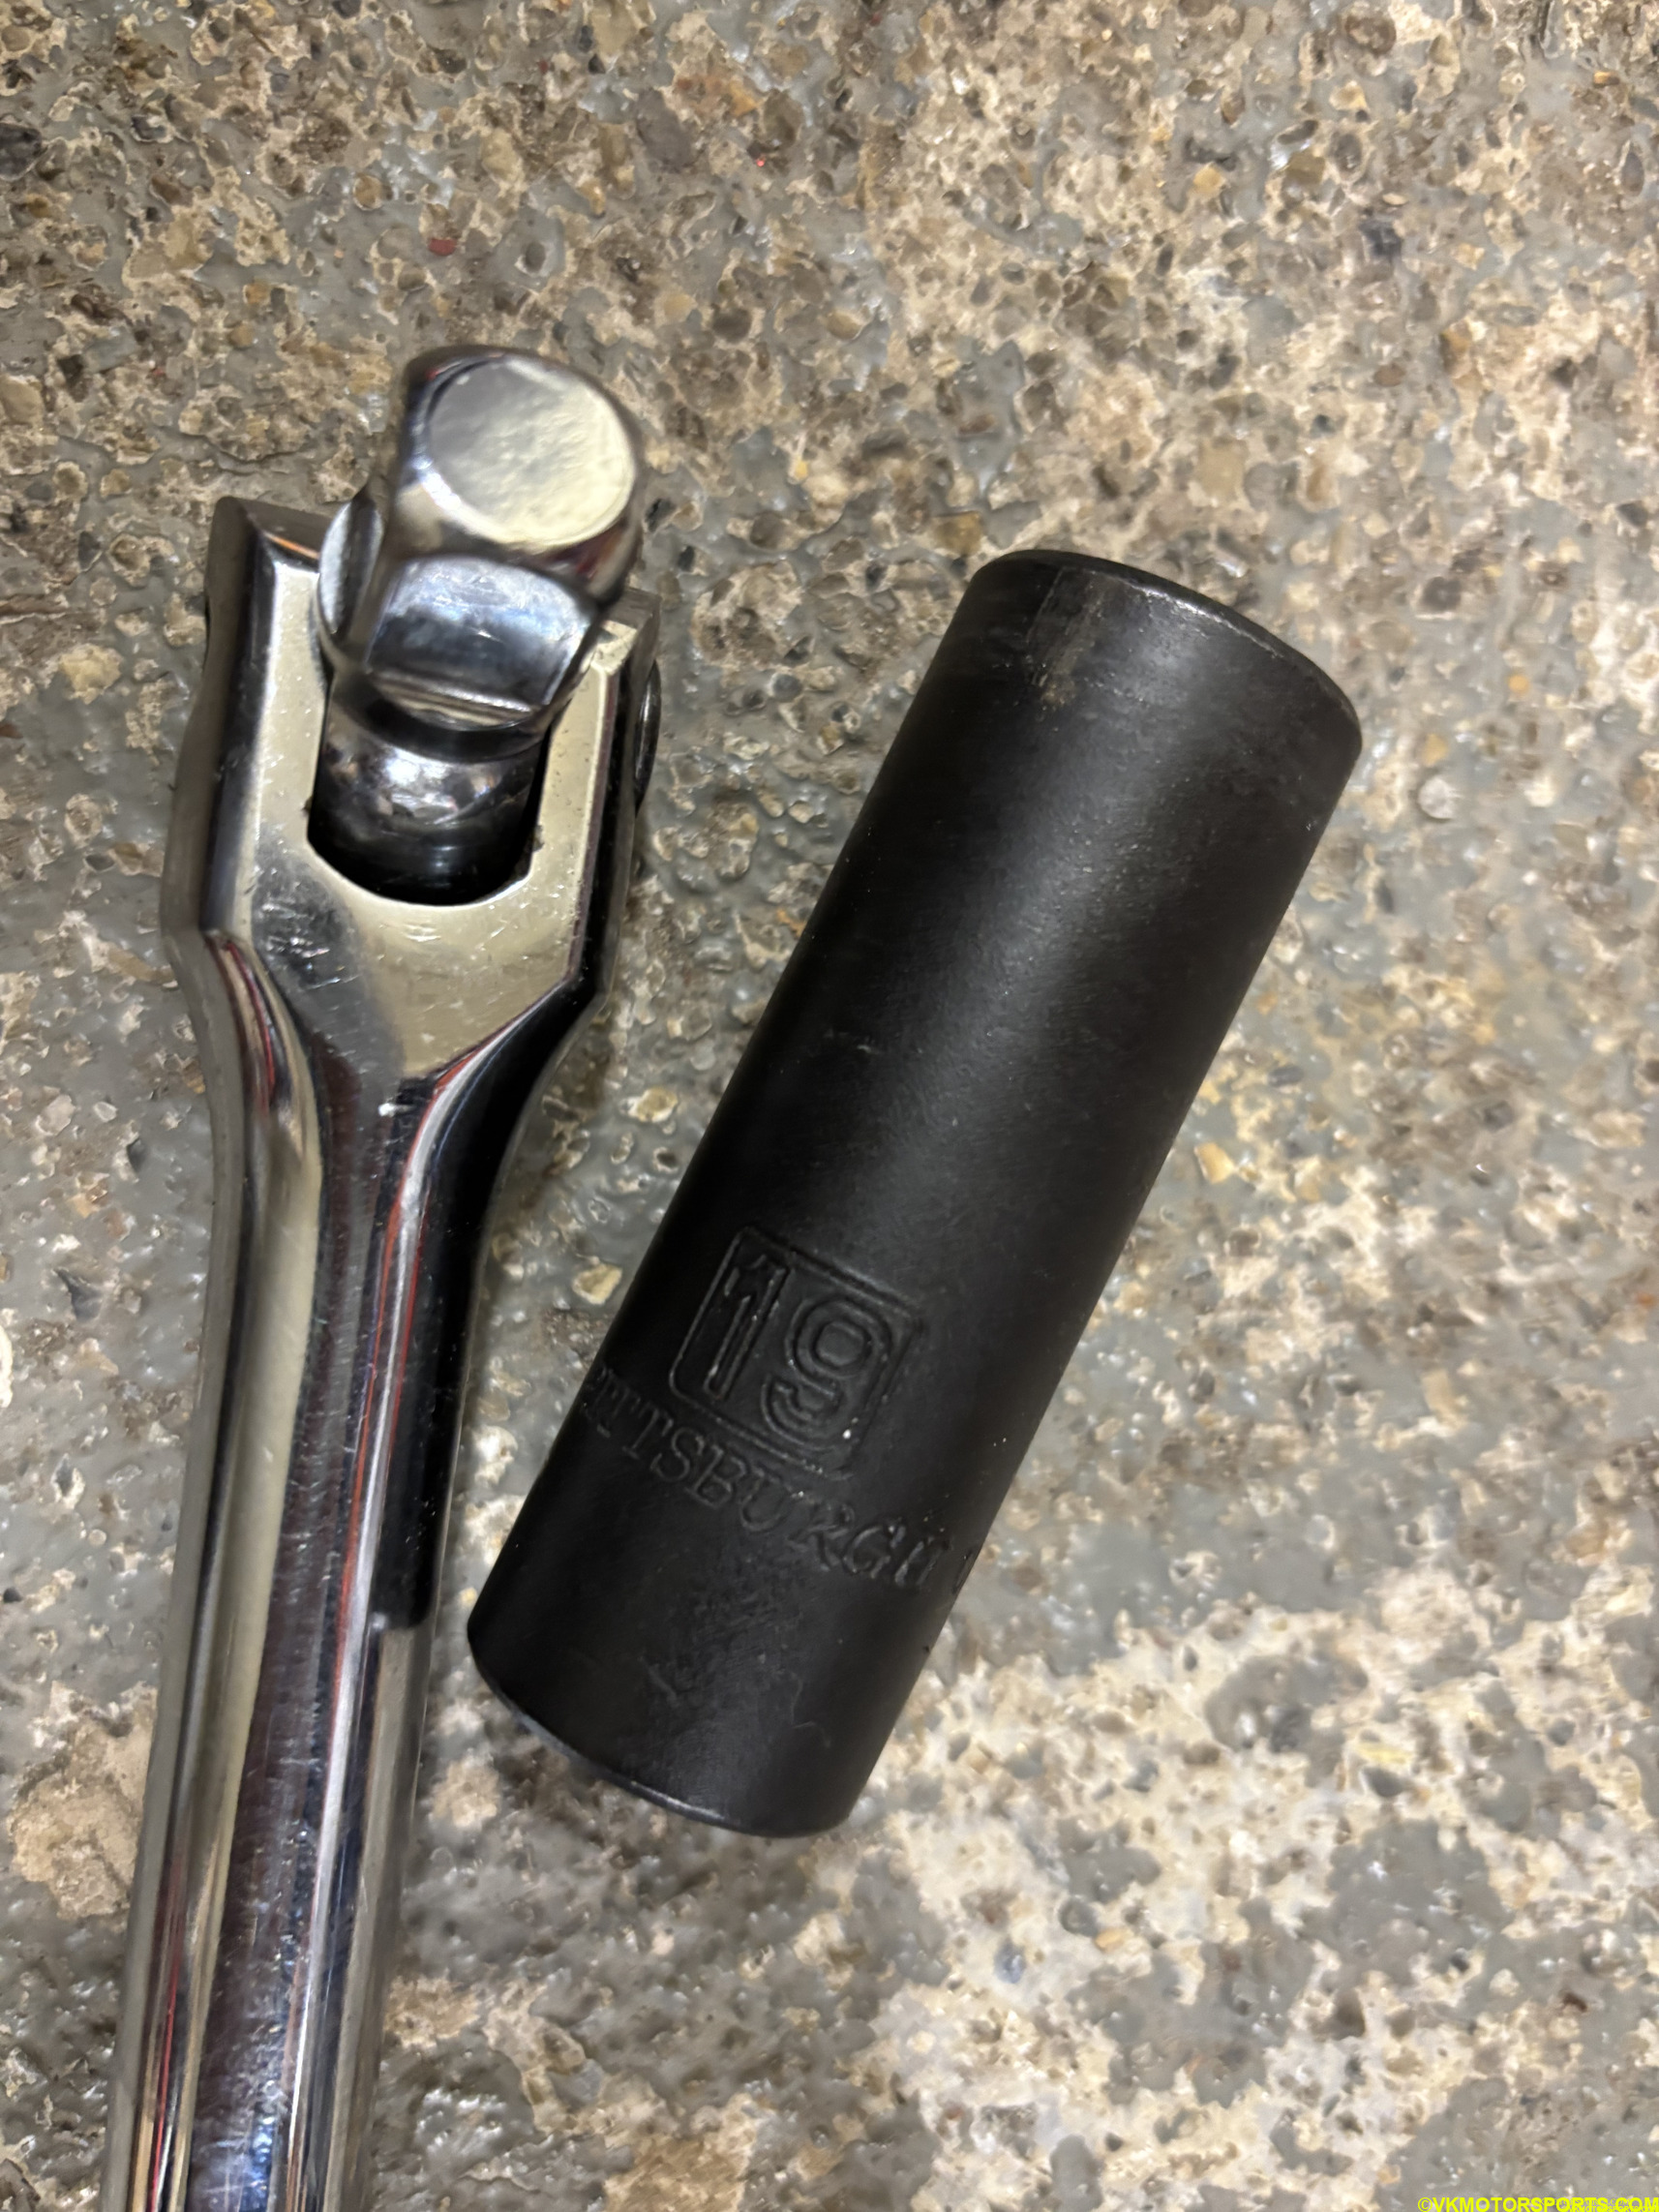 Figure 1. 19mm socket and a breaker bar
When you remove the wheel, you should place it below the calipers for safety as shown in Figure 2.
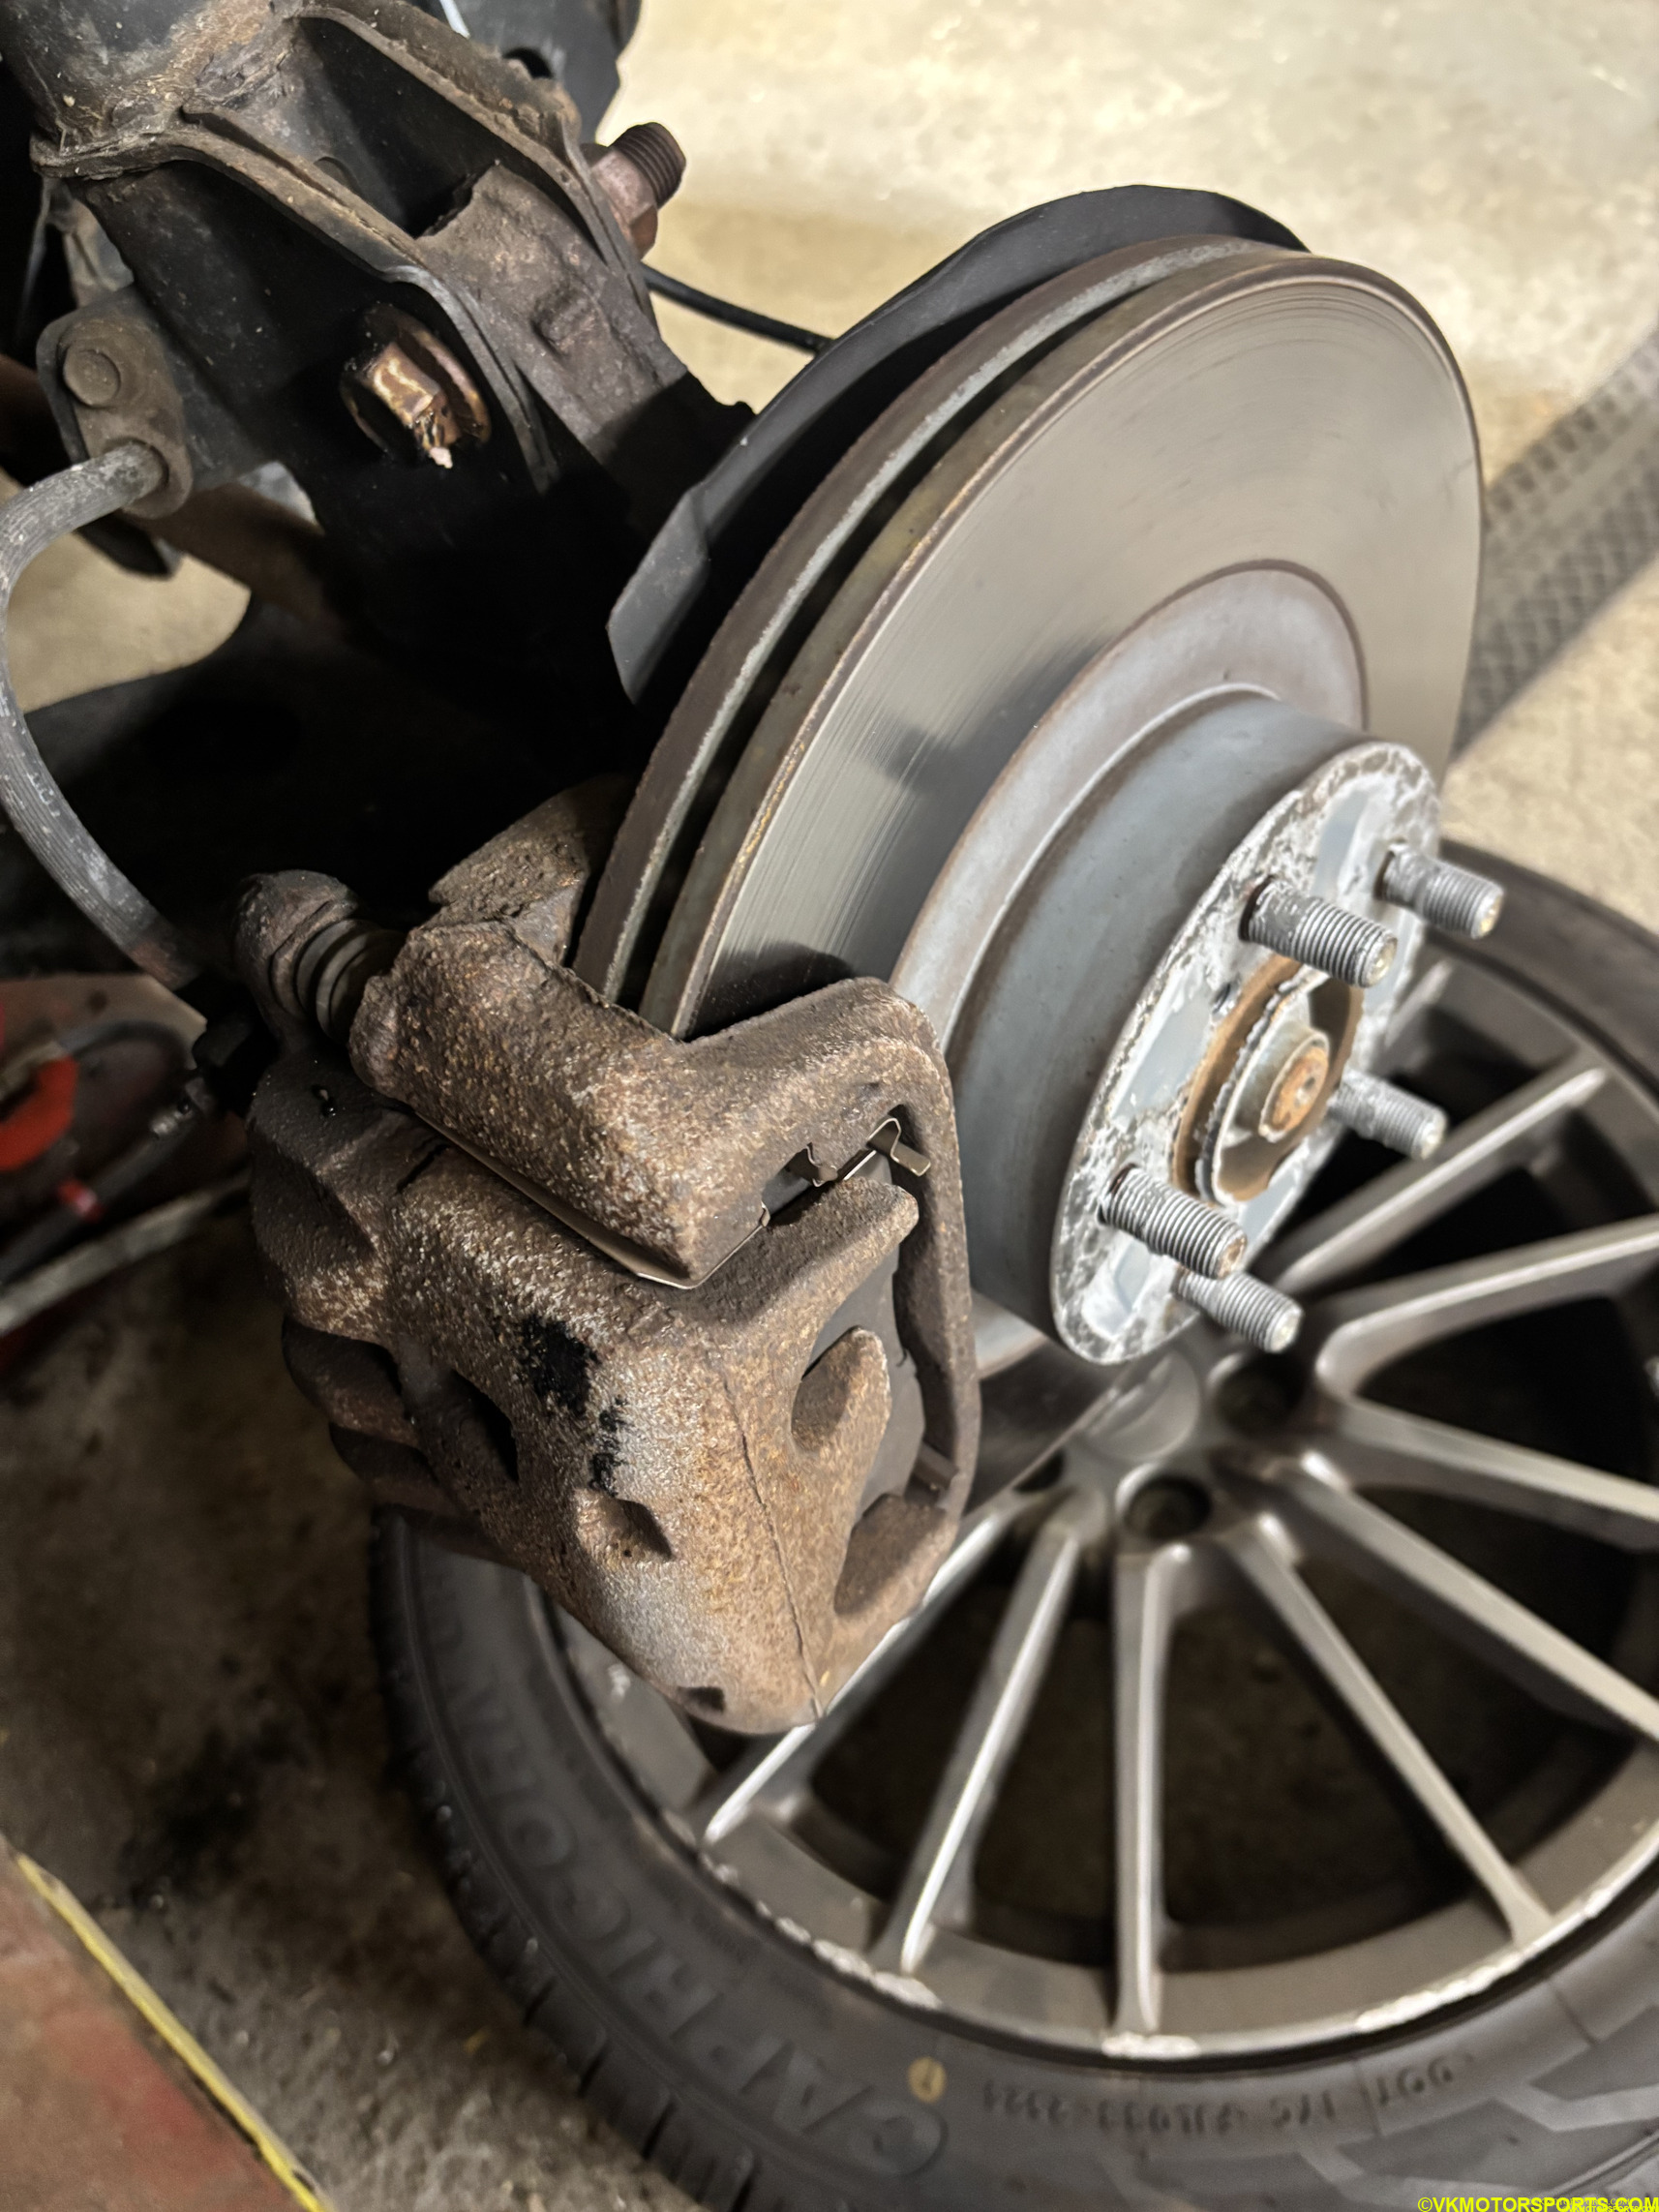 Figure 2. Front wheel removed and placed under the rotor
Now spray the calipers, rotors and brake pads with brake cleaner as shown in Figure 3.
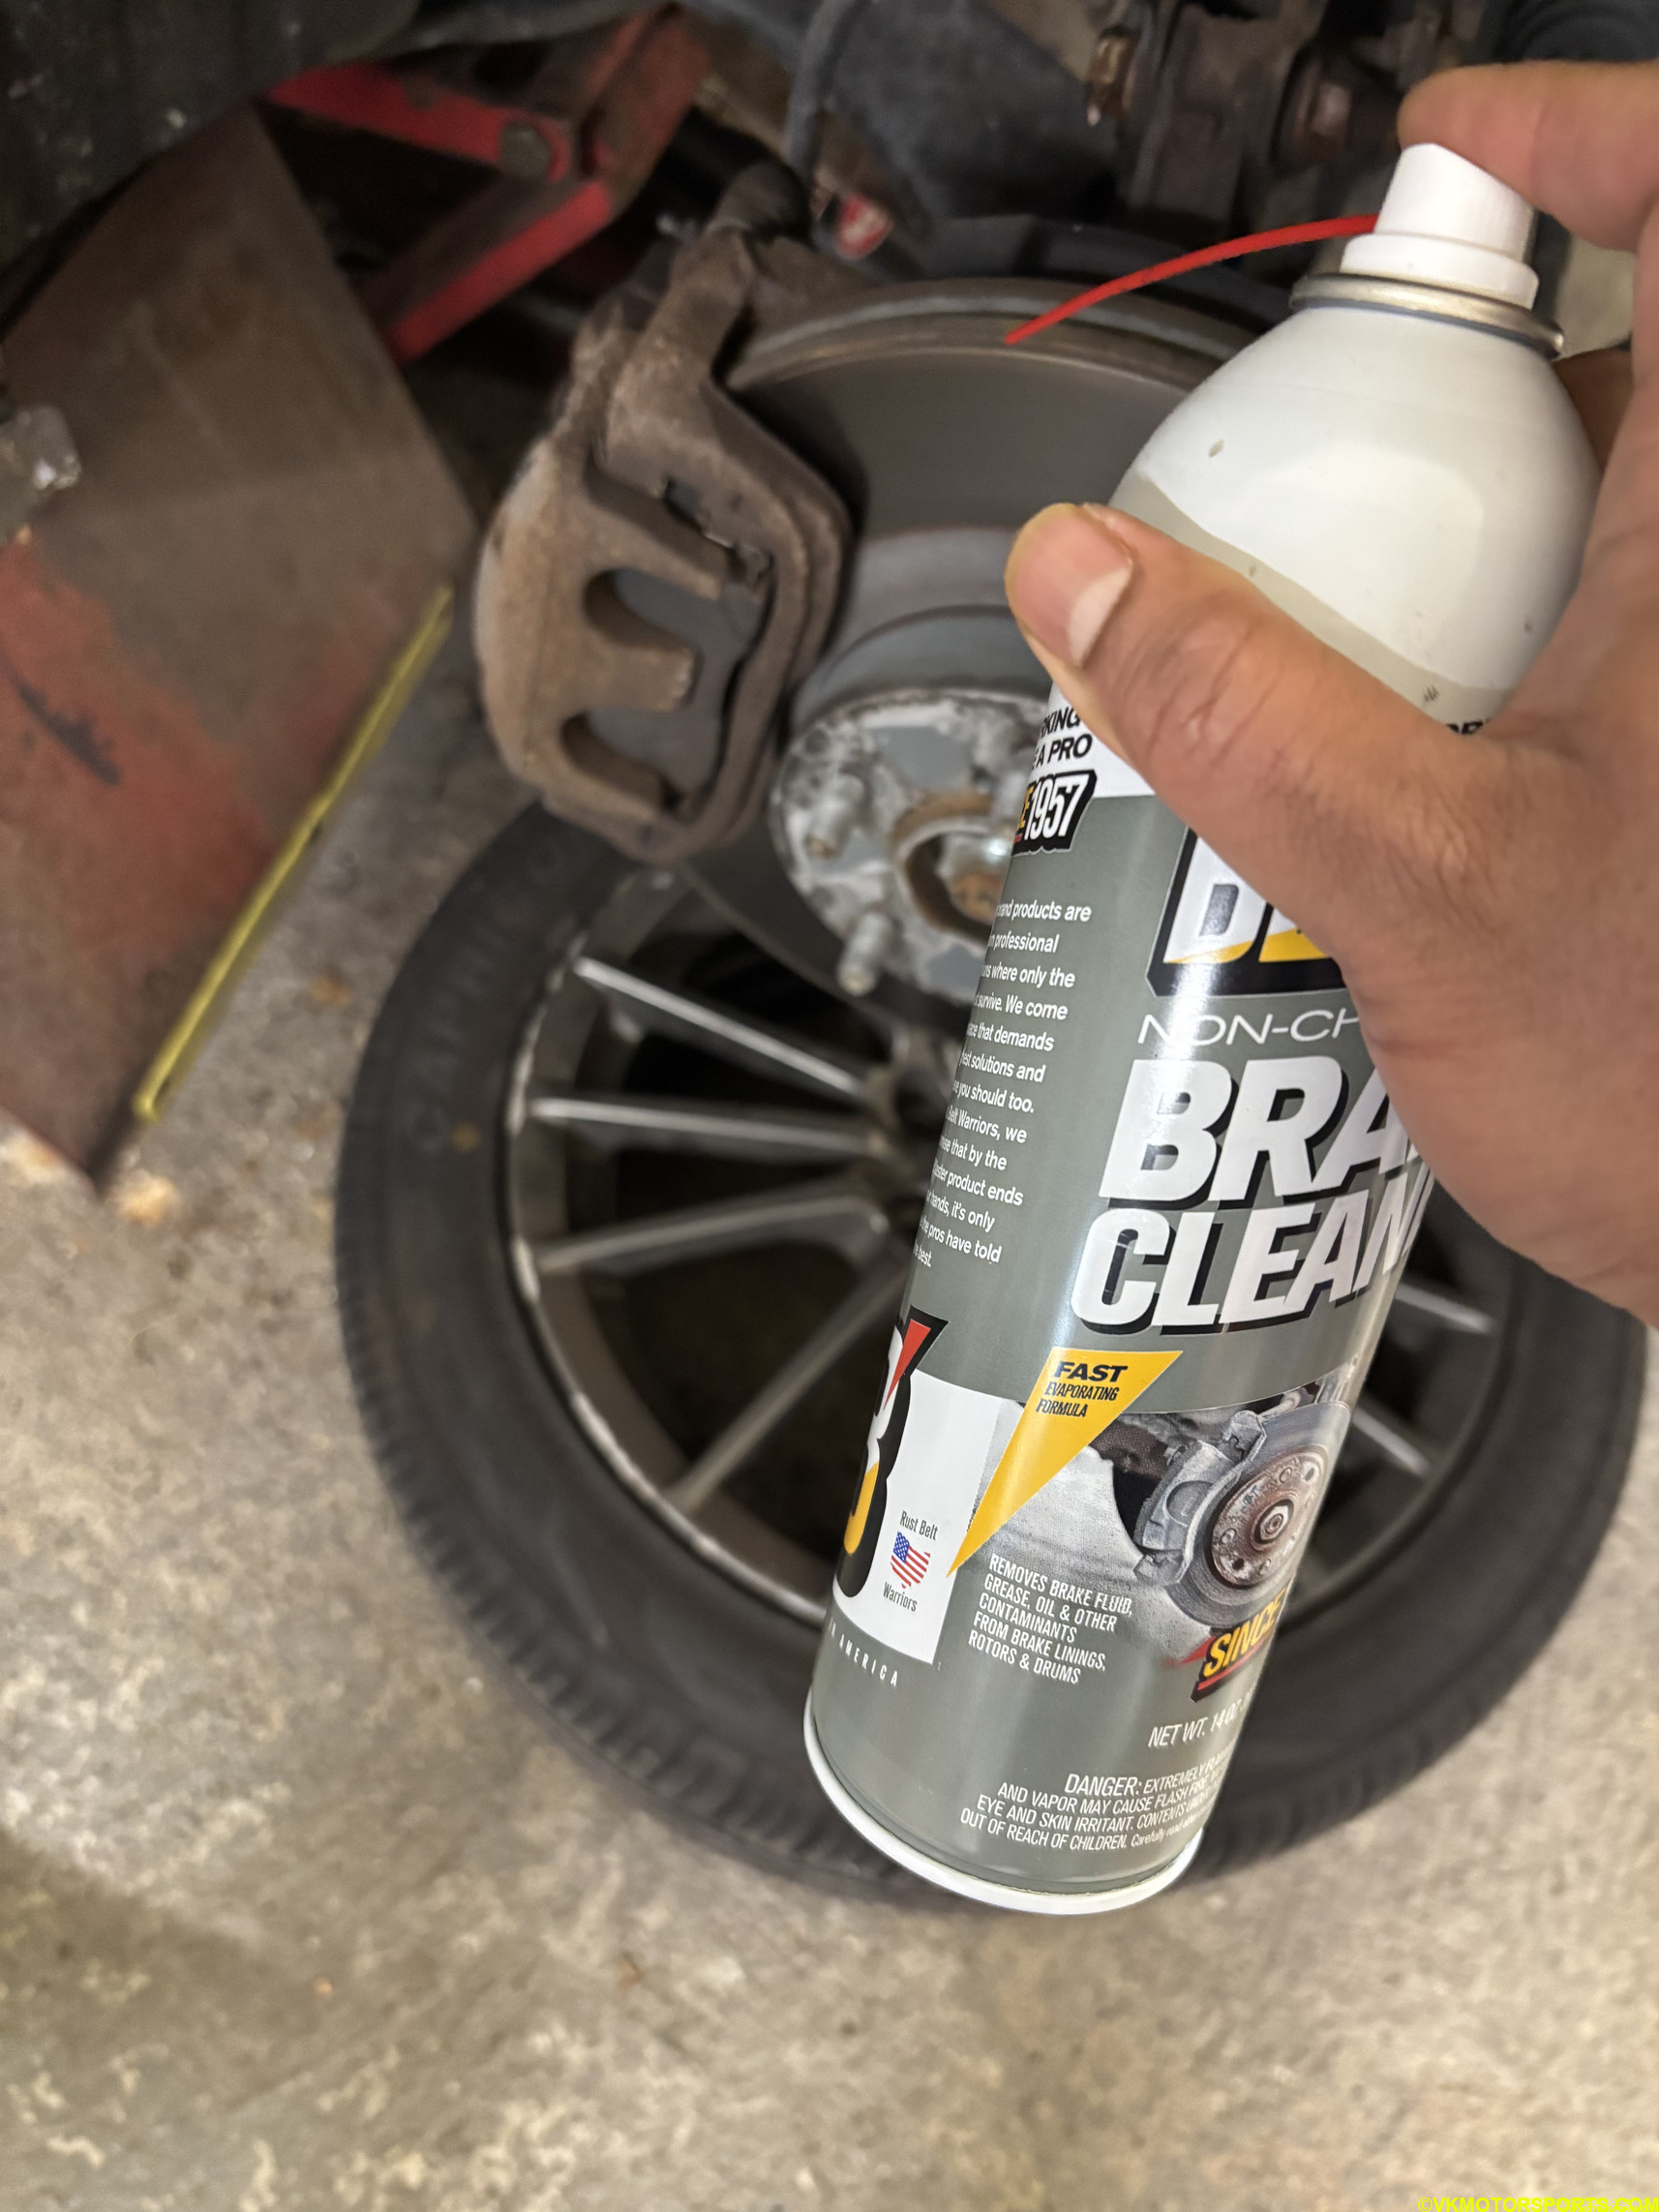 Figure 3. Clean the brakes, calipers, rotors with Brake Cleaner
Doing the Front Brakes
The front brakes are easy to do. In my first try, I ended up opening both the bolts as shown in the red circles in Figure 4 below. However, you only need to do the lower bolt and loosen the upper bolt to flip the caliper upwards. You will need a 14mm socket to open these bolts.
If you are like me and have an old car, and want to take out both the bolts, you can. This post shows how to do this procedure by taking out both the bolts.
NOTE: If the whole caliper is being removed, remember to hold it up with a zip-tie or a bucket and not let it hang freely to avoid damage to the brake line tubing.
You can see in Figure 4, that the green arrows point to the old brake pads. There are 2 red arrows that point to some extra clips that you also need to take out and replace. If you have purchased a full brake pad set, these clips should be provided. If they are not provided, take them out, and clean them with brake cleaner spray, and then install them back.
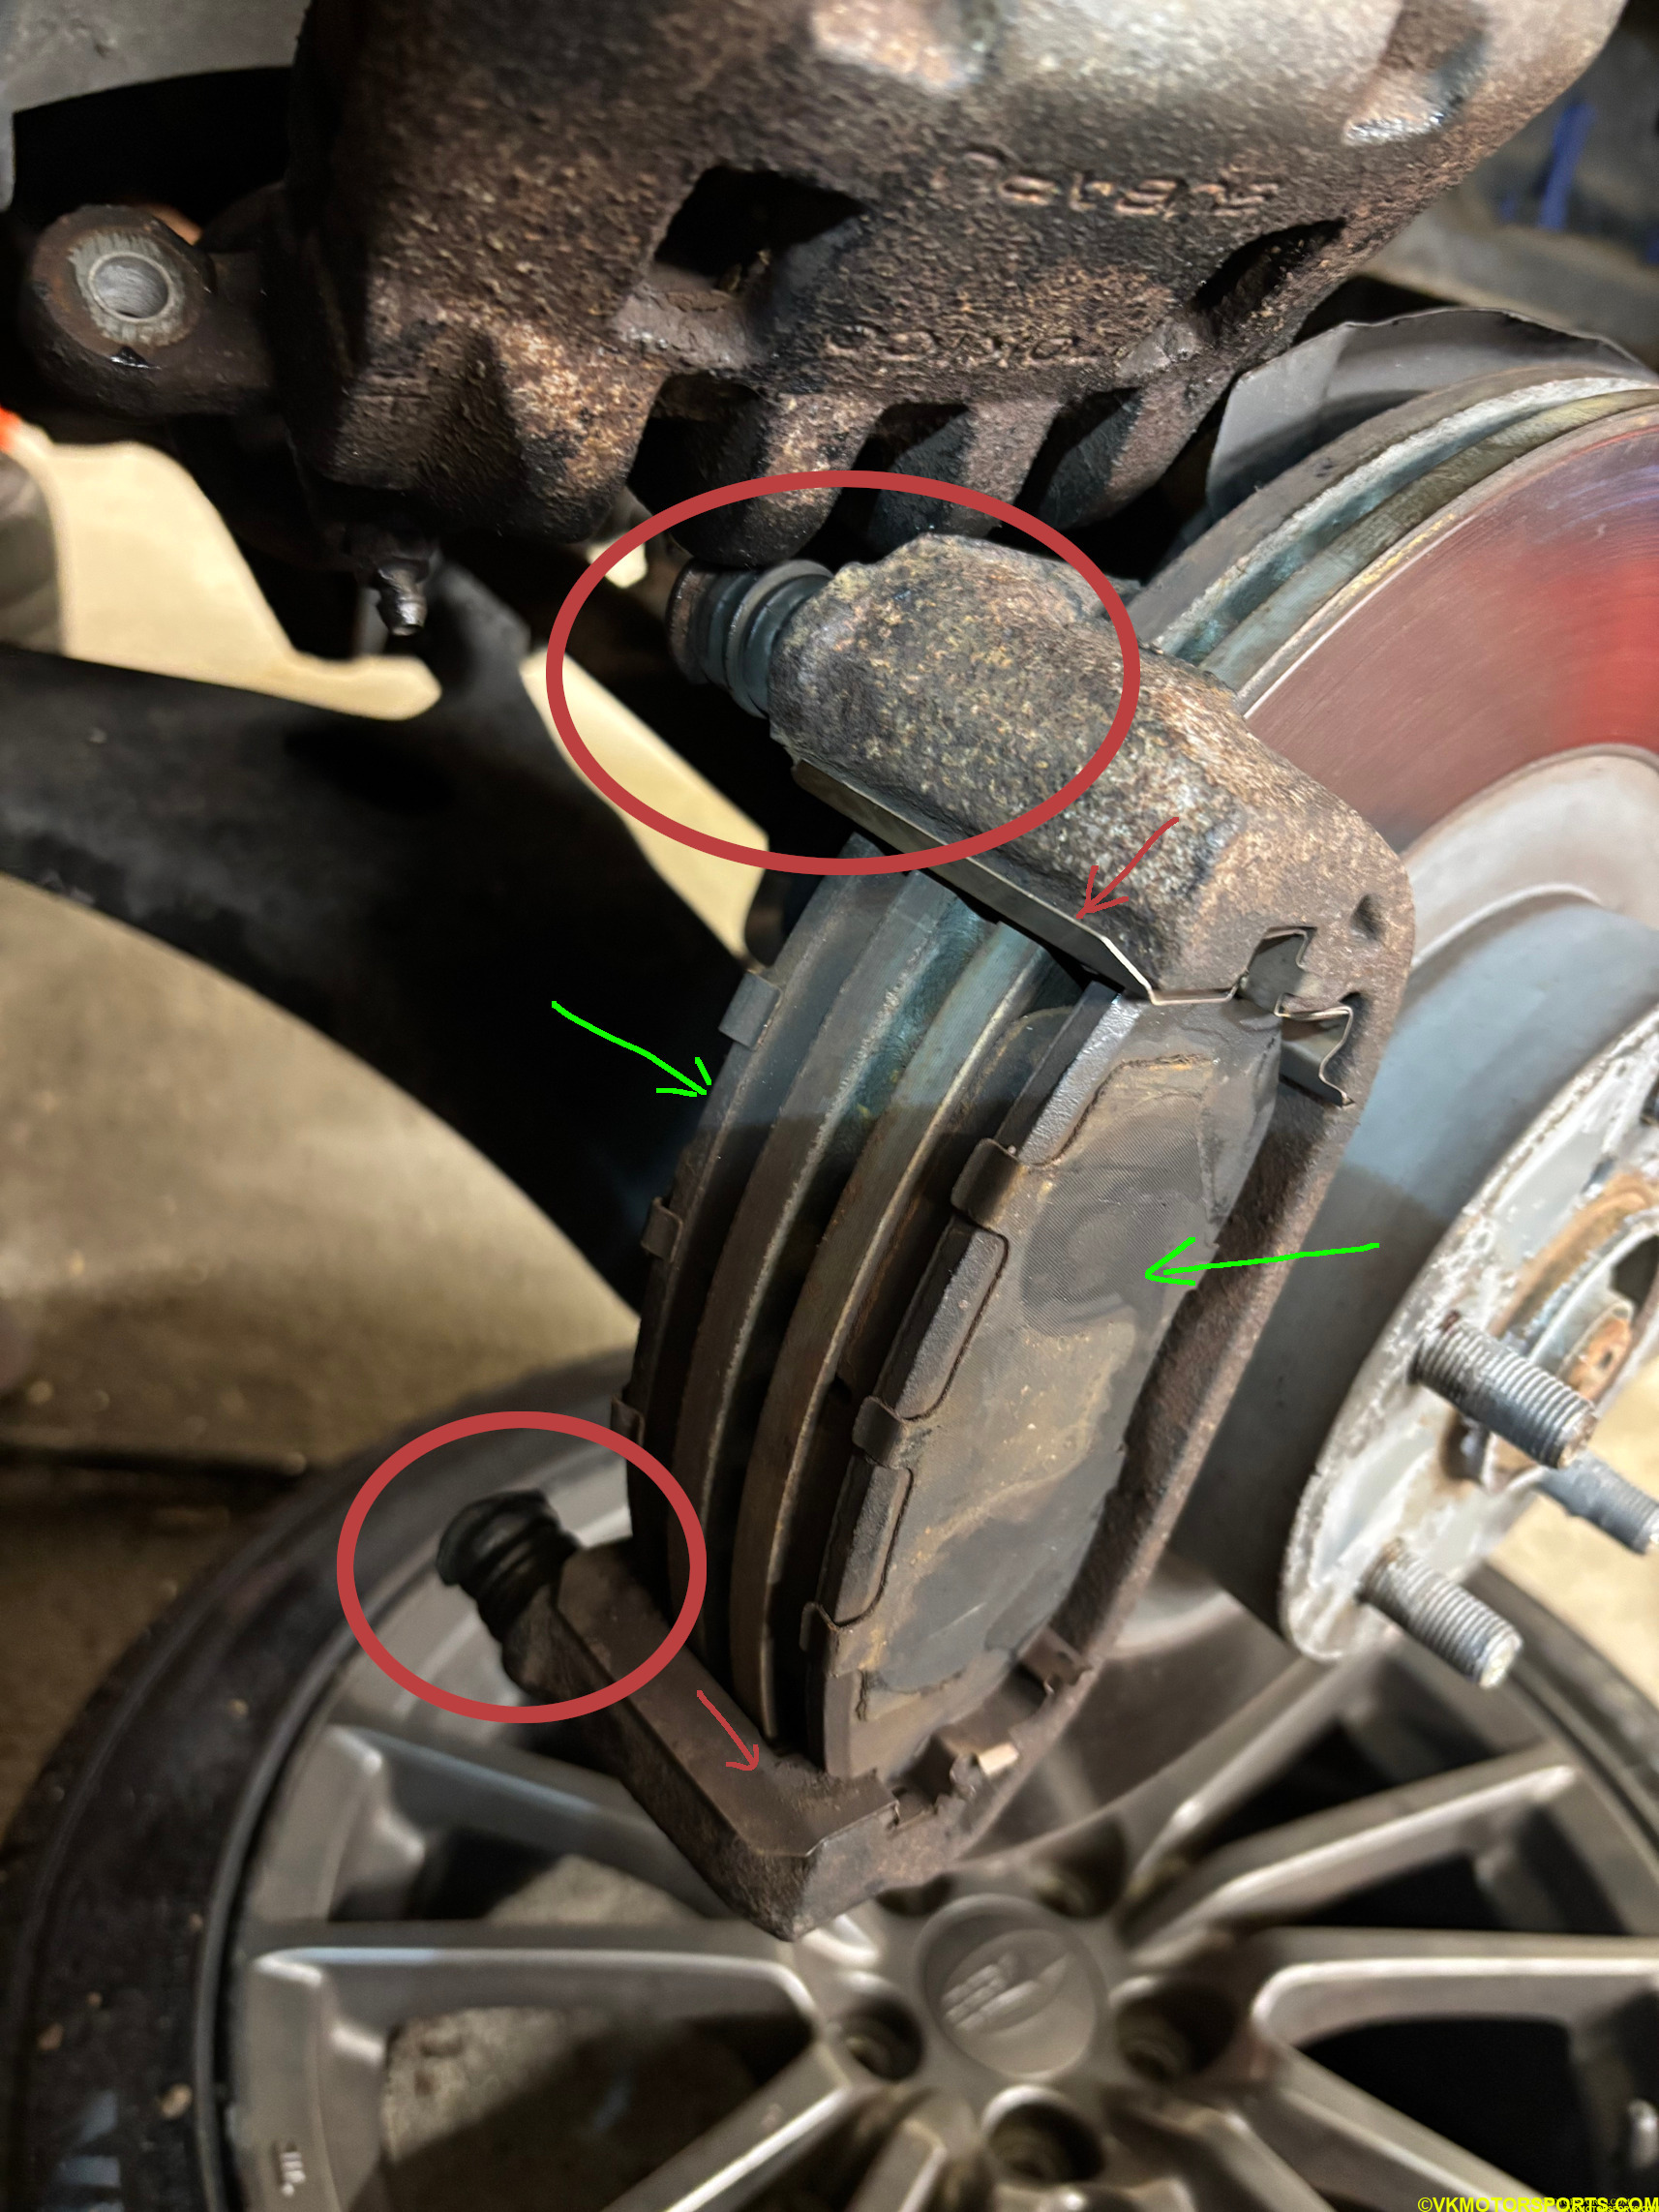 Figure 4. Front caliper with both bolts removed
Using a flat-head screwdriver you can pop the brake pads out, as seen in Figure 5. You can see that I have not removed a clip there and it is dirty!! Must spray brake cleaner again after removing all the old parts.
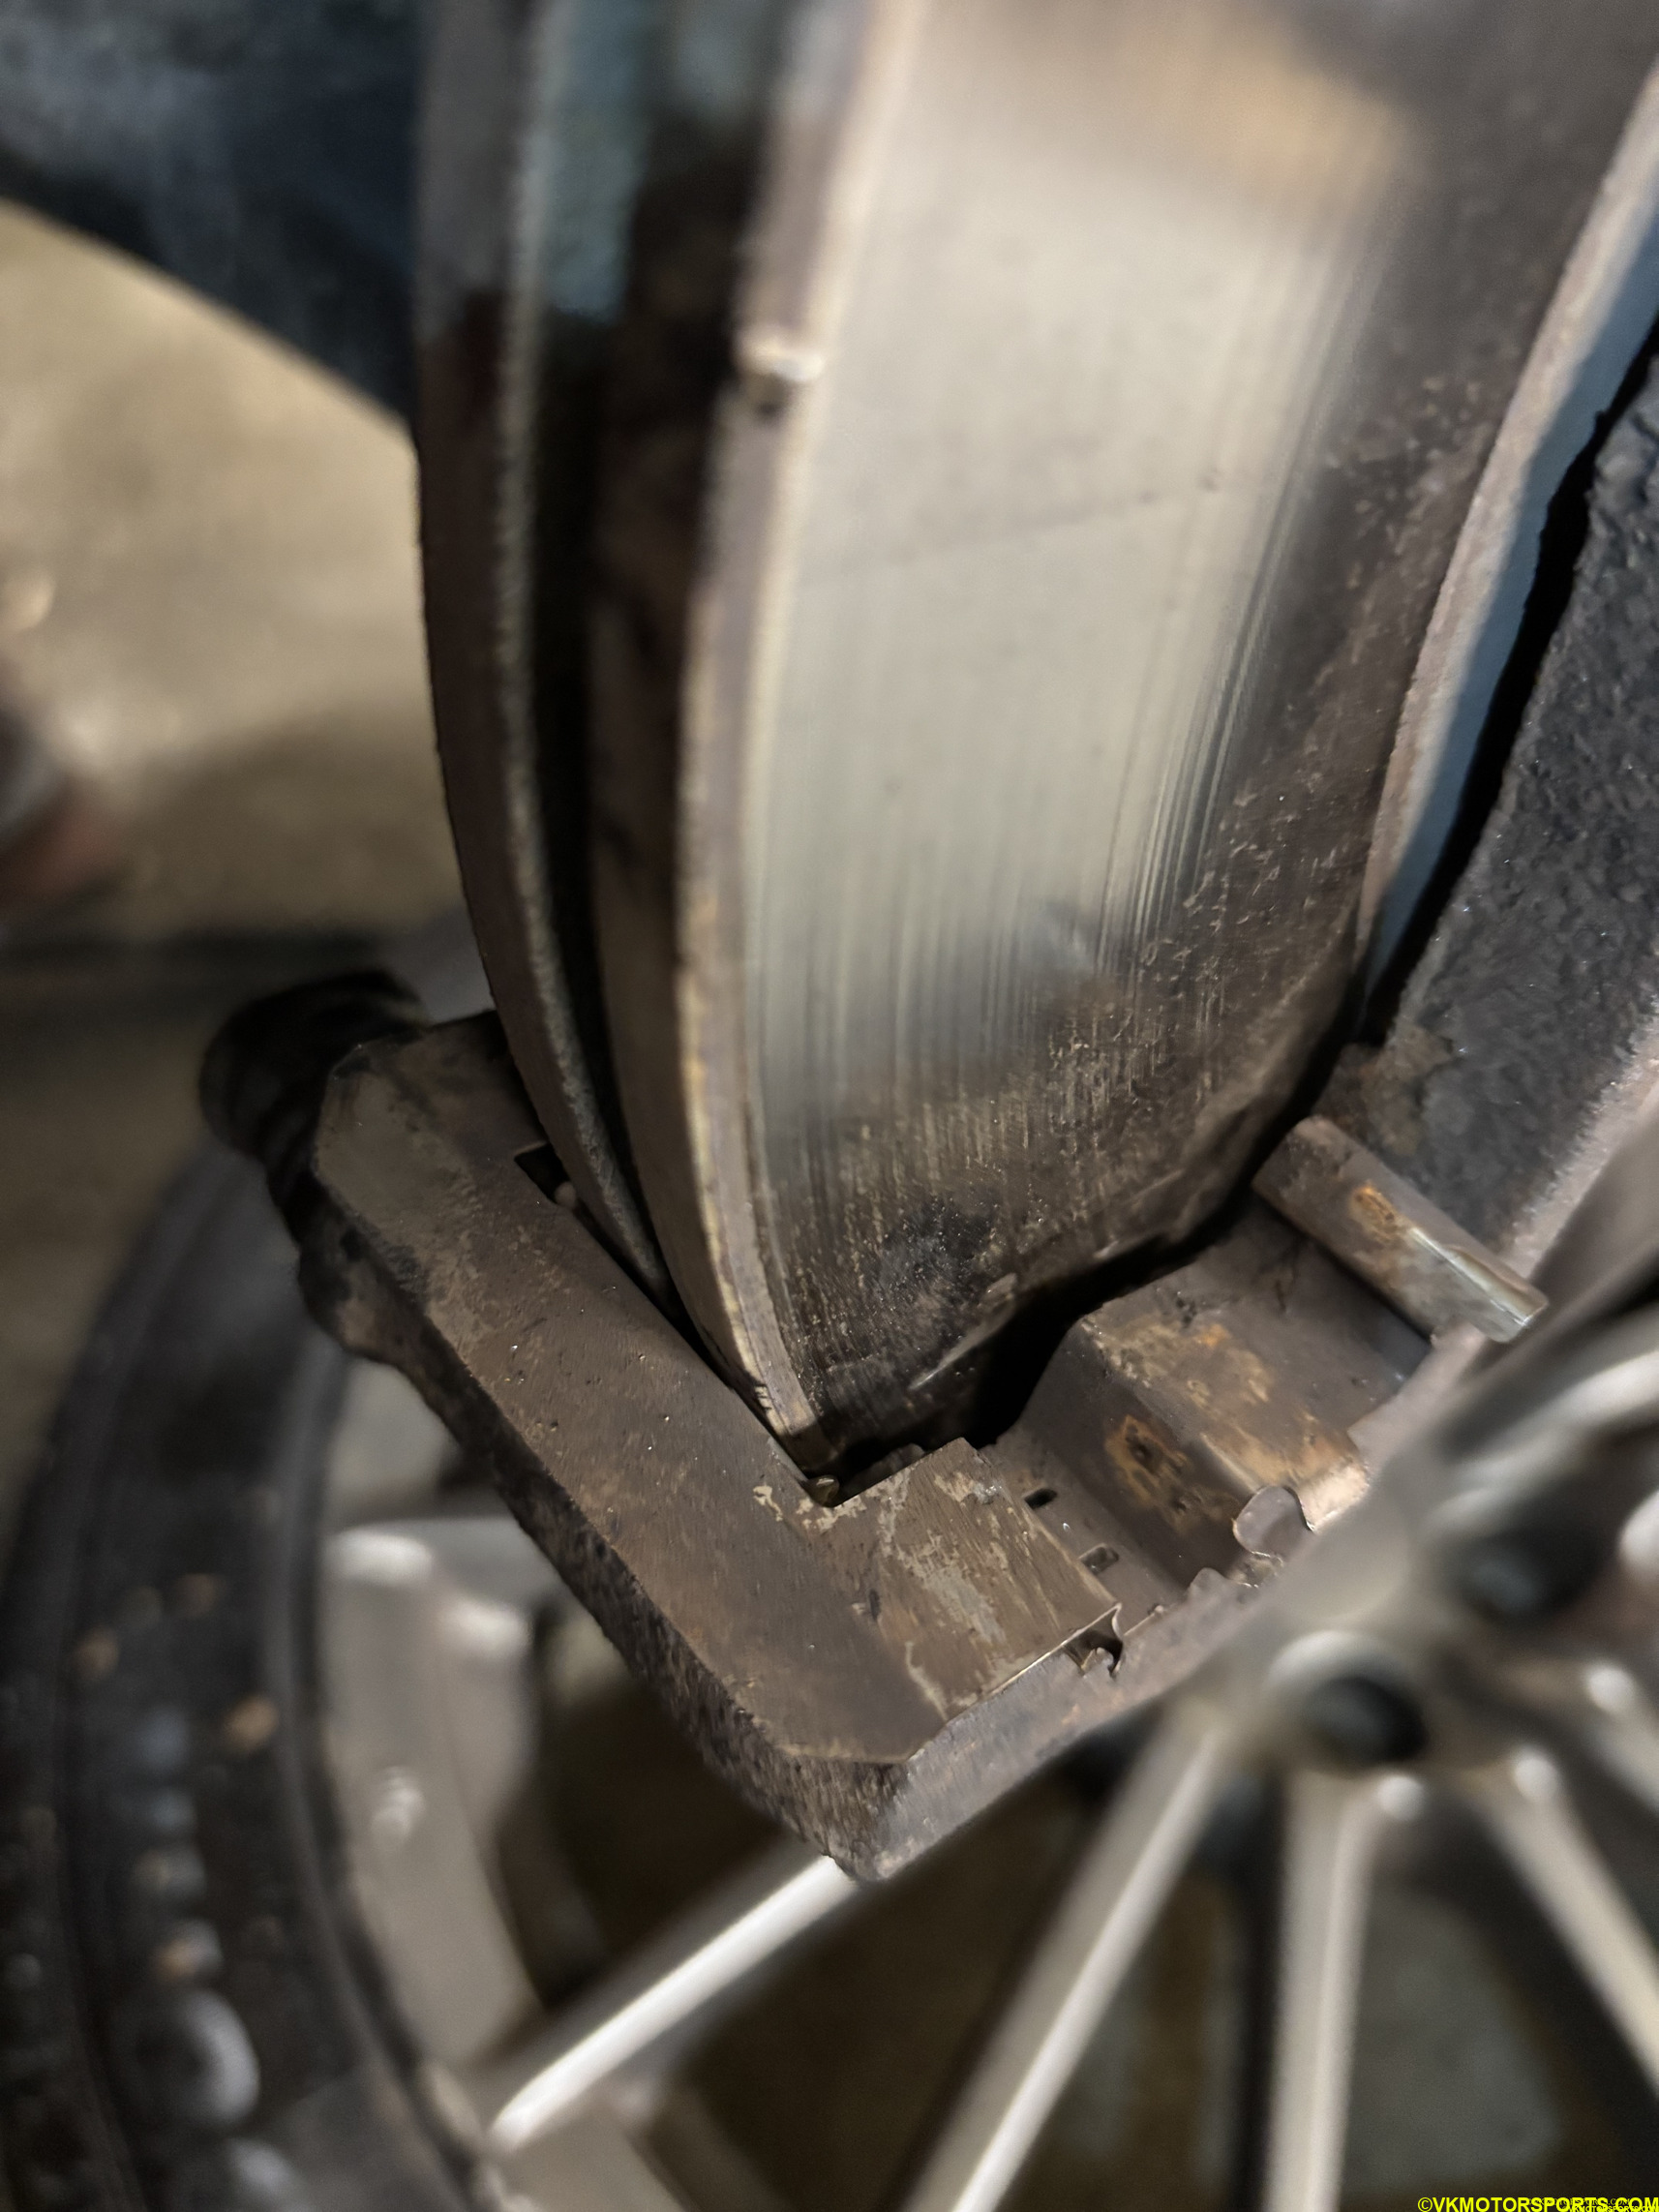 Figure 5. Front brake pads removed
Now we will adjust the cylinders of the caliper. To do that first open the lid of the brake reservoir in the engine bay, as shown in Figure 6.
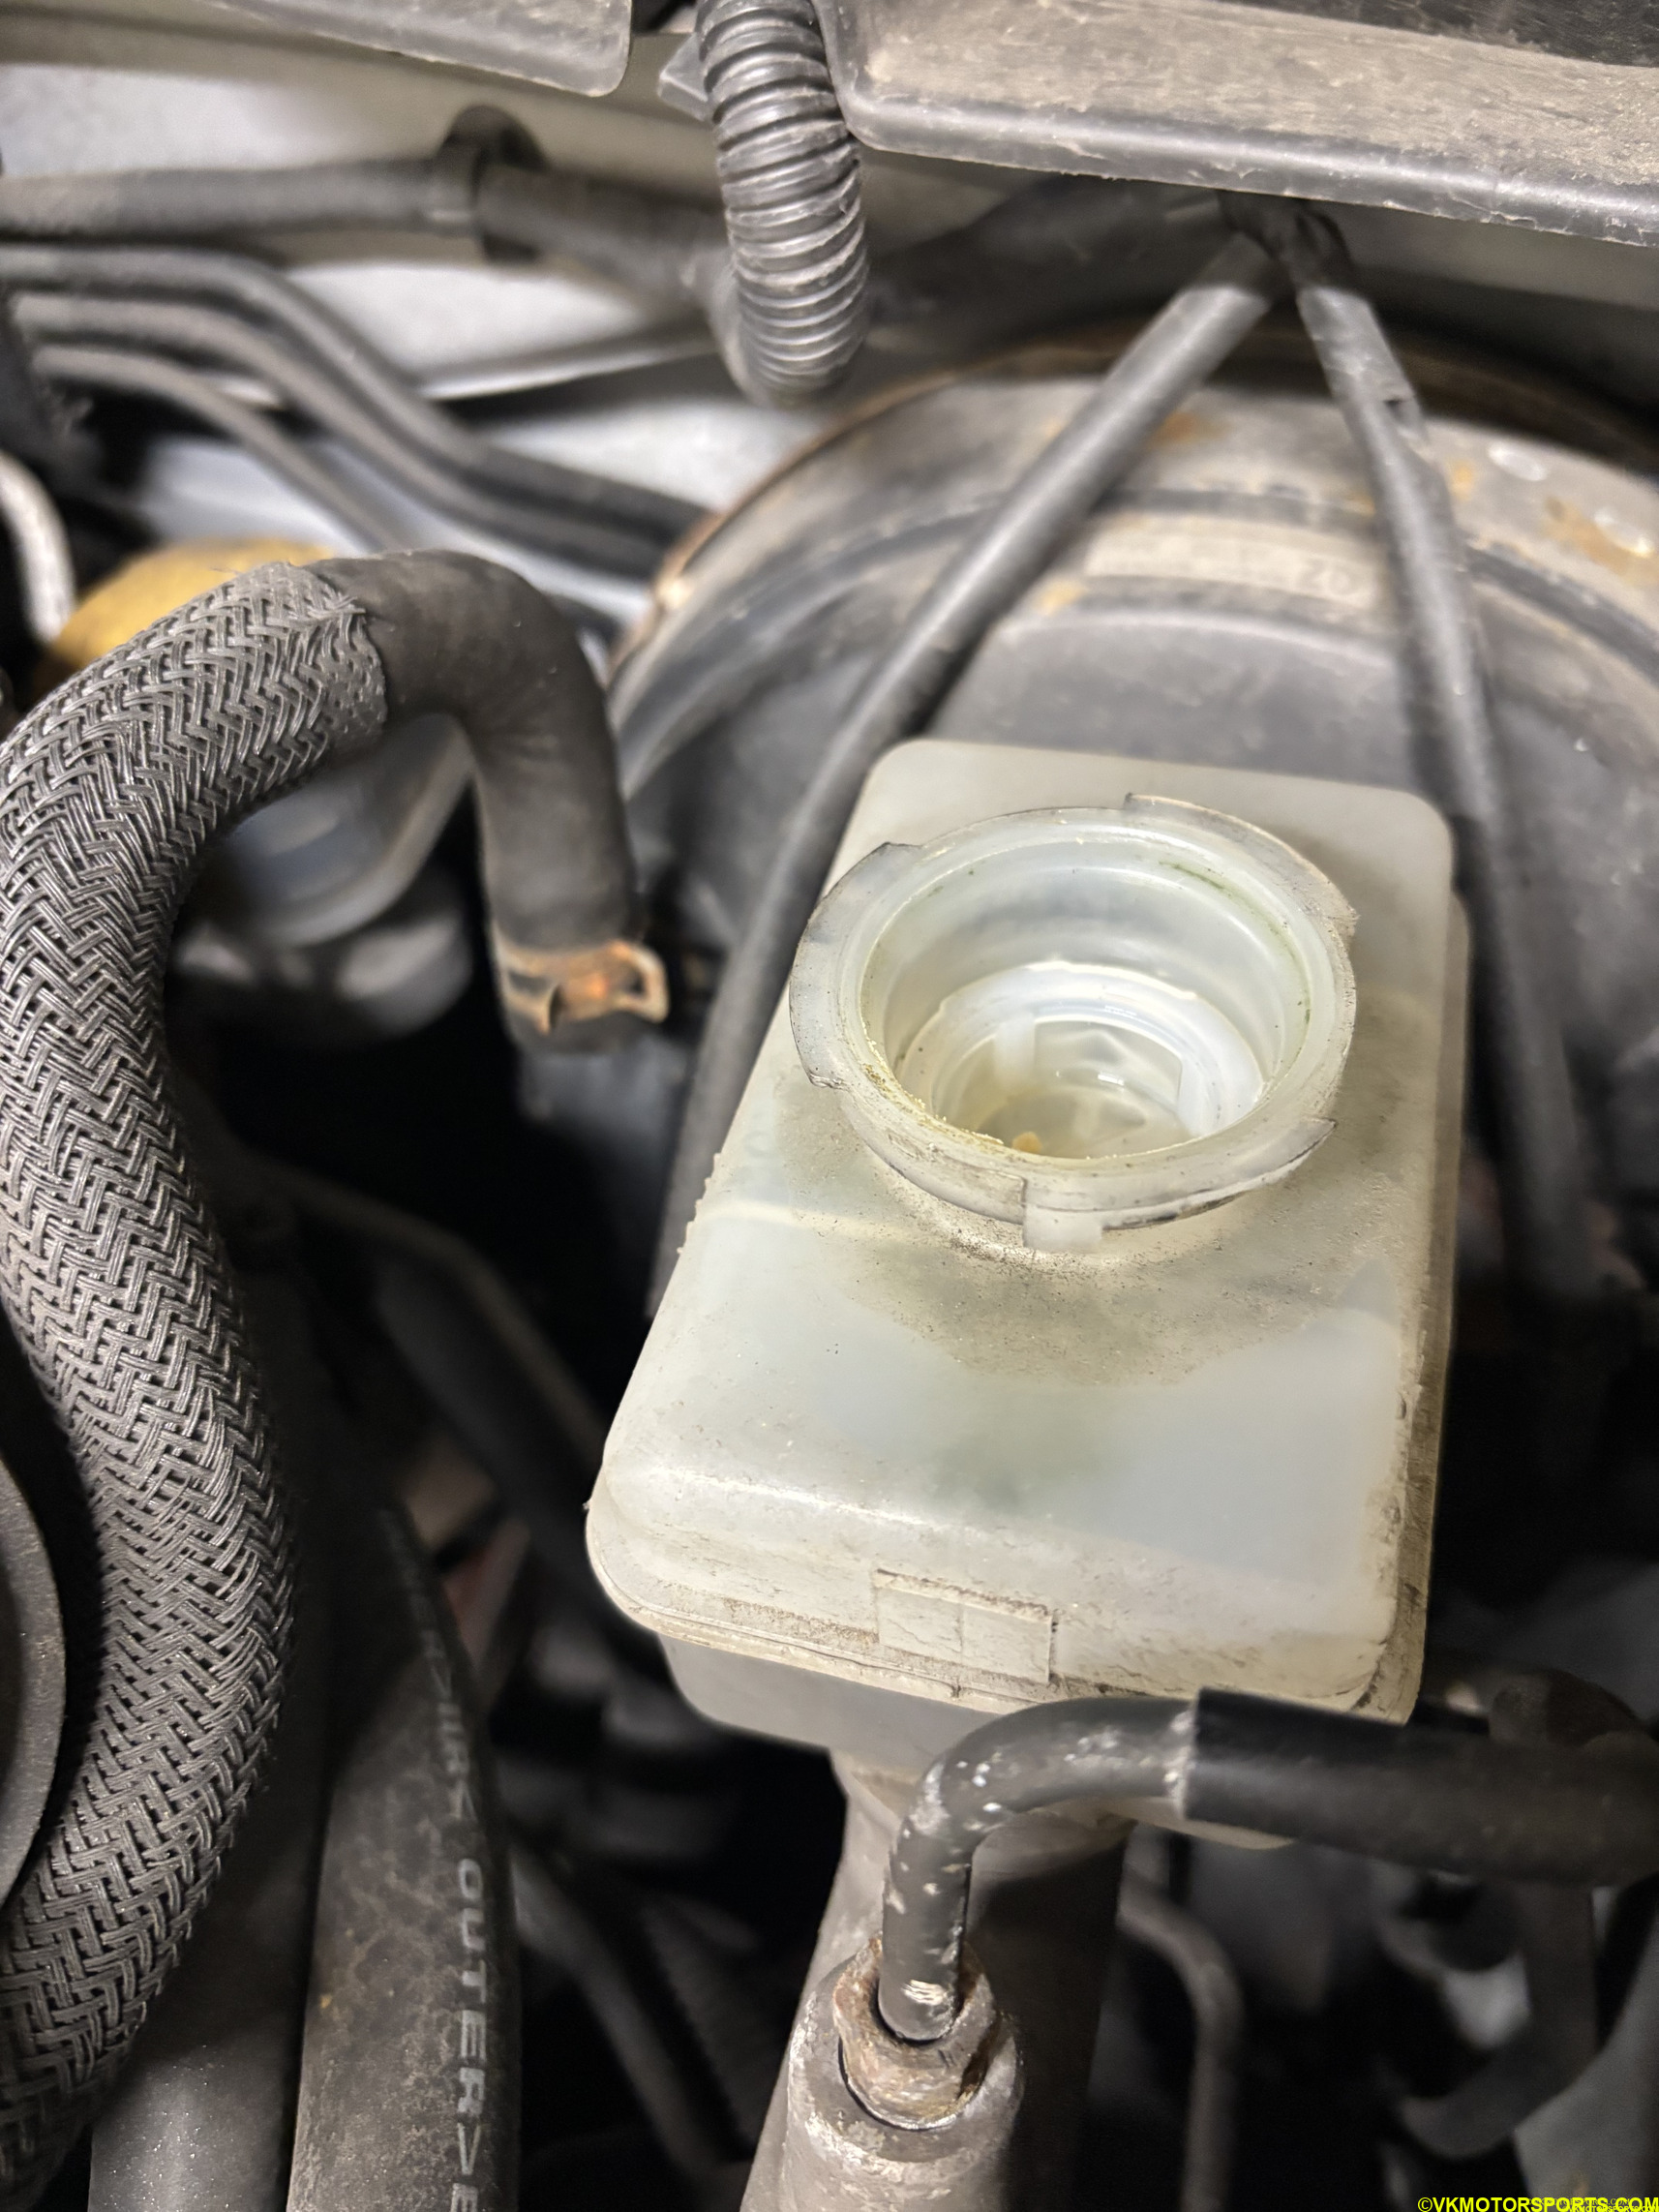 Figure 6. Brake reservoir lid opened up in the engine bay
In Figure 7, you can see my rusted cylinders that are extended and need to be pressed in so that they are flat as in Figure 8. This is done so that the thicker new pads can fit in. As brake pads wear out, the cylinders extend outwards. I used a large C-Clamp to do this pressing. Place an old brake pad on the cylinder, so as to not damage it. Then press the cylinders in one by one by tightening a C-clamp over it.
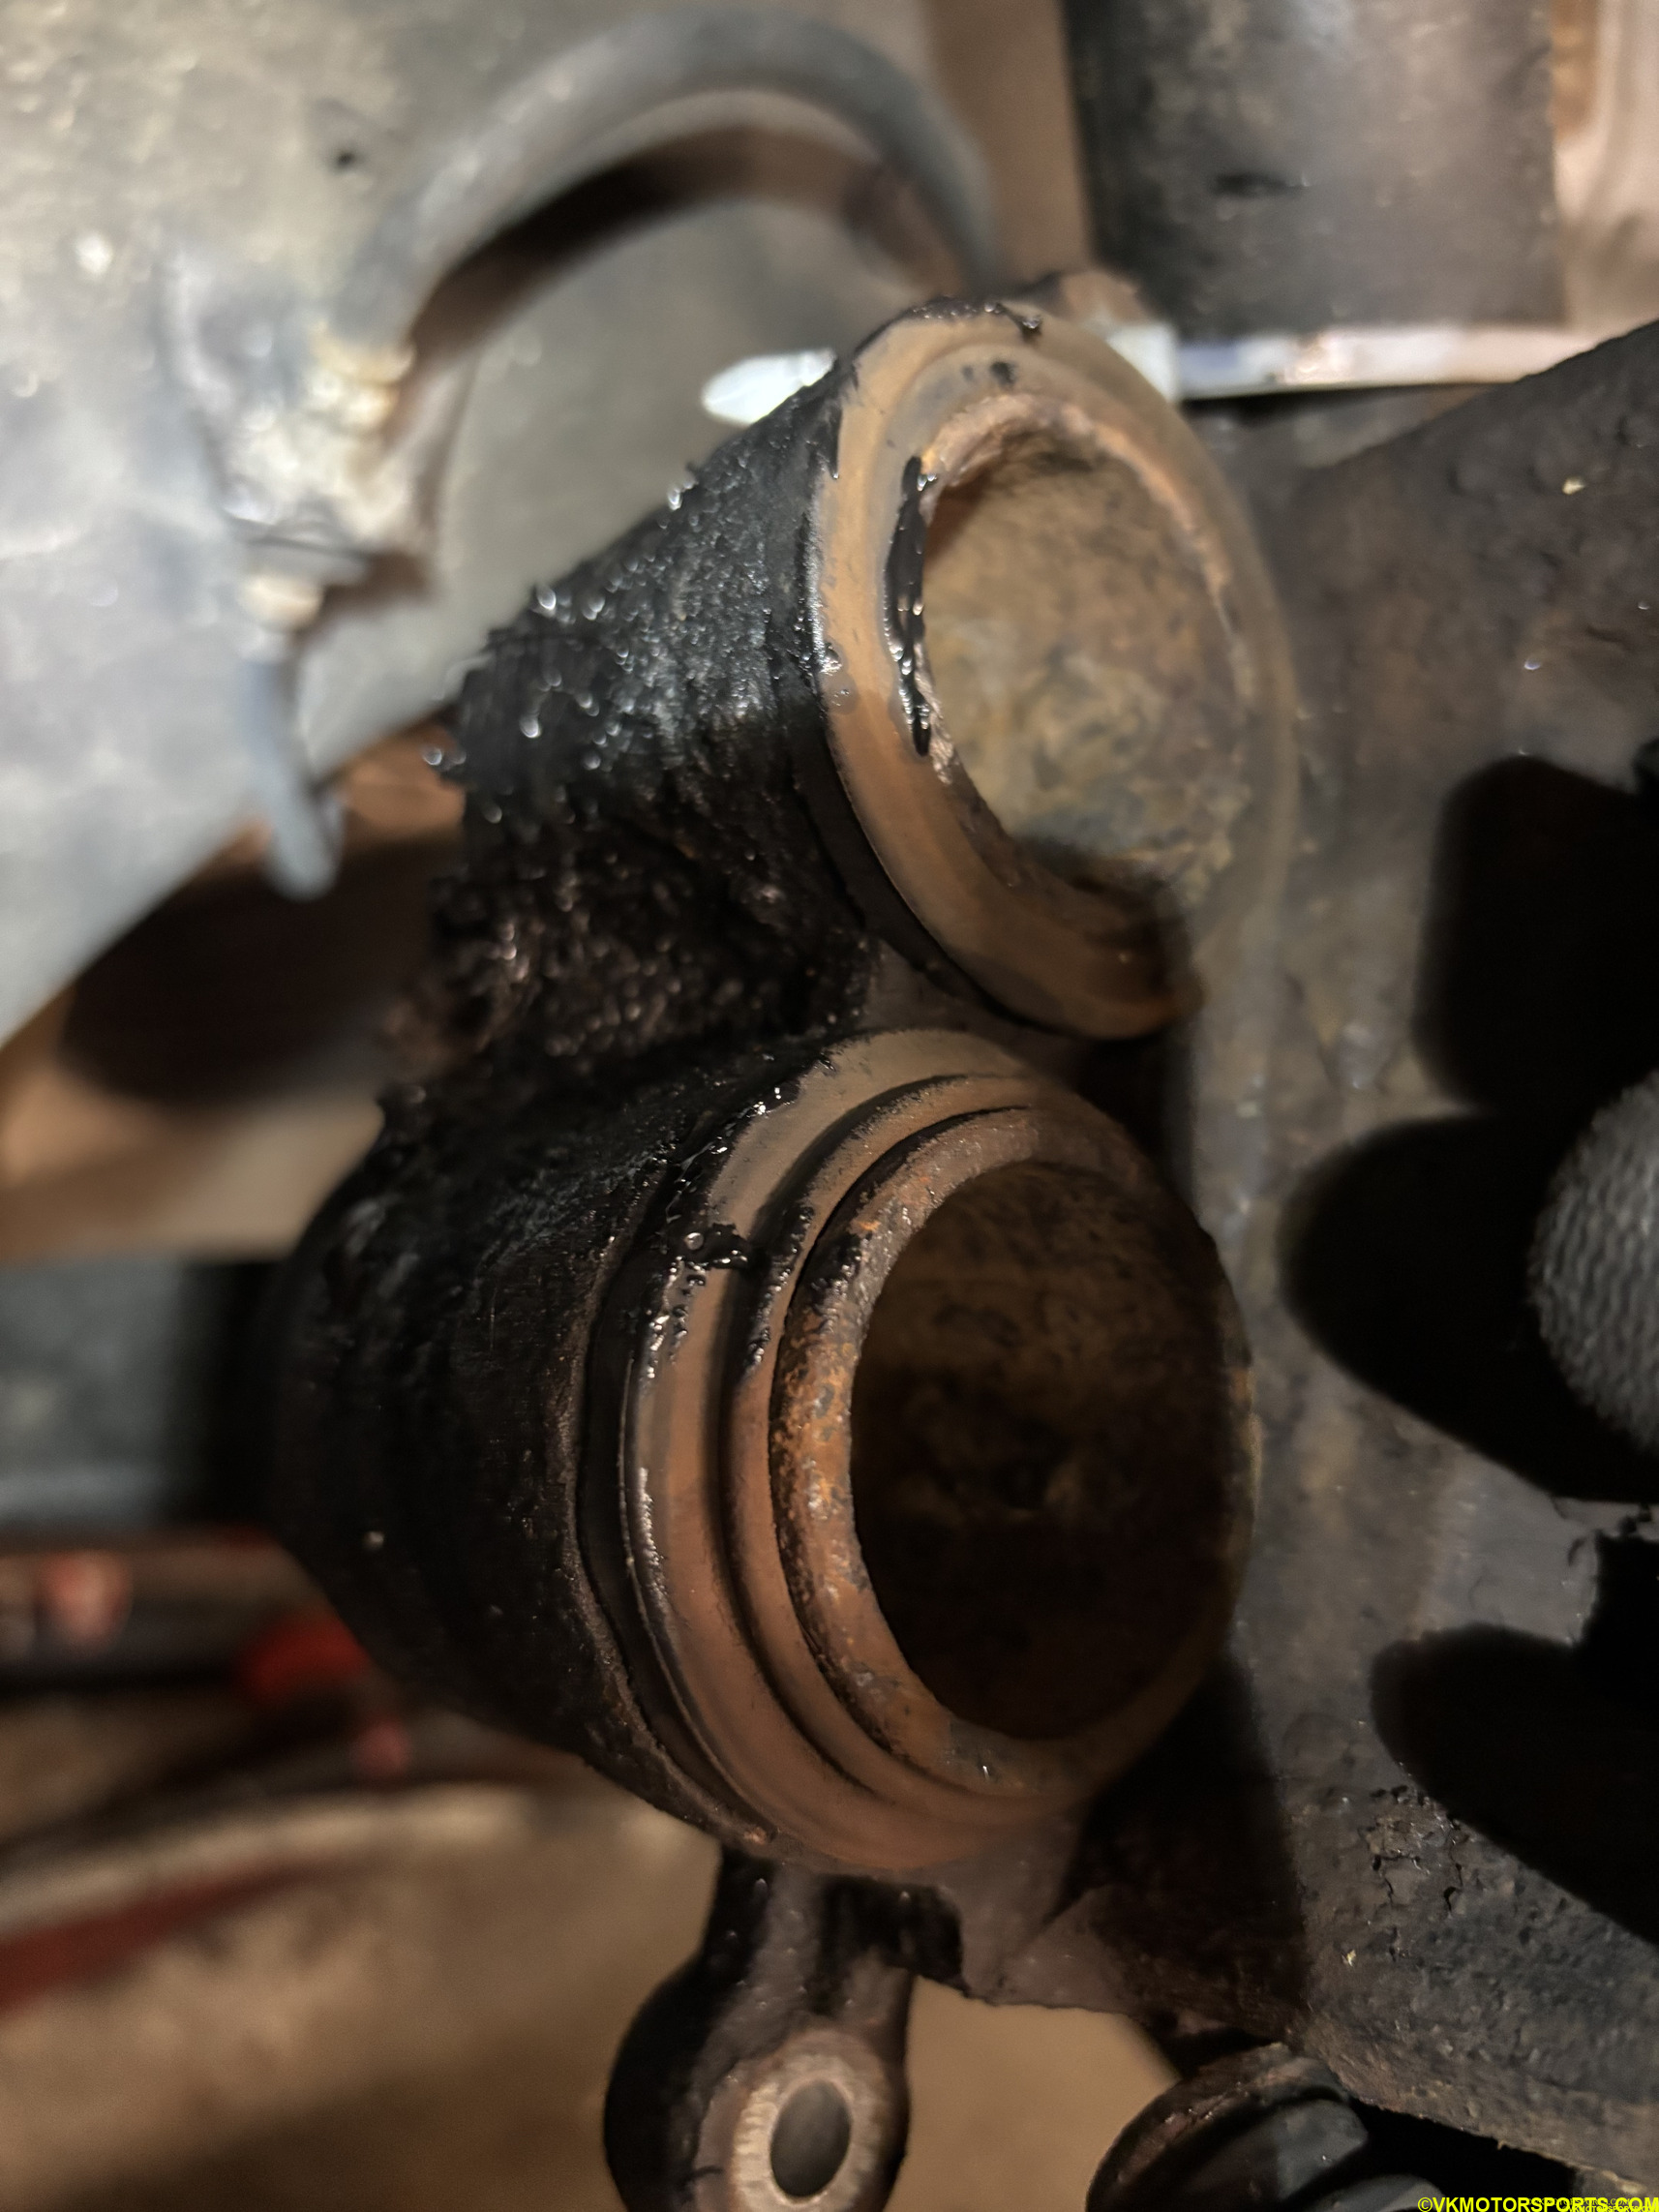 Figure 7. Front caliper cylinders that are extending outwards
Below is a view of the cylinders pressed in.
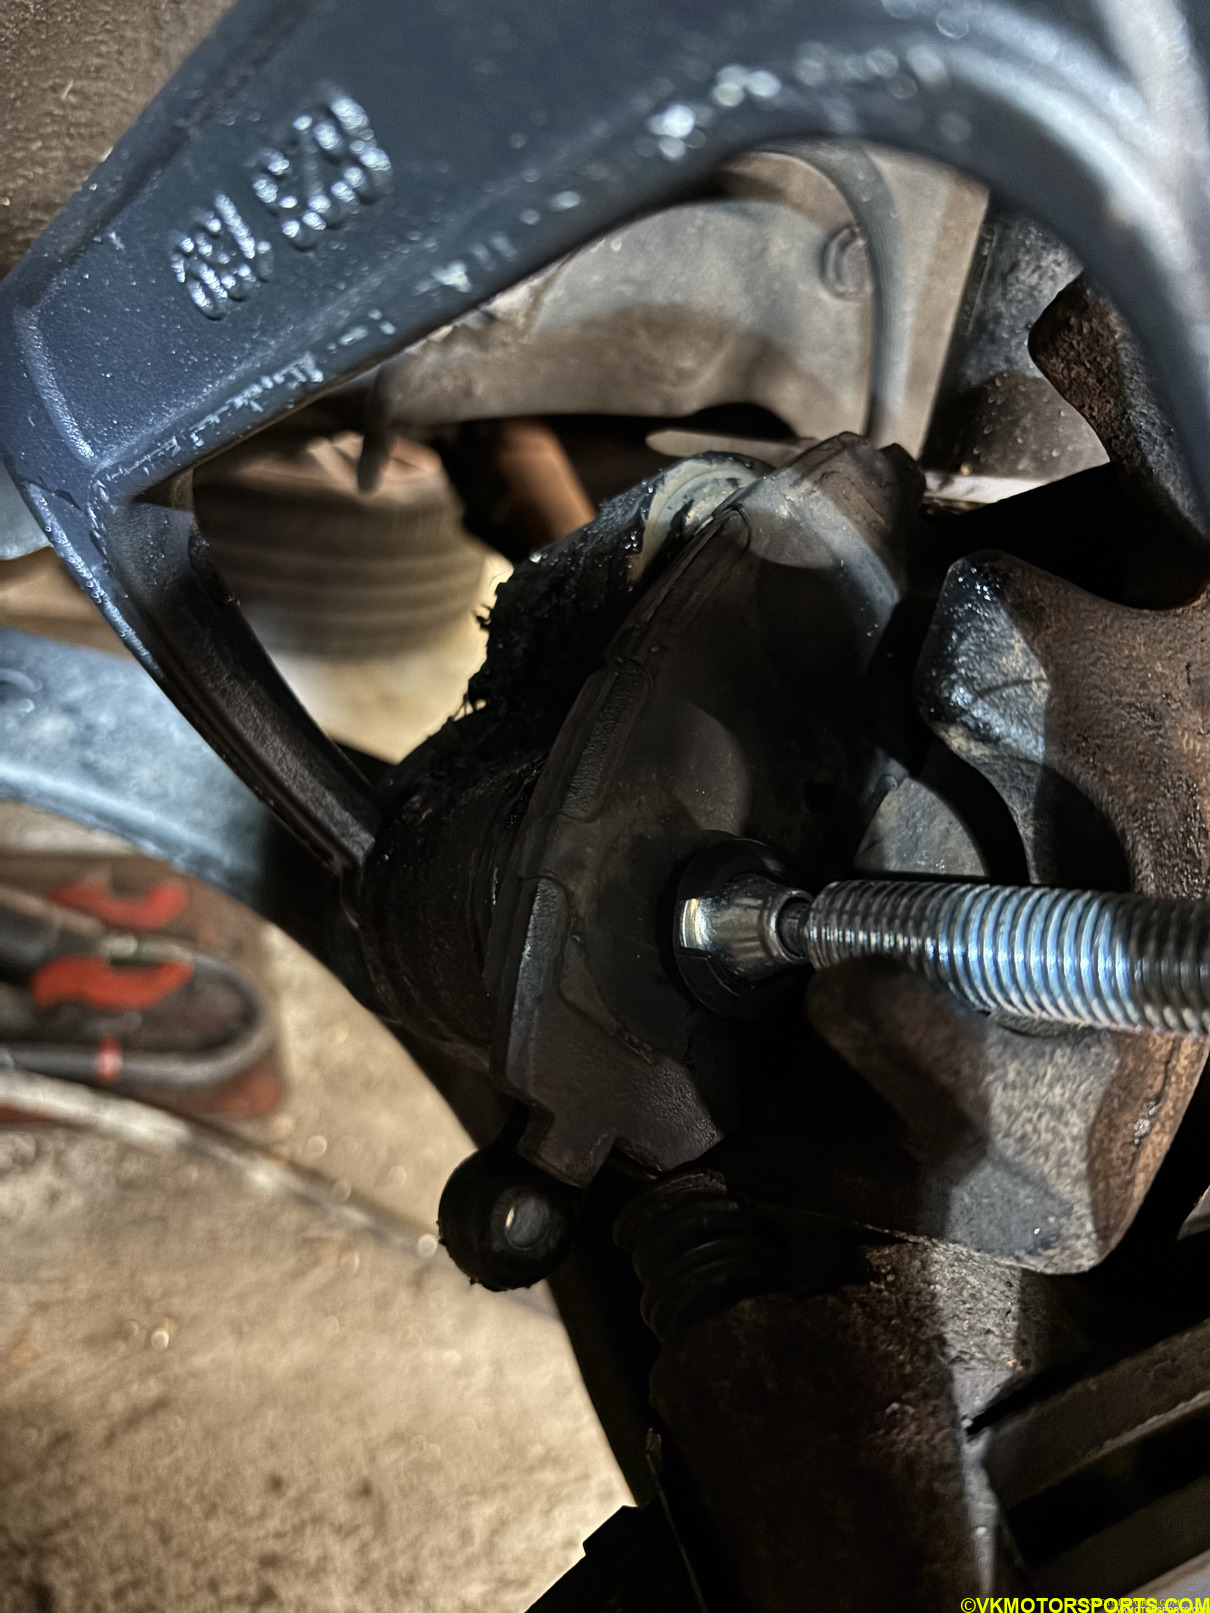 Figure 8. Front caliper cylinders being pressed in place with a C-clamp
Once the cylinders have been pressed in, place the new brake pads on the rotors appropriately as shown in Figure 9. You can see that the new brake pads are much thicker than the old ones in Figure 4.
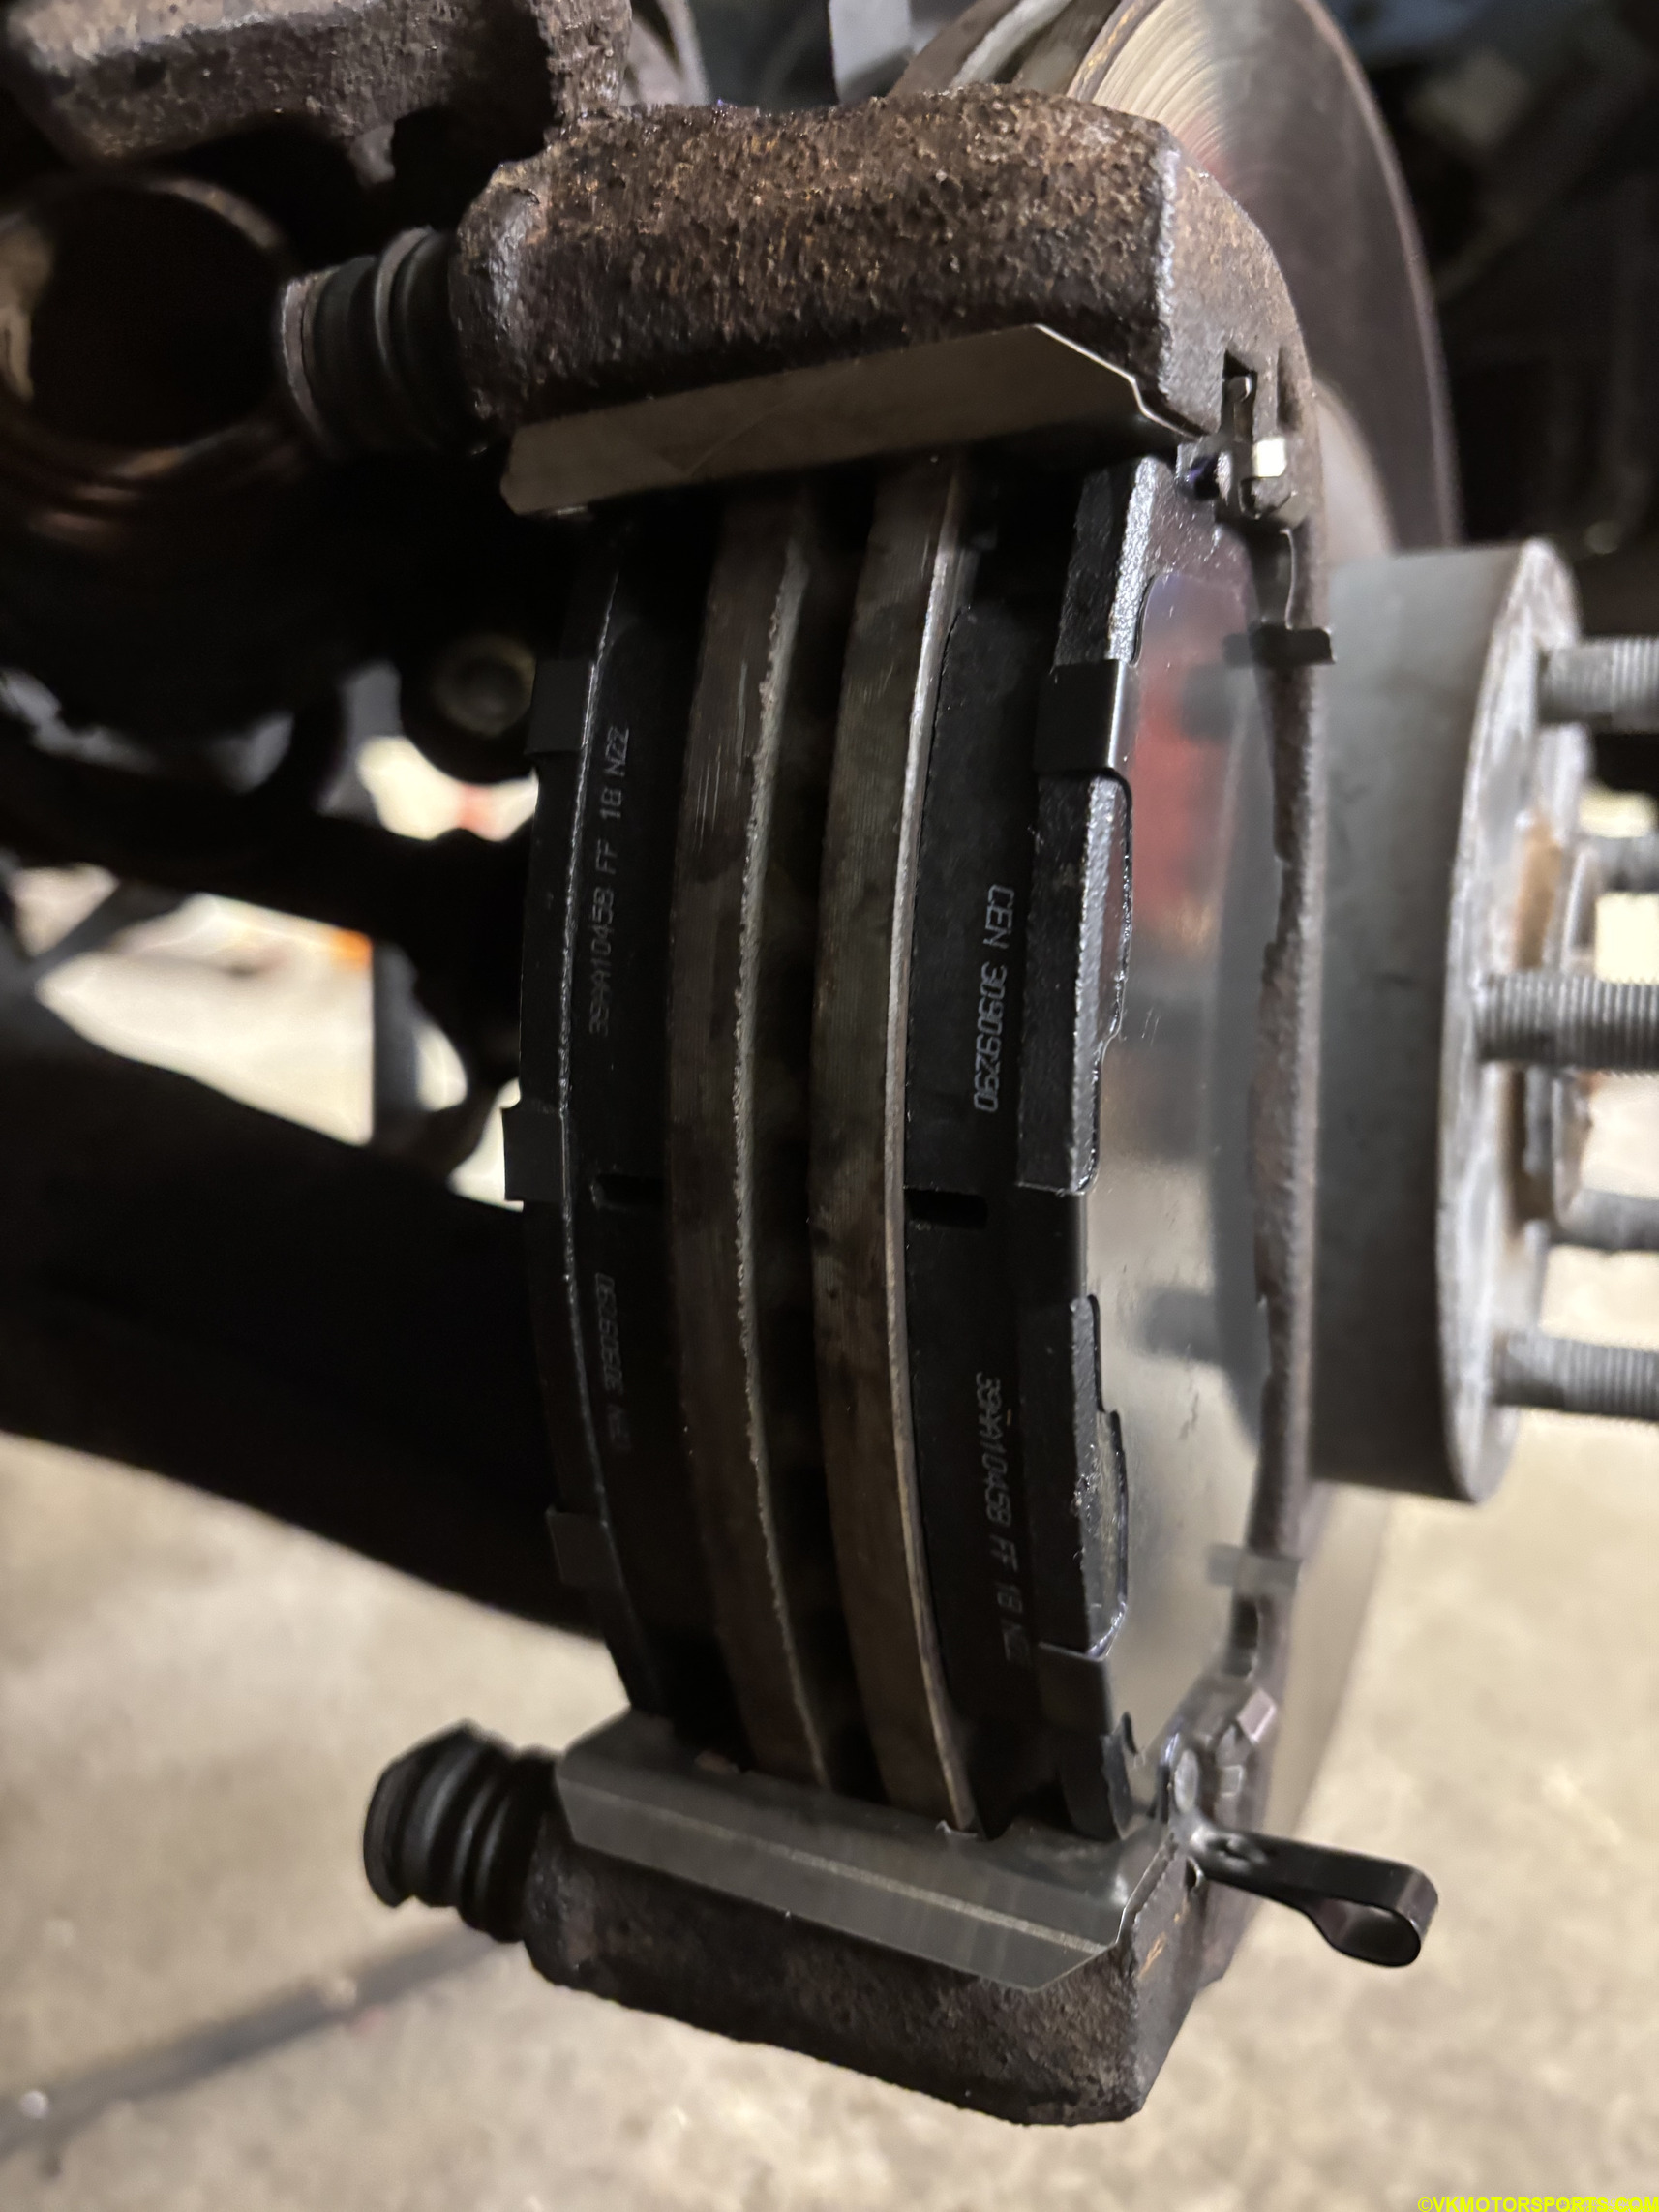 Figure 9. New brake pads and clips installed on the front caliper
Figure 10 shows the brake pads installed with a view from the inside of the rotor.
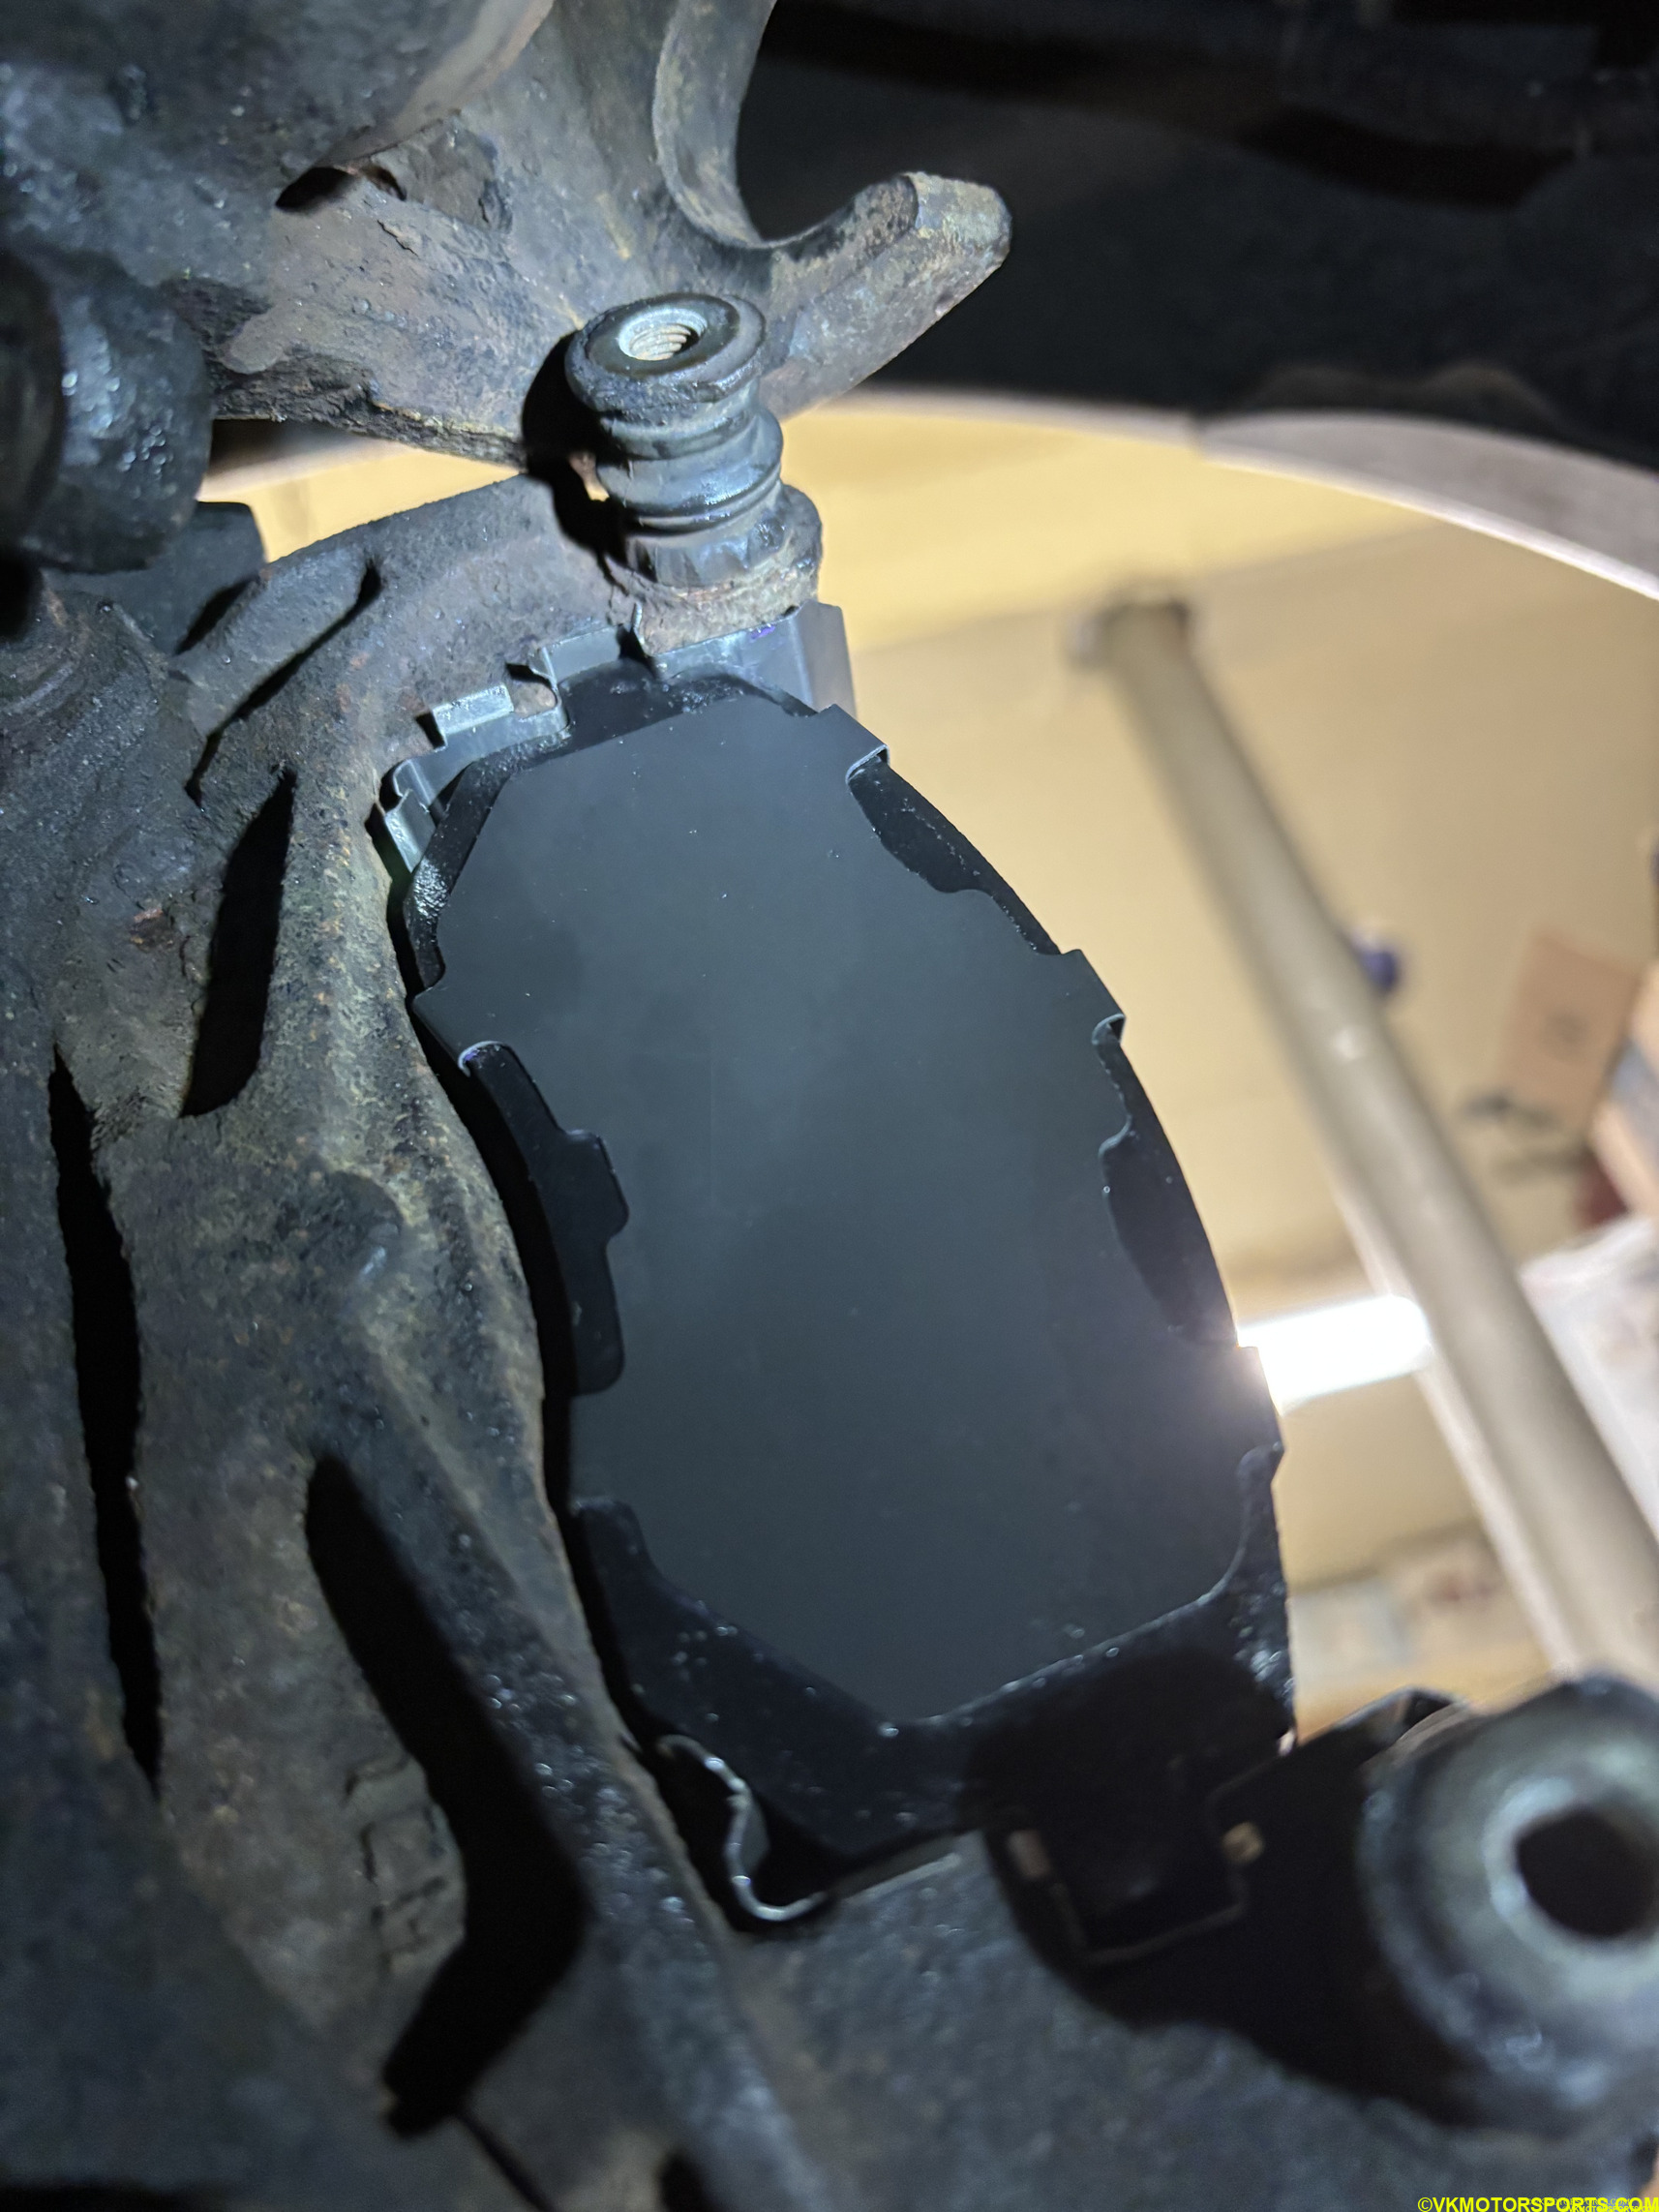 Figure 10. View from under the car of the new brake pad installed
Now that your brake pads have been installed, rub some brake pad lubricant on them (quantity as shown in Figure 11), and then close the caliper and tighten the bolts to 20 ft-lbs of torque.
NOTE: Do not apply brake pad lubricant to the side of the pad that touches the rotor.
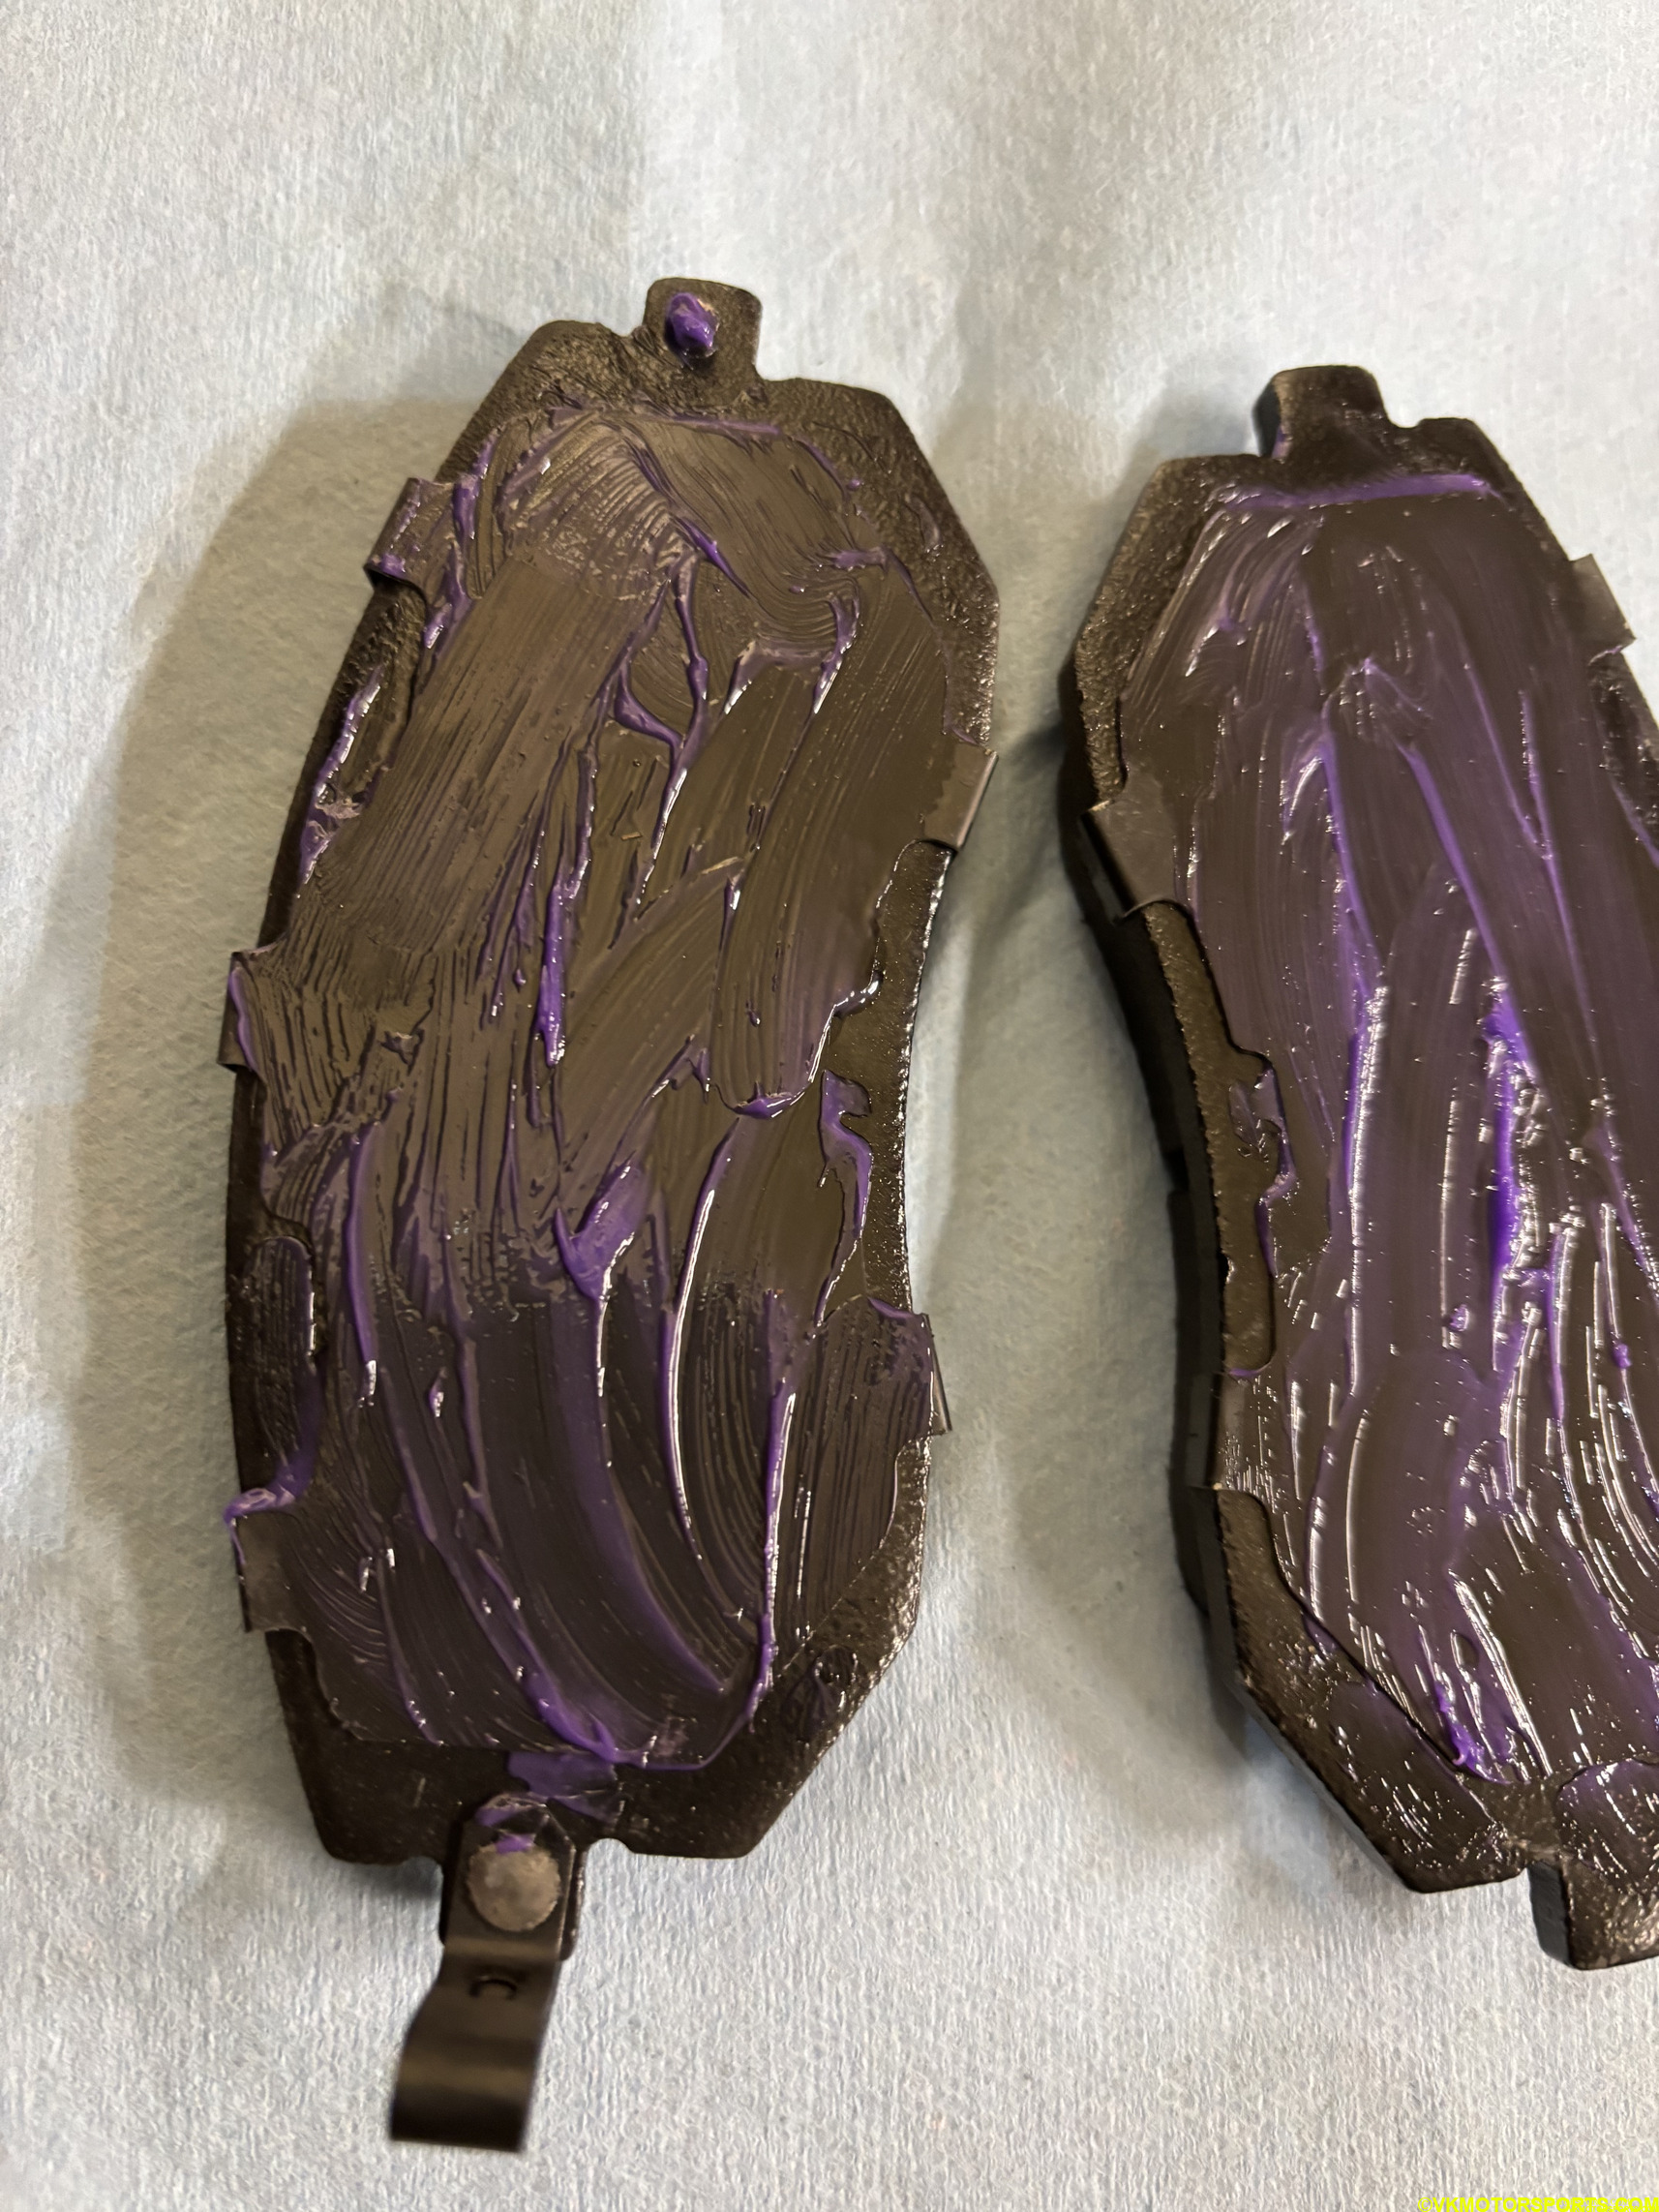 Figure 11. Brake pad lubricant applied to the brake pads
Doing the Rear Brakes
Changing the rear brake pads is similar to the front ones, except in this one I only remove one bolt for the caliper.
As shown in Figure 12, remove the wheels first and remove the bolt circled in red.
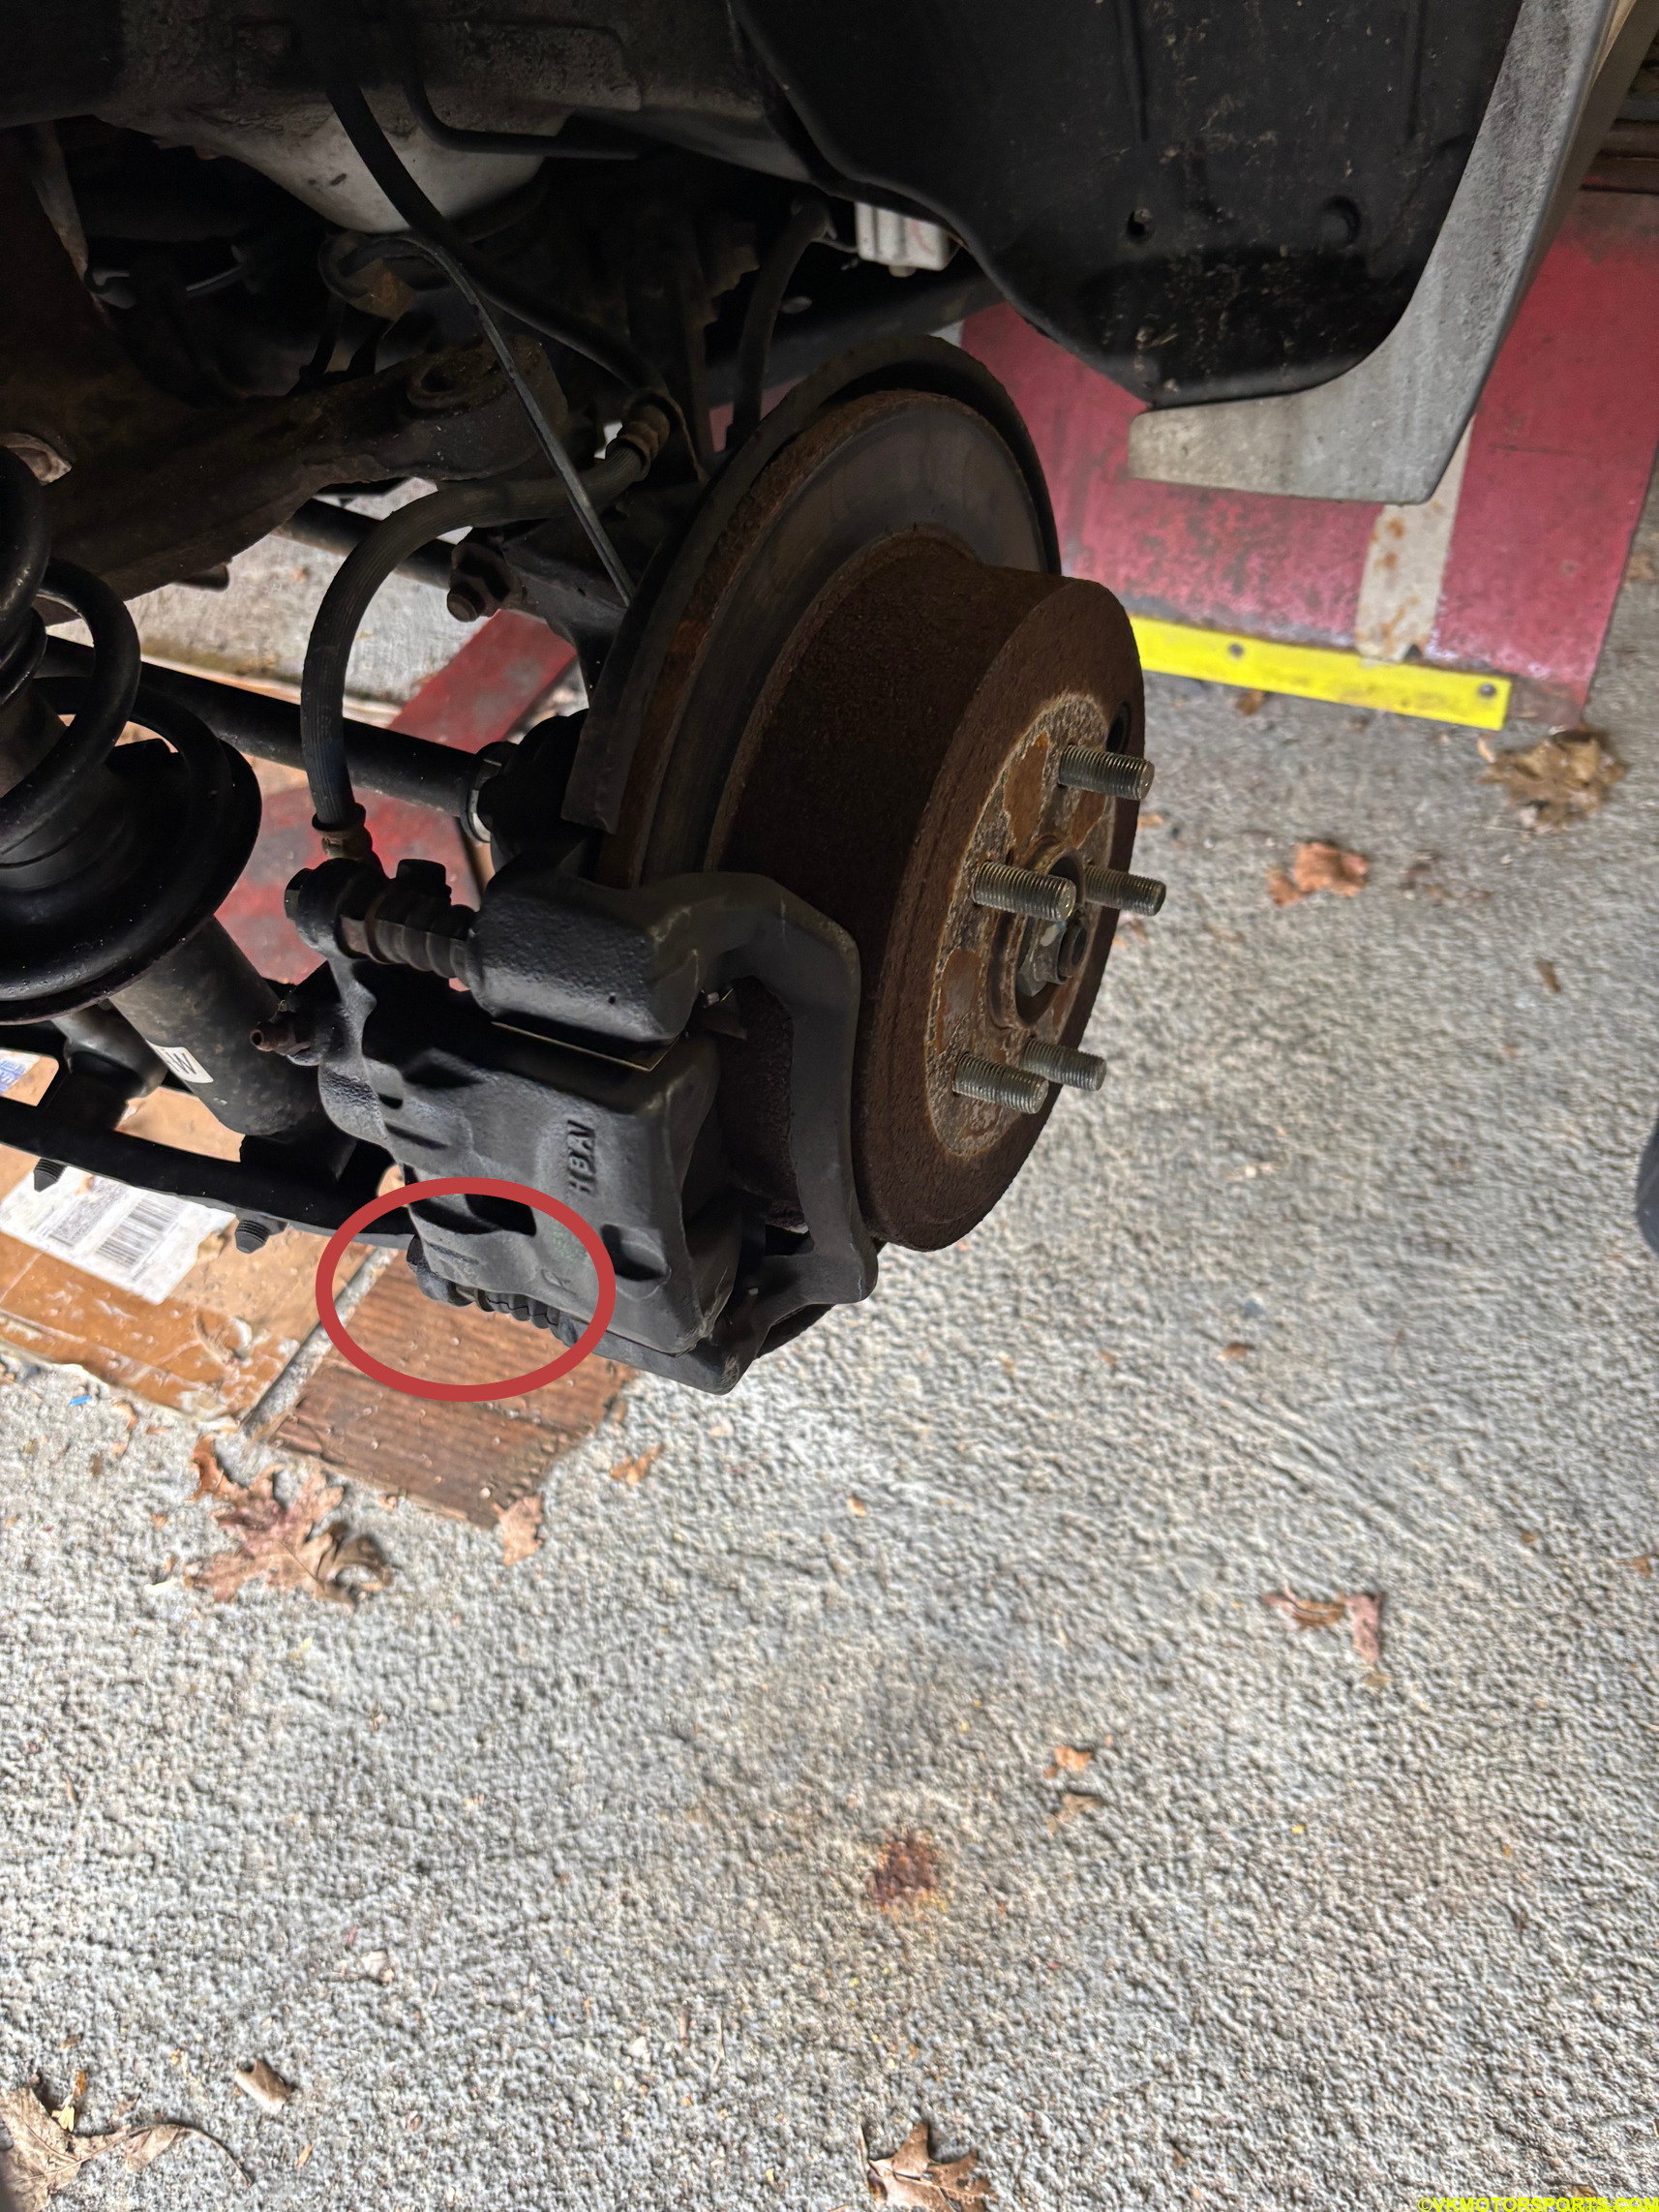 Figure 12. Remove rear wheel
Another view of the bolt to remove is shown in Figure 13.
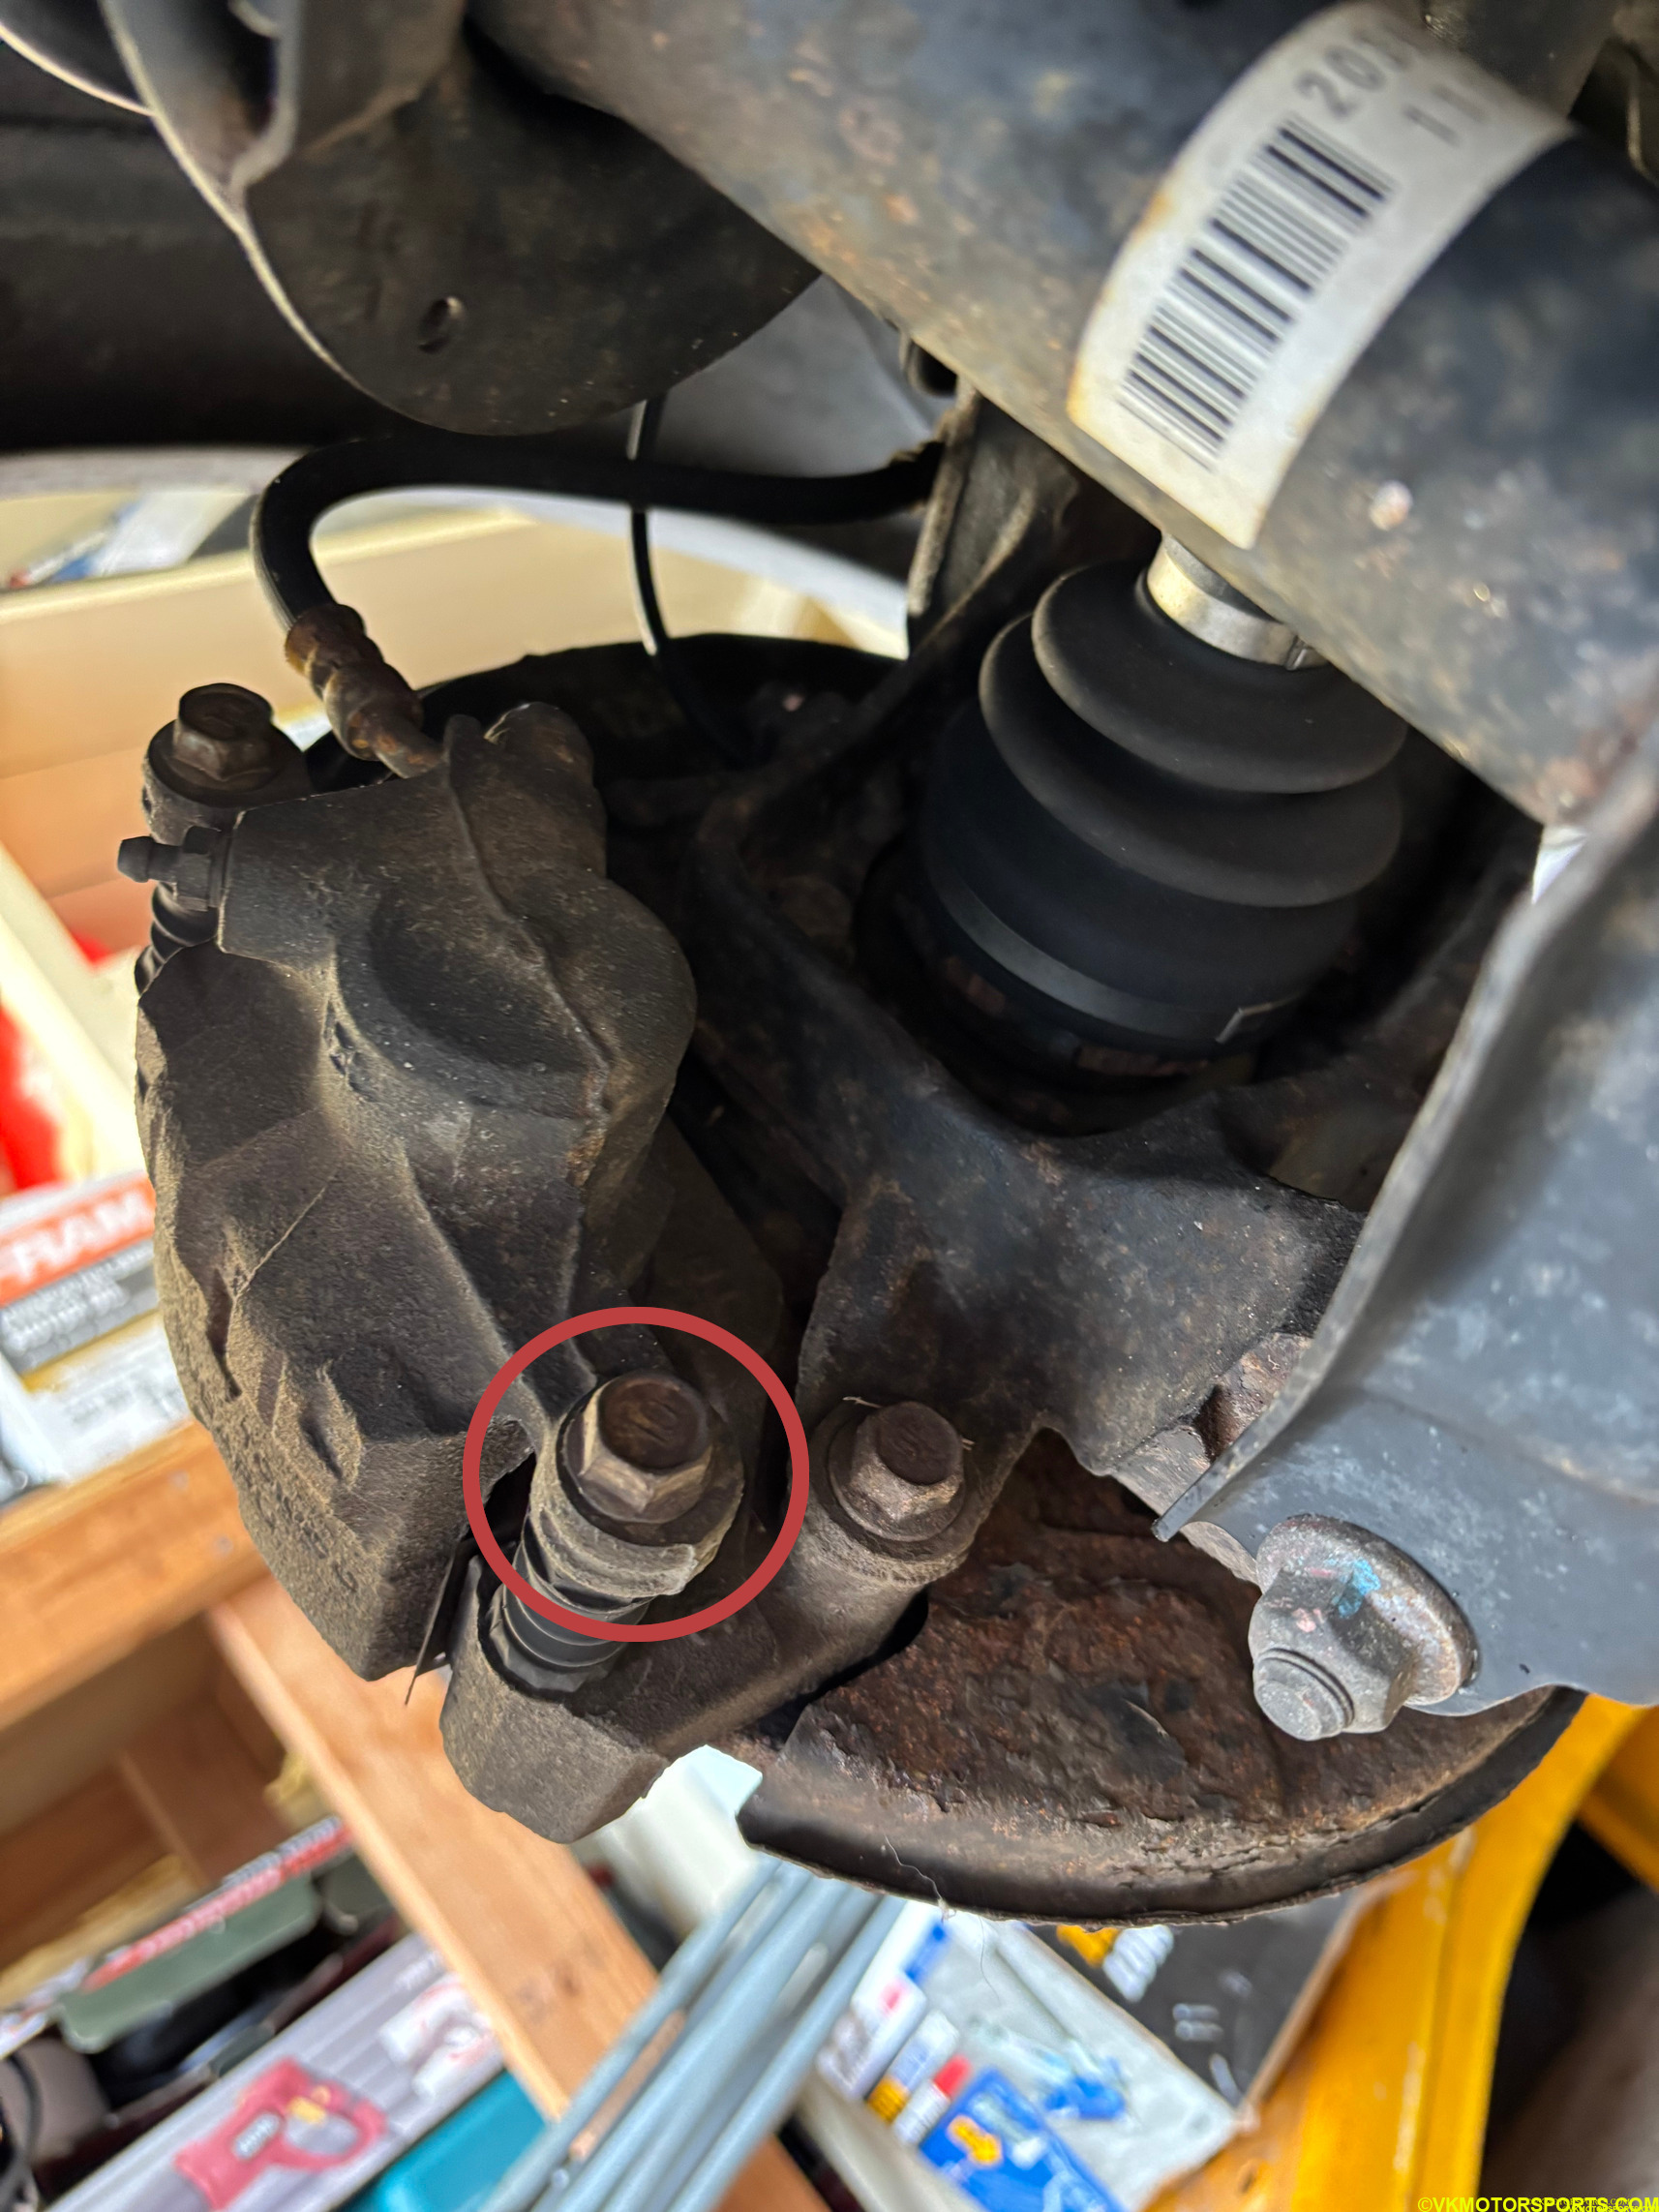 Figure 13. Remove the caliper bolt circled in red
Before you flip the caliper up, you can use a C-clamp and press the cylinders in completely with the existing brake pads (shown in Figure 14). This process is now much lesser work !
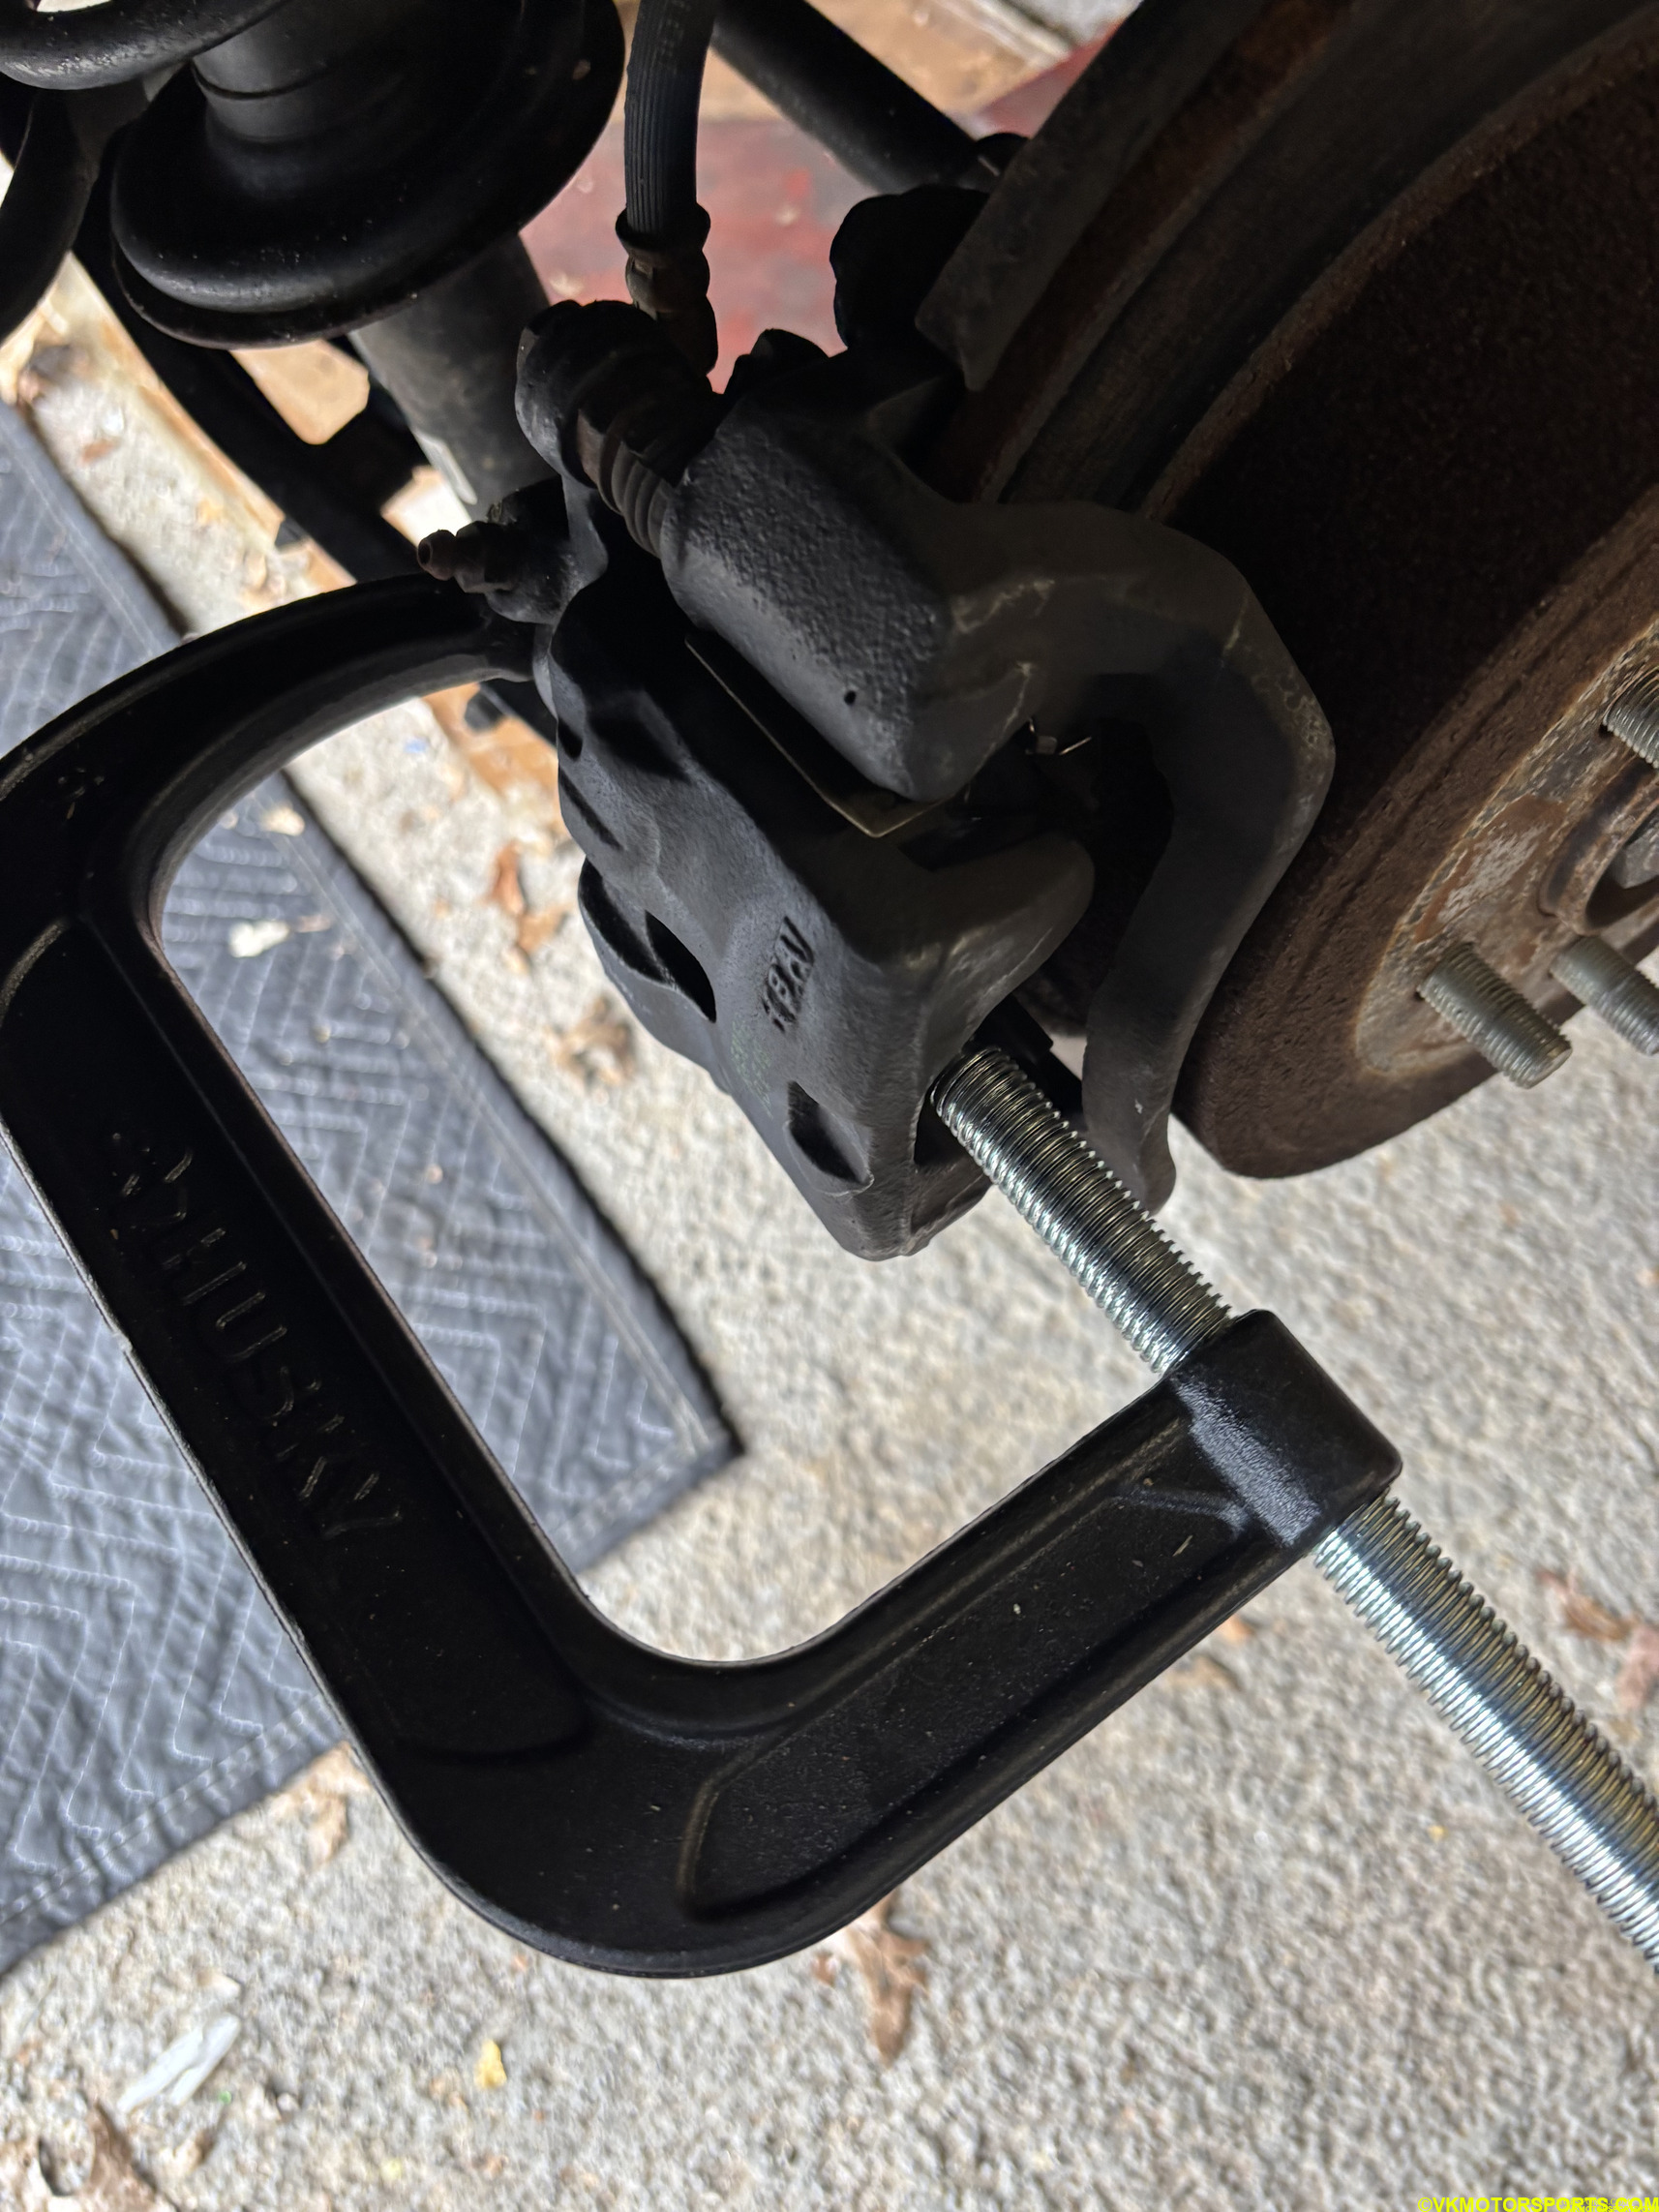 Figure 14. Press the caliper cylinders in place with a C-clamp
Flip the caliper upwards and remove the old brake pads as shown in Figure 15.
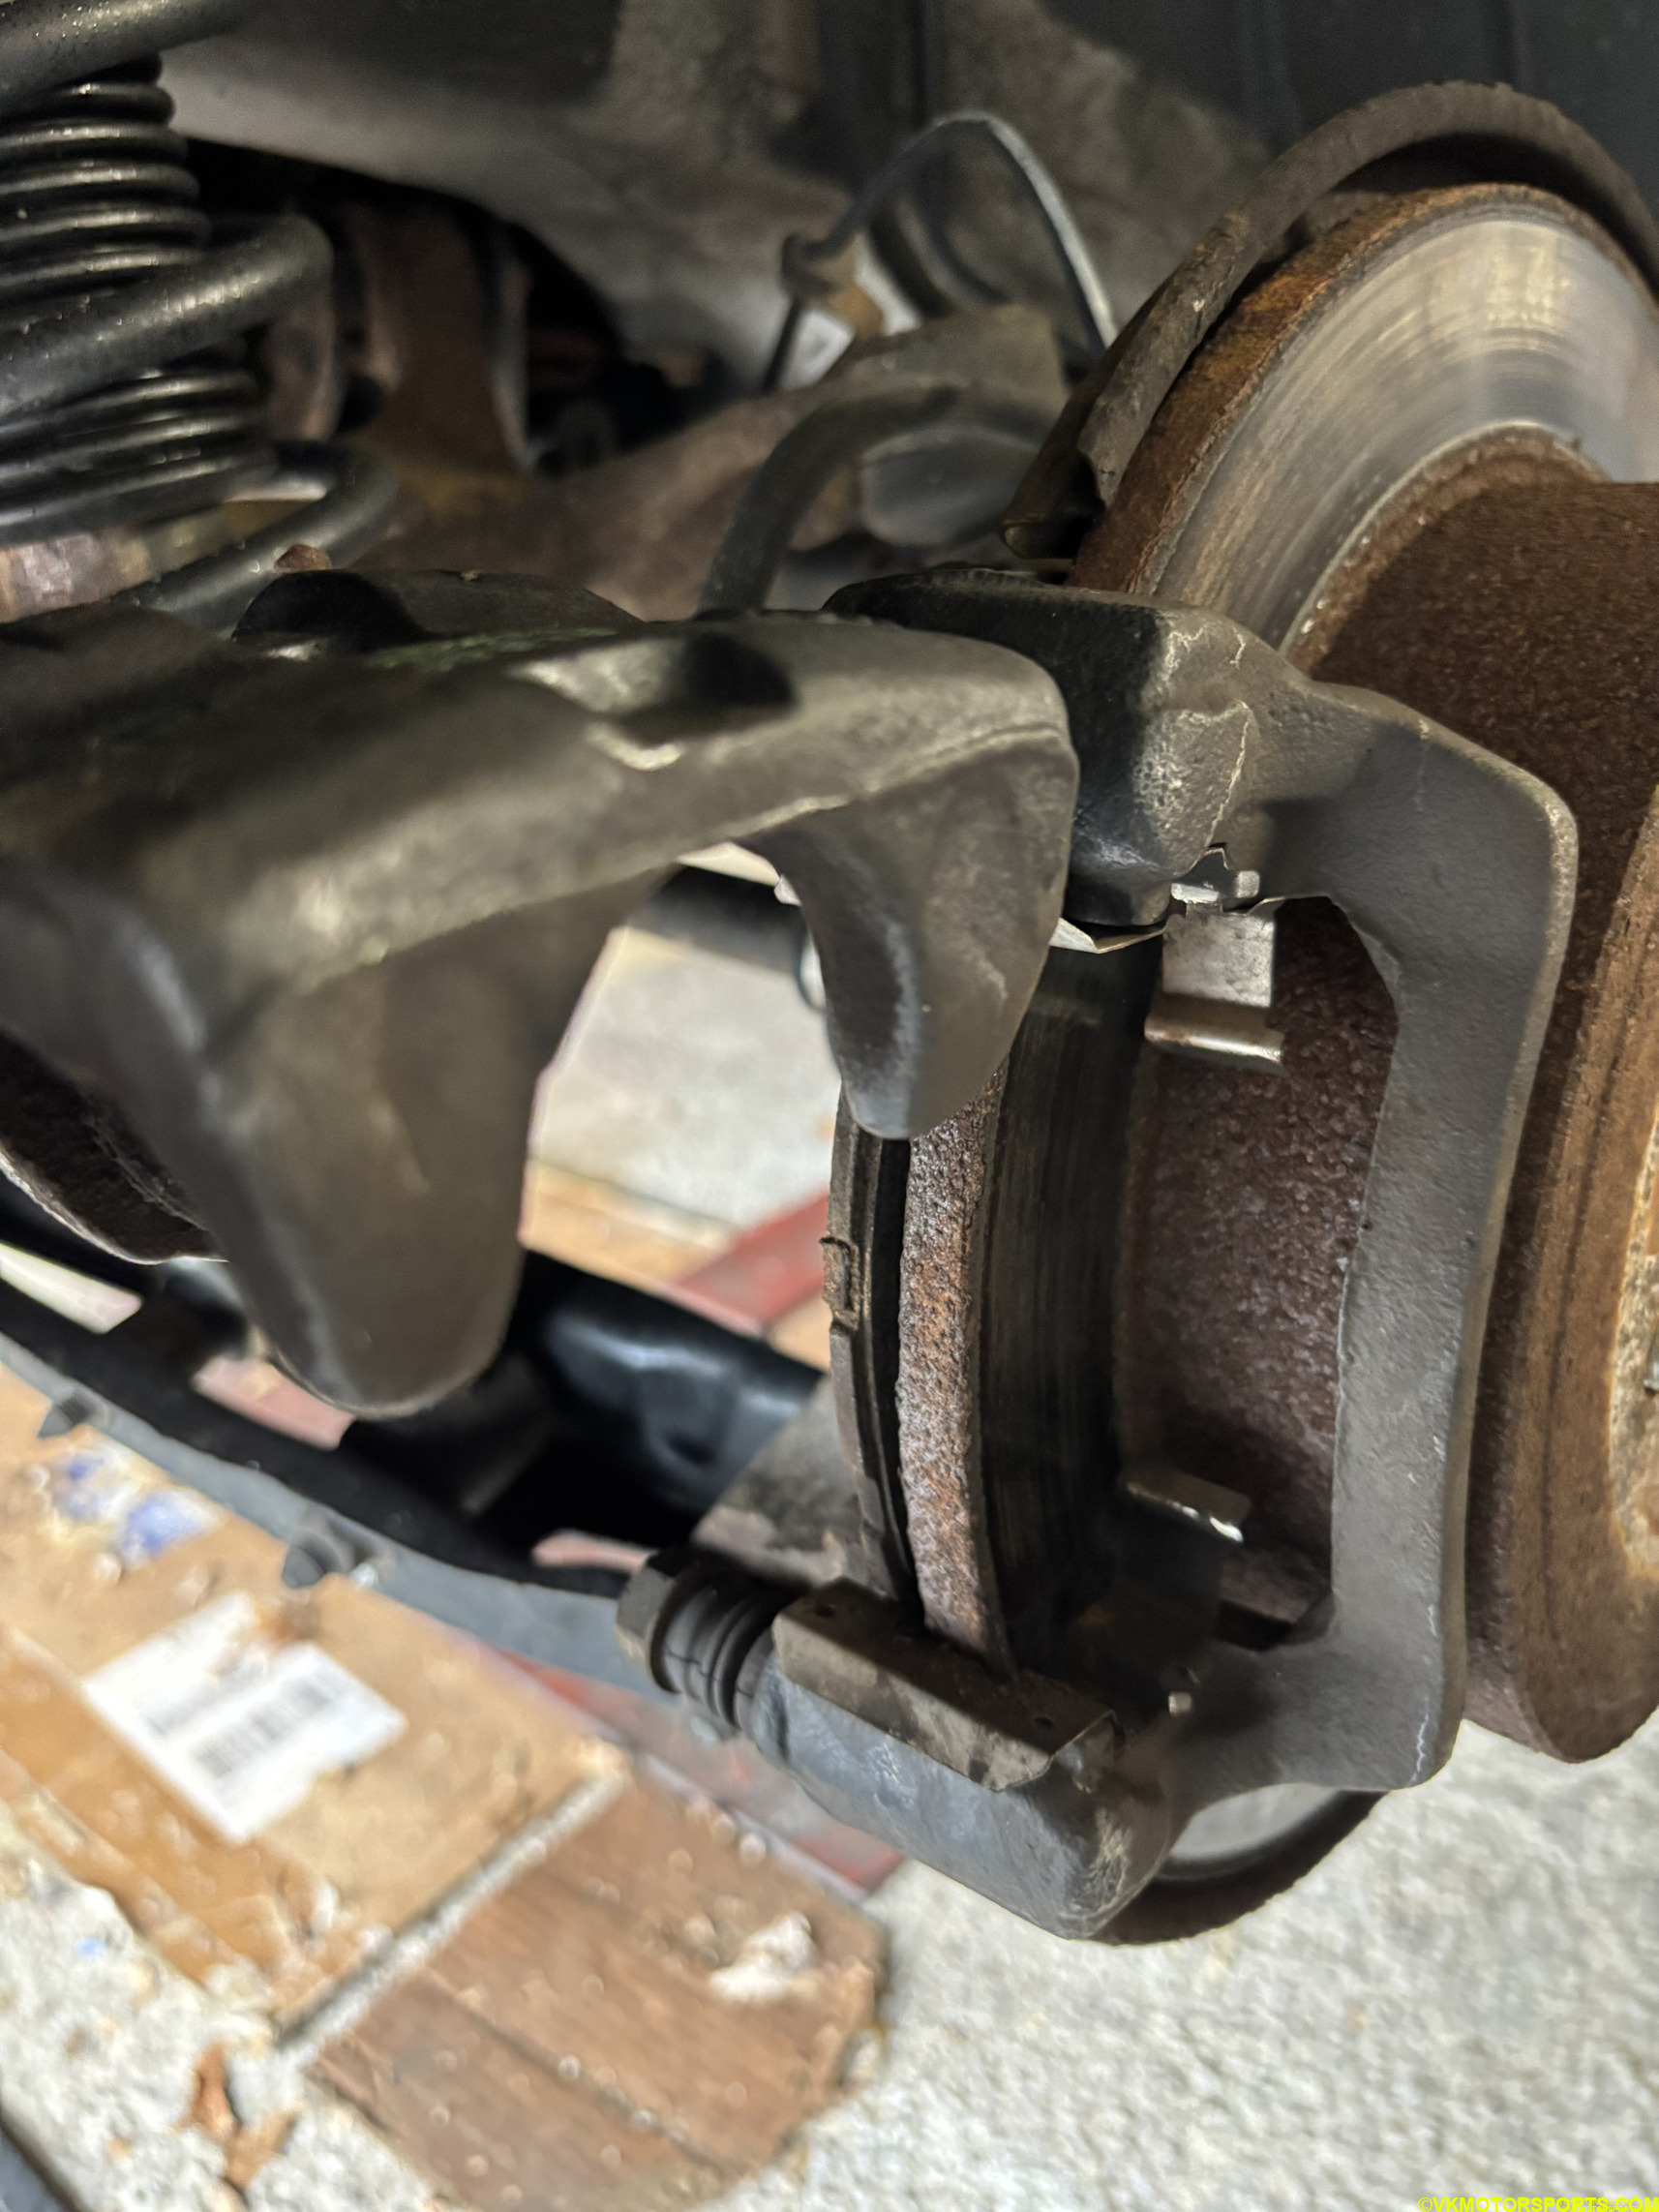 Figure 15. Flip the caliper upwards and remove the old brake pads
Install the new brake pads as shown in Figure 16, apply the brake pad lubricant to the pads and close the caliper. Tighten the bolt back to 20 ft-lbs of torque.
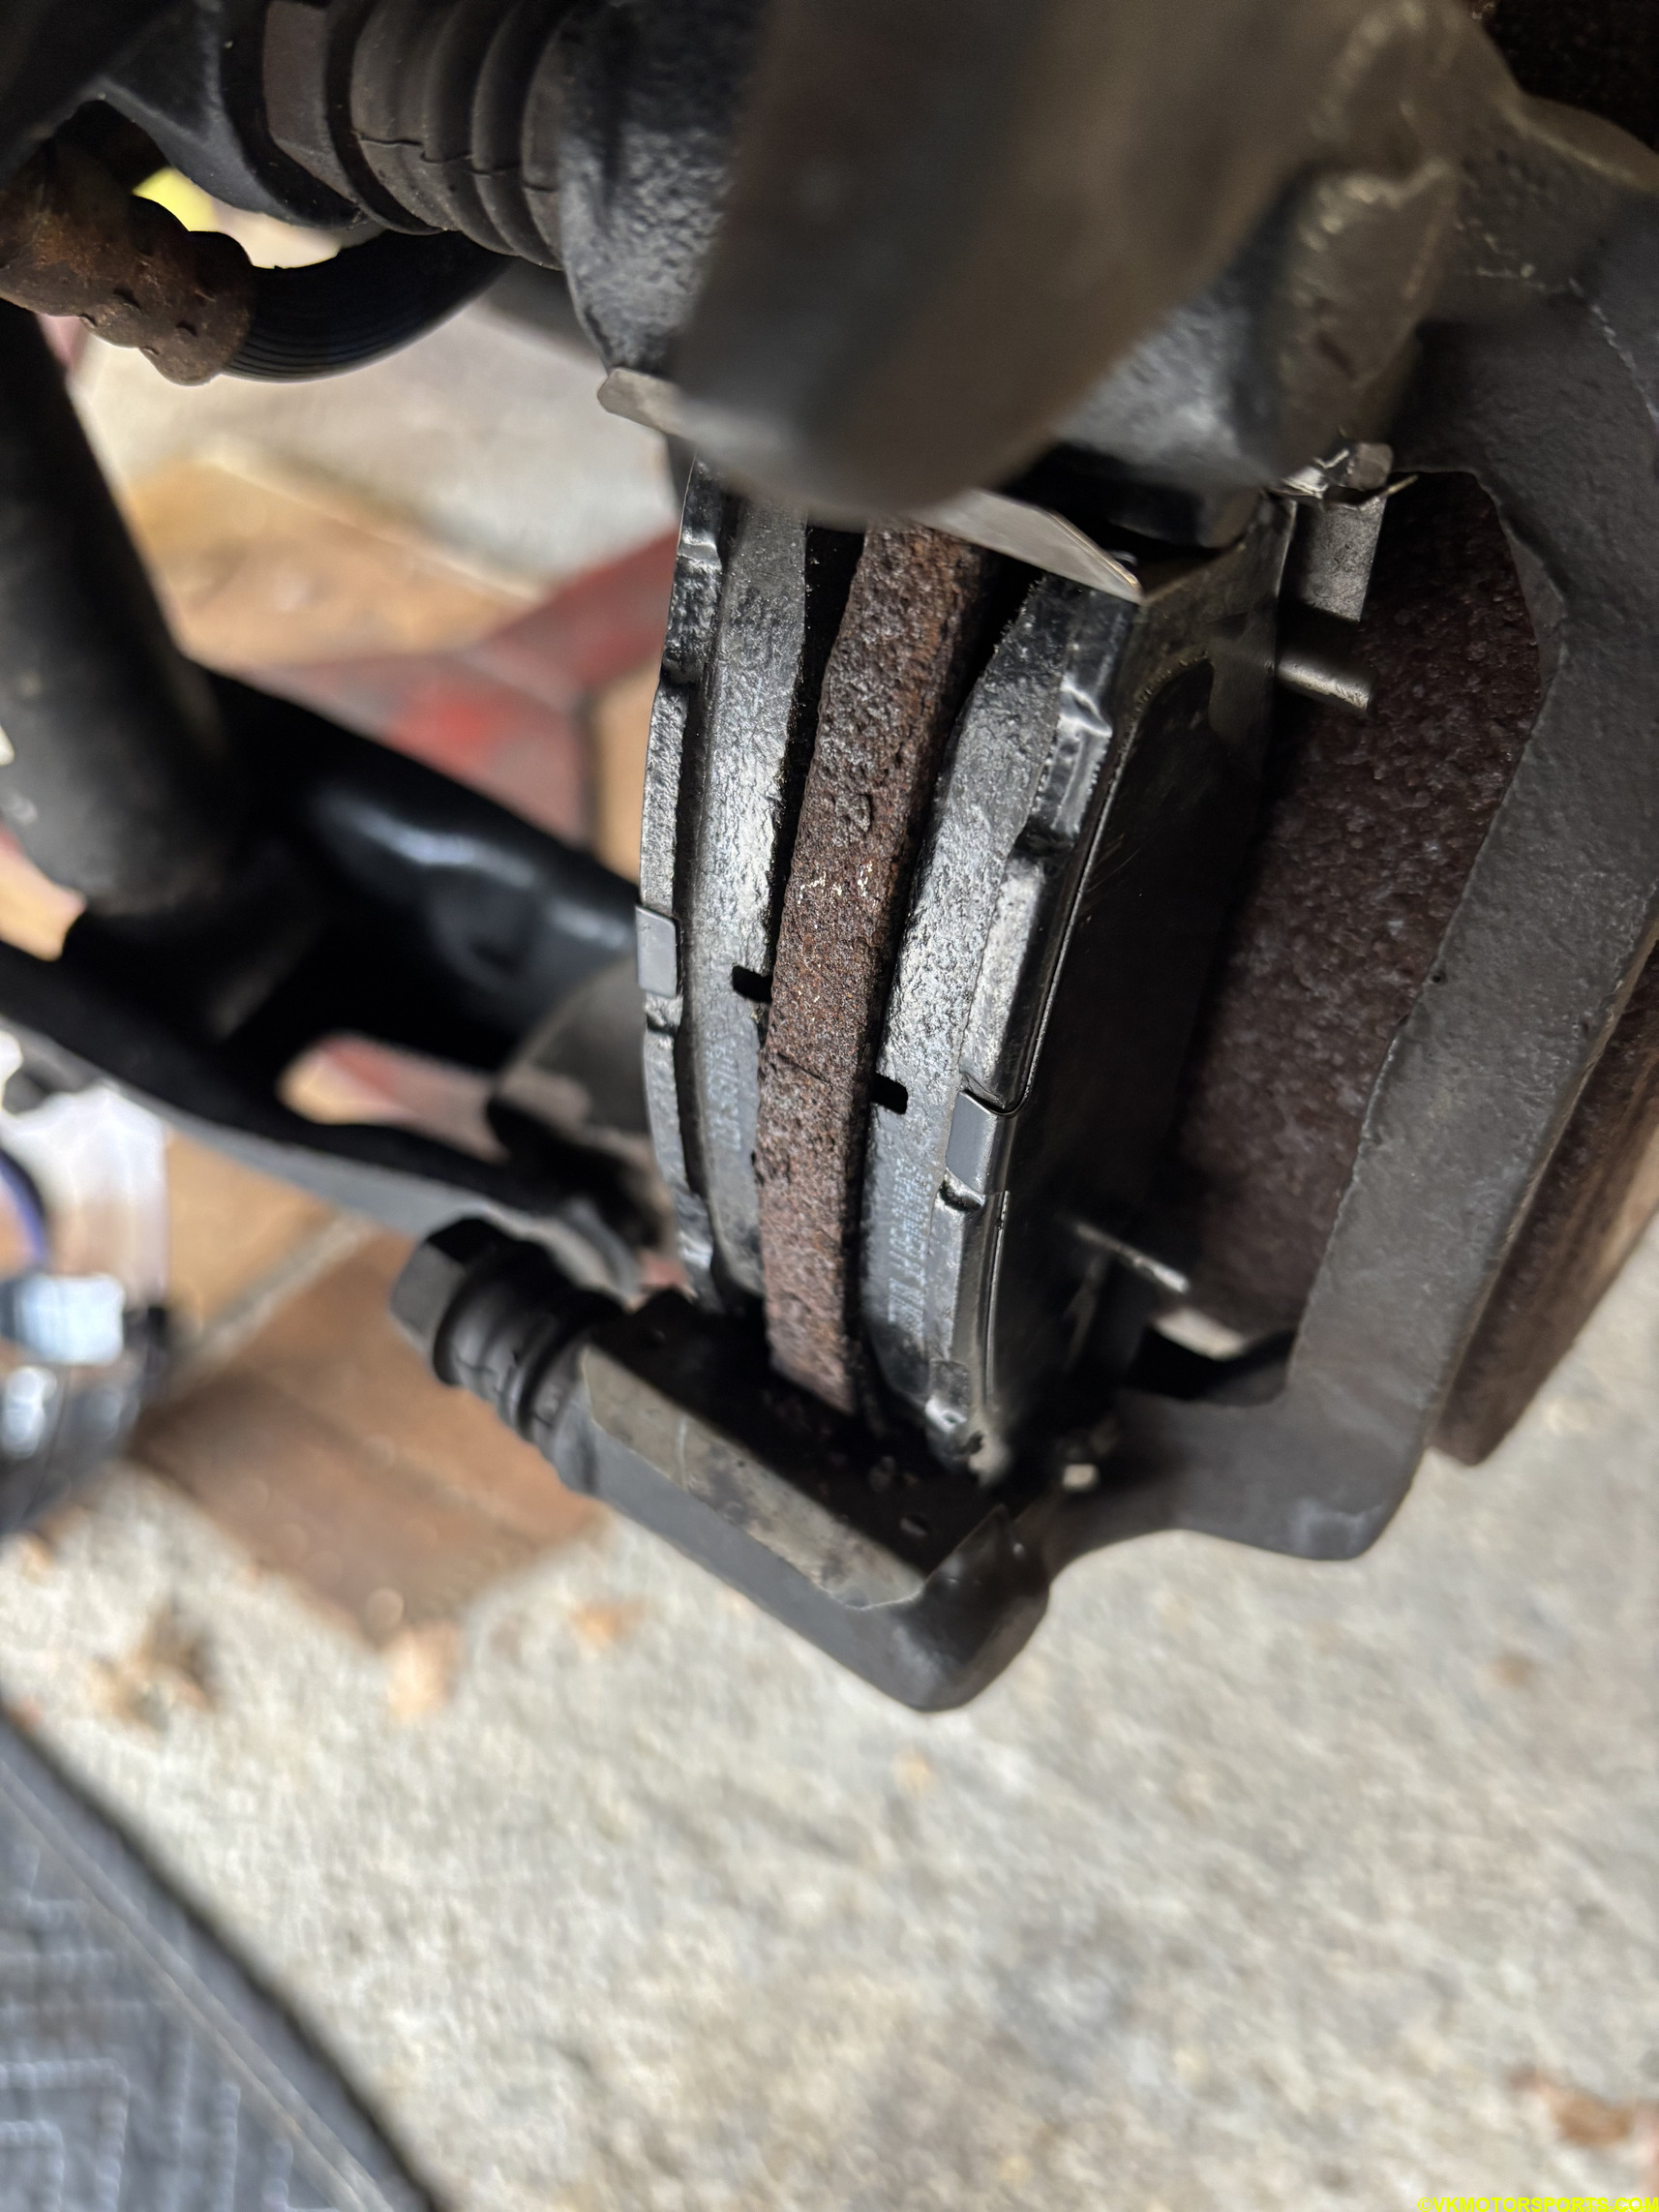 Figure 16. Install new brake pads and clips
Final Tasks
Remember to put the wheels back on, tighten all the nuts and torque them to 74 ft-lbs using a torque wrench.
The brake pedal may feel loose, so pump it until it gets tight. Remember to close the lid on the brake reservoir after you do this. Any extra brake fluid should be removed from the reservoir.
Now go test drive the car, and slowly break the pads in, by driving and stopping and testing out the stopping power of the brakes at differnt speeds.