The Porsche Boxster S started showing a check engine light (CEL) in May. I used an OBD2 code reader and saw that the codes were P1128 and P1130.
Luckily for me, there was an article in the May-June Porsche Club of America magazine (Figure 1) that mentioned this exact issue in their tech Q&A section.
Turns out it is related to the intake, and the easiest test is to clean and/or replace the mass air flow (MAF) sensor. Since a new MAF sensor is about $150-$270, I decided to clean it first to see if that fixed the issue.
However, based on other research it could also be an evap leak but this post is about the MAF sensor cleaning.
Other references that point to the same methodology are listed below:
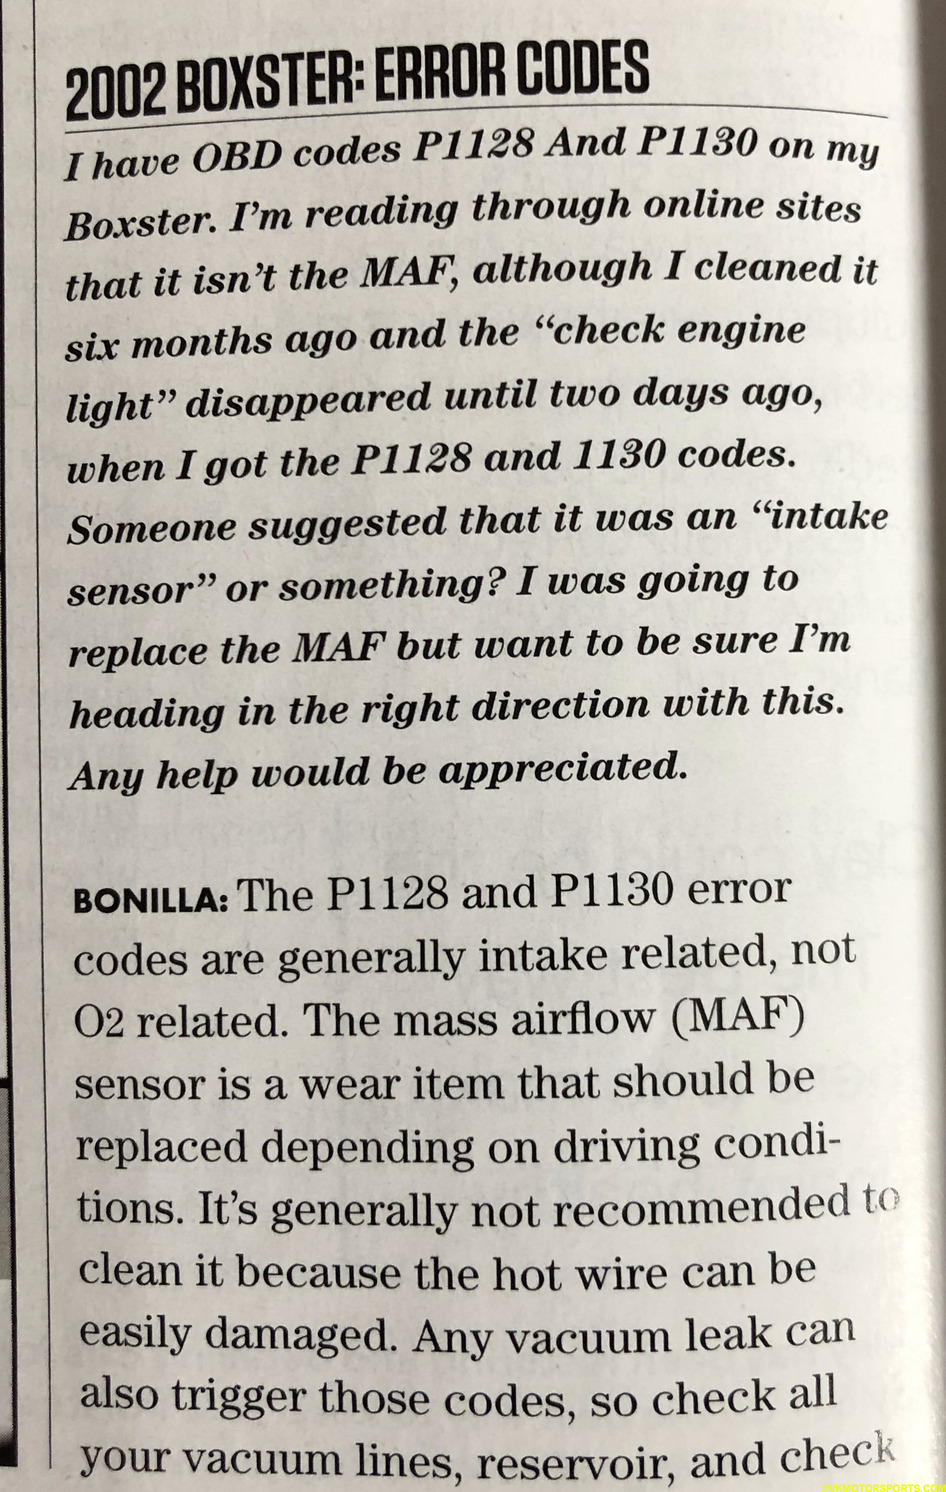
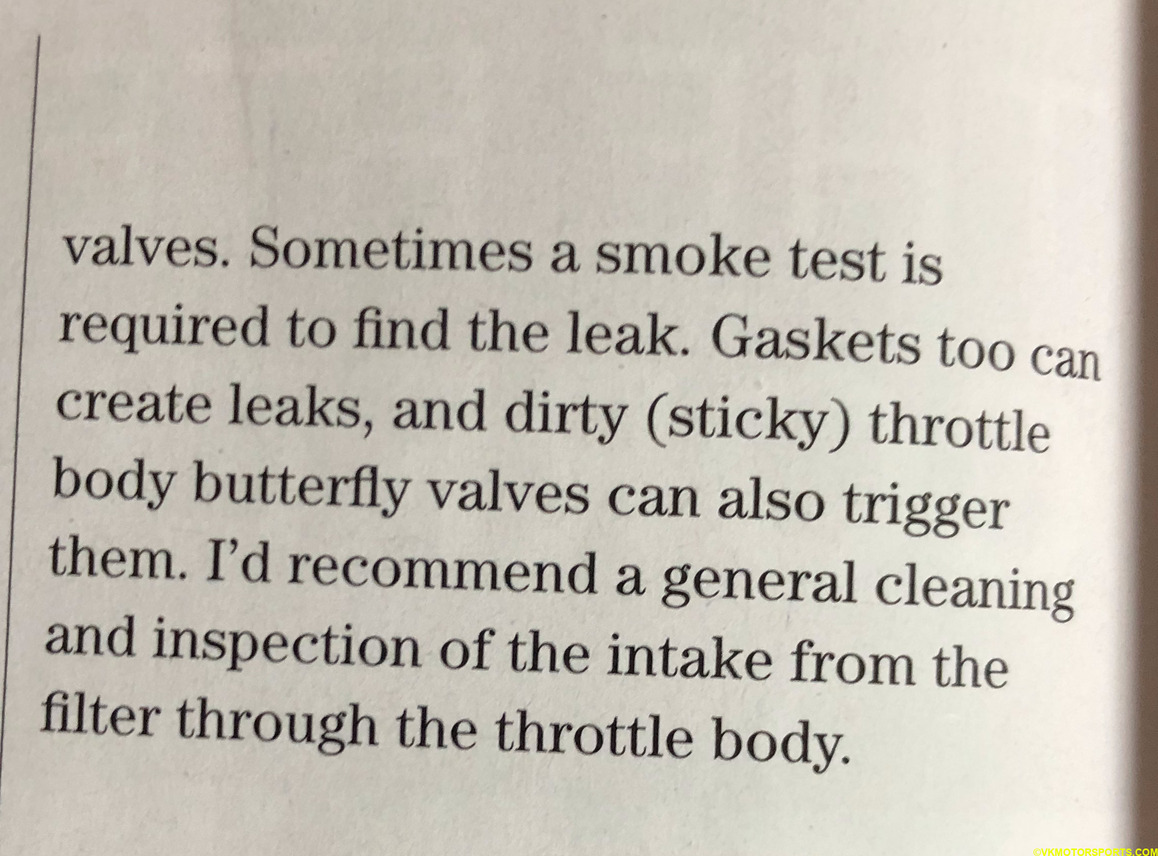 Figure 1. Porsche Club of America Magazine solution to P1128/P1130 CEL
The Bentley Boxster manual also has some information on how to remove the MAF sensor as shown in the below image.
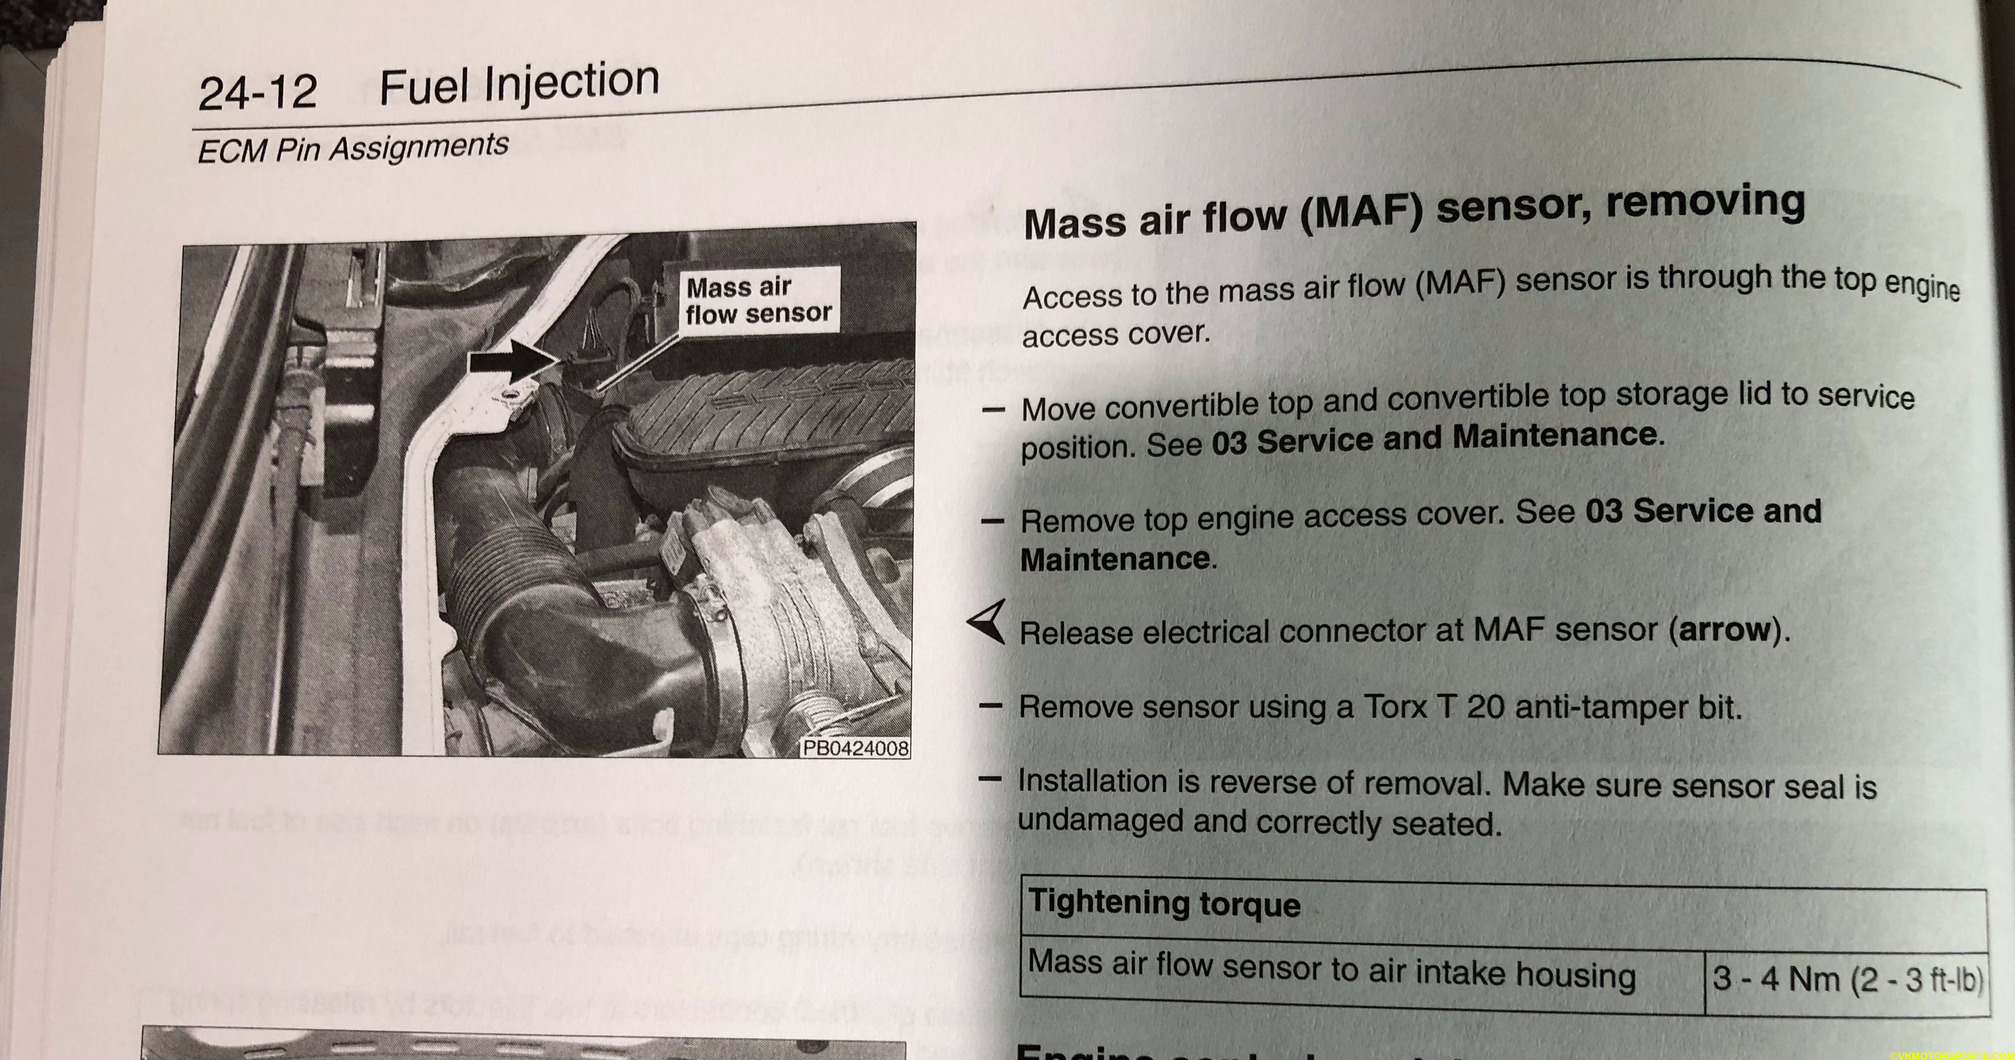 Figure 2. Bentley manual for Boxster shows MAF sensor removal
Tools and Materials Needed
Here are the tools and materials you need to perform a MAF sensor cleaning.
- CRC MAF Sensor Cleaner 11oz. from Amazon or a local auto-parts store for $8-11. (Figure 9)
- Torx T-20 screw driver from Amazon or a local hardware store like Harbor Freight for $5-10.
- Flat head screw driver from Amazon or any local hardware store.
- Gloves to hold the MAF sensor
- Shop Towels for drying the MAF sensor
- MAF Sensor by Bosch if your sensor has failed and needs replacement.
Procedure to Clean the MAF sensor
Step 1: In an earlier post I have described how to open the engine cover and access the engine bay. You need to do that first.
Step 2: The next step is to locate the MAF sensor which is next to the air filter and looks like in Figure 3. In my case it was looking dirty and the surrounding intake pipes were also looking very dirty.
If that is your case too, using soapy water and a clean microfiber cloth, first clean up the entire area and wipe it down so no more dust is visible. This will prevent the cleaned MAF sensor from grabbing onto any dirt.
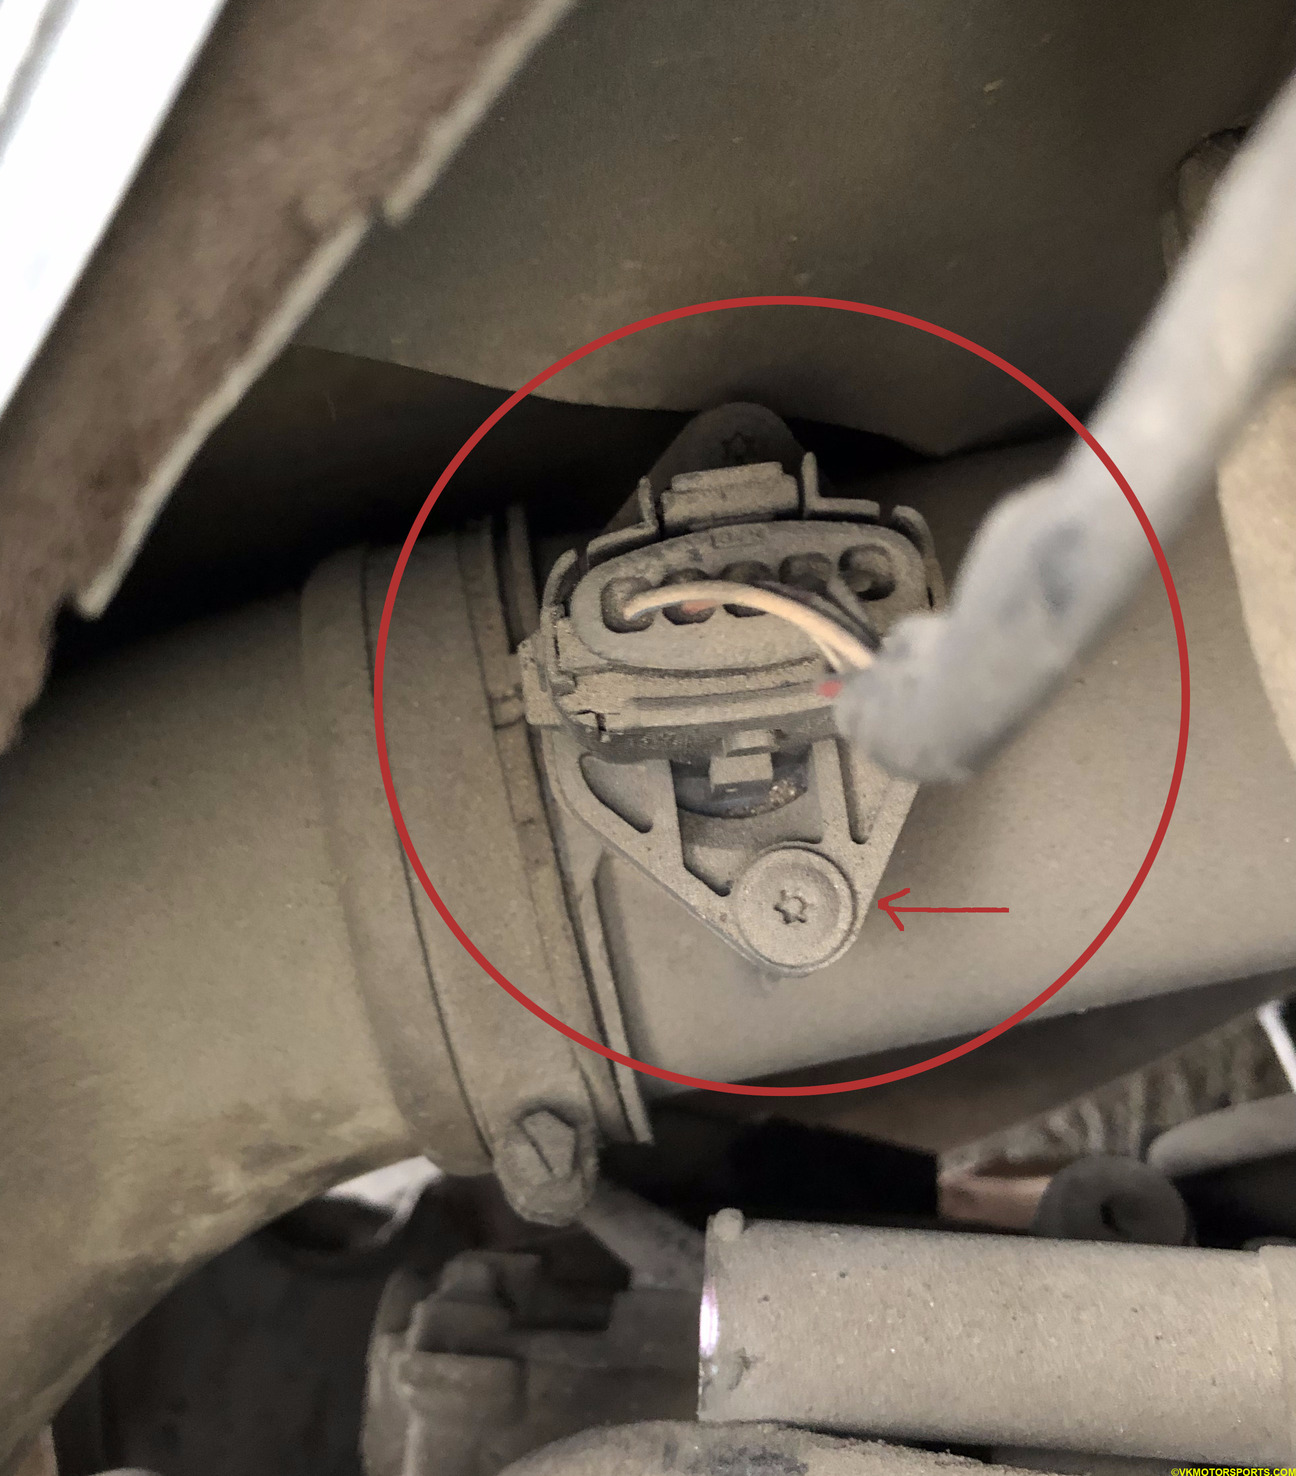 Figure 3. Locate the MAF sensor in the intake. Looking dirty !
Figure 3 also shows the location of the screws that need to be removed.
Step 3: Now using the Torx T-20 screwdriver or a T-20 socket remove the two screws as shown in Figure 4. Be slow and do not drop the screws in the engine bay. Once removed, it should look like Figure 5.
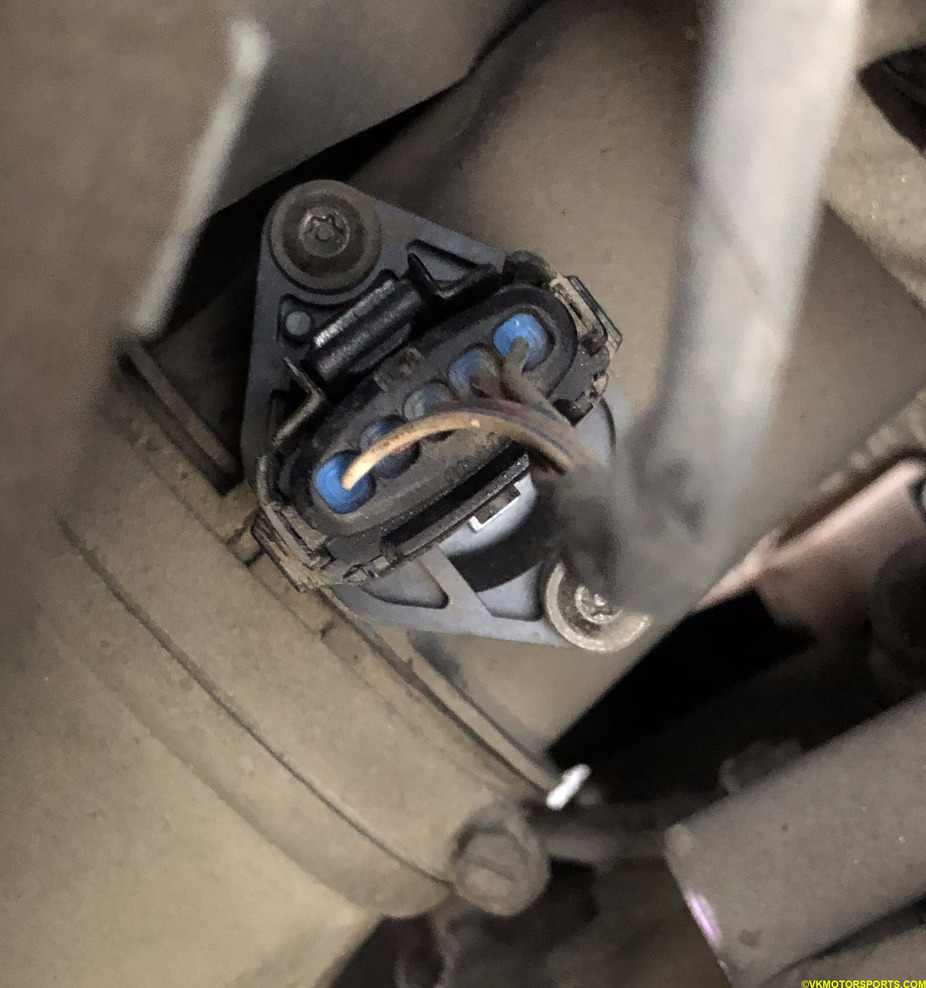 Figure 4. Remove the two screws
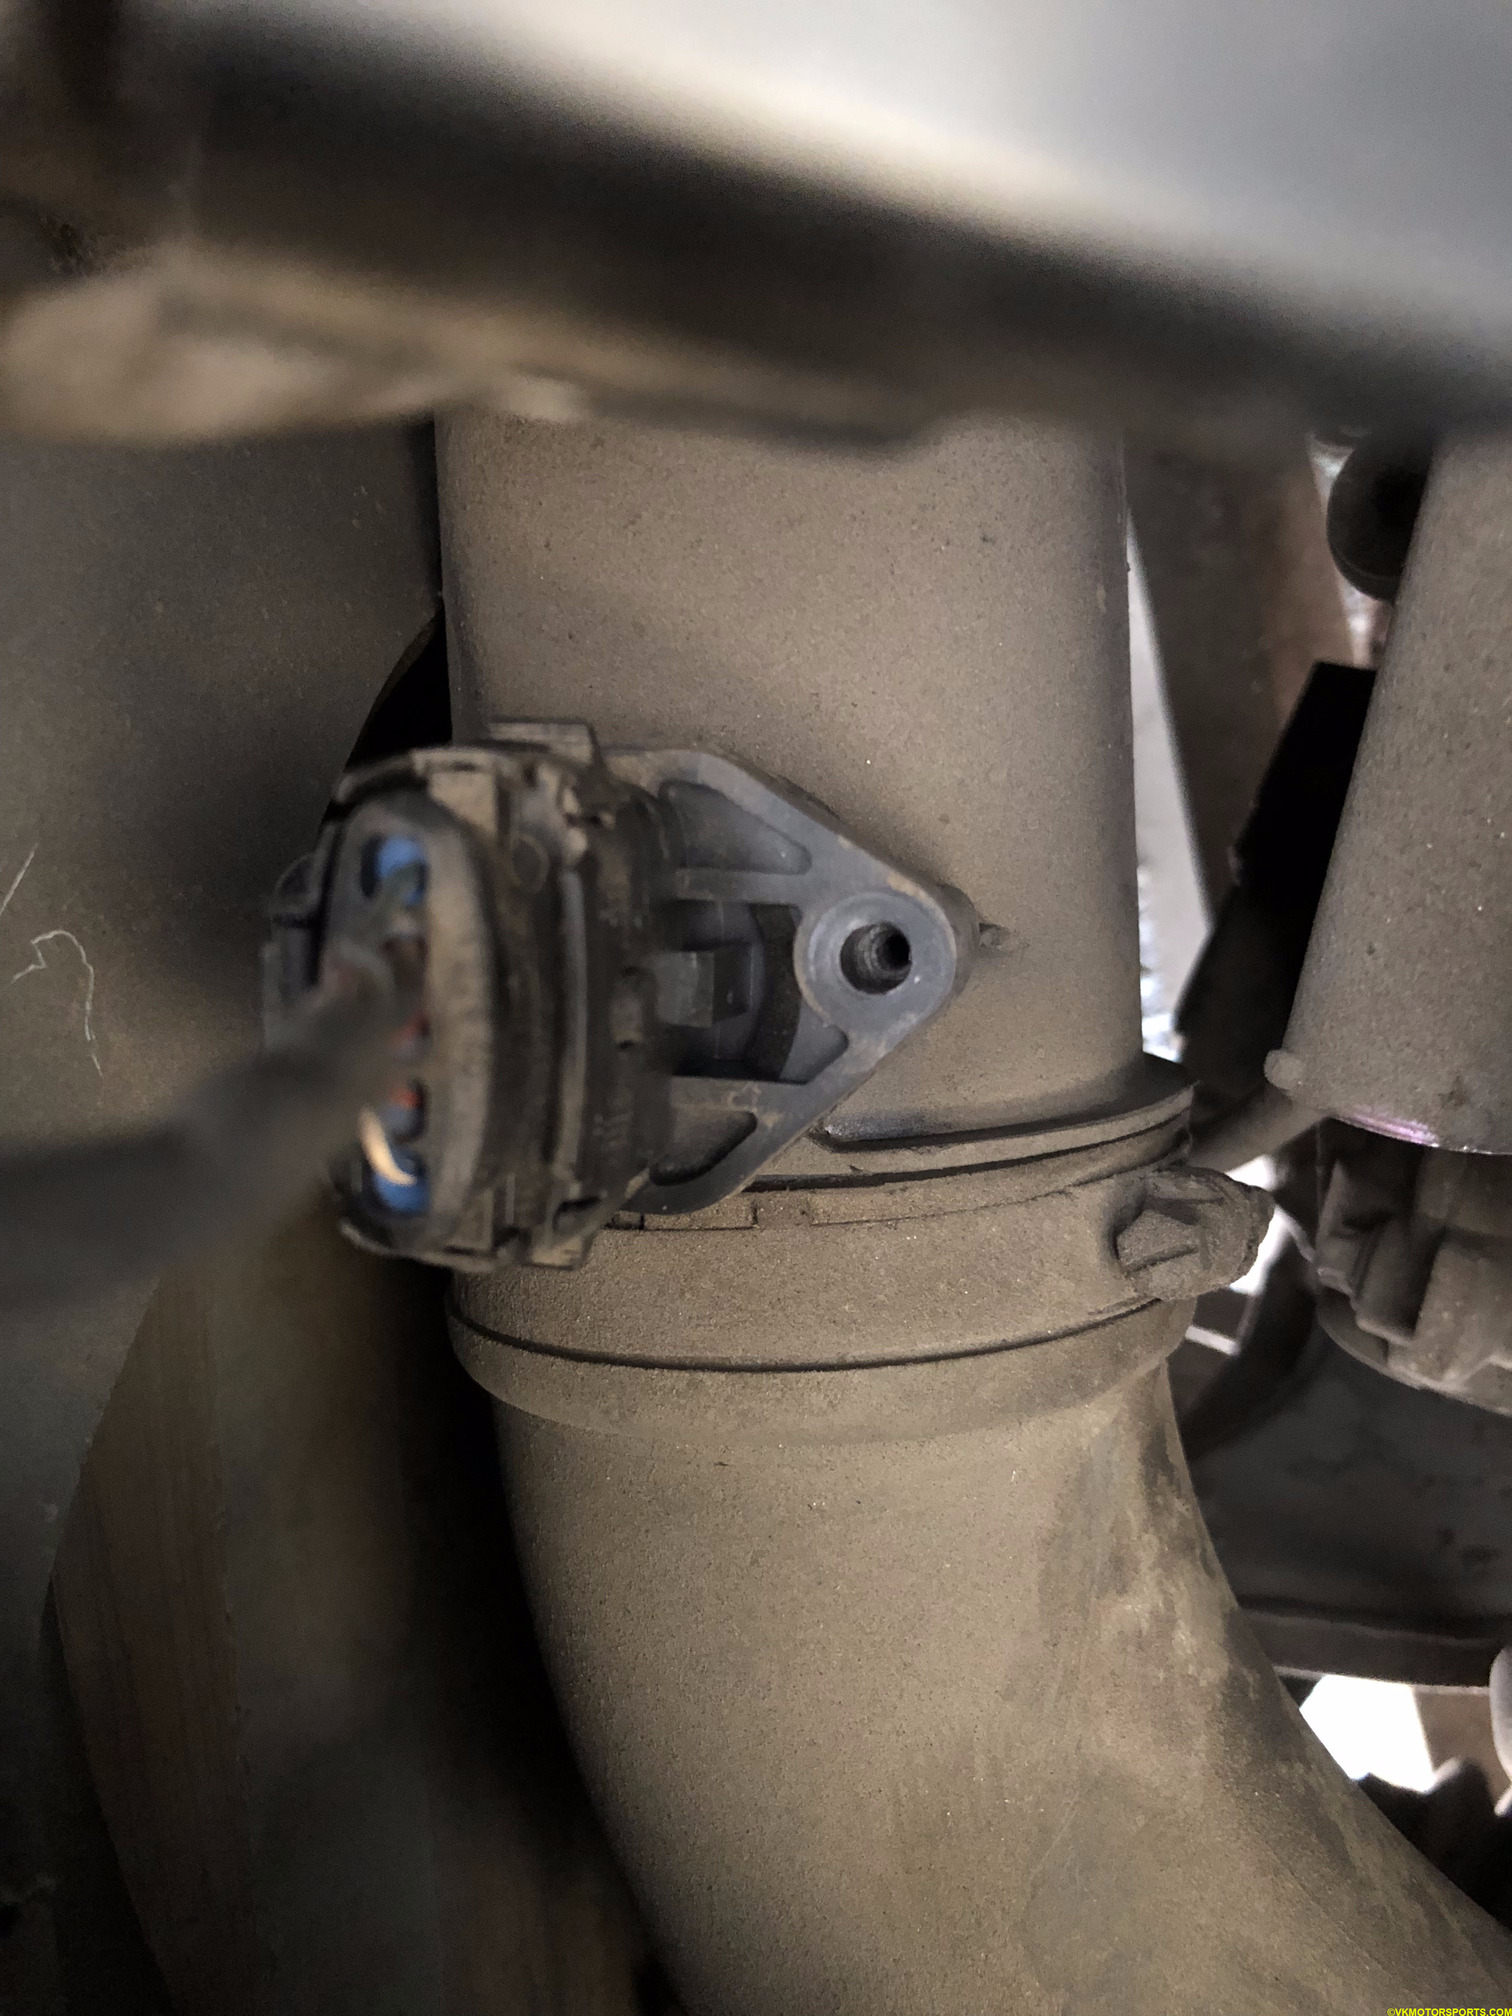 Figure 5. Screws have been removed
Step 4: Carefully, wearing a glove, lift out the MAF sensor from the intake and using a flat head screwdriver try to detach the electrical connector as shown in Figure 6.
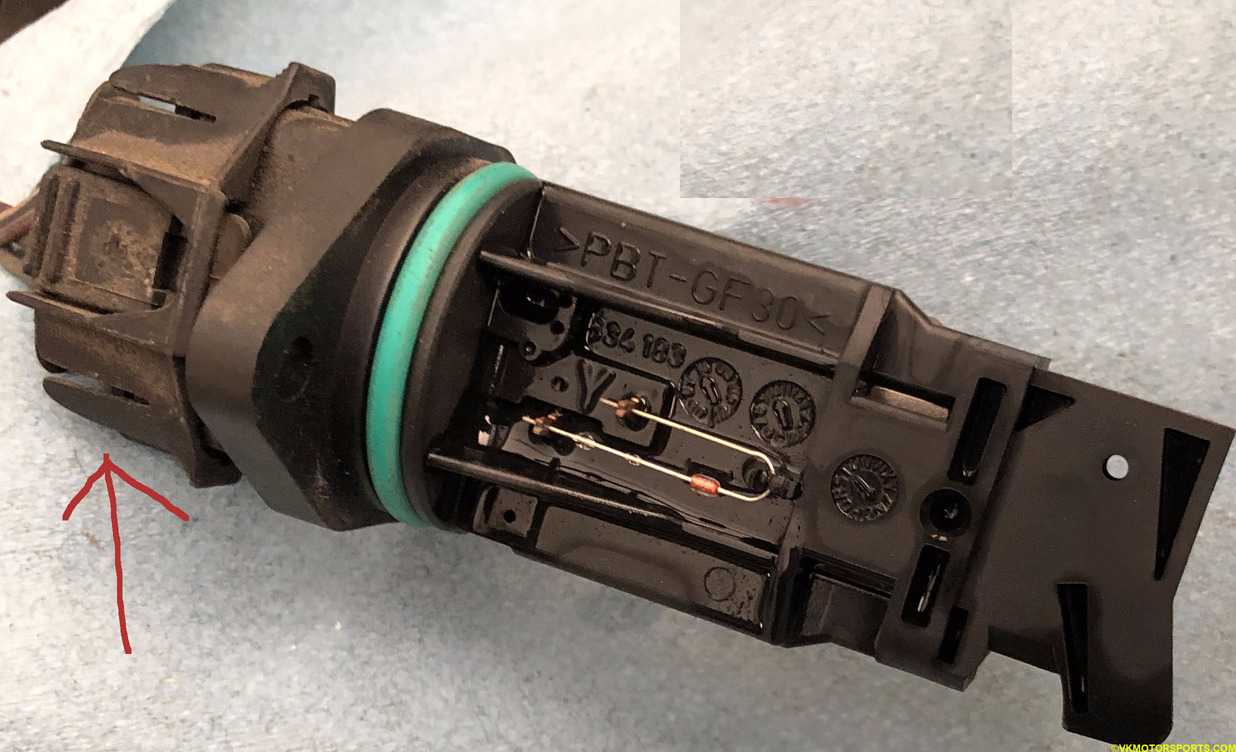 Figure 6. Detach the electrical connector
Once the MAF sensor has been separated from the connector, place it on a shop towel (Figure 7).
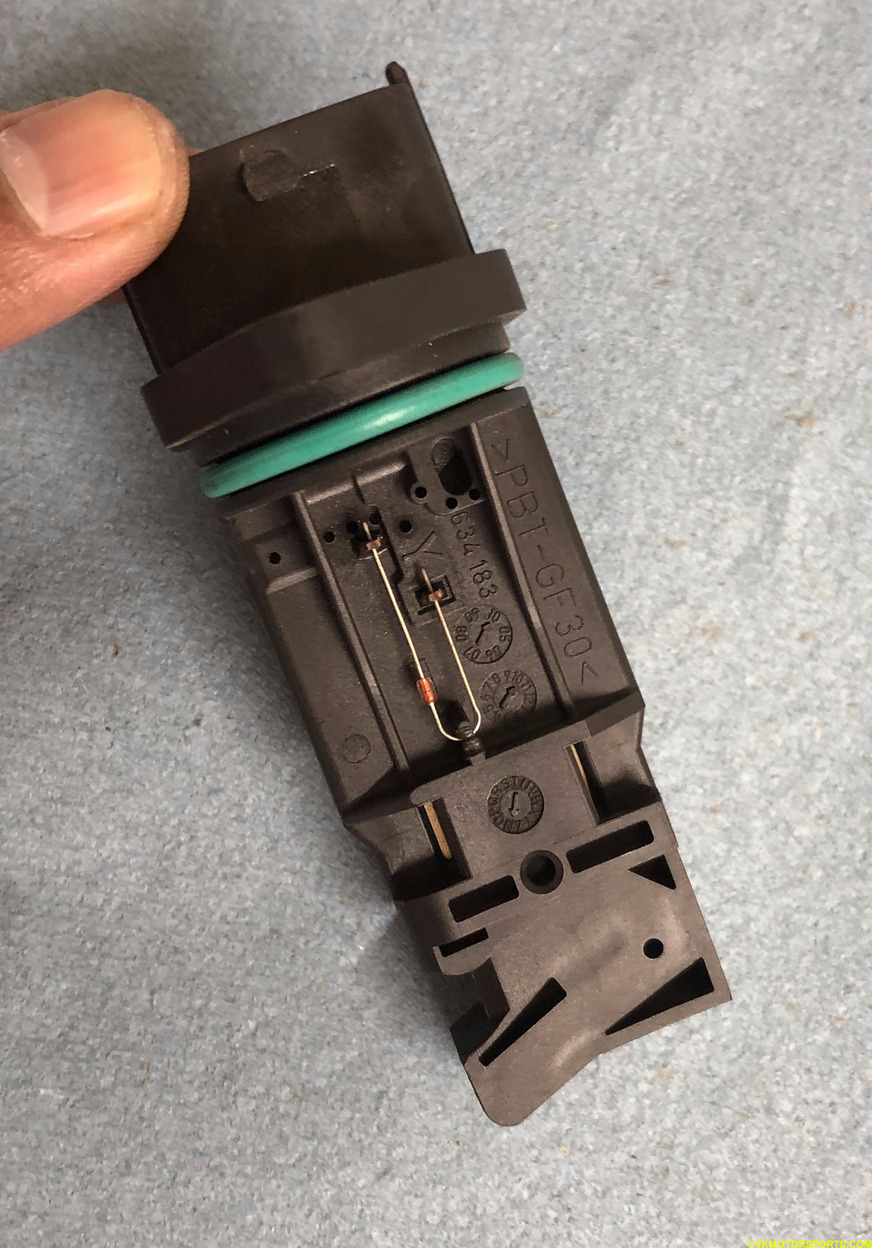 Figure 7. MAF sensor placed on shop towel ready for cleaning
You can see in Figures 8a and 8b the part number of the sensor that is in my Boxster. You want the same part number 98660612501 made by Bosch if you are replacing the sensor. These sensors are quite expensive and can be anything between $150 on Amazon to $270 on PelicanParts.com.
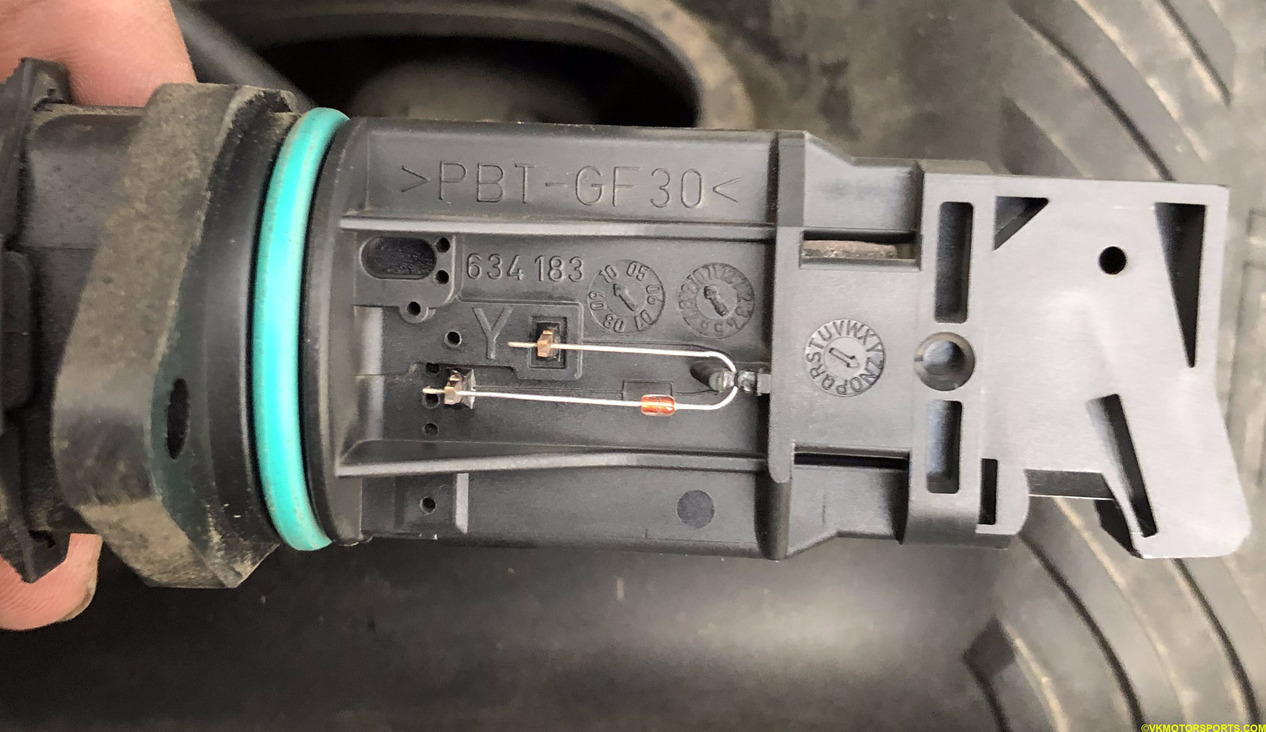 Figure 8a. Front of MAF sensor Bosch 98660612501
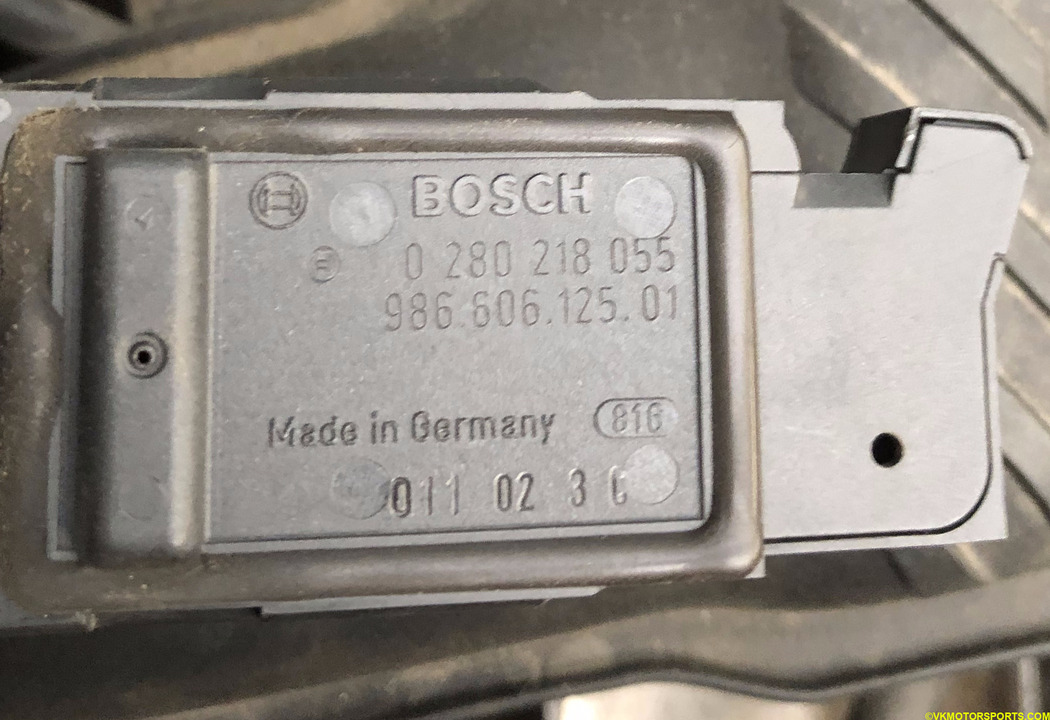 Figure 8b. Rear of MAF sensor Bosch 98660612501
Step 5: Now using the CRC MAF Sensor cleaner (Figure 9) you can spray the sensor wire points as shown in Figure 10. Be liberal with the spraying and spray well. Make sure you spray all the metallic surfaces nicely.
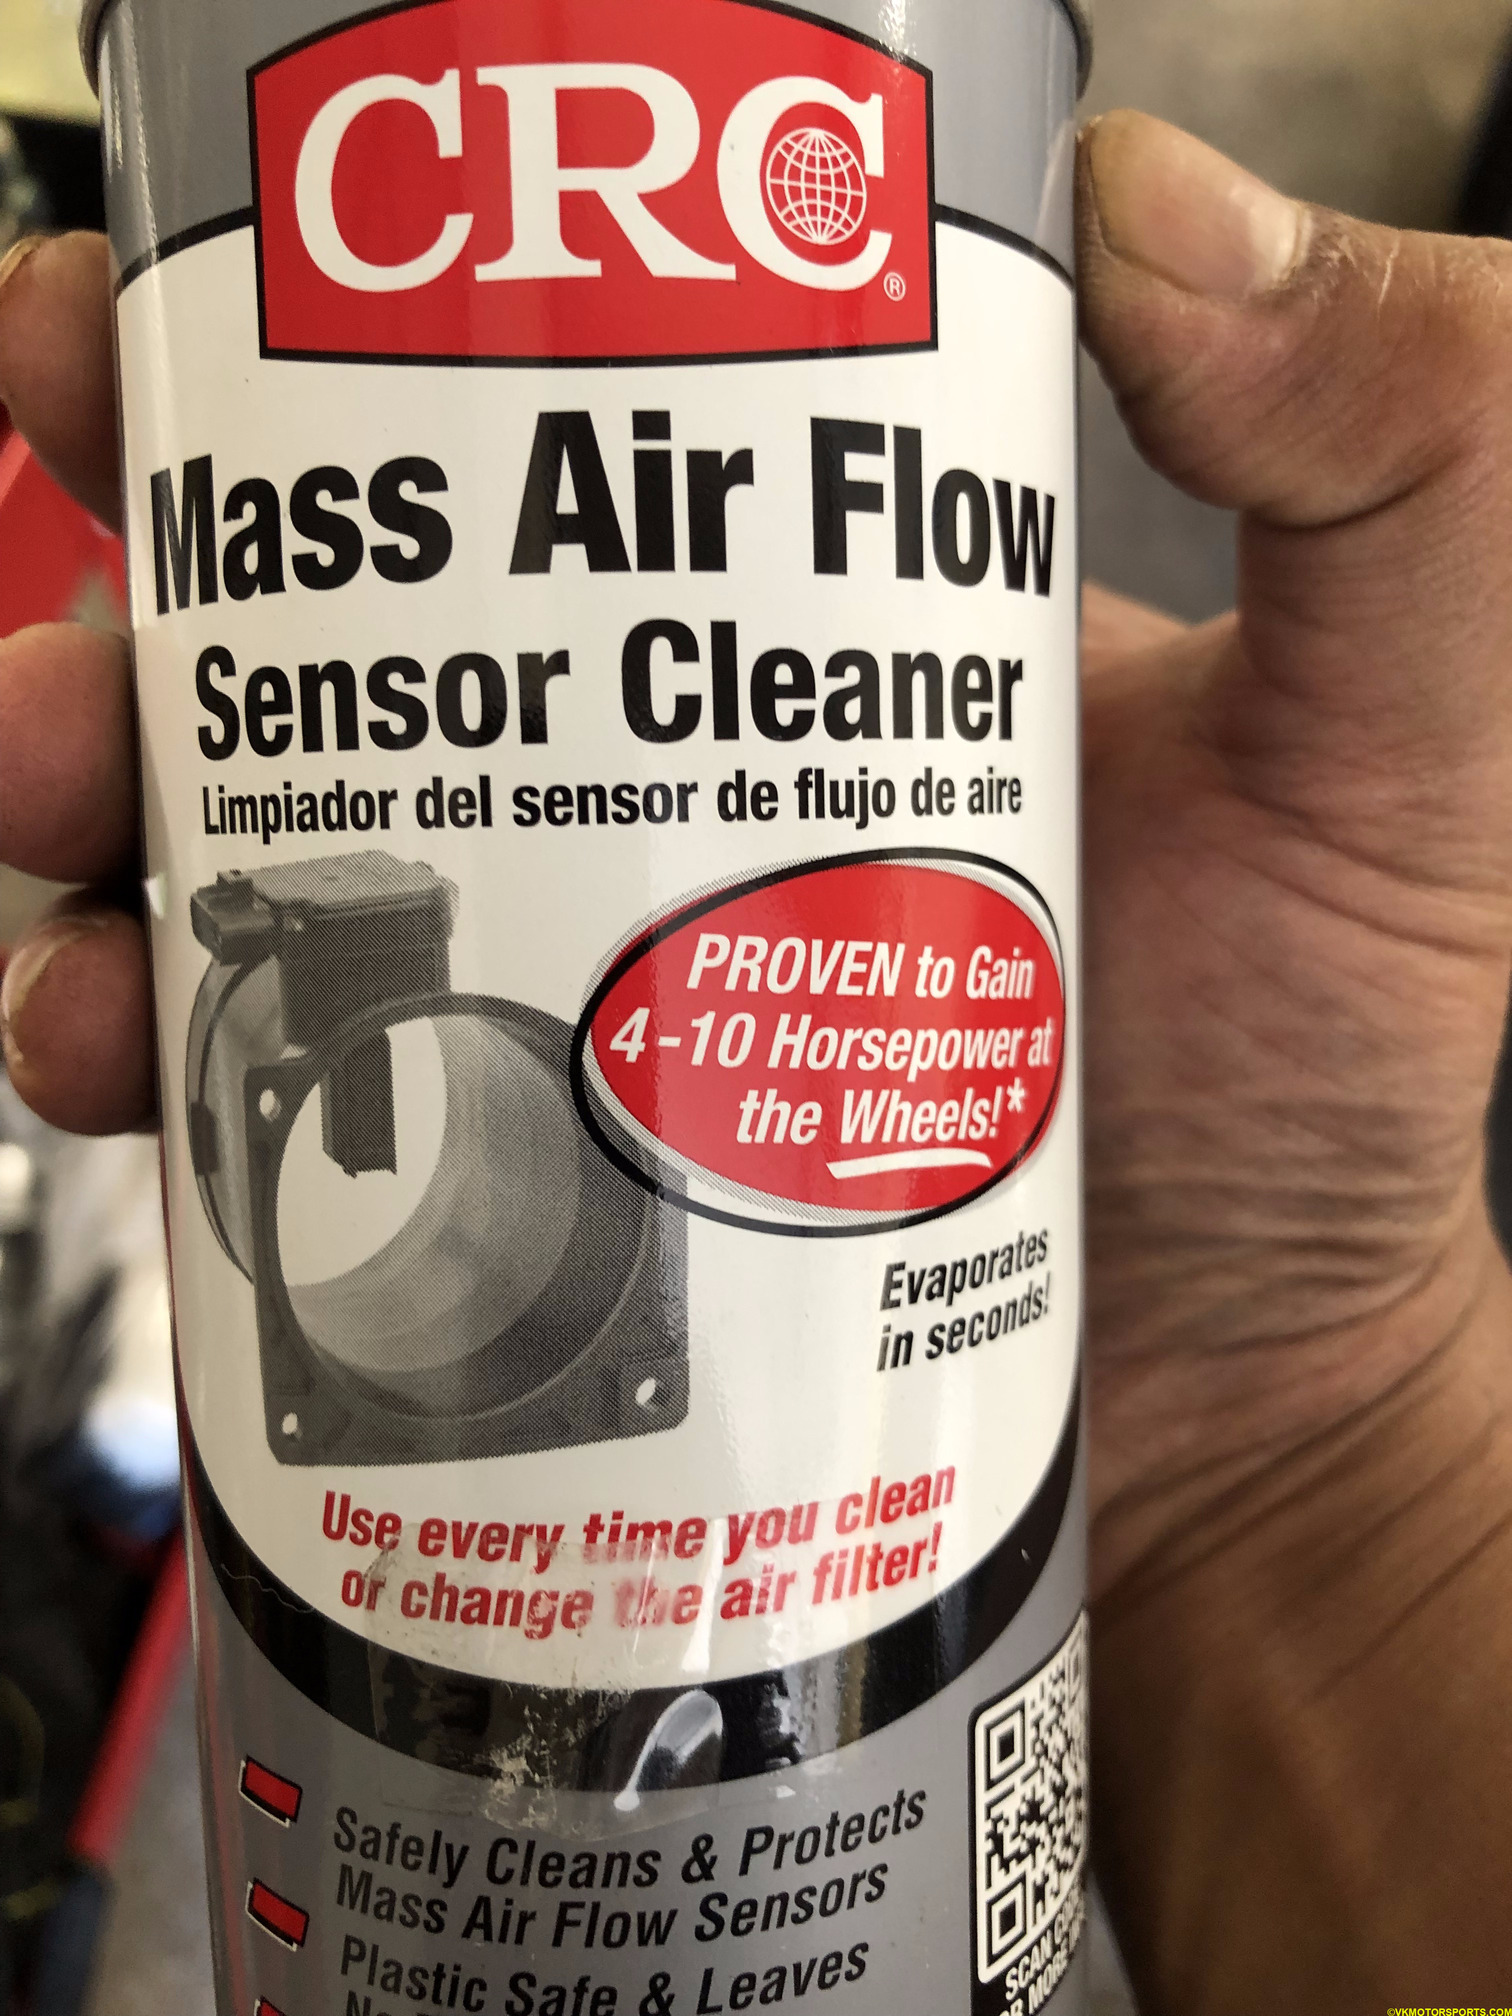 Figure 9. CRC MAF sensor cleaner
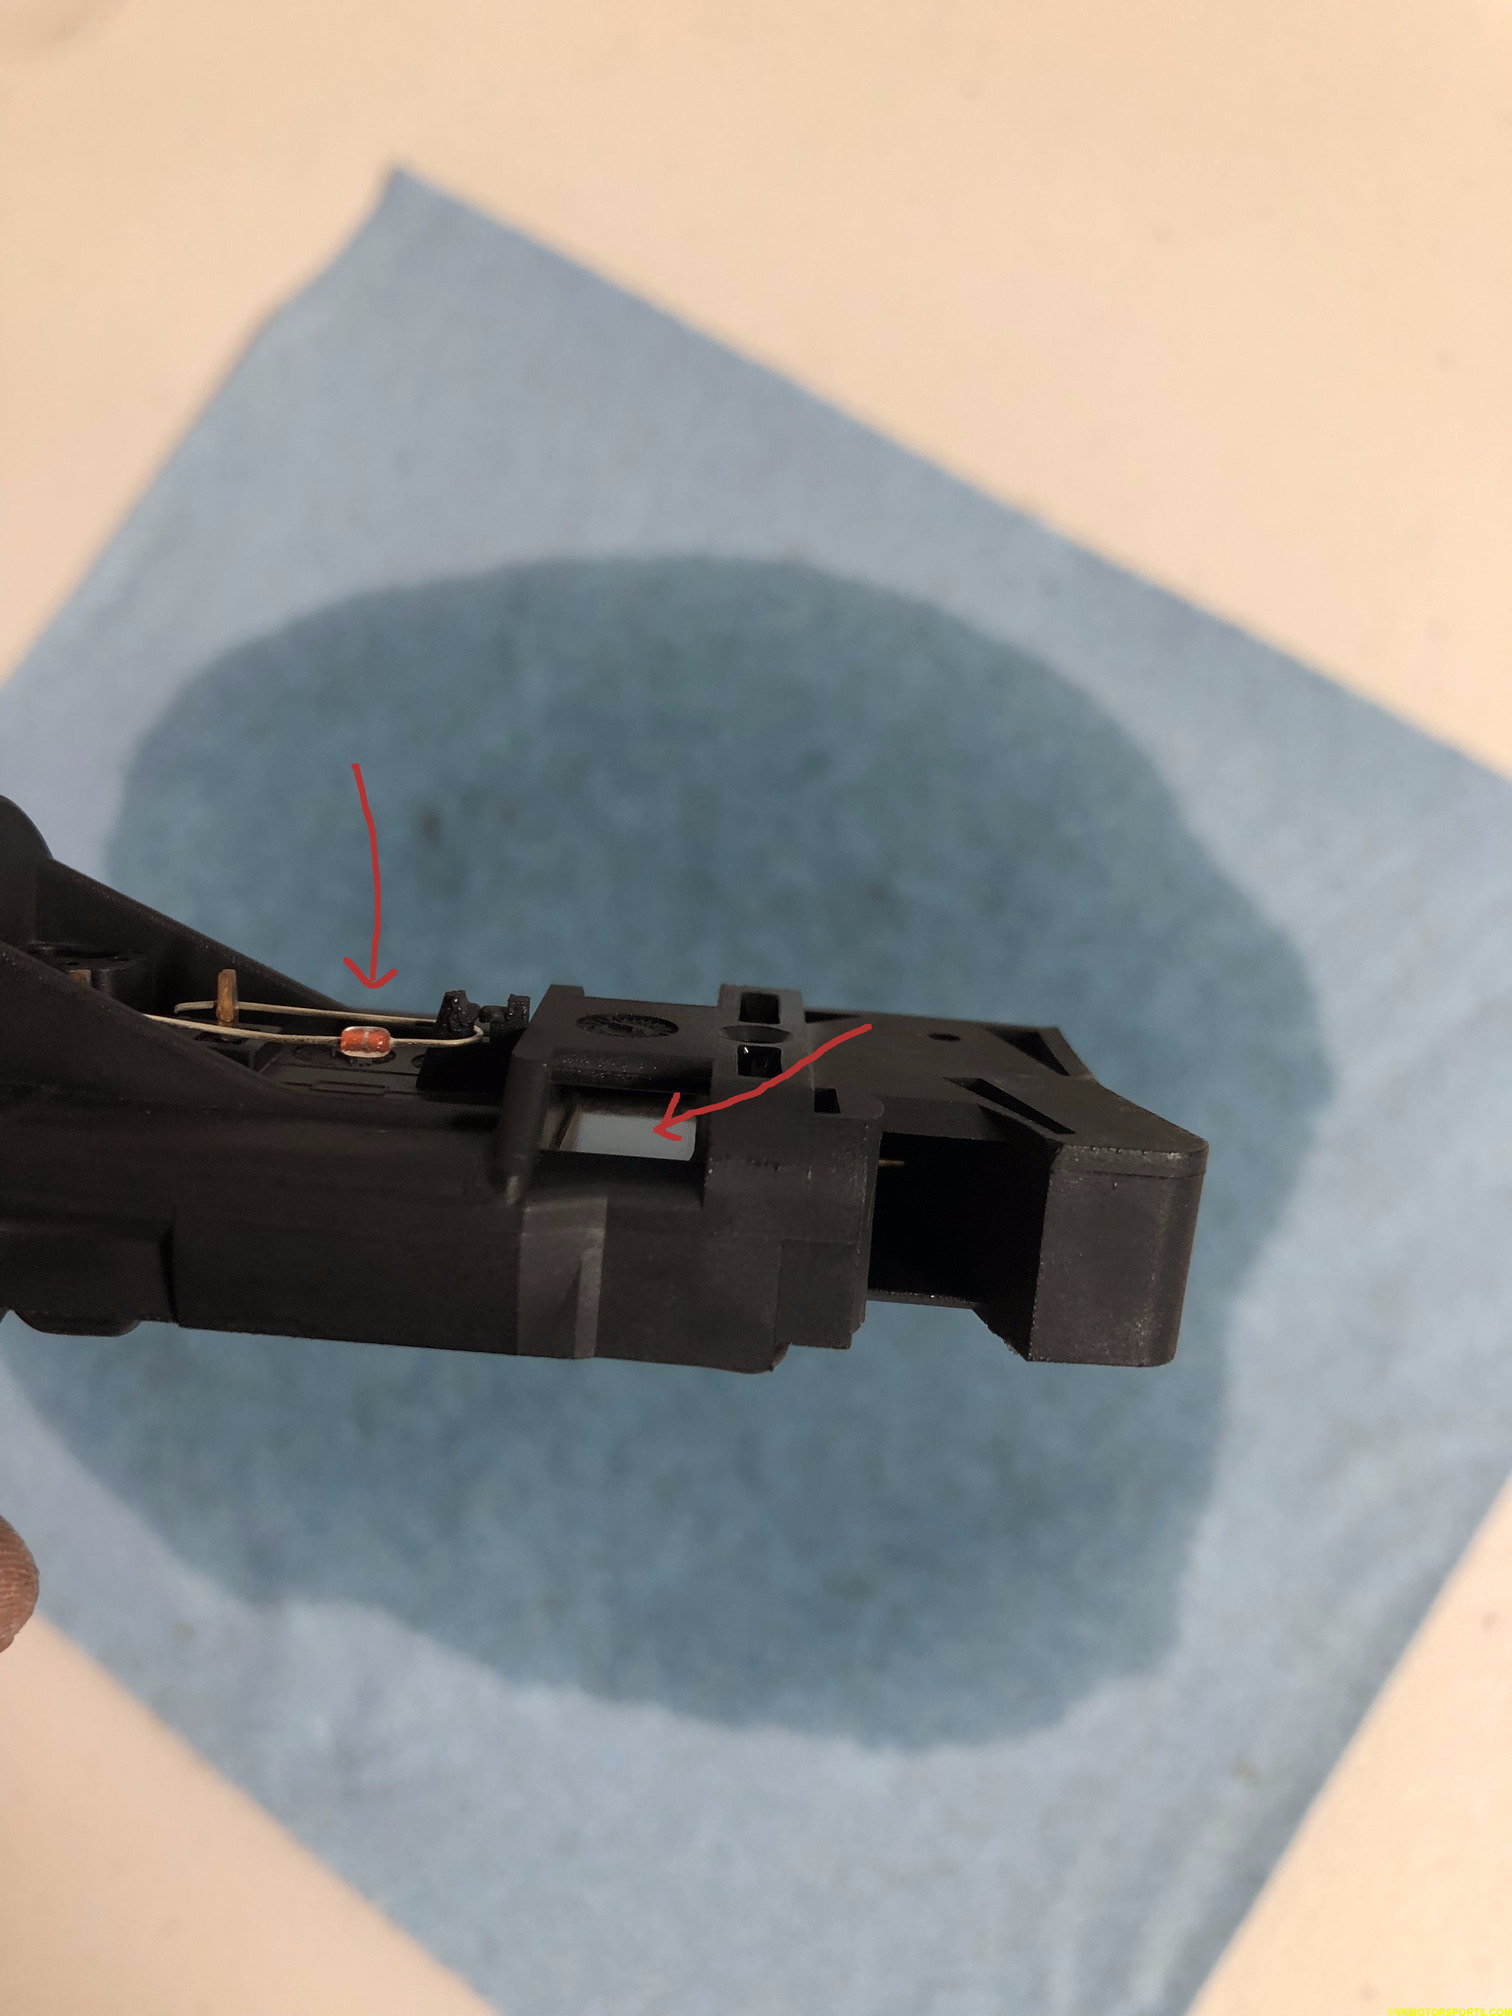 Figure 10. Sensor cleaning points
Step 6: Let the sensor now dry for about 10 minutes. Once it is dry, wearing gloves, install it back into the intake and screw the sensor back in. Then connect the electrical connector.
Step 7: Erase the codes using the OBD2 code reader. Then start the car and drive it for about 50 miles. If the code returns then you need to replace the MAF sensor, if it does not then you have fixed the problem.
Step 8: Even after replacing the MAF sensor if the code returns then you need to follow the research links above on the 986forum.com on how to perform an evap leak test and look for vacuum leaks.
Luckily, I did not have to do that, and cleaning the sensor has fixed my problem. I have driven it over a 100 miles now and the codes have not returned.